MF 12G dash repair

esbbent

Tractorologist
Member
This will be a posting on how I repair the plastic dash on the MF12g, I did a similar repair on a MF14. I purchased the tractor a few weeks ago and plan on getting it running and use it before a full restoration.

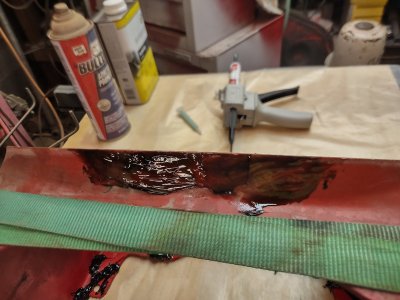
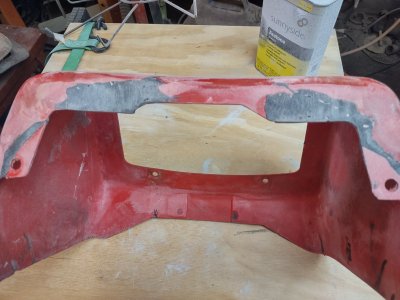
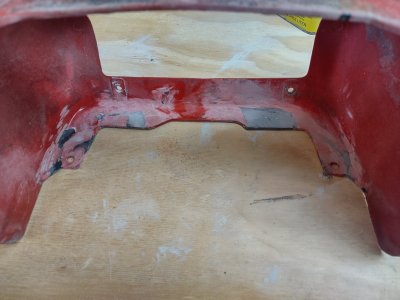
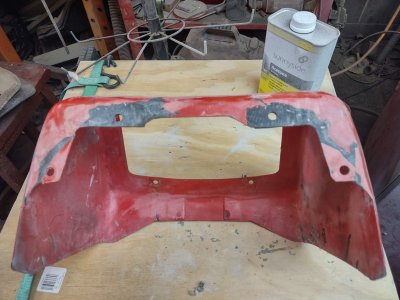
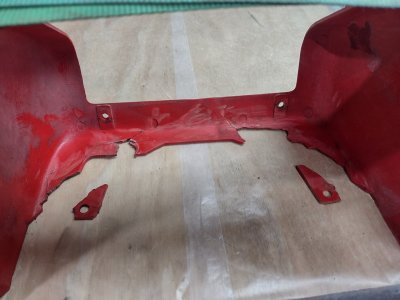
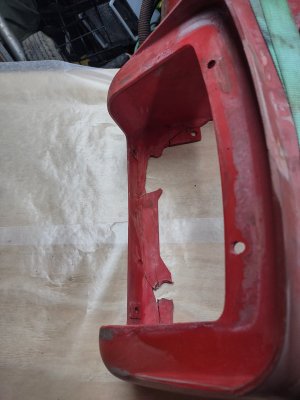
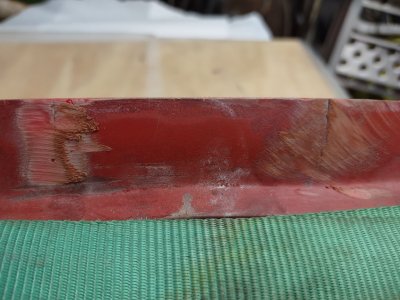
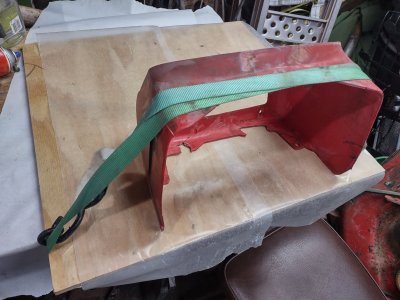
The dash piece is in real bad shape on the bottom where it bolts to the tractor. All 4 of the bolt holes were broken off. IMG_20250527_174617948_HDR.jpgIMG_20250527_174608855_HDR.jpgThe first thing I did was try to clean it up the best I could. I will clean it again with thinner before I apply the primer. I then took my die ginder with a round scotch Brite pad and cleaned up the areas I plan on using panel bond.IMG_20250527_174635033.jpg The next step is get a smooth piece of plywood and apply wax paper and then clamp the dash down. This time I used a ratchet strap doubled around and pulled tight.IMG_20250527_174559781_HDR.jpgThe panel bond will not stick to the wax paper so I can use it to fill in the missing parts.
I ordered the panel bond, once it arrives I will post more.
 
This will be a posting on how I repair the plastic dash on the MF12g, I did a similar repair on a MF14. I purchased the tractor a few weeks ago and plan on getting it running and use it before a full restoration.

The dash piece is in real bad shape on the bottom where it bolts to the tractor. All 4 of the bolt holes were broken off. View attachment 94519View attachment 94521The first thing I did was try to clean it up the best I could. I will clean it again with thinner before I apply the primer. I then took my die ginder with a round scotch Brite pad and cleaned up the areas I plan on using panel bond.View attachment 94518 The next step is get a smooth piece of plywood and apply wax paper and then clamp the dash down. This time I used a ratchet strap doubled around and pulled tight.View attachment 94520The panel bond will not stick to the wax paper so I can use it to fill in the missing parts.

I ordered the panel bond, once it arrives I will post more.
I would take a few key measurements, make a 3D model, then print a new dash. :cool:
Even if it's in 2 parts, it would look very original.

Depending on the shape, the time to 3D model vs. manually remaking it with filler is a trade off.

The 3D Printed dash would last well over 10 years or better. The old filler filled dash is still the old dried out material.

A 3D Printed part could also include upgrades to the dash for the owner as well as people with the same dash.
The time involved making the 3D models is paid back by offering the dash to others for $15. Then they would have access to the STL file to print locally for them.

In 5 or so years, AIs would be able to replicate parts and offer them up for sale without humans even involved. As you can see, people will be replaced by then. Income lost and creative talents of the trade gone for good.
 
This will be a posting on how I repair the plastic dash on the MF12g, I did a similar repair on a MF14. I purchased the tractor a few weeks ago and plan on getting it running and use it before a full restoration.

The dash piece is in real bad shape on the bottom where it bolts to the tractor. All 4 of the bolt holes were broken off. View attachment 94519View attachment 94521The first thing I did was try to clean it up the best I could. I will clean it again with thinner before I apply the primer. I then took my die ginder with a round scotch Brite pad and cleaned up the areas I plan on using panel bond.View attachment 94518 The next step is get a smooth piece of plywood and apply wax paper and then clamp the dash down. This time I used a ratchet strap doubled around and pulled tight.View attachment 94520The panel bond will not stick to the wax paper so I can use it to fill in the missing parts.

I ordered the panel bond, once it arrives I will post more.
Following! Nice work so far, Ted. The inside of my dash is similar, but not quite that bad.

Thanks for showing us your method!

DAC
 
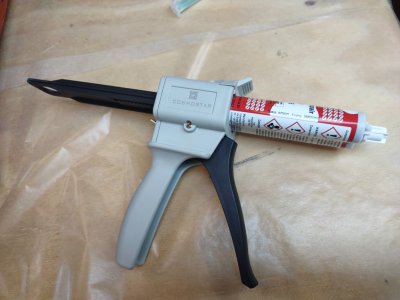
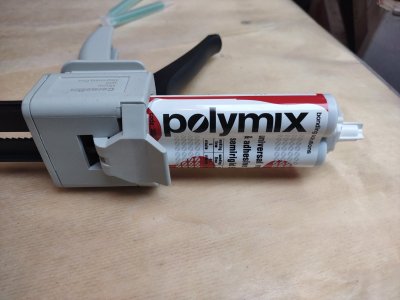
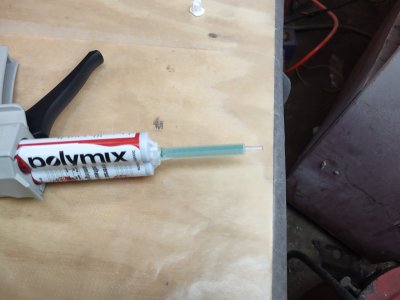
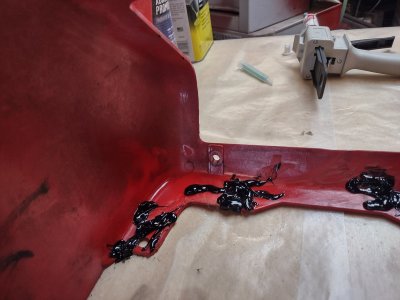
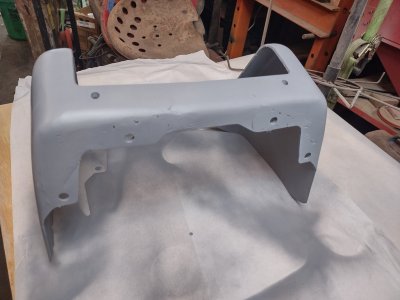
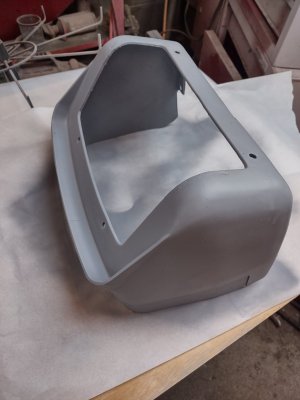
The panel bond I ordered from Amazon showed up today. The special applicator gun arrived last week.IMG_20250531_141701834.jpgIMG_20250531_141709286.jpgThe bond material came with 2 mixing nozzles.IMG_20250531_141737622.jpgHere are a few pictures after applicationIMG_20250531_142115763_HDR.jpg,IMG_20250531_142123609_HDR.jpgI did have to apply additional to the bottom side once it set up. I did end up using the whole tube and both applicator tips. Unlike the product I used in the past this stuff heated up while it started to cure. I will let it sit overnight before I start grinding and shaping. After it is smoothed out I will apply adhesion promotor and then primer.
 
I took the die grinder with a flap grinder blade to remove the extra panel bond.IMG_20250601_085814432_HDR.jpgIMG_20250601_085835127_HDR.jpgOnce it was shaped how I wanted it I took it out to the tractor and marked the 2 bolt holes. After drilling out the 2 holesIMG_20250601_090615320_HDR.jpgI then wiped the whole piece with acetone to clean up the grease and dust. After cleaning I sprayed it with Adhesion promoter. Once it sat for 10 min I applied the primer.IMG_20250601_093449622_HDR.jpgIMG_20250601_093443708_HDR.jpgWhere it bolts down it need smoothed up a little bit before paint. I will be using body filler or glaze to finish. For now it will stay In primer. I plan to get it running and using it to make sure no other issues and then do a restoration. The MF16 will be getting torn down next for restoration.
 
I took the die grinder with a flap grinder blade to remove the extra panel bond.View attachment 94651View attachment 94652Once it was shaped how I wanted it I took it out to the tractor and marked the 2 bolt holes. After drilling out the 2 holesView attachment 94653I then wiped the whole piece with acetone to clean up the grease and dust. After cleaning I sprayed it with Adhesion promoter. Once it sat for 10 min I applied the primer.View attachment 94655View attachment 94654Where it bolts down it need smoothed up a little bit before paint. I will be using body filler or glaze to finish. For now it will stay In primer. I plan to get it running and using it to make sure no other issues and then do a restoration. The MF16 will be getting torn down next for restoration.
That stuff looks likes its pretty good. What's your thoughts on its strength ?
Also thinking (good or bad) that maybe a plate or large washers on top where it rest and bolts for additional support ?
 
That stuff looks likes its pretty good. What's your thoughts on its strength ?
Also thinking (good or bad) that maybe a plate or large washers on top where it rest and bolts for additional support ?
Strength is very good, it was hard to grind off the extra amount. I was going to use fender washers on both sides of the plastic.
It would be nice to use a 1 piece plate to go over and cover all the bolt holes. I would just need the patience to make some out of flat steel and then weld it together. They use self locking nuts from the factory on the bolts, I believe to avoid overtightening and cracking the plastic. Only issue is after 40 years thye do not like to come off easy.
Hope it last another 40 years so you can give a follow up on how its holding up .. ;)
 
Back
Top