An acquaintance contacted me a few weeks ago about making a new cover for his Allis Chalmers 170 tractor and I decided to try and help him out. I have not been doing much upholstery work the last couple of years due to a few reasons and I am not sure how this is going to turn out as I may be a little "rusty". Thought I would do a thread on this project so others can see what is involved in recovering a seat. Usually I post on the other site but since this is off of a farm tractor rather than a garden tractor I thought posting on this site might be more appropriate. If anyone feels this post is not appropriate please advise a moderator so they can delete it.
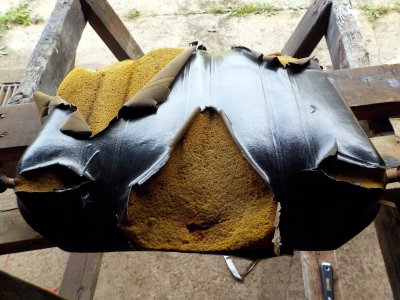
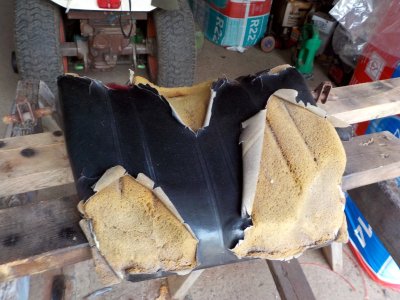
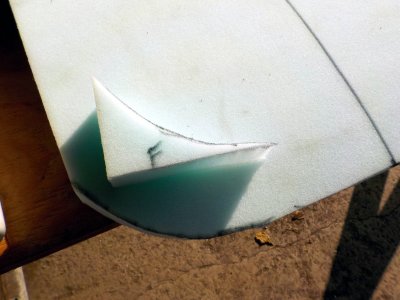
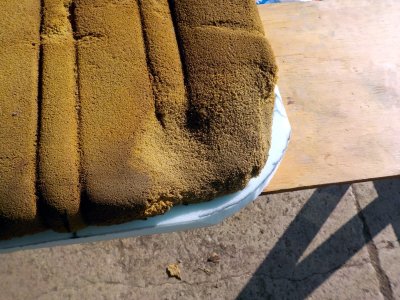
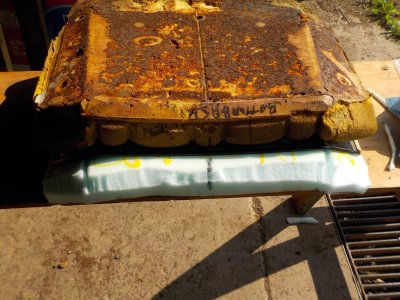
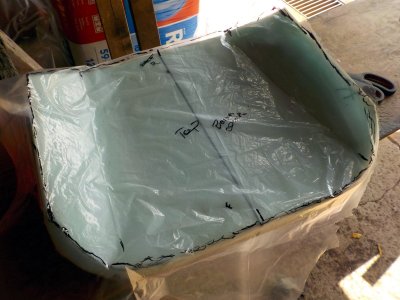
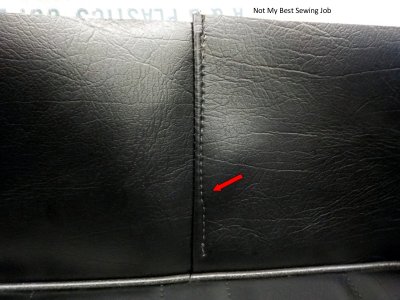
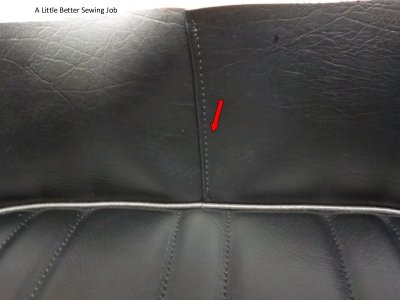
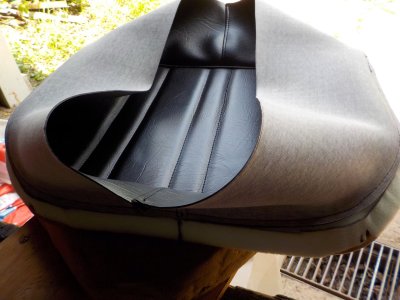
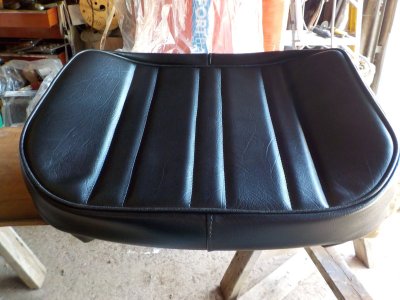
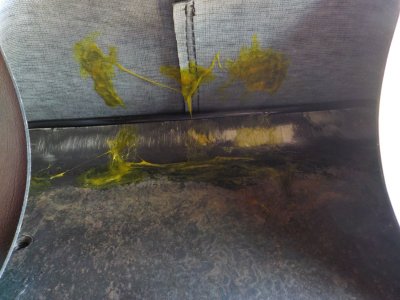
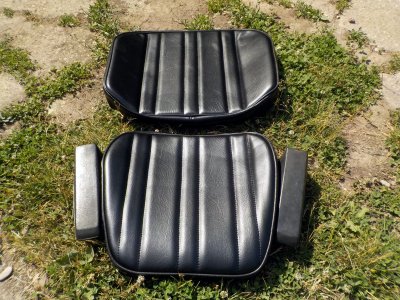
Since farm tractors are usually work horses rather than show queens and funds and time are usually tight the seat is quite often ignored until the operator gets to the point where the upholstery is so hard and brittle it becomes a sore spot in the operators behind or it is no longer comfortable to enjoy some work (seat) time. To illustrate my point I have attached a couple of pictures that show how a once comfortable seat can deteriorate as the materials get far beyond their best by date.
It is my hope that by posting this thread others can see how a project that may look overwhelming to some people can be tackled and made to look (and feel) respectable again with a little thought and effort.
As you can see the bottom has had a new piece of vinyl installed at some point along the tractor journey and the back is probably uncomfortable to lean against with the edges of sharp, brittle vinyl sticking out.
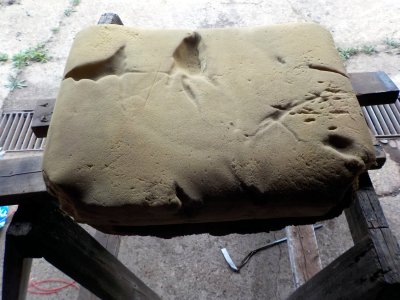
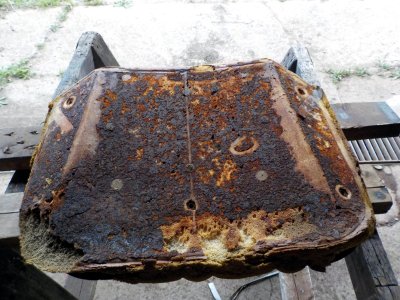
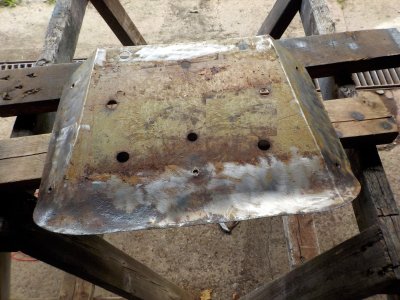
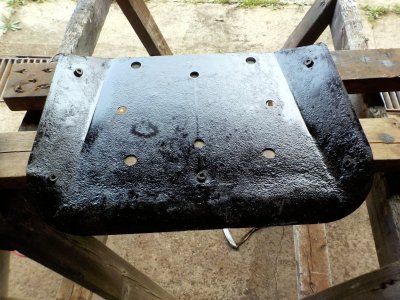
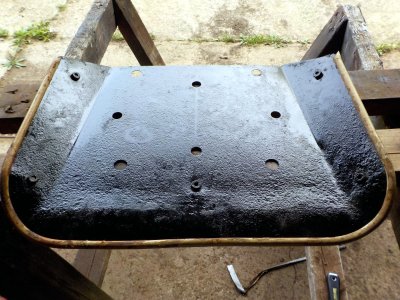
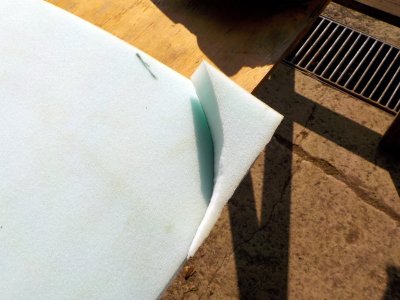
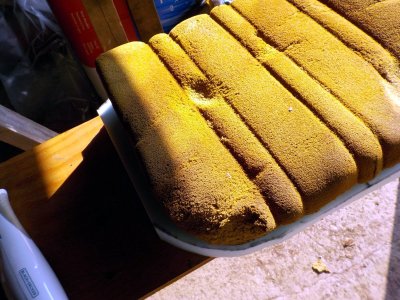
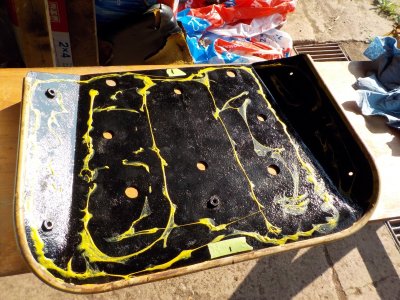
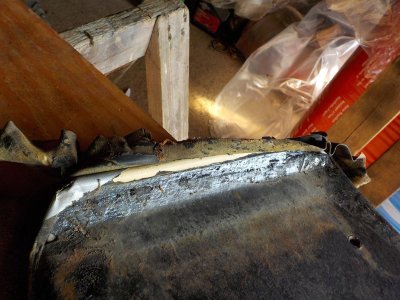
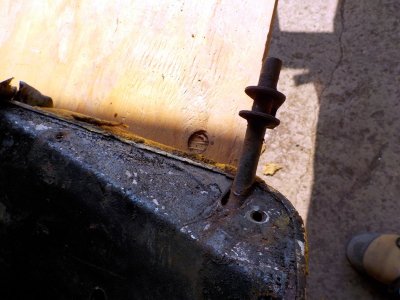
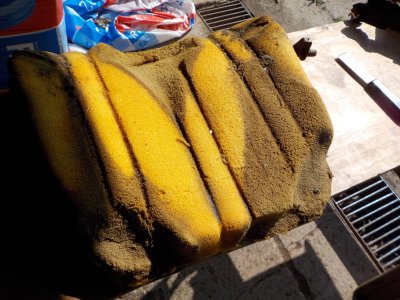
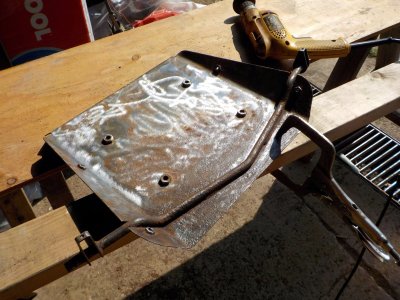
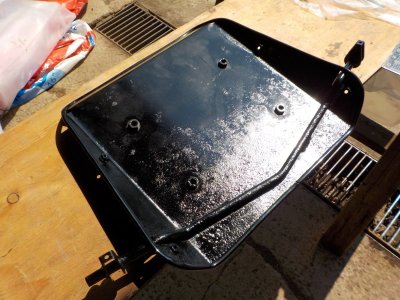
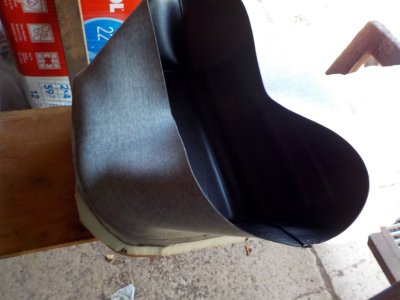
I decided to find out what I had taken on and began by removing the newest piece of vinyl on the bottom. Underneath it I found a piece of padding that I assume got installed when the vinyl was added. The padding was sitting on top of what appears to be the original padding which has some slight flaws in it but still shows the marks where the pleated style pattern was bonded. The padding was stuck to the sheet metal piece that bolts to the seat frame on the tractor so I slowly worked away at breaking the bond and eventually it came off. Some "rust bunnies" have formed so the top side of the sheet metal got a good wire brushing and then a coat of black rust paint to slow the growth of any future "rust bunnies". The bottom side has the original adhesive covering the majority of it so I wire brushed the outer area where I am hoping the new cover can be glued to the sheet metal to hold it in place once I get it made Originally the sheet metal piece was left as bare metal and just sprayed with adhesive - I assume this was to save time and cost and also provide a nice clean surface to bond the padding and cover to. After the paint had dried for a few hours I put the outside edge trim that goes around three edges of the sheet metal lip to keep the lip from cutting into the vinyl cover material. I will probably add a piece of door edge trim where the is no trim to keep the edge from trying to cut into any material - there was a piece of duct tape over the edge that might have been done at the factory.
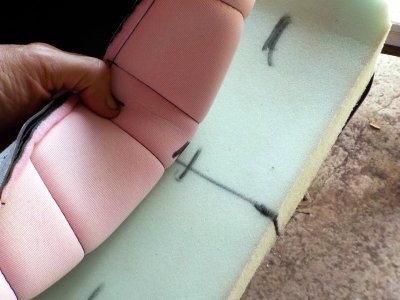
I checked with the customer and suggested new padding was in order as trying to patch and repair the old padding would be a challenge. He agreed and he also would like the pleated pattern put in the new cover so I will try and accommodate him but it may not look 100% the way it did originally. I also asked him if he wanted the bottom to be as thick on the padding and he said he would like to stick to the way it was originally but it was ok to make the padding a little thicker. Since the original padding was 2" thick and I don't have any new padding that thickness on hand I may try making the new padding out of some 3" foam padding that I have on hand - can always cut it down to 2" if it looks too thick.
Attachments
2 Padding Undeneath Worn Out Cover.jpg
209.3 KB
· Views: 4
3 Remains Of Orignal Lower Padding.jpg
304.3 KB
· Views: 4
4 Padding Removed From Sheet Metal Piece.jpg
271.2 KB
· Views: 4
5 Bottom Of Sheet Metal Piece.jpg
235.4 KB
· Views: 3
6 Top Side Cleaned Up And Painted.jpg
303 KB
· Views: 3
7 Edge Trim Put Back On That Will Protect Vinyl Cover.jpg
Great job Stew it’s always good to follow your tutorials. Carol tossed some old patio cushions away a few weeks ago without me knowing it. I told her that cushion foam is not cheap. I would have kept those.
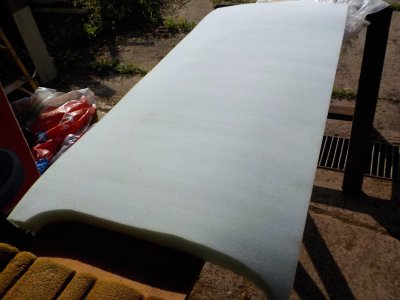
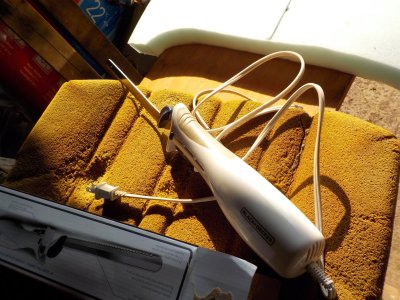
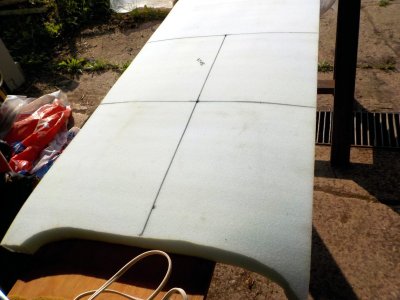
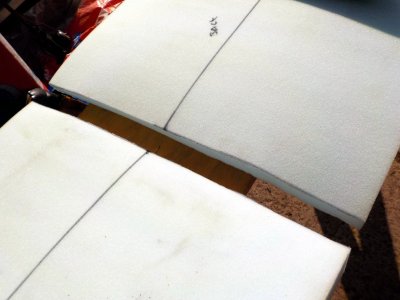
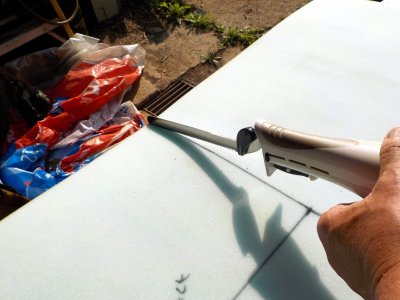
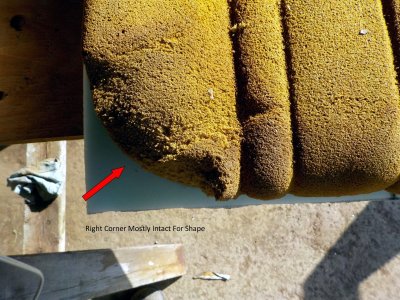
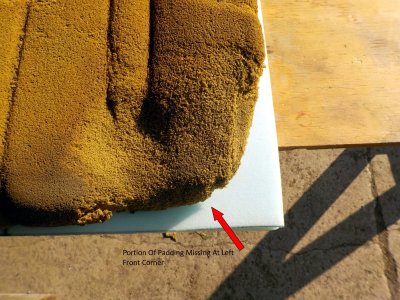
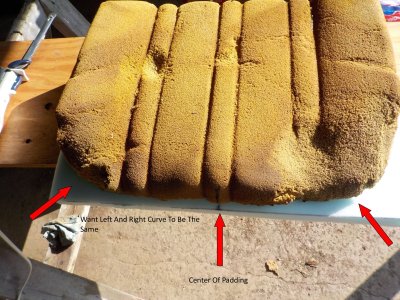
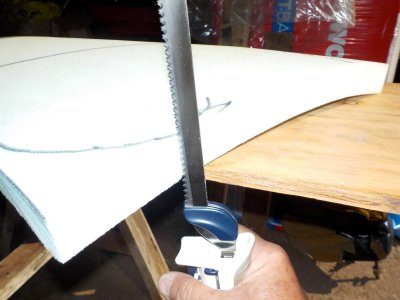
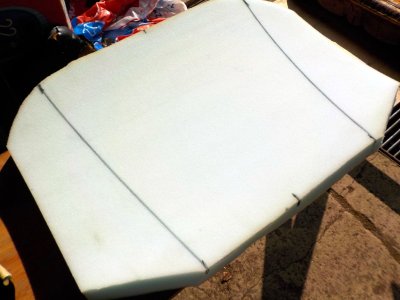
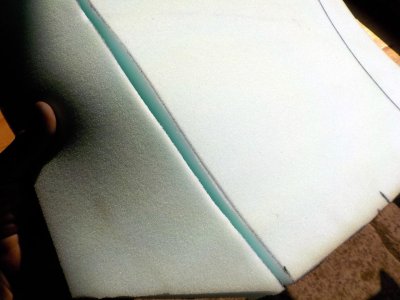
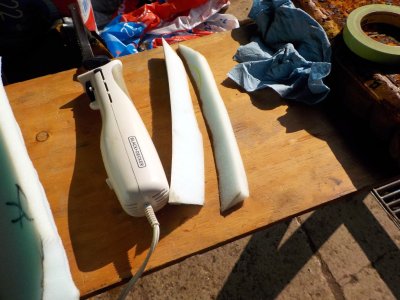
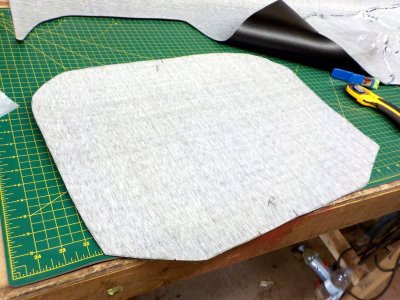
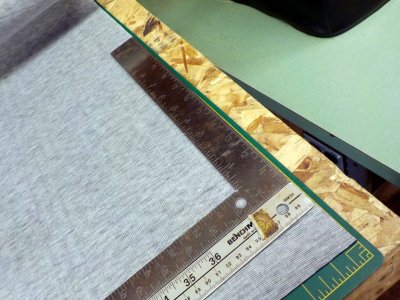
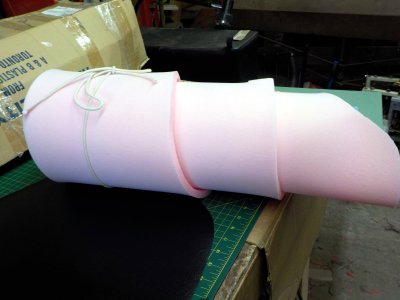
Got to thinking last night about using the 3" padding and remembered that since there will be pleats the 1/2" thick sew foam I use will add 1/2" to the total thickness of the padding - this would make it 3-1/2" thick and I decided that would be too thick compared with the original padding thickness of 2". I did have some 1-1/2" thick padding that I keep on hand that is about 22" wide so I opted for it. The padding place I order from will cut the padding I need to any thickness, width and length and price it similar to a board foot of lumber. I brought out the partial roll I had - laid it out flat on my temporary work bench (a piece of plywood on two saw horses) and marked out two pieces to cut that will make the bottom and back padding. I used a square to make sure the pieces were rectangular and measured everything a couple of times. Things looked good so I plugged in the electric carving knife and proceeded to slice off the two pieces. For cutting long thin pieces I keep the blade of the knife at a slight angle to the horizontal to create a nice smooth edge as shown in the one picture. Then I set the old bottom piece of padding on top of the new piece of foam and asked the foam fairy to make the bottom piece look like a new piece of padding to match the seat pan. I waited for a few minutes while I got a drink of water and nothing happened so I decided I had better do it myself. I marked the center at the front and the back of the old piece of padding and aligned it with the center of the new piece. I quickly noticed that the left front corner of the original padding was missing some of the outer edge but the right looked like it was mostly intact so I marked the right side corner of the new padding using the original corner as a guide. Upholstery is not an exact science as things ten to stretch, compress and move a bit but having the left and right side look symmetrical is important for the finished product to look correctly - just using the original padding as a marking pattern the way it is worn and missing pieces in spots would be a bad plan but it does serve to be a rough guide. Just like any project the parts and pieces that you cannot see when finished will reflect on how the finished product looks - similar to trying to frame a house on a foundation made out of sand and dirt.
Attachments
1 New Padding.jpg
152.6 KB
· Views: 5
2 Electric Carving Knife.jpg
263.9 KB
· Views: 4
3 Pieces For Bottom And Back Marked Out With Square.jpg
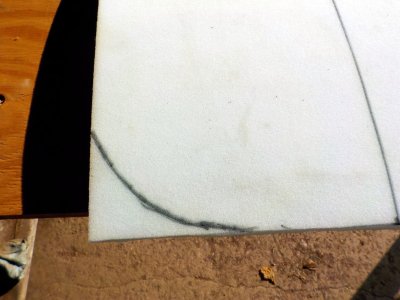
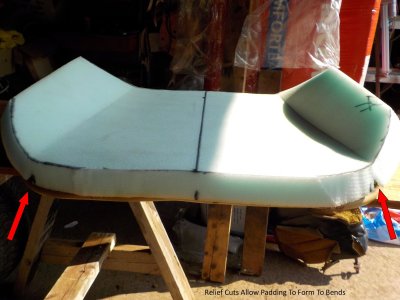
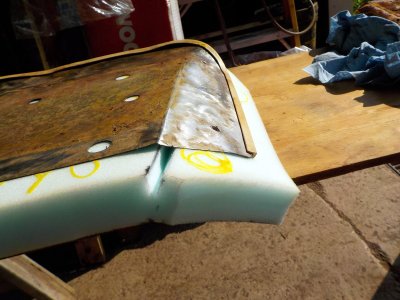
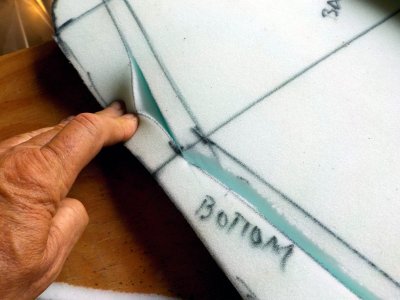
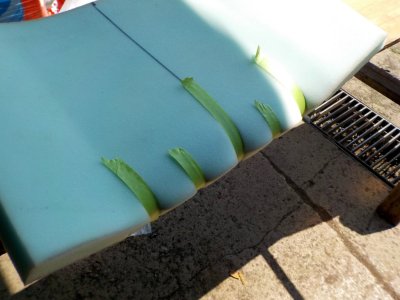
With the right corner marked out I carefully cut the curved edge holding the knife blade at 90° to the padding as shown. This creates a nice 90° edge and also gave me a pattern from the cut off piece of foam that could be flipped and used to mark the left side front corner. The rear corners were marked and then the knife was put to work cutting them to conform to the shape required to match the bottom seat pan. I set the old padding back on top to see how things looked - the right front corner looks good but you can see where the left front corner of the original padding is missing a portion. The new padding corners looked good on the lower seat pan however which is what I was aiming for so I marked where the bends in the sides of the seat pan are located and marked and cut relief lines in the new padding the depth of the knife blade. These will allow the padding to bend easier to conform to the lower seat pan when it is glued in place. Please note the two sides of the new padding are still full length and will not be cut until after the new padding is glued to the seat pan. Since the two outer edges will bend upwards the seat pan will be used as a guide so that the edges are cut at 90° to the flat center section of the seat pan.
Attachments
1 Right Front Corner Marked On Padding.jpg
171.9 KB
· Views: 4
2 Piece Cut Off For Corner.jpg
174.5 KB
· Views: 5
3 Cut Piece Flipped To Mark Left Corner.jpg
196.5 KB
· Views: 5
4 Left Corner Marked For Cutting.jpg
191.1 KB
· Views: 4
5 Knife Blade at 90° To Material To Cut Corners.jpg
123.8 KB
· Views: 4
6 Right Corner Matches Pretty Close.jpg
298.1 KB
· Views: 4
7 Left Corner Not So Much.jpg
320.4 KB
· Views: 4
8 Front And Back Edges Cut And Relief Lines Marked For Bends.jpg
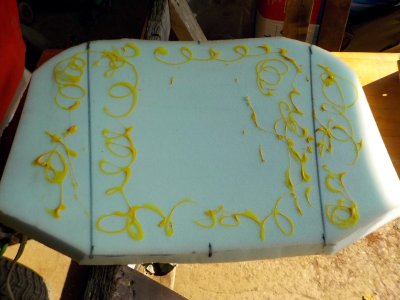
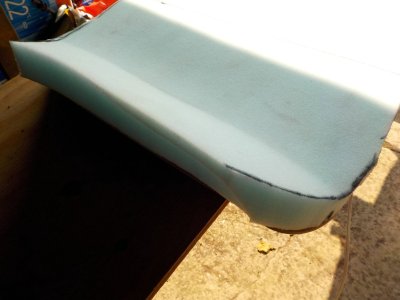
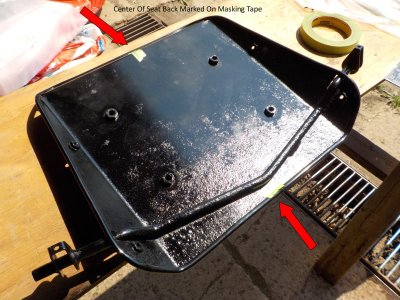
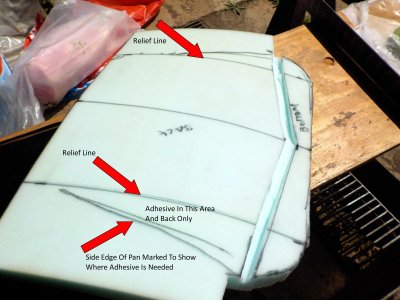
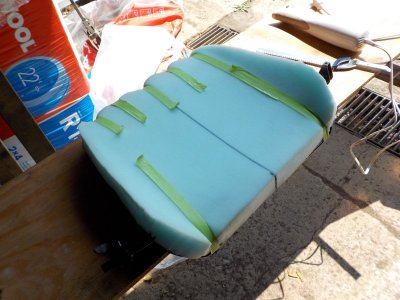
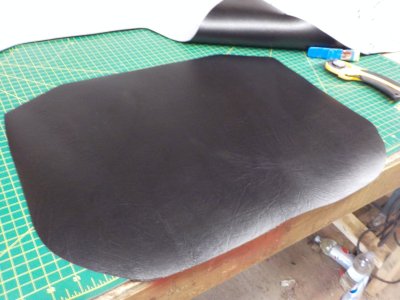
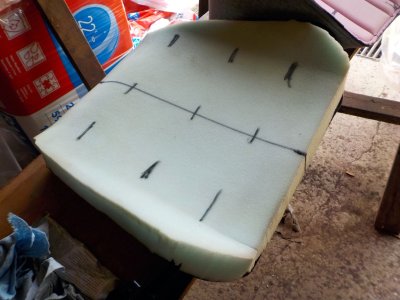
The first picture shows how the relief cuts can be spread apart but still allow the padding to maintain its shape. I placed two pieces of masking tape at the front and back of the seat pan near the center and then measured to determine where the center of the seat pan is so that the center mark on the padding can be aligned with them. Did a test fit and things looked promising so I applied some 3M weatherstrip adhesive to the seat pan and the padding and let them tack up. It was quite warm here today in the sun so it didn't take long and the padding got aligned front to back and centered and it formed a happy marriage with the seat pan as it got pressed into place and took on the shape of the seat pan at the bends. You can see in the pictures how the two relief cuts help at the bends and after another inspection the two sides got trimmed with the knife using the edge of the seat pan as a guide.
Attachments
1 Relief Lines Depth Of Blade.jpg
184.1 KB
· Views: 4
2 Masking Tape With Center Of Seat Pan Marked.jpg
252 KB
· Views: 4
3 3M 80010 Weather Strip Adhesive Applied To Padding.jpg
154.5 KB
· Views: 4
4 Adhesive Applied To Seat Pan.jpg
313.8 KB
· Views: 4
5 Padding Stuck To Seat Pan.jpg
155.5 KB
· Views: 4
6 Relief Cuts Allow Padding To Form To Seat Pan Bends.jpg
140.7 KB
· Views: 4
7 Sides Edges Can Now Be Cut To Match Seat Pan.jpg
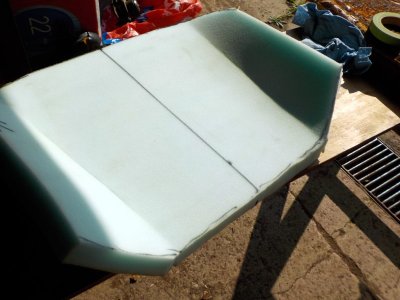
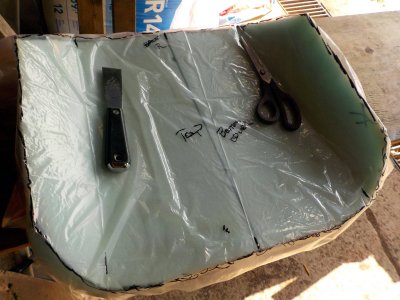
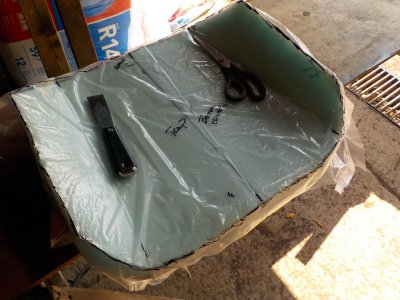
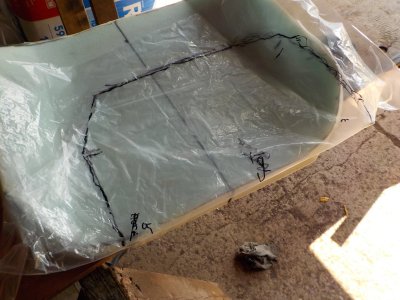
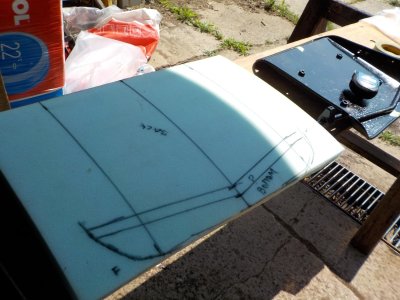
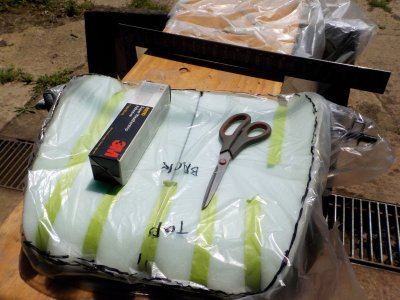
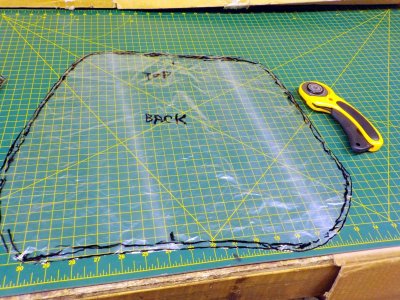
The padding extends just a smidge along the two side edges but will easily compress once the cover is installed and pulled over the padding. Used the knife to reshape the rear edge of the new padding so it conformed fairly close to the old padding - looks a little rough but should work fine. To obtain a really fine smooth surface a small 2" 36 grit roloc dic on a die grinder could be used to smooth up and level the spots if desired. Since this will be the rear and compressed with the the cover it should be fine as is. Took a large clear garbage bag and cut it at the seams to produce a piece of patterning material. Laid it on top of the new padding and removed most of the wrinkles as I have found that where plastic will lay flat a piece of vinyl will also. Used the putty knife and the scissors to hold the plastic in one spot as the wind was doing its best to try and move it around. Once I had it siting where I was happy I used a marked to draw out on the plastic where the edge of the padding is and also added a center mark at the front and back and F and R to tell me which was front and back. Then I removed the plastic and did the fold test to see how symmetrical the two halves looked when folded back on itself. Things looked good so trimmed the plastic to near the marked outer line and set it back on the padding. Things look good so this should serve to create the insert piece (top part) of the cover I hope. Had some appointments to attend this afternoon so that was all I got accomplished today. Maybe I can get the back apart and padding made for it tomorrow if things go well.
Please note that the methods I describe may not be the correct or best way to do a project like this. From doing this task over several years I have found what works for me and how to try and keep things logical and simple for me since for me this is strictly a hobby pass time. The reader may have a better or more correct way of doing this.
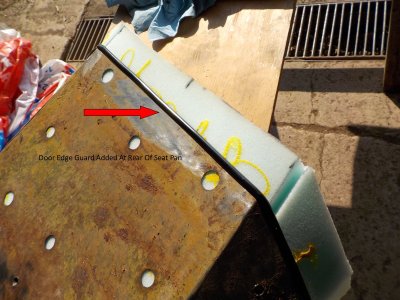
Told you I was a bit "rusty" forgot to mention that in the third picture you can see I have added a piece of door edge guard at the rear edge. The original white edge piece that went along the front and two sides kept wanting to fall off so I ended up having to glue it in place along the edge before I glued the padding to the seat pan.
Attachments
1 Padding Extends Sligjhtly Past Edge Of Seat Pan.jpg
117.4 KB
· Views: 6
2 Bottom View Of Side.jpg
188.4 KB
· Views: 7
3 Door Edge Guard Added At Rear Of Pan.jpg
220.7 KB
· Views: 5
4 Rear Of Seat Padding Cut to Match Original.jpg
243.5 KB
· Views: 6
5 Clear Garbage Bag Cut To Use To Make Pattern For Cover.jpg
174.5 KB
· Views: 8
6 Edge Of Padding Marked On Plastic Along With Front Back And Center Marks.jpg
187.5 KB
· Views: 7
7 Plastic Folded To Verify Edges Match Side To Side and Front and Back.jpg
177.8 KB
· Views: 7
8 Plastic Rough Trimmed And Set Back On Padding To Amke Sure It Lays Reasonably Flat.jpg
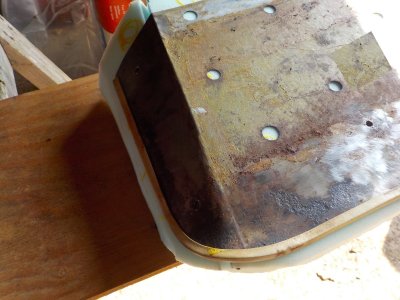
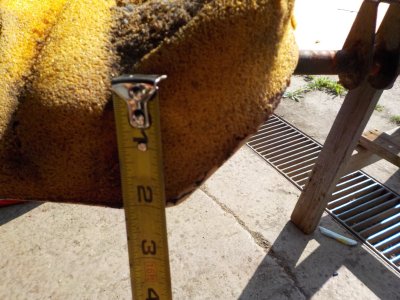
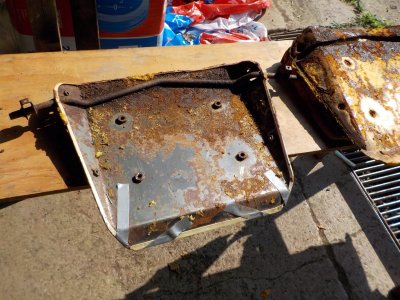
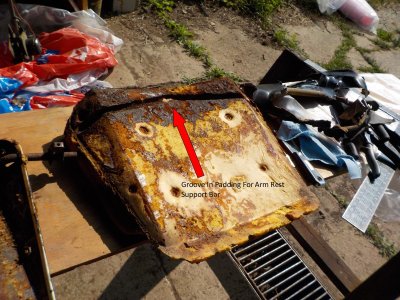
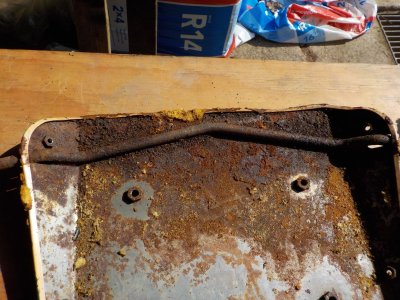
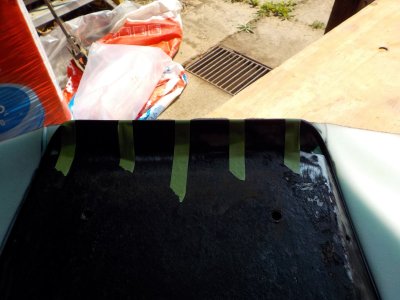
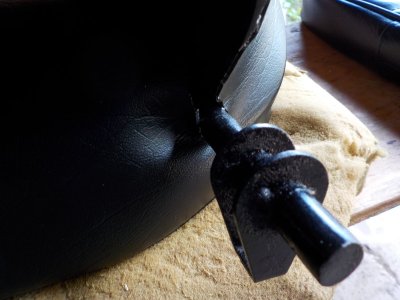
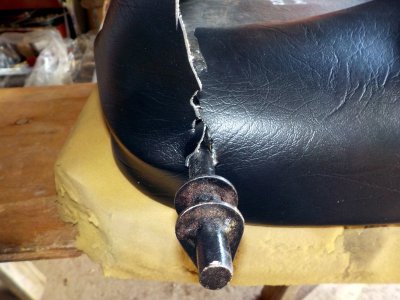
Today I started on the back of the seat by peeling the remains of the original vinyl - the adhesive was still holding quite nicely but eventually I was able to break the bond with the help of a putty knife. The cover peeled off of the remains of the seat cushion and then I verified that the padding used on the back was also 2 inches thick. Then I peeled the padding away from the seat back and found some more rust bunnies. Fortunately the metal still appeared to be solid and the bar for the arm rests was still firmly attached. The customer assured me that he had checked all the bolt hole threads and they were in good shape so that was one less thing I had to do. Used the drill with the wire brush to get rid of the scale and crud so I could give things a splash of paint. When working on seat pans the best time to do any metal repairs required is with the cover and padding removed - fortunately the metal cleaned up nicely.
Attachments
1 Peeling Cover From Seat Back.jpg
226.8 KB
· Views: 4
2 Cover Slowly Being Removed.jpg
189.4 KB
· Views: 4
3 Cover Removed From Padding.jpg
266 KB
· Views: 3
4 Measuring Padding Thickenss Appears To Be Two Inch As Well.jpg
201.7 KB
· Views: 3
5 Padding Removed and More Rust Bunnies.jpg
265.6 KB
· Views: 3
6 Groove In Padding For Arm Rest Support Bar.jpg
275.9 KB
· Views: 3
7 Rust At Bottom Edge Will Need To Be Cleaned Up.jpg
The outer edges also got the wire brush treatment so I would have a nice clean surface to glue the new cover to when the project reaches that point. I gave the metal where the padding goes a nice coat of paint and let it dry in the sun for a few hours and applied a new piece of door edge molding on the edge of the seat pan. The original edge trim was not in the cleanest condition so I figured making it all new would be the cheapest in the long run rather than trying to reuse the original pieces. While the paint dried I cut out and formed a new piece of padding for the back. The padding required an extra groove where the arm rest rod goes across so marked it out and cut a groove in the new padding. Cut where the two marks were for the edges and then cut from the center at a 45° angle to start removing the padding material and once that was done I could lay the knife down and cut across to form the new groove area. Rushed it a little bit by applying the adhesive to the fresh paint as the solvents tended to soften the paint a bit but wanted to get the padding in place to finish shaping it.
Attachments
1 Outer Edges Wire Brushed To Remove Old Adhesive And Dirt.jpg
194.2 KB
· Views: 4
2 Inside Painted And New Door Edge Guard Installed Around Edge.jpg
242.8 KB
· Views: 4
3 Center Of Seat Back Marked.jpg
257.6 KB
· Views: 3
4 New Padding Marked For Relief Lines And Arm Rest Bar.jpg
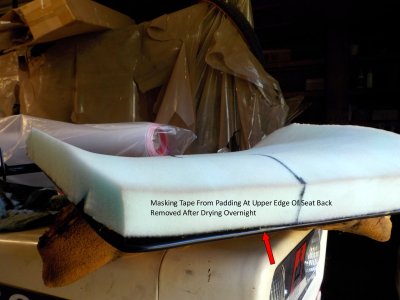
As a result a few pieces of masking tape got used to hold the padding at the top edge to conform to the bend and then used the electric knife to cut the sides to conform with the seat pan shape. Then I used the remains of the clear garbage back to mark out a pattern for the back seat cover similar to the way I did the bottom. All I got done today but still making progress and so far things are looking promising - maybe have a couple of cover inserts done tomorrow if I get time and ambition. Since I have arthritis in my hands the fingers are complaining a bit from pulling on the old vinyl back material while removing it. Please forgive any typing mistakes I may have added because of this.
Attachments
1 Making Tape To Hold Padding While Adhesive Cures.jpg
148.2 KB
· Views: 3
2 Masking Tape At Seat Edge At Top.jpg
147.4 KB
· Views: 3
3 Padding Trimmed To Match Seat Pan At Edges.jpg
173.6 KB
· Views: 3
4 Plastic Used To Mark Out Edge Of Padding For Rear Cover.jpg
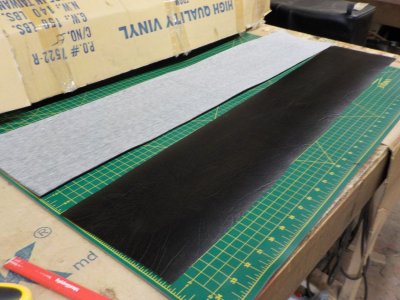
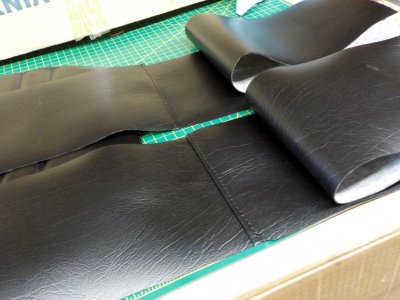
With the padding completed I now have a good foundation on which to build. For those interested the last picture shows how the padding on the rear looks after the adhesive cured overnight and the making tape was removed. To create the final pattern I need to add an area around the outside padding mark on each patter that is called a seam allowance. Basically this is the material that will serve to hold the thread that forms the seam where it will be sewn as the vinyl is joined together. I use a 3/8" wide seam allowance but because I want the inserts and boxings to be a snug fit on the padding I purposely added a mark around where the existing pattern was marked that was only spaced away 3/16" from the existing mark. Thus when the final seam is sewn that will join the insert with the boxing (side) pieces the top insert will be 3/16" too small and no longer a loose fit. Also there will be a smidge of shrinkage occur side to side as the pleat lines are sewn but this amount will be small since there are only 6 seams and each seam will cause about 1/16" of shrinkage - this will result in about 3/8" which will be easily accommodated with the padding being squished that much. Once I had the patterns made I folded them in 1/2 - the bottom one looked good but I had to trim the back slightly around one corner to get it to match. Once that was done I cut the plastic around the new outer mark so it just showed using my material cutter as it does a nice job on the thin plastic versus scissors. The patterns were then transferred to the back of the vinyl with pencil and the pieces cut out.
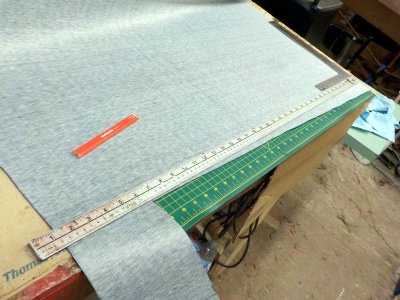
At this point I will point out it usually takes about 1 yard of vinyl to make a tractor seat cover so most people will usually only order 1 yard of vinyl - as a result it is wise to think about how you are going to cut the pieces required as vinyl is usually about 54" wide. The bottom insert and the rear insert require about 20' - 22"of width and 16" - 18" front to back or bottom to top. As a result it will take about 34" X 22" of material to cut them out of. The boxings I am using for this will be 7"" high and I need about 34" to go half way around from the center at the front to the center at the back to form one side of the boxing. This will require 4 boxing pieces 7" x 34" to be cut so I only have a join at the center at the back and the front so I would need a piece 34" x 28" of vinyl to cut them out of. 34" plus 20" equals 54" - the total width of the vinyl. One yard will only provide 36" X 54" so with some planning it is doable but just. One other option would be to cut one more 7" wide boxing piece which would require 35" of vinyl (which is available) and then use it to make the boxings longer and have one join at the front center and two joins along the side or at the rear corners as ones needs dictate. Since I use black vinyl that I purchase in a 20 yard roll this is not as big a concern for me but with just one yard to work with it does become something to think about as one decides how they will lay out the pieces required to make the cover.
With the two insert pieces cut out and other pieces being cut out of my roll I needed to square up the lower edge of the roll to mark out four 7" high boxing pieces. I used my small square against the edge and a steel yard/metre stick to mark a line that will be about 90° to the edge. Then I measured, marked and cut out 4 pieces that will be used to create the boxings. 7" high boxings may seem quite long given the padding is only 2" thick but I checked with a tape measure and in spots I will require 6" high material to get to where the original cover was glued and it is a lot easier to trim an inch off than try and add an inch later. Did a test fit of the two insert pieces I cut out on the seat paddings to check where the join seams will be and things looked good so I carried on like I knew what I was doing.
Attachments
1 Added New Outer Mark To Pattern For Three Eighths Seam Allownace.jpg
306.1 KB
· Views: 3
2 Outer Edge Of Plastic Patterns Trimmed To Outer Mark.jpg
326.3 KB
· Views: 2
3 New Piece Of Vinyl Marked And Cut Out From Pattern.jpg
242.8 KB
· Views: 2
4 Black Vinyl For New Cover.jpg
152.1 KB
· Views: 2
5 Squaring Up Vinyl So Boxings Can Be Marked Out.jpg
246.5 KB
· Views: 2
6 Squaring Up Vinyl So Boxings Can Be Marked Out.jpg
266.6 KB
· Views: 2
7 Two Seven Inch Wide Boxing Pieces Cut For Bottom Cover.jpg
178.2 KB
· Views: 3
8 Test Fit Of Bottom Insert On Seat Padding.jpg
183.3 KB
· Views: 3
9 Seat Back Paddin After Sitting Overnight And Masking Tape Removed.jpg
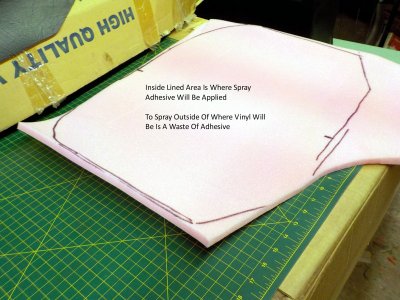
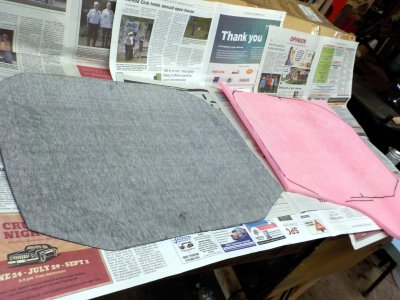
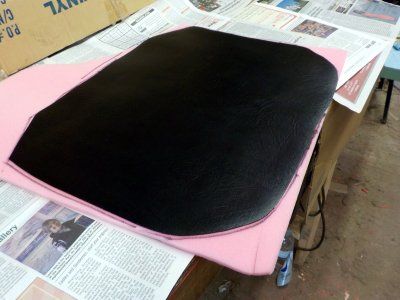
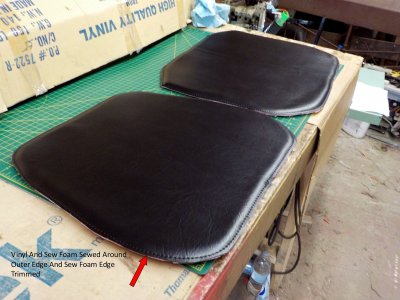
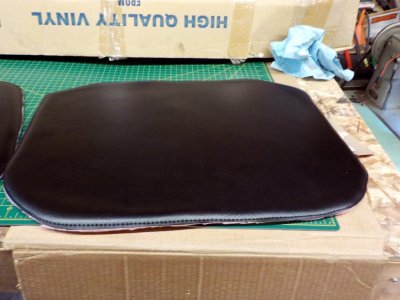
I dug out the remains of the roll of 1/2" sew foam I have been using up and I was just barely able to get a piece out to use with the lower insert - I had to open up my new roll to get a piece for the back insert. For those who don't know sew foam is padding that is 1/2" thick that has a scrum (or thread lattice grid) bonded to one side- this scrum gives the thread used to create pleats something to grab onto. Years ago cloth material was used as a backing to accomplish this but the scrum works well and makes things simpler. I marked out where the sew foam would meat with the insert piece of vinyl - this gives me an area to apply a light coating of spray adhesive to so the vinyl and the sew foam can be bonded together. Spraying outside the marked area is a waste of product as that area gets trimmed off. I marked the center of the foam and the vinyl so the vinyl can be folded and set on the centers and then smoothed out towards the outer edges so it bonds without any wrinkles or puckers. The spray adhesive can recommends two coats but I usually apply only one since the sew foam and the vinyl get sewn at the other edge to keep everything in place so nothing moves. If someone is doing this step only use a very lightweight adhesive that dries quickly as a heavy adhesive will take longer to dry and can bung up a sewing machine needle - ask me how I know. Someone doing this may wish to not use a spray adhesive - I have done covers without gluing them together and it can be done if you take your time and have patience. If the pieces are not going to be glued cut the sew foam about 1" larger all the way around the edge and then sew along the outer edge observing for any puckering as you go. With the seam allowance of 3/8" any sewing done within 1/4" of the outer edge of the vinyl will not show in the finished cover. Sometimes matching the vinyl pieces together as they are being sewed is not perfect at the edges and as a result I mention the 1/4" distance rather than the theoretical 3/8" that you should have to work with. The vinyl inserts and the sew foam got adhesive applied and after waiting a few minutes for them to tack up they were joined together. Been in the high 70's F here during the day so the adhesives don't take long to get tacky compared to colder days in the spring or fall. Afterwards I ran a seam around the outer edge of each insert about 1/8" in from the edge and then trimmed the sew foam to match the vinyl inserts edge.
Attachments
1 Roll Of Half Inch Sew Foam.jpg
117.8 KB
· Views: 2
2 Sew Foam Marked Out For Insert.jpg
221.9 KB
· Views: 2
3 Light Coat Of SPray Adhesive Appled To Sew Foam And Vinyl.jpg
203.3 KB
· Views: 1
4 Sew Foam Stuck To Bottom Of Vinyl Insert.jpg
165.9 KB
· Views: 2
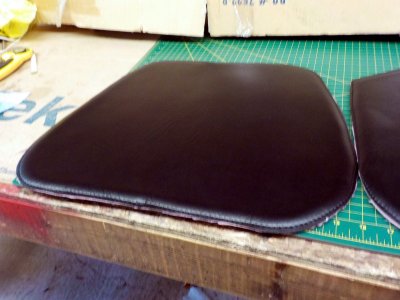
5 Bottom And Back Inserts Ready To Mark Out Pleats.jpg
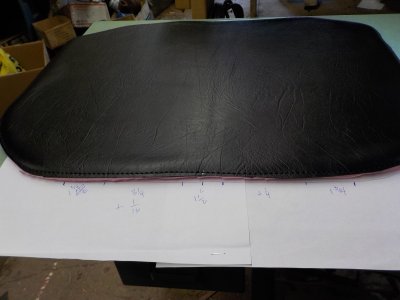
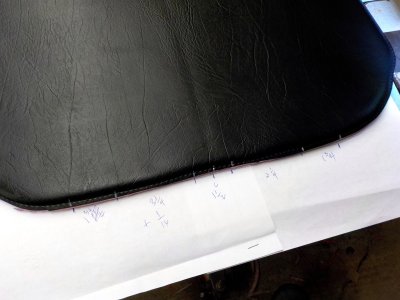
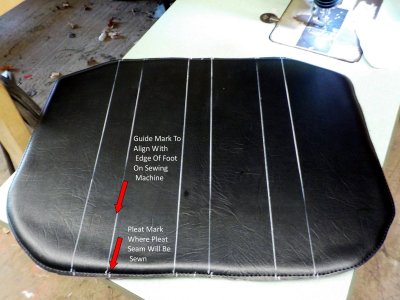
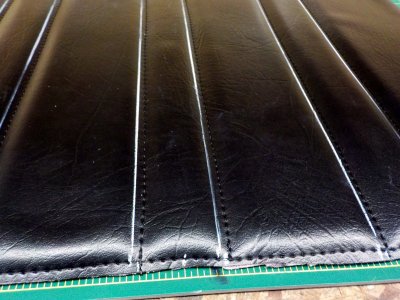
I then figured out the center of each insert and marked them at the front and back using a white grease pencil. Then I figured out the spacing required for each seam to match the original pleat marks in the original padding - turns out the bottom and back had the same pattern spacing. I added 1/16" to each width since as each seam is sewn and the vinyl material pulled down into the sew foam the vinyl will shrink a smidge because it is no longer flat on top but actually slightly U shaped. Since the patterns were the same I used two sheets of paper stapled together to transfer the marks to and then used it to transfer the marks to the other three edges. With that done I made a marking template out of a piece of cardboard that had the distance beside the inner edge of the presser foot and the needle and marked that as an offset to the mark where the seam will be. This mark was used to draw guide lines on the vinyl with the grease pencil so I can use it as guide at the presser foot so the seam gets sewn where it belongs. This way keeps the grease pencil mark from not being under the seam where it can be a challenge to remove once the seams are sewn. Once the seams were sewn the marks are out in the open where they can be removed with a few scrubbings with a cloth dampened with water. As you can see my seams are not perfectly straight but fortunately the operator will hide this fact when the seat is occupied.
Attachments
1 Center And Pleats Marked Out On One Edge Of Vinyl And Transferred To Paper.jpg
149.3 KB
· Views: 4
2 Piece Flipped Around And Ready To Mark Out Pleats On Other Side.jpg
126.8 KB
· Views: 2
3 Marks Transferred To Vinyl Edge.jpg
162.1 KB
· Views: 2
4 Pleats And Guide Marks On Vinyl Using Grease Pencil.jpg
172.3 KB
· Views: 6
5 Rear Insert Marked Out Same Way.jpg
196.9 KB
· Views: 3
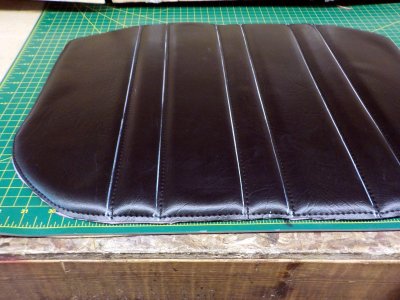
6 Pleats Formed By Material Pulled Together With Sewing Seams.jpg
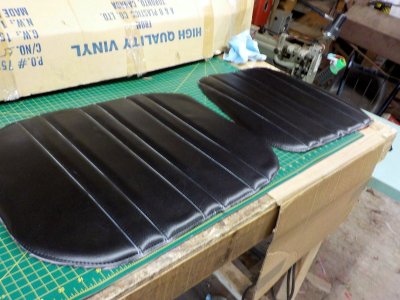
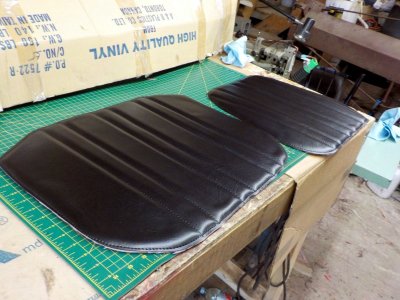
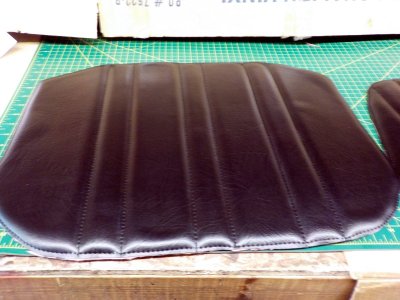
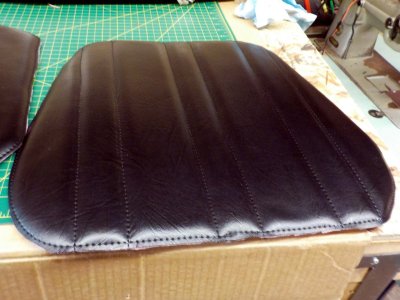
After a few scrubbings the grease pencil marks were virtually gone and I had two inserts that are starting to look like the beginnings of a new seat cover (I hope). I also took two of the the 7" boxing pieces and sewed them together at one end and then created a French seam at the join as this makes the join lay flat. Now I have a boxng piece for the bottom and the back insert. Took a break so I stored the vinyl pieces in a new clear plastic garbage bag so that they stay clean and critters are not tempted in case I don't get back to them for a few days. Using the clear bag insures that I know what is inside so it does not get thrown out and if a bird sneaks in and decides to poop on things trying to find a way out the vinyl is protected.
A word of caution if someone is marking vinyl using a grease pencil - apply it, do your sewing and remove it as soon as you can as I have heard that grease pencil can be a challenge to remove if it gets moist or damp and is left on for any length of time.
For those interested I do use an industrial sewing machine and it is powered by a newer electronic sewing machine motor that allows me to keep the speed very slow - I usually have it set so the needle is going up and down about once per second to make it easy for me to sew the heavier (thicker) black vinyl I use for some covers. Having said that it is not necessary to have an industrial sewing machine to sew up a cover - just makes it easier. I have used a simple sewing awl tool called the Speedy Stitcher" to sew pleats and seam by hand with good success - not fast but it can be done. I install a larger eye sewing machine needle in it rather than the large needles that come with it and use the heavier thread I use on the sewing machine wound on a Speedy Stitcher bobbin. To get straight lines and even stitch spacing I will stick a piece of masking tape on the vinyl using the edge of the tape as a guide and then I mark the stich spacing on the masking tape where I want the needle to make the hole in the vinyl. As I stated this is a very slow process but it can be done if someone wants to take the time. Another sewing option is to cut out the vinyl pieces and then take them to someone who does custom sewing to sew them together using directions provided by you. This will cost a bit but still allows you to do a lot of the seat refurbish work yourself cutting down on some of the expense versus having an upholstery shop do the complete seat. One more note I will make is that old treadle sewing machines can be found at sales and a lot of them were made to sew heavier materials such as burlap. They can be powered with an electric motor (such as an old drill) so they turn slow or in the majority of cases converted to a hand crank style by adding a handle to the hand wheel.
Just some options that I thought I would mention in case a reader might think it takes a lot of special equipment and major dollar investments to be able to sew up a new seat cover.
To hold vinyl pieces together I often use a staple or a few paper clamps as I sew pieces together so they are kept in proper alignment until they are joined together.
For those interested in learning more about sewing there are several youtube channels that go into great detail and offer good instructions on how to do this - far better than any instructions I could offer. Hope this information makes sense to the reader and encourages them to consider making a seat cover sometime in the future.
Maybe if I get time and things go well tomorrow I can complete the covers and get them installed.
Attachments
1 Grease Pencil Lines Washed Off With Water.jpg
196.6 KB
· Views: 5
2 Bottom Insert Pleats.jpg
176.8 KB
· Views: 5
3 Rear Insert Pleats.jpg
173.4 KB
· Views: 5
4 Seven Inch Wide Pieces Joined Together On One Edge To Form Boxings.jpg
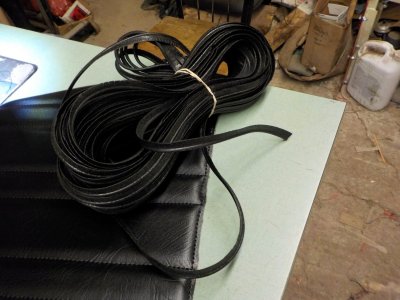
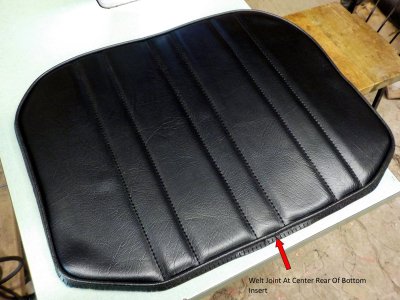
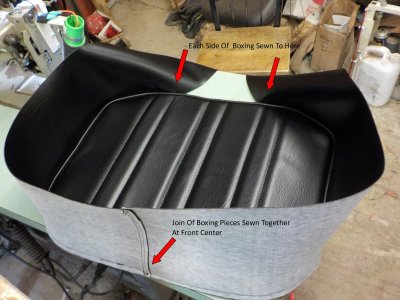
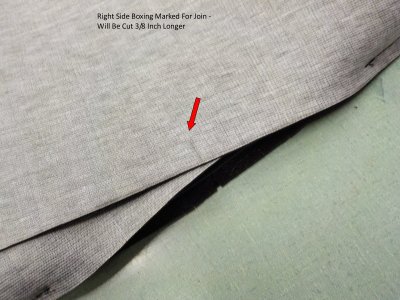
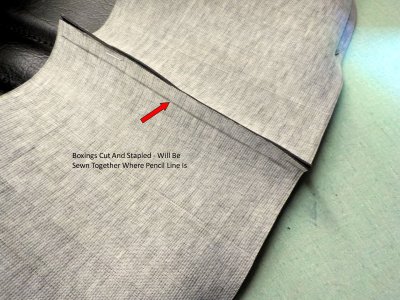
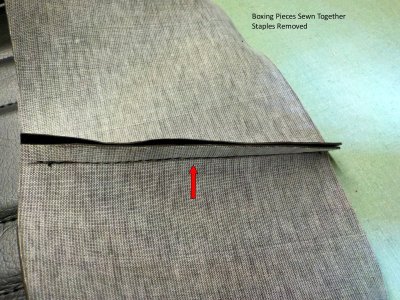
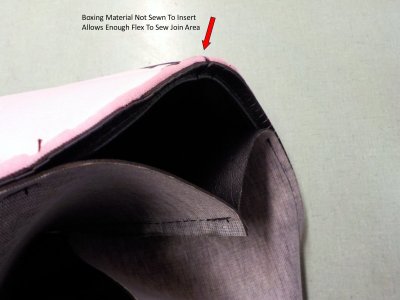
Got an early start today and here are the results. Suggested to the customer that the joint between the insert and the boxings would be a good place to use a 3/16" welt material I keep on hand and he agreed. I sewed the welt around the outer edge of the back and the bottom insert piece starting at the center rear of the bottom and the center bottom of the rear as this will make the join where the ends meet least noticeable. This step takes a bit of time and thread but makes the next step of sewing the boxing to the insert so much easier. Once the welt was sewn on I started to sew on the boxing piece beginning with the joined area of the two boxing pieces at the front center of the bottom insert and the top center of the rear insert. Then I sewed one side about three quarters of the way around to the rear, stopped and sewed the other side the same amount so there was about 3" on either side of where the boxings pieces meet unsewn. This allowed me to accurately gauge where the boxing pieces would join in the center which I marked and added 3/8" on each piece for a seam allowance. The two boxing pieces were then cut with a 3/8" seam allowance on each and the two pieces were then stapled together. Since the boxing pieces were not sewn for the short distance this allows enough flex that the two boxing ends can now be sewn together to create the second join seam which is accurately centered in relation to the center of the insert piece. Since vinyl stretches and shrinks depending on how it is being pulled or pushed to try and cut the unsewn ends of the boxing pieces to the correct length before attaching them is not something I have the skill to do so this is why I do it the way I show. Once the boxing join is sewn the staples are removed.
Attachments
1 Three Sixteenths Welt For Join.jpg
172 KB
· Views: 4
2 Welt Sewn Around Edge Of Back And One Last Test Fit.jpg
176.4 KB
· Views: 4
3 Join Will Flex Apart.jpg
188.5 KB
· Views: 3
4 Welt Sewn Around Edge Of Bottom Insert.jpg
218.9 KB
· Views: 3
5 Sewing On Boxing.jpg
187.6 KB
· Views: 3
6 Left Side Boxing Marked For Join.jpg
166.6 KB
· Views: 3
7 Right Side Boxing Marked.jpg
260.6 KB
· Views: 3
8 Boxing Cut And Stapled Together At Seam Allowance.jpg
325.7 KB
· Views: 3
9 Pieces Joined And Staples Removed.jpg
411.5 KB
· Views: 4
10 Why Boxing Material Is Not Sewn All The Way Yet.jpg
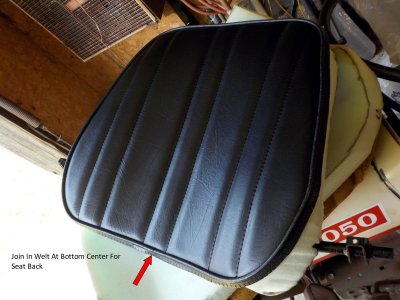
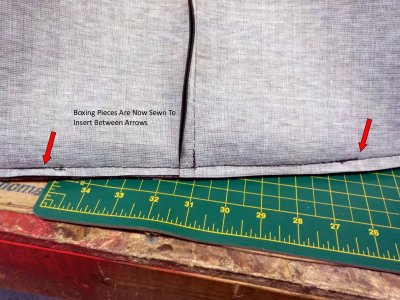
The short unsewn area of the boxing and the insert are now sewn together to create a nice centered boxing join at the rear of the bottom seat and the bottom of the back seat.
I forgot to mention that I am using cording feet on the sewing machine as they trap and hold the welt in place making sewing the cording installation easy. A zipper foot might also work in place of a cording foot to do the task. Another option would be to not use the welt and just sew the boxing to the insert with a regular seam and then create a French seam using the regular sewing feet. In my opinion the welt looks a little nicer but either option looks ok in the end.
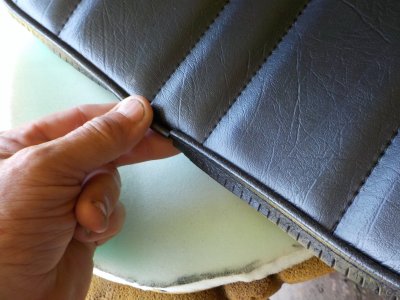
Once the boxing had been sewn to the insert I switched back to the regular sewing feet and created a French seam at the joined area. Got the first French seam a little wandering but the second one I did looks a bit better.
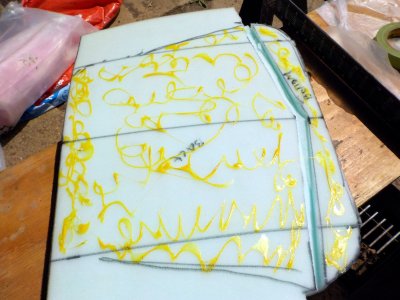
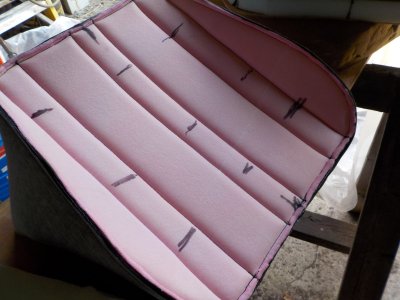
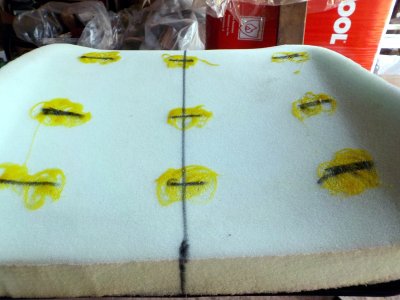
Then I did a test fit of the covers on top of the padding and things looked good so I added marks on the sew foam and the padding where I could spot glue them together. Since the adhesive works on the same principal as contact cement it is important to get a tack spot on both surfaces aligned so that when they are pressed together they adhere well. The spot gluing of the two pieces will keep the cover from shifting on the padding as someone sits down or gets up from the seat as such action usually creates a sideways or front to back motion as the person contacts or departs the seat at an angle as they mount or dismount it.
Attachments
1 Boxing Pieces Sewn To Insert.jpg
312.5 KB
· Views: 2
2 Join Is At Rear Where It Is Least Noticeable.jpg
114.5 KB
· Views: 2
3 Join Is Now A French Seam So It Will Lay Flatter.jpg
180.8 KB
· Views: 2
4 Other Boxings Done The Same Way.jpg
135.8 KB
· Views: 2
5 Rear Cover Ready For Test Fit.jpg
117.9 KB
· Views: 2
6 Marks On Padding And Sew Foam Where Adhesive Will Be Applied.jpg
212.9 KB
· Views: 2
7 Marks Where Adhesive Will Be Applied To Padding.jpg
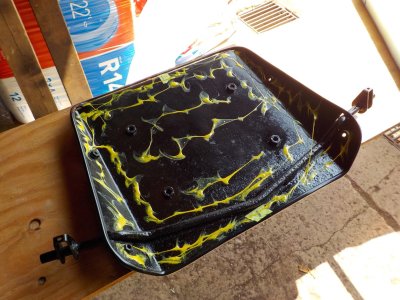
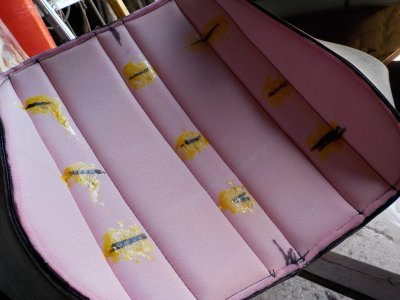
The circular dabs of adhesive were applied and left to tack up and then I made sure the inserts were centered in relation to the padding side to side by using the center marks on each and that the edges aligned front to back with the seam where the boxing joined the insert and the two pieces got pressed together starting at the center and working outwards from there - front to back and side to side. Then the boxings got pulled down and tucked in underneath and I did a quick inspection to see how things looked. The arm rest rod added a little bit of a challenge as the boxing material had to be slit with a razor blade so the material could be pulled around the rod so it would lay flat with no wrinkle or puckered area.
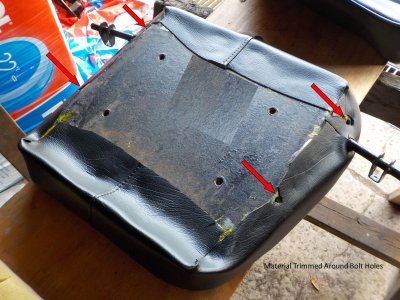
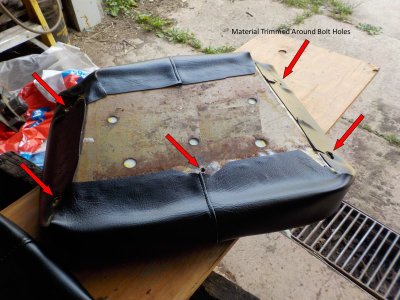
Once everything looked good I set about the task of trimming and gluing the boxing material to the back and bottom of the seat pans keeping in mind to cut out for the bolt holes to make installing the seats easier for the customer. I stated at the center at each side and then did the corners trimming the excess material to keep folds and puckers to a minimum. Since the vinyl I use is a bit thicker than the normal vinyl material it doesn't lend itself quite as easy to be tucked and folded over on itself but eventually I got it trimmed to where it looked not too bad. Fortunately the back sides are all covered by the seat frame so my less than perfect work will be hidden from view once the seat pans are installed again.
Attachments
1 Adhesive Applied To Sew Foam.jpg
193.2 KB
· Views: 3
2 Adhesive Applied To Padding.jpg
173.3 KB
· Views: 4
3 Insert Aligned And Stuck To Padding.jpg
159.6 KB
· Views: 3
4 Boxings Pulled Down And Folded Under.jpg
181.6 KB
· Views: 3
5 Boxing Slit For Arm Rest Bar On Back.jpg
135.4 KB
· Views: 4
6 Boxing Slit For Arm Rest Bar On Back.jpg
180 KB
· Views: 3
7 Starting To Glue Boxings To Back Side Of Seat Pans.jpg
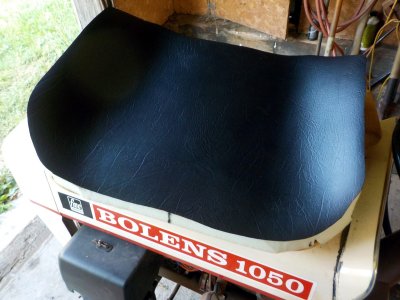
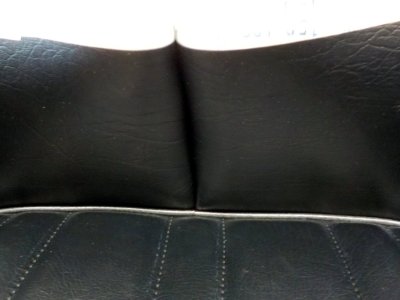
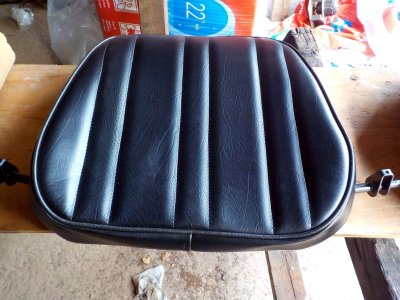
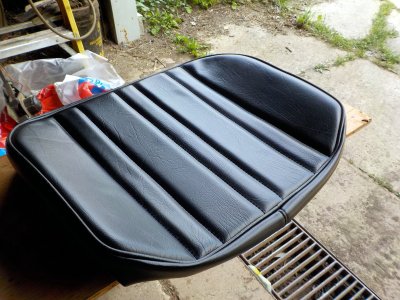
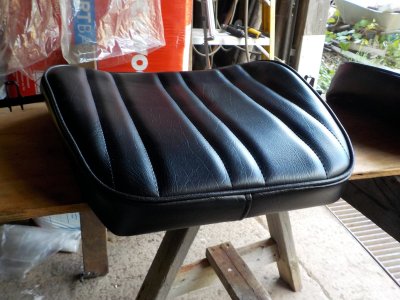
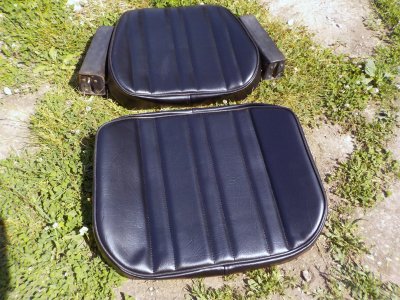
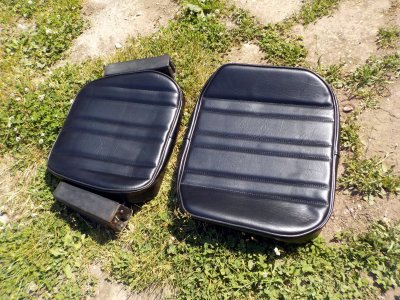
I installed the fold up arm rests to the seat back and took some pictures of the finished seat bottom and back. This is where all the measuring, trimming and attention to the detail of the foundation work that is now mainly hidden pays off in my opinion. If things go well you end up with a seat that looks respectable - will let the customer (and the reader) judge as to how good of a job I did.
As a note the armrests are still original and not perfect but the material is still in good shape so I suggested to the customer we leave them alone and he could purchase a can of black vinyl paint to freshen the look of them up if desired. Just for the heck of it I checked online and found a site that showed new arm rests that can be purchased for about $275.00 each.
As it stands now the customer is stopping in tomorrow to see how things are progressing - will see if he is happy with my work then??
Hope you have enjoyed this little journey of a tractor seat cover refurbish project.
This site uses cookies to help personalise content, tailor your experience and to keep you logged in if you register.
By continuing to use this site, you are consenting to our use of cookies.