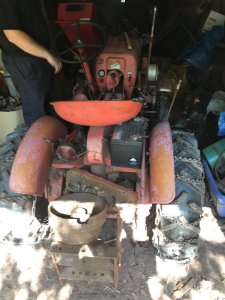
Well between mowing grass and suffering though this heat and humidity humidity is the worst, I been doing a few things on the 58 Country Squire the right brake was not working I figured it was a broke band as this is the usual thing. So last week thought I work on that first removed the wheel wts then got wheel and tire and fender off. Yep I could see the band was broken so removed the assembly and took it apart got the band out and the related linkage found the brake lining was pretty much gone also. Cleaned up the band and clamped it down to weld it looked it over good and figure I had it lined up right so welded it I like to gas weld these it works much better than trying to arc weld them. Went to reassemble the unit and just could not get it back together worked on it gave up for the day next morning I decided to remove a unit from another tractor to see if I could figure out what the deal was finally I seen it when I weld the 2 parts together I got them 180 out so got the hack saw out cut it apart and re welded it reassembled it and this time it went back installed some new brake lining bonded it with JB weld Industrial after letting it bond for 24 hour reinstalled the brake assembly on the tractor and It Works great checked the left brake over the lever didn't want to go to the full release position so I lubed all the pivots and linkage hinges got it pretty good but ended up installing a new return spring. Took the tractor out for a test drive and the brakes will lock up the wheels now all is good

You are using an out of date browser. It may not display this or other websites correctly.
You should upgrade or use an alternative browser.
You should upgrade or use an alternative browser.
Been working on the Country Squire some
- Thread starter MNGB
- Start date
Hi Noel yes I can post a few have more to post tomorrow I forgot them in the shop this afternoonAny pictures of the Country Squire Gary.
Noel


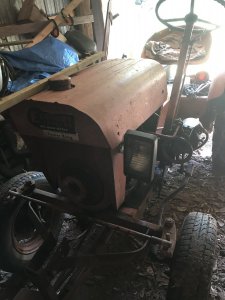
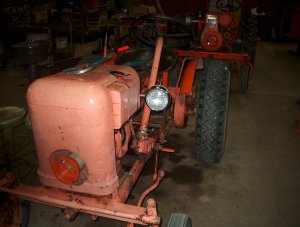
It has a replacement engine OEM was a B&S 9 hp this is a B&S 10 HP rear tires are 16" originally would have been turf ot ag bar tires these are 7.50 x 16 truck tires but I king of like the tires. These tractors are the same as the Economy tractors made by Engineering Products Co, EPCO made Economy and Power king tractors sold thur dealers and the Country Squire was a mail order tractor, they sold the CS for about 10/12 yrsWow. That’s a good size tractor. What is the hp. Tires original. ?
Noel
Doing more little things previously the fenders had been modified by adding braces going from the fenders to the tractor frame and differential, I didn't care for them so when I had the fenders off to work on the brakes I got busy with the side arm grinder and removed all that I could with out messing up the fender off course then there were a couple of spots where the grinder went thur the paint on the fender and the strap was ground down smooth and nice and shinny so I did a quick paint job on them to keep the rust at bay then I installed a couple of foot rest/pegs for your feet when driving these are working good. Decided to clean up and paint the draw bar lift assembly so that looks better will reinstall it tomorrow or Thursday. I also ended up replacing the seat assembly I liked the back rest one oncww on the tractor but getting on and off was not easy and when they modified the seat with the back reast they repaired the broken out bottom mount area by welding a 1/4" round palte on the top and bottom good deal very sturdy now but then they welded the seat to the mount frame and the operator must have been a short legged guy so now no way to move the seat back so I fabricated a whole new seat mount frame and bolted a seat pan to that


Pretty simple Kenny a valve spring in each tube don't know what engine the OEM ones were but I had some Lycoming V0435 springs that were just rightHas that got a couple shocks under the seat?
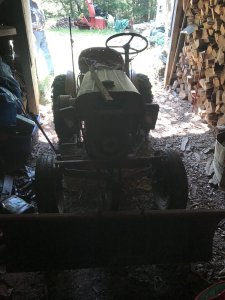
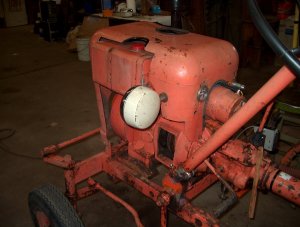
Yea I've been thinking about that but it won't be until winter, today I worked on an extended air cleaner, the early CS, all had an air cleaner that extended above the hood and I like the look but finding an original extended air cleaner tube is next to impossible soI got busy looking in the junk piles dusty corners and anywhere I thought I might have something suitable, did find some thin wall 1.5" diameter aluminum tubing. Cut an old short tube in 2 and fit the alum tube into the 2 pieces fabricated a new mount and a longer tie rod to hold the oil bath bowl assembly in place. Temporally installed it on the tractor looked good so now its in the paint roomNow ya gotta paint the whole tractor Gary.
Noel


Thanks Noel I'm not a fan of vertical exhausts was thinking of a under the frame muffler like the Fords & FergiesNeed a muffler stack now behind it.
The air cleaner does look good.
Noel.
That sits high enough to do that.Thanks Noel I'm not a fan of vertical exhausts was thinking of a under the frame muffler like the Fords & Fergies
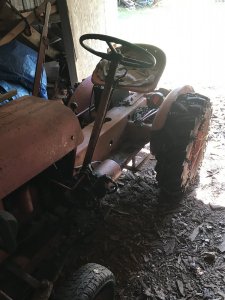
Got the extend aircleaner tube painted along with the oil bowl an installed and the newly painted hitch lift assy installed, I should have removed the draw bar and painted it also well that's another day. Some how the steering shaft got bent so that when you turned the wheel it move about 3 inch out of round I removed the steering wheel removed the outer column measured the distance the shaft was bent by measuring to the shift lever slipped a long pipe over the shaft and bent it back after several tries and measurements it got pretty straight slipped the tube back on the upper bearing was shot so installed a new 1 3/8" OD X 3/4" ID bearing reinstalled the steering wheel and it as good as it gets for now. It steering much easier now also. With the hood in place the rope start pulley was inside the hood making it unusable looked into finding and installing a PTO pulley but for now I fabricated a spacer to move the pulley out and it works fine.


O kay Noel I'll contemplate that is afternoonGood idea on having lights, how about semi-gloss black. Just some thing to think about. We don’t want you too idle.
Noel


Seen this today Gary in my travels.
Noel
Noel