JD 317 transmission repair help

Dpregs

Well-Known Member
Member
Hey guys,

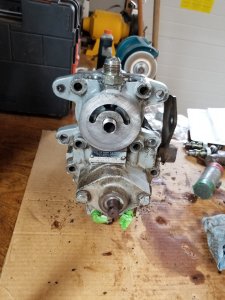
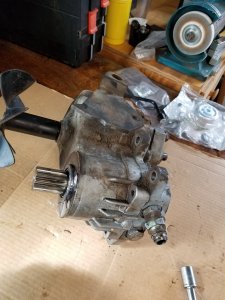
So it has been a year since this problem started and I am finally getting around to starting it. It has been a crazy year! Anyways, I have a 317 that started to leak hydro fluid as soon as I changed the fluid. I changed from ATF to low vis hyguard and bam leaks. Not sure if it was the change of fluid, or it was just its time to leak, but it started. At first I could not figure out where it was leaking from, but after cleaning it and carefully inspecting it I am 99.9% sure it is leaking from the gasket that holds to housings together. I made a little video to walk through it. But first, any advice, guidance, or other things I should think about would be GREATLY appreciated!


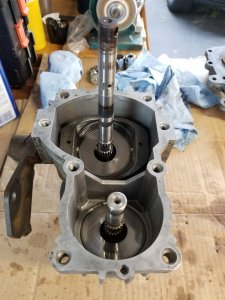
I was able to get the transmission out and on the bench, but I am stuck. I can't seem to get the housing apart. What am I missing? Any advice on getting it apart?

Also, is that a plastic film on the gasket going to the gear box?
 

Attachments

  • 20180726_102405.jpg
    20180726_102405.jpg
    184.2 KB · Views: 19
  • 20180726_095758.jpg
    20180726_095758.jpg
    183.1 KB · Views: 19
Thank you for the reply! I had taken off the charge pump and there was a small pin that fell out too. Still won't budge.
 
Very interesting. More pictures please. I haven't even turned the shaft on my 317 trans yet. I will be watching. Don
 
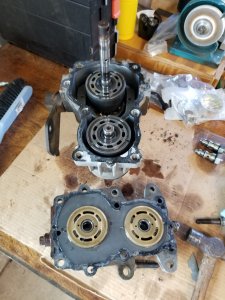
Success! Took a few razor blades as shims to break it loose! Think I found the leak too.

While in here, anything I should think about?

Thank you for all the help!
 

Attachments

  • 20180727_104307.jpg
    20180727_104307.jpg
    187 KB · Views: 17
  • 20180727_104211.jpg
    20180727_104211.jpg
    189.7 KB · Views: 17
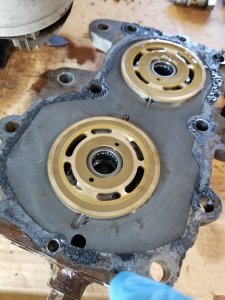
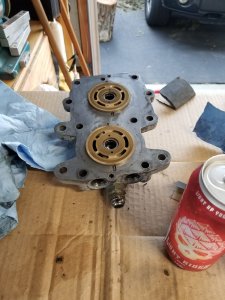
This gasket is old and cranky! Any tips on getting it off clean?

Should I take this to a parts washer before putting back together?
 
The wear surfaces as I can see from the pic look very nice, so doesn't appear anything else needs doing in there. As to removing the gasket, you can use a razor scraper on the steel section, but be careful on the aluminum part o not to gouge or scratch it. You might get some gasket remover to aid. I would do my best to scrape outward to keep the little bits of gasket from falling inside the bodies. I usually just use carb cleaner to spray out any residue, then air blast. The least you can disturb things the better. The main thing is clean, clean, clean before assembling!
 
I use a razor blade scraper for all the old gaskets. Especially if I intend to re assemble with out totally tearing down and cleaning. Takes lots of time but I find that with the blade in one hand and a shop vac hose in the other I can control debris better for a cleaner job and less contamination. You say you found the leak, did you determine the cause. Don
 
Don't know the cause, but it looks like the gasket had a break in it right where I thought the leak was coming from. I guess I will find out when I get it back together :)
 
Ok, went out to napa and picked up some gasket remover. Took several applications and using a razor carefully, but it is off! I go into a little more detail in the video.

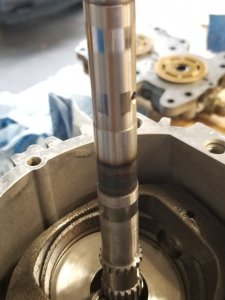
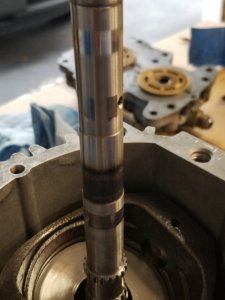
Also, look at the longer shaft, does it look like it overheated?


Attachments

  • 20180727_151328.jpg
    20180727_151328.jpg
    164.2 KB · Views: 9
  • 20180727_151418.jpg
    20180727_151418.jpg
    174.4 KB · Views: 10
  • 20180727_152023.jpg
    20180727_152023.jpg
    116.5 KB · Views: 10
  • 20180727_152021.jpg
    20180727_152021.jpg
    116.5 KB · Views: 10
Removing gaskets I found heating the old gasket up with heat gun or hair dry works well. I removed a pan gasket on 10 hp kohler yesterday and the gasket and sealer came right off. Installing I clean mating surfaces and coat gasket on both sides with grease it holds the gasket in place then when tighten the grease will squeeze out. Then it will remove easy.
brillionman
 
Thank you for the input guys, greatly appreciated! I was wondering if I should put anything on the gasket besides just the gasket, like silicon or something as an additional assurance. Here are a few more questions if you have a minute:

1. Just gasket, or add something to it?
2. I'm reading this right, there is only an O-ring, not a gasket for the charger pump
3. The connection point between the gearbox and transmission seems to have 2 gaskets? One had a plastic film on it?
4. Anyone know the torque specs for the bolts or have a repair manual? I have the parts manual
5. When reconnecting the hydro hoses, do you use any sealant?

Thank you again!!!
 
If you are using JIC hoses fittings, do not put anything on them. They are made to self seal without help. The hose/fitting vendor that comes to the mine told me years ago that anything on the fitting can cause it not to seal properly and can actually cause a leak instead of helping to prevent leaks.
 
Thank you for the reply! I guess I forgot to add a few questions to my list above :)

6. My plan is to to run it for an hour or so and then change out the hydro filter again, overkill?
7. Long debate, but ATF or LoVis Hygard? I am going to mainly use it for snow removal, but also it may see some summer time mowing and yard work.

thanks again guys for helping me through this!
 
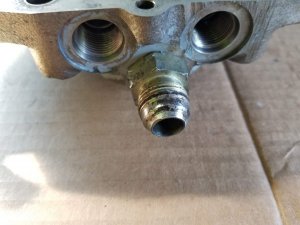
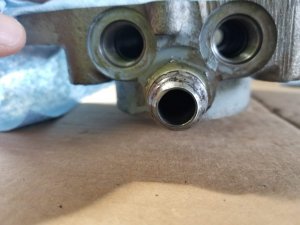
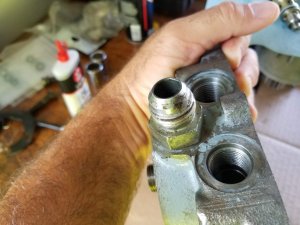
Haven't made much progress in the last week as I have had a lot to do around the house. I also need to go get a few more parts before I can put it all back together. Question, looking at the lower hydro nipple (yup, I said nipple because I don't know what it is really called :) ), it looks like it has a flat spot in it. Not sure if the pictures really show it well. Also, there is build up on the flare of the nipple that I tried to clean off with little luck. Is this something I should look to replace?


Attachments

  • 20180802_103113.jpg
    20180802_103113.jpg
    138.9 KB · Views: 9
  • 20180802_103215.jpg
    20180802_103215.jpg
    122.1 KB · Views: 9
  • 20180802_103255.jpg
    20180802_103255.jpg
    149.5 KB · Views: 9
I think I would replace it. As far as fluid, I'd go with the LoVis. I'd run it several hours before changing the filter, just to make sure the fluid had plenty of cycles through there. Might not be needed, but if it gives you peace of mind, why not?
 
Okay, finally got some more time to get back to this. Picking up more parts tomorrow, but I wanted to get at least the housing back together....and then I ran into some questions. I made a video showing what I was doing, it is longer....10 mins. SO that you don't have to watch the FULL video unless you really want to, here is a link to where my question starts:


Question 1: Will I be able to tighten this down enough to close that gap?
Question 2: Anyone have the torque specs on these bolts?

And now the FULL video if you like :)
 
A 5/16 bolt torques to around 22 foot pounds, and a 3/8 around 39 foot pounds. These may be metric, but sizes are close enough to go by. I like to put oil on the contact surfaces on assembly, as you do not want this to turn dry at all!
 
Last edited:
A 5/16 bolt torques to around 22 foot pounds, and a 3/8 around 39 foot pounds. These may be metric, but sizes are close enough to go by. I like to put on on the contact surfaces on assembly, as you do not want this to turn dry at all!

Thank you for reply, I assume you mean oil on both surfaces.

Also, am I correct that as I tighten this will come together? (Issue in 1st video)
 
Back
Top