Using A Small Wood Chipper Rated For 3 Inch Branches And What I Have Learned

29 Chev

Tractorologist
Senior Member
Member
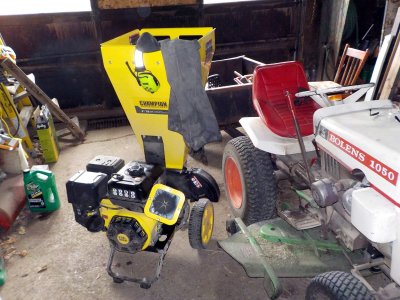
A few weeks ago a local store had a 3" Wood Chipper on sale and they had one in stock so I decided to purchase one. Here is what it looks like - fairly typical of a small wood chipper - has a hopper that one can toss in leaves and small branches up to 1/2" diameter and a dedicated front chute to accept branches that is rated for a 3" diameter.
1 Wood Chipper.jpg
Side view shows the exit chute to deflect the chips and a bag that can be easily attached to contain the discharged material.
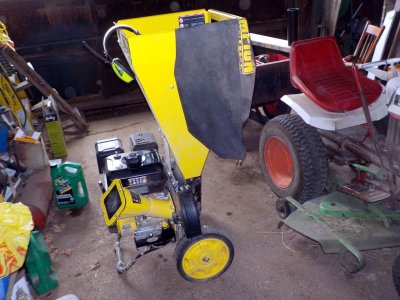
2 Wood Chipper.jpg
One benefit is the fuel tank sports a fuel gauge - not a great picture but is easy enough to read when using the machine.
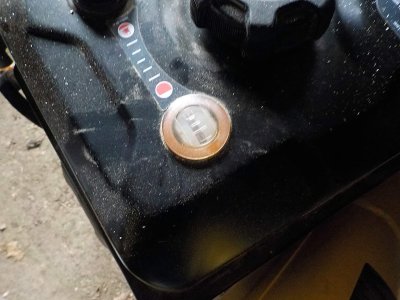
3 Fuel Gauge.jpg
A lot of people buy these machines figuring that it will take up to a 3" diameter branch and end up being disappointed because they find the machine will only accept anything close to a 3" diameter branch if it is straight as a broom handle. If there are any twists, bends, knots, etc. in a branch close to the 3" diameter it usually will not feed into the intake chute and often get stuck or jamb requiring the machine be shut down and the intake chute cleared before you can resume chipping. This often leads to the owner / operator becoming frustrated with their investment and developing a love / hate relationship with their new machine and often parking it in the corner of the shed at the end of the day.
I decided to do a thread on the machine as I knew all this before I purchased the machine having made and used a small 3" homebuilt chipper that mounted on my Bolens 1050 tractor. There were two main reasons why I purchased the unit - first it is powered by its own engine so it is ready to go anytime and I don't have to connect it to a tractor to power it and then tie up the tractor until I am done chipping. The second reason is that the unit has a separate hopper that leaves and small branches can be fed into to chew up to create mulch.

A word of advice - if you plan on chipping anything close to 3" diameter branches by picking them up and feeding them into the intake chute buy a chipper that is larger and rated for 5" or 6" diameter branches. The larger chippers will take 3" branches with bends and knots and chew them up - usually without any problems but you will usually spend twice or three times as much money in your initial investment. However, if you are like me and are "budget restricted" I will offer you a few tips and tricks on how a 3" rated chipper can be your friend and help you turn those small branches into wood chips without getting frustrated in the process.
 
Last edited:
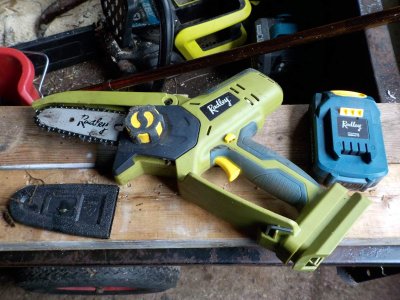
This spring I have been working along one side of the laneway where a few years ago I removed a bunch of trees that acted to hold snow from blowing clear of the laneway during the winter months. The trees were also growing underneath the hydro wires so they were always requiring trimming to keep them under control. The removal of the trees left a number of small stumps sticking out of the ground - most are around 5" in diameter or less at the base but there are a few that are larger. Rather than investing in a stump grinder or a backhoe I am just cutting the stumps down to ground level so I can finally use the lawn mower to keep the grass and other growth under control - the laneway is about 800 ft. in length so keeping the growth at bay with a string trimmer is starting to wear thin on me as I age. About a month and a half ago I purchased a 20 volt 4" hand held chain saw to work away at the smaller stumps to get them down to ground level by slicing the remains of a stump into small wood areas (similar to X and O's) and then breaking off the notched chips with a hatchet. The saw does not have a lot of power and it requires manually oiling the chain periodically but it does the job for the task I am using it for and am quite happy with it.
4 Hand Held Saw.jpg
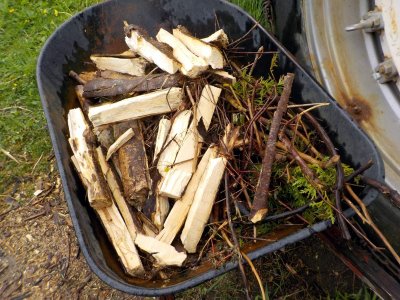
With the size of some of the wood pieces from the larger stumps along with a bunch of branches left over from trimming the trees over the years that are just lying on the ground it is necessary to remove them from where they are so the ground will be clear for mowing so I have been clearing about a 5 foot section at a time and loading any branches and stump remains into my cart and then taking them back to a designated chipping area by the shop. Most of the branches are 1-1/2" diameter or smaller and old but some are still pretty solid so any offshoots would be a challenge to feed into the chipper intake as is and expect them not to jamb up.
The chipper has no throttle control and as a result it cannot be idled down before shutting the engine off and the preferred shut down method is to shut the fuel valve off so the engine runs out of fuel - this works out pretty well as you can gauge the amount of material left to be chipped and then shut the fuel off and continue chipping up the remaining branches on the fuel remaining in the carb. This shut down method prevents the engine loading up with fuel as the chipping flywheel has a bit of momentum before it stops turning and yes there is an On Off switch for emergency shut down on the engine that kills the ignition. I mention this as every time you jamb the intake chute the chipper must be shut down, 3 bolts removed so the intake chute flap can be moved out of the way and the jamb material removed - this gets old real quick and will lead to the frustration and love / hate relationship I mentioned earlier.
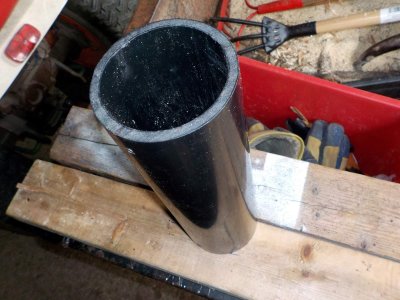
This is why I have started pre-staging the branches and stump remains using a rather simple device that I will call a Go / No Go gauge which is simply a 12" long piece of 3" ID ABS pipe I had left over from a plumbing job.
5 3 Inch ID ABS Pipe 12 Inches Long.jpg
If a branch or remains of a stump looks like it might not pass through I simply try it into the ABS pipe - if it slides through it is a Go - if it does not then it is a No Go and the little chainsaw or the hatchet is used to trim the offending piece until it will slide through the piece of pipe.
PLEASE NOTE: Using the saw, a hatchet or the wood chipper is a safety hazard and personal protective equipment such as gloves, safety glasses, a mask (some old rotting wood can be dusty) must be used and Safety Practices must be observed - one second of stupidity or forgetfulness can result in a lifetime of suffering!
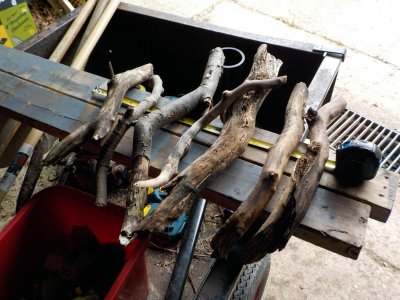
Here is a picture of the branches and remaining stumps after I made sure they will all feed through the pipe ok.
6 Branches Stump Pieces Sized To Slide Through ABS.jpg

Some people will argue that pre-staging the branches is time consuming and requires handling the material an extra time and I will agree but by doing this I know when I start up the chipper and am feeding the pieces in they will not result in a jamb and create a love / hate relationship. If the chute becomes jammed or if you force a piece into the intake chute only to find it is too large to feed fighting with it to remove it back out takes time and the engine is burning fuel while nothing is getting chipped until you shut the machine down or get the too large piece back out - this wastes fuel and time so I have found pre-staging works for me which is why I am suggesting it for those with smaller chippers like this - your opinion may differ and that is OK - for me pre-staging works. Something to keep in mind is that a stick or branch that is pie or "D" shaped may look like it will pass through a 3" diameter hole but will not when you try to feed it in. I have found that if a branch has a moderate curve, a slight zig zag or a circular twist it is hard to determine just by looking at it whether it will pass through ok or not once the diameter is over 1-3/4". I have also found that if a branch or stick is approaching 3" in diameter you may want to cut it into 9" to 12" lengths before you feed it in - I had branch that was just under 3" in diameter and about 5 feet long - once the blade made contact and started chipping it I could not hang onto it (I have arthritis in my hands) and the machine self fed it and stalled out after it ingested about 15" of the branch - cutting it into short sections gives the machine time to recover if it starts to self feed since it is only chipping short sections at a time.
Along the laneway there are many ruts left by a skidder loading logs onto trucks as the ground was soft ad wet when this was done. There are also a few holes where I have removed rocks (some around 12" x 12") that were sticking up a couple of inches above the ground. When I have chipped the branches and stump pieces the chips are used to fill in any ruts and and holes so the area will be level enough for me to mow with the tractor and mower. I figured the investment in the chipper was the most cost effective way to create an area that I can mow and eventually the chips will decompose and become soil versus using a stump grinder or a hoe.

 
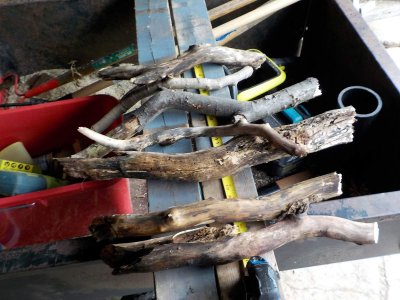
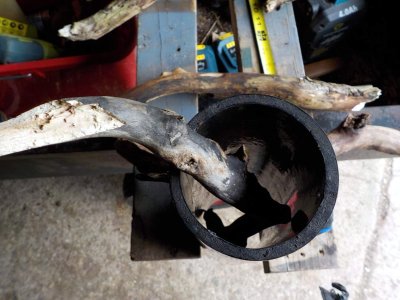
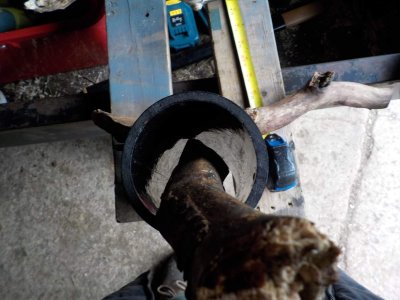
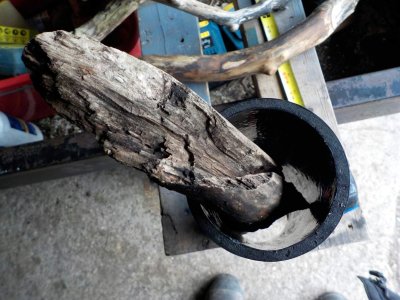
To better illustrate how a branch that is in the 1" to 2" diameter area can cause grief and frustration to someone who is unfamiliar with a small chipper (like my 3") I took some pictures today. These pictures show several branches that at a glance one would assume they would feed in just fine to the uninitiated and what they look like trying to pass through a 3" diameter hole and how they get hung up. If a branch is larger than 1/2" in diameter and still solid it is very difficult to get them to flex enough to feed into the inlet and this is why pre-staging with my piece of 3" ABS pipe makes things so much easier for me rather than putting a branch like these in the inlet chute and then having to fight with the rubber flap as it binds up to remove them again. There are some videos on youtube that show where people have the same 3" chipper and removed the rubber flap so they can see down the intake chute but this defeats the safety protection that the rubber flat provides. Once you have seen (and perhaps felt) the result of a short piece of stick flying back out the inlet chute as it gets kicked back by the chipper blade and you will appreciate the rubber flap remaining in place.
1 Examples Of Small Diameter Branches That Won't Feed.jpg2 Examples Of Small Diameter Branches That Won't Feed.jpg3 Twists Result In A No Go.jpg4 Twists Result In A No Go.jpg5 Twists Result In A No Go.jpg
 
This shows a pile of branches, sticks and stump pieces and how I have them pre-staged and ready for chipping.
1 Branches And Stump Pieces Prestaged For Chipping.jpg

I used the bag to contain the chips so as it filled up to being thee quarters full I would shut down the chipper and empty the bag into the trailer - no unexpected stops because of a jamb in the inlet chute. When I was done I had a nice load of chips in the trailer to fill in more ruts and holes.
3 Trailer Three Quarters Full With Chips.jpg
 
A lot of people buy these machines figuring that it will take up to a 3" diameter branch and end up being disappointed because they find the machine will only accept anything close to a 3" diameter branch if it is straight as a broom handle. If there are any twists, bends, knots, etc. in a branch close to the 3" diameter it usually will not feed into the intake chute and often get stuck or jamb requiring the machine be shut down and the intake chute cleared before you can resume chipping. This often leads to the owner / operator becoming frustrated with their investment and developing a love / hate relationship with their new machine and often parking it in the corner of the shed at the end of the day.
Thats why we got a 8"x 8" 3-point chipper. Not that we want to chip 8" logs but more for the bends and curves in the branches we feed in. Fruit tree prunings can really be tough to get fed in.
 
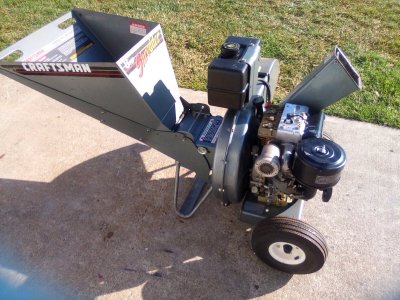
Like you mentioned, those smaller machines are built for small branches and fed slow. The simply do not have the capacity or power to do anything of any size. I purchased a Super Tomahawk about 20 years ago. It has a 10" wide steel drum with three rows of hammers to do the grinding. 10 hp Briggs has to work some to get that heavy drum turning and up to speed but once turning it acts as a heavy flywheel to keep it grinding when feed a load of branches. 3" branches, better green than dead, will go through it but needs to feed slow. I normally won't feed that big of stuff into it as it vibrates the hands to much. Big stuff goes to the burn pile. Those smaller ones are great for what they are intended to do. I usually put mine on a trap and just keep the material way from the chute so it don't plug, then load and haul to where we want the mulch to be.
 
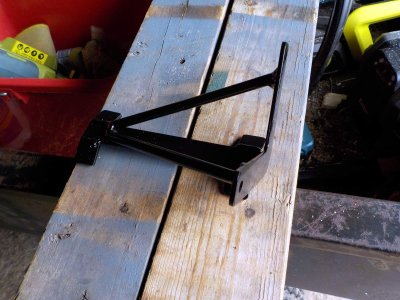
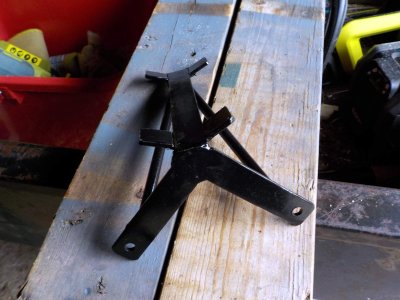
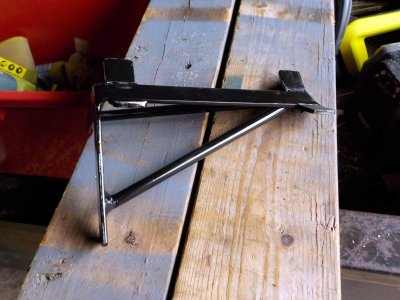
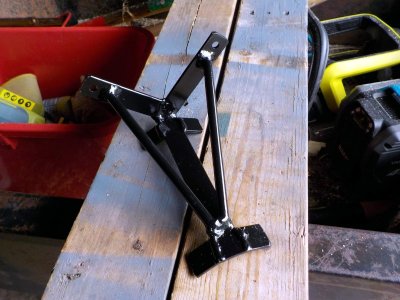
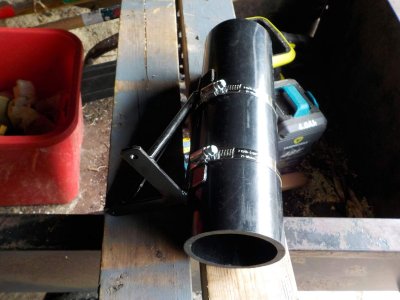
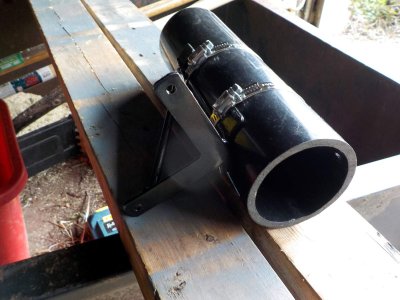
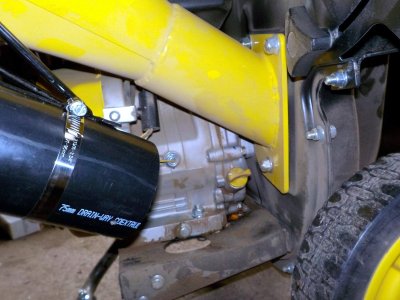
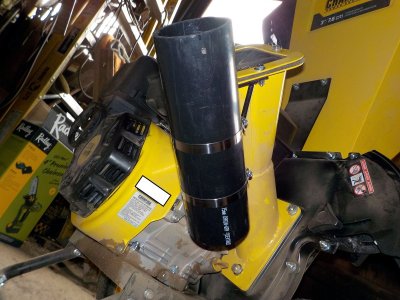
I did the oil change on the chipper at the 5 hour interval as recommended in the owner’s manual. This gave me an idea of which side the oil drain and fill plugs are easier to access since the engine has them on both sides and I think the one on the intake chute side is slightly easier to get to. I decided that I would make up a bracket and install a second go / no go gauge on the chipper as well as sometimes I will be using it at the brush pile I have accumulated over the years from trimming trees. I will still use the original piece of ABS unmounted but having a second one attached to the chipper will allow me to try a stick in it to see if it will feed ok rather than trying to feed it into the intake and it not going and then having to fight with the rubber flap to get it back out of the intake chute.
Here are pictures of the bracket I made and how the ABS pipe attaches to it with two hose clamps.
1 Bracket Made To Mount ABS On Chipper.jpg2 Bracket Made To Mount ABS On Chipper.jpg3 Bracket Made To Mount ABS On Chipper.jpg3.5 Bracket Made To Mount ABS On Chipper.jpg4 ABS Clamped TO Bracket.jpg5 ABS Clamped TO Bracket.jpg
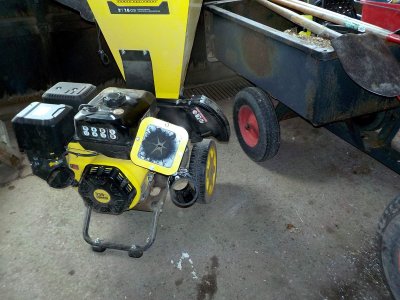
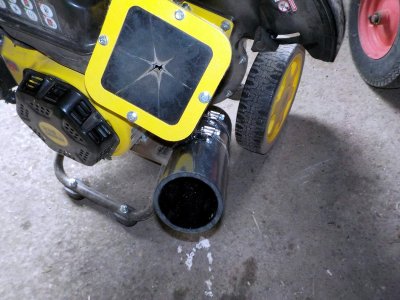
Then the bracket got installed on the chipper right beside the intake chute - I can easily try a stick into it to see if it is under 3" diameter and if it will pass through the length of pipe. Had to use a couple of longer bolts to mount it and still have the lock nuts fully threaded through the nut and the original bolts had washer heads so I added a couple of flat washers on the head side. It sticks up a little bit but should not interfere with feeding the sticks and I can still access the drain plug and fill plug ok.
1 Pipe And Bracket Installed.jpg2 Longer Bolts Installed.jpg
3 Still Can Access Oil Fill And Drain Plug.jpg4 View From Side.jpg
 
Stew my old Kemp chipper/shreader will take up to a 3” branch like you said straight as an arrow. For me anything above 2” gets burned in the shop. I also somewhat stage as I cut branches and pile them. While the machine is running this allows me to continue without long delays finding something that’ll go in.
 
Back
Top