I use ground engaging implements with my GT, and I have the new style of mower deck mount, if you do also, this may be a consideration, or you may have run into this already.
I will identify the problem, the solution I found, and the process, including what I determined wouldn't work, and what didn't work. The last is the one that did work.
Observed problem,
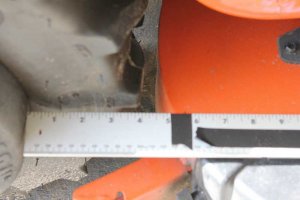
When I use my Johnny Bucket JR, I prefer to not have the Fabricated mowing deck attached because I have 1/2" of clearance between The front of my rear tire and the rear of the deck.
As a suspension deck, it's supposed to move some to reduce stress. The weight is great for JBJR use, but in my opinion too risky.
The solution,
Remove the deck, use JBJR.
Not so simple.
On this deck (Clearcut Gen II, fabricated 48", they are impressive) they are suspended by 5 points, connected to the chassis by 6. The 6th is the deck sway bar, its a quick disconnect, and not an issue in this modification.
So far so good.
4 of the 5 points are quick disconnect. Still good.
The bad,
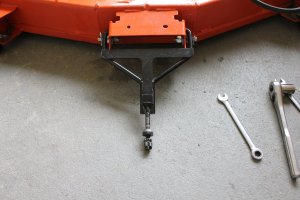
The deck when attached leaves approximately 3" of ground clearance, unattached gives full 8" of clearance.
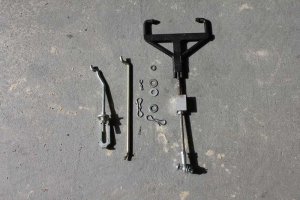
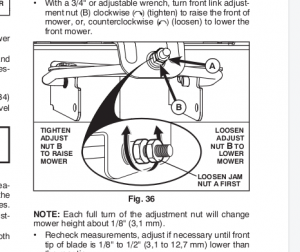
This is a quick disconnect for maintenance on the deck, but not for changing implements and Garden Tractor use, due to the rod (E) hanging down. Allowing a piece attached to the front axle to hang down and get caught on something while working another implement could be bad. The ground clearance that you gain is lost due to this piece hanging down also. (All companies are using a type of this method, under $4K, JD too). This is not a complaint, this system does work fine. It's about making your ground engaging implements possibly safer to use and getting more work out of them.
To uninstall this rod requires getting wrench's and undoing the careful deck height adjustment already done. When you reinstall the deck you will be required to go through the deck adjust process again. It's doable, but a pain.
This modification was a quest to simplify the process of deck removal and re-installation without having to readjust the deck height. In other words, a simple, affordable way to have full quick disconnect like the big expensive brands do, without spending a lot of money, anyone can do this, or maybe someone finds an even better way!
The first idea I had was to create a bracket to hold the piece that hangs down up, safely and out of the way. The chassis is 12" wide and the front connection is 9" wide. Trouble already. All places on the chassis while maintaining ground clearance gained, keeping the piece from being potentially pushed up into the PTO and other things spinning, killed this idea.
The second idea,
I noticed that the old way of doing this was having two sturdy drag links attaching to the front of the chassis. This seemed sturdy enough then, and sturdy enough now. I thought, If I could make these precise enough, they would not need to have adjustment, eliminating this front adjust in an ingenious way.
It worked, partially. I could not get a precision enough hole drilled, it was always off a bit, translate=
Quality of grass cut, worse. Not a success. With much more investment it would work, but then it would be outside the scope of this quest. To keep it simple, affordable, and that anyone can do it.
Here are the pictures of this effort,
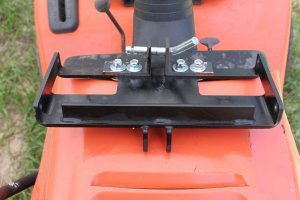
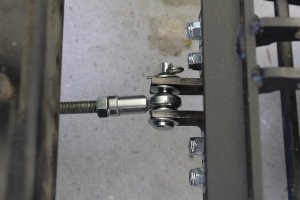
The way the original piece attaches,


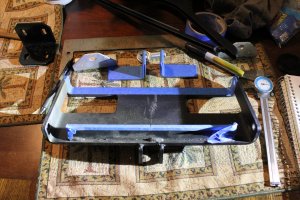
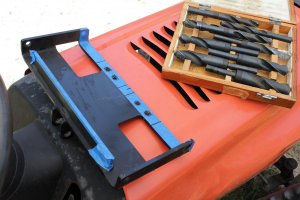
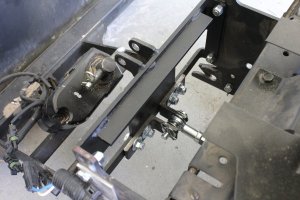
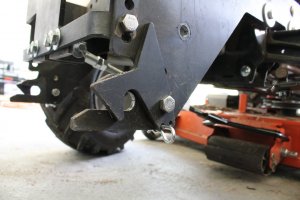
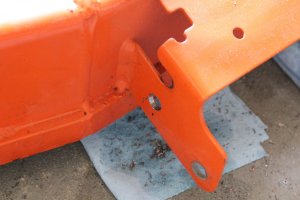
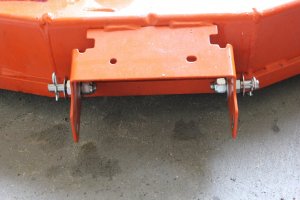
I drilled two holes in deck mount bracket,
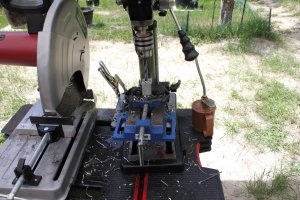
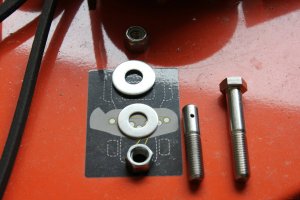
I created 4 quick disconnect pins from 1/2" stainless steel bolts (2 for the JBJR and 2 for the deck), used a thread die to clean the threads, used my drill press to drill holes for the pins.
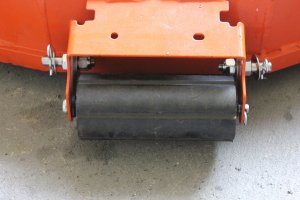
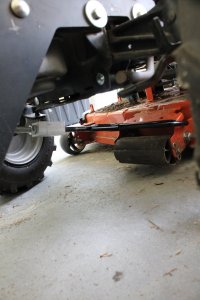
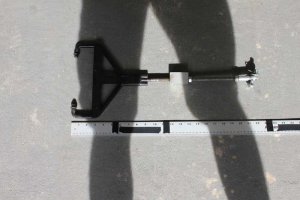
I made two of these (drag links), to connect to the Johnny Bucket support, to make proper clearence they needed to be long.
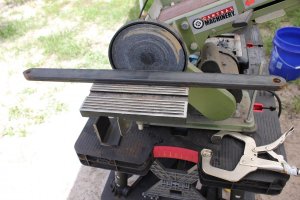
I mowed a part of the lawn in back, un-viewable in case......yep in case happened. Funky grass cut lines. Without precision metal working tools, welder, extra money..... I abandoned this idea, I needed to have adjustability in the drag links. Goes to show, not every great idea works, but if you don't try, you'll never know.

In my next post I will show what worked, success!
I will identify the problem, the solution I found, and the process, including what I determined wouldn't work, and what didn't work. The last is the one that did work.
Observed problem,
When I use my Johnny Bucket JR, I prefer to not have the Fabricated mowing deck attached because I have 1/2" of clearance between The front of my rear tire and the rear of the deck.

As a suspension deck, it's supposed to move some to reduce stress. The weight is great for JBJR use, but in my opinion too risky.
The solution,
Remove the deck, use JBJR.
Not so simple.
On this deck (Clearcut Gen II, fabricated 48", they are impressive) they are suspended by 5 points, connected to the chassis by 6. The 6th is the deck sway bar, its a quick disconnect, and not an issue in this modification.
So far so good.
4 of the 5 points are quick disconnect. Still good.
The bad,

The deck when attached leaves approximately 3" of ground clearance, unattached gives full 8" of clearance.
This is a quick disconnect for maintenance on the deck, but not for changing implements and Garden Tractor use, due to the rod (E) hanging down. Allowing a piece attached to the front axle to hang down and get caught on something while working another implement could be bad. The ground clearance that you gain is lost due to this piece hanging down also. (All companies are using a type of this method, under $4K, JD too). This is not a complaint, this system does work fine. It's about making your ground engaging implements possibly safer to use and getting more work out of them.
To uninstall this rod requires getting wrench's and undoing the careful deck height adjustment already done. When you reinstall the deck you will be required to go through the deck adjust process again. It's doable, but a pain.
This modification was a quest to simplify the process of deck removal and re-installation without having to readjust the deck height. In other words, a simple, affordable way to have full quick disconnect like the big expensive brands do, without spending a lot of money, anyone can do this, or maybe someone finds an even better way!
The first idea I had was to create a bracket to hold the piece that hangs down up, safely and out of the way. The chassis is 12" wide and the front connection is 9" wide. Trouble already. All places on the chassis while maintaining ground clearance gained, keeping the piece from being potentially pushed up into the PTO and other things spinning, killed this idea.
The second idea,
I noticed that the old way of doing this was having two sturdy drag links attaching to the front of the chassis. This seemed sturdy enough then, and sturdy enough now. I thought, If I could make these precise enough, they would not need to have adjustment, eliminating this front adjust in an ingenious way.
It worked, partially. I could not get a precision enough hole drilled, it was always off a bit, translate=
Quality of grass cut, worse. Not a success. With much more investment it would work, but then it would be outside the scope of this quest. To keep it simple, affordable, and that anyone can do it.
Here are the pictures of this effort,
The way the original piece attaches,


I drilled two holes in deck mount bracket,

I created 4 quick disconnect pins from 1/2" stainless steel bolts (2 for the JBJR and 2 for the deck), used a thread die to clean the threads, used my drill press to drill holes for the pins.


I made two of these (drag links), to connect to the Johnny Bucket support, to make proper clearence they needed to be long.

I mowed a part of the lawn in back, un-viewable in case......yep in case happened. Funky grass cut lines. Without precision metal working tools, welder, extra money..... I abandoned this idea, I needed to have adjustability in the drag links. Goes to show, not every great idea works, but if you don't try, you'll never know.

In my next post I will show what worked, success!

