Its certainly not as easy as it used to be. If Minneapolis Moline tractors weren't the featured tractor at our local show I probably wouldn't be going as far with the clean up. I would have stopped at a good pressure washing.Sure wish had your energy cjet!!

You are using an out of date browser. It may not display this or other websites correctly.
You should upgrade or use an alternative browser.
You should upgrade or use an alternative browser.
Workin' on the Old Tractors
- Thread starter cjet69
- Start date
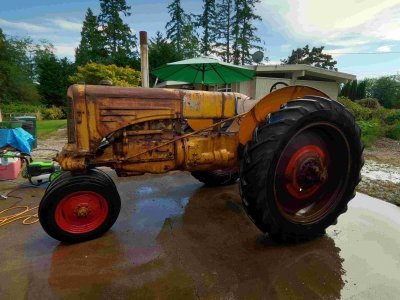
The ZAU was the first Minneapolis Moline I ever worked on. I knew nothing about them back then and I still retain most of that knowledge to this day. LOLThe ZAU looks like a fresh resto still CJet! The ZTU looks great in it's work clothes! I too would love having your energy and a bit of your knowledge.
DAC
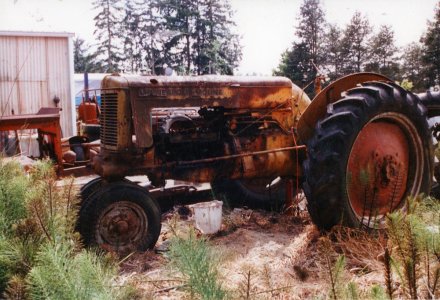
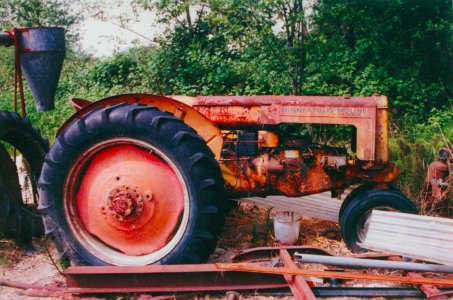
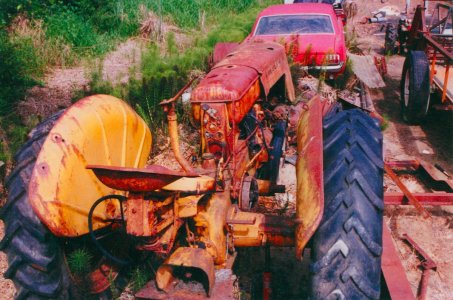
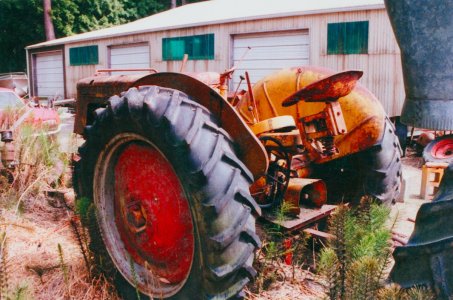
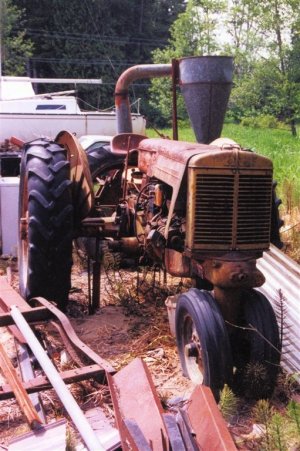
") Looking back through my pictures I see the earliest date was in March of 2005 when I was still painting and assembling. The ZAU took me about a year to complete so that mean I started in 2004. I took pics with my 35mm camera prior to that March 2005 digital pic. Here are a few of those scanned pics of where I started on that basket case tractor. All of the pistons were stuck bad, Bull gears were toast, And the fuel tank had a starling nest in it that rotted the bottom out of it. It had to be replaced. We found a partial parts tractor in the salvage yard that we bought and for the most part everything that was bad on our tractor was good in the parts tractor. Worked out perfectly.
Looking back through my pictures I see the earliest date was in March of 2005 when I was still painting and assembling. The ZAU took me about a year to complete so that mean I started in 2004. I took pics with my 35mm camera prior to that March 2005 digital pic. Here are a few of those scanned pics of where I started on that basket case tractor. All of the pistons were stuck bad, Bull gears were toast, And the fuel tank had a starling nest in it that rotted the bottom out of it. It had to be replaced. We found a partial parts tractor in the salvage yard that we bought and for the most part everything that was bad on our tractor was good in the parts tractor. Worked out perfectly.Attachments
Last edited:
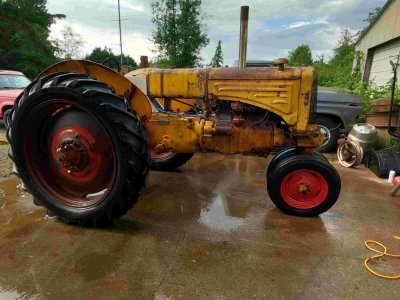
Thanks GB. Yes, they are featured along with Rumley.That's a good looking Z Chris, are they featuring MM at the show this year?
Here is the clubs site. Vintage Farming Days — Puget Sound Antique Tractor and Machinery Association
Last edited:
After last years tractor show the trailer brakes wouldn't work. The little green light on the controller wouldn't light up. I found a test procedure for the controller and it checked out. Hooked up the trailer, the little green light lit up, and now the brakes work. The only thing I can think of is in messing with the wires under the dash that it made a good connection. I suspect it could be the wire with a quick connector on it. At least I have brakes again.

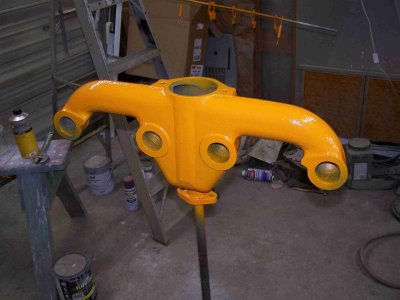
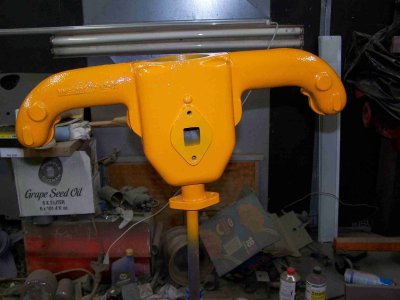
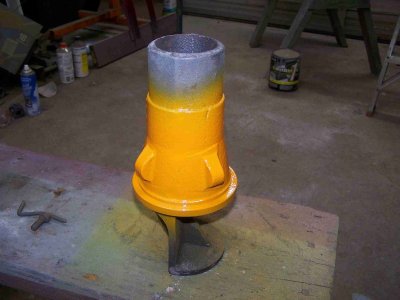
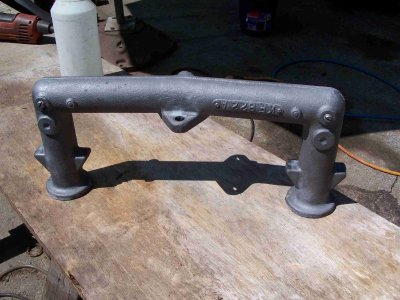
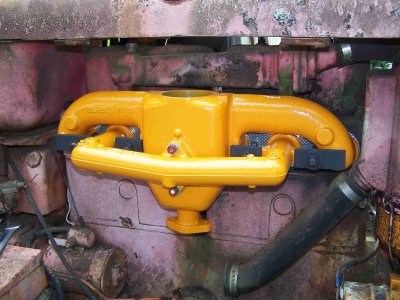
Forgot about the intake manifold. Wire brushed and then a quick run through the blast cabinet. Hit it with Ospho then warmed it up good with a propane torch to dry it fast. Should be ready for paint after my coffee break.
Attachments
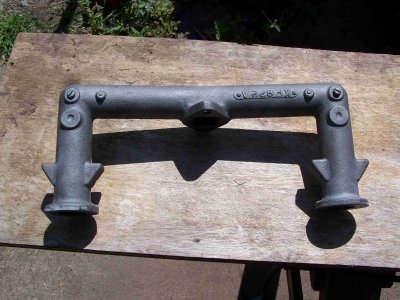
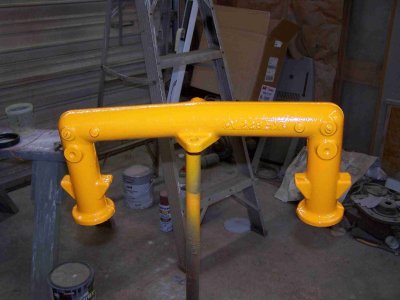
Now that is prettyPainted the new manifold for the MM UTS Special.
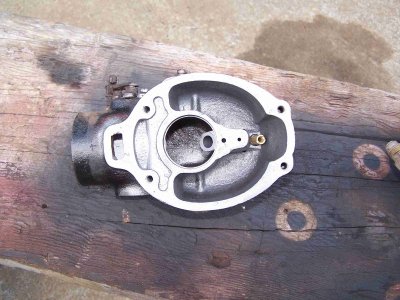
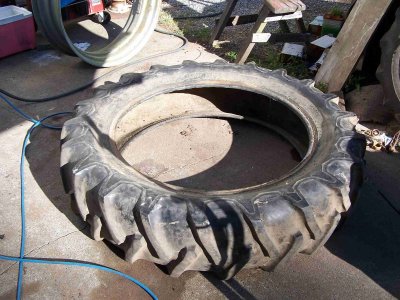
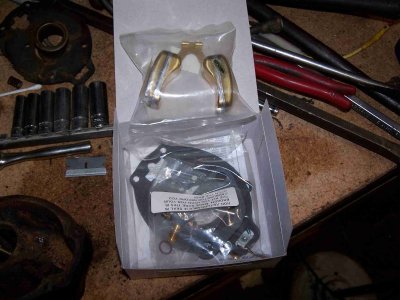
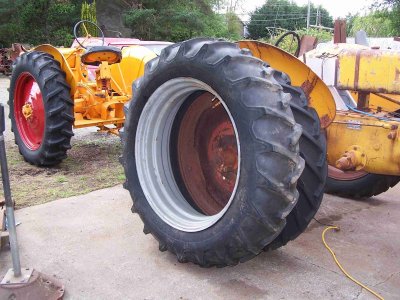
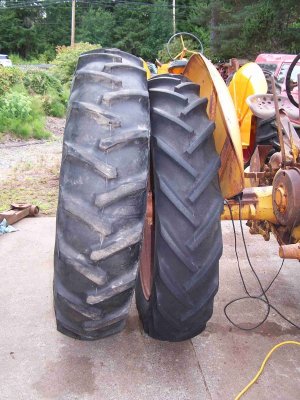
Pulled the replacement tire for the MM UTS Special out of the barn and brought it to the shop. Then rolled the rim out so its ready to pressure wash and mount the tire. I found my new float and carb kit so that's ready to get cleaned up.
Attachments
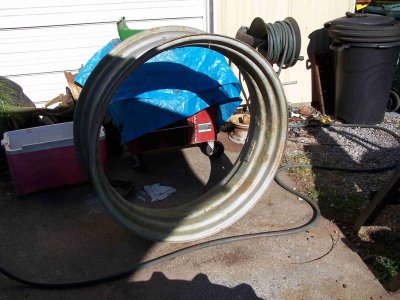
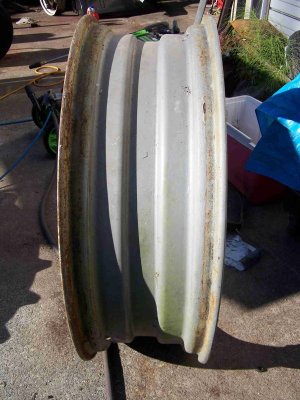
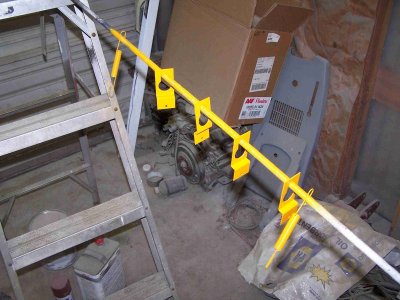
Pressure washed the tire and rim. While I was waiting for that to dry I cleaned up the studs and bolts for the manifold and installed it. Then back to mounting the tire. I need to make some clamps for the heat riser on the top of the manifold.
Attachments
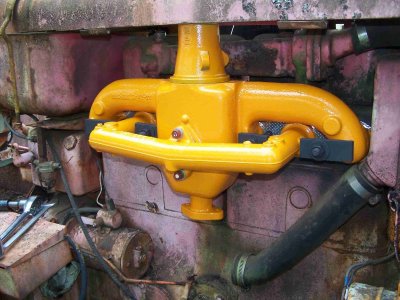
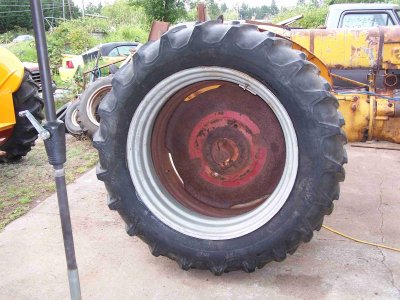
Isn't your show this weekend ?Pressure washed the tire and rim. While I was waiting for that to dry I cleaned up the studs and bolts for the manifold and installed it. Then back to mounting the tire. I need to make some clamps for the heat riser on the top of the manifold.
It starts Wednesday July 30 and goes thru Saturday August 2nd.Isn't your show this weekend ?
I Just put them on the trailer behind the F-250 and haul one at a time. My Brothers daughter(my niece) and grandson are taking the Farmall H and Farmall A this year. My niece' boyfriend has a 1-ton dually with a trailer and he will be taking a couple over so its only a couple trips each.Not only am I looking forward to pics of your tractors at the show, I'm also interested on how you get them all there, CJet!
Looking great!
DAC
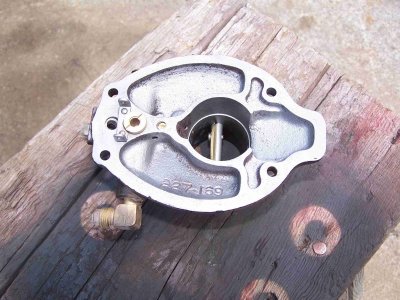
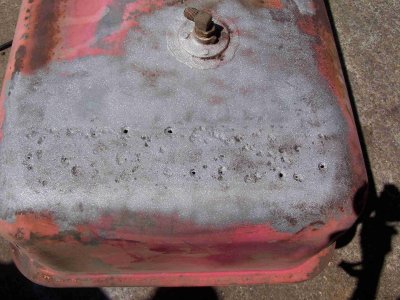
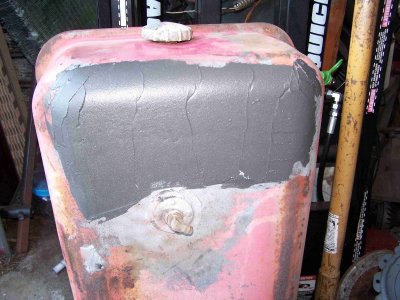
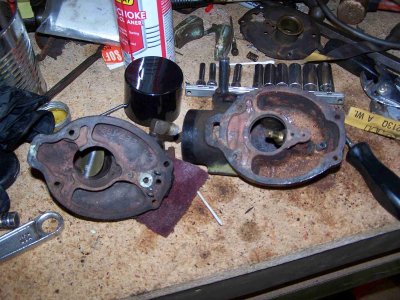
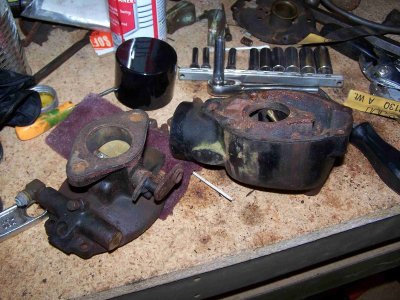
Made some progress on the MM UTS Special. Cleaned up the carb and installed it. Hooked up a battery and had to file the points to get spark. Hooked up a remote fuel tank and it fired up. Found the charging system wasn't working but cleaned the terminals on the VR and that fixed it. I pulled the fuel tank to clean it and found some deep pits on the front edge where it sits on the tank support. After pressure washing the tank several times I put it in the blast cabinet to clean up the pitted area. The pits went clear thru in about a dozen spots. I soldered them up and coated the whole area with some Devcon plastic metal. Its similar to JB weld. I will eventually need to put some tank liner in it but am hoping I can get by for the show.