John Deere Quik-Tatch hitch on Massey Ferguson 1655

Copy completed!

Lets continue with an update on the project!

First, I had to thin down the thin flange with the bolt pattern as it was too thick to fit on the tractor! It is now 3mm (~1/8") thick

Next since there was no space left between the big hex nut of the front axle pivot and the thin flange I needed to remove the heads on bolts to make "studs" and I welded them on the flange
IMG_7776.jpgIMG_7775.jpgIMG_7780.jpg

I also cut the splined sleeve to 45.5mm (a bit over 1-3/4") long so it fits tight between the shaft's bearing and the new groove for the retaining snap ring (see previous posts)

Here is a view of the stack
IMG_7781.jpgIMG_7782.jpgIMG_7783.jpg

And here it is on the tractor
IMG_7777.jpgIMG_7778.jpgIMG_7779.jpg
 
Next task on the list, the PTO shaft I bought is too short (I knew this) therefore I must get it to proper length. I first started by finding the length I need to be able to use the snowblower in all positions, from the blower being lower than the tractor (tractor on a bump) to being fully raised and all of this when the blower is straight or completely angled to the left. My guess is that I will probably not be able to angle the blower to the right because of interferance between the shaft and the lifting cylinder but as long as I can angle it to one side I am fine. I have a half circle drive way and it will be definitely easier to clean with the blower at an angle. I know John Deere tells you to avoid doing this, may be they didn't consider it with the shaft length or there is something else to consider that I will find out myself.

For my application I needed to extend the shaft of 3" and the tube of 3.75".

The first steps where to remove the shaft from the yoke (it was welded, I used a grinder to remove it) and then my friend machined a known diameter on the tube. I thought about using this diameter but found later that I couldn't. I also machined 4 bushings to replace the needle bearings to avoid damaging them while welding
IMG_7814.jpgIMG_7817.jpg

The required 3/4" x 7/8" shaft material was not available with my supplier so I bought 3/4" x 1" and milled it to required dimension. I hand filed the edges until the shaft was barely fitting inside the original tube to help aligning the parts, after welding I will round the edge a bit more.

The tube I bought 1.75" OD, ~1" ID tube and turned it to 1.099" ID to match as tightly as possible the hand rounded rectangle shaft and 1.554" OD to match the original tube.
IMG_7818.jpg

BTW I tried using my new 3/4" x 7/8" as a broach in the new tube instead of turning the diameter but it didn't work at all and I didn't want to do this with harder steel not hardening my part.
IMG_7820.jpg

Here is the new setup
IMG_7821.jpgIMG_7822.jpg

Welding the shaft side was not a problem but I didn't foresee the problem with the tube which is cast iron... Obviously I am not able to weld the cast iron to the mild steel with my welder, my welds were quickly cracking right in the middle. This is to expect but I wanted to try and learn. There are a lot of mitigations possible (pre heat, special welding wire, etc) but I am not setup for those processes. I will be getting those welds done by a friend who is a welding teacher (and was a professional welder before that), he will use something like nickel type filling material to do the job.

If the welds do not hold to the power I will buy a yoke and a 3/4" x 7/8" PTO tube and make it over. I definetly prefer the cast part since it has greasing zerg and grooves inside and also a groove and a stop screw to keep the shaft and the tube together. Those features would be quite a challenge to reproduce!
 
Mac,

Thanks for posting your project, you are doing great work and I'm looking forward to seeing it blow snow.

I hope that this blower is worth all this work, ie, does it blow snow good?
And could you have reduced the speed by changing the chain sprockets instead of the pulley?
I wonder if a different blower would have been easier, ie, I have a 2 stage, 48" for my Troy Bilt which should be designed for the 3600 pto drive.

Just some thoughts, keep the story coming please.

Dan
 
Dan, thank you for the compliments, I am also looking forward to seeing it work, at least on YouTube those blowers (47" or 54") seem to perform really well! For this point I think it is worth it to use this snow blower.

Indeed I could have modified the implement instead of the tractor but I wanted to be able to use the standard John Deere accessories, maybe some day I will find the sweeper broom or if I ever upgrade to a bigger engine I could switch to a 54" blower without modifications (I know I could have swapped the modification). Also I want to keep the option of someday buying a JD 430 (this one is so much a odd ball tractor that I like it) if I come across one at the right price and in this way I could use the blower on both tractors.

Another advantage I find is the actual quick hitch itself, I like to be able to switch easily from the blower to the blade as I will be using both and also it will be easier to play MacWorld Garage Tetris™ with the blower detached from the tractor when I must get a car in my garage during winter. The quick hitch will also enable me to build a grapple (Innovative Tractor Attachments LLC – Bringing great tractor ideas to life!). In fact I also think about building a "parallel lift" quick hitch since the original is pretty close to the ground which is a problem to me in summer since my lawn is not flat. This is another project!

Also to my multiple searches in the past I found that around me the JD implements are quite common to find used (and new!) and the parts are really easy to get. I am not a big fan of JD but I like to be able to quickly get quality parts without searching for hours.
 
Yes, I know what you mean about odd tractors. I have a MF/Snapper 1855, and now you have me thinking about keeping the Troy Bilt blower for it. (It came with a single stage that I'll try 1st).

But, I've been researching what to get next, and wanting to avoid green, I "discovered" the Simplicity Legacy line. Turns out they are very similar to the 1855's and Bolens/Troy Bilt's, ie, Kohler vee, shaft to eaton 11 for drive, hi/low final drive, elec clutch via belts for Ft PTO for mower and blower, PS, extra spool/s, 26 tires. They are a bit longer then a 1855, and even more if the XL is considered. And there are lots of them.

dan
 
If you want my opinion, 1 stage snow throwers are not worth much time. On picture perfect snow (light, cold and fresh) they work properly but once you encounter snow already moved by a street plow they get "overwhelmed". Worst, wet snow which they can barely lift or they only push forward like a plow (the auger spins so fast it builds a ice wall in front of itself). Also because of the high speed they tend to vibrate a lot and they disassemble themself or even the tractor (at least it does that with my rebuilt 37A on my JD 214).

The 1655/1855 are indeed now a bit of oddball tractors but I have some sentimental attachment to mine (was owned by the father of a friend) therefore I am not using logical thinking to decide if I should keep it. Also it was mostly given to me, the initial investment was non existent. I like how simple yet efficient and overbuilt they are. Their only downside seem to be the "weak" front spindles which everyone break once they put a FEL , their lack of power steering (also in my plan to install JD 3xx/4xx parts to upgrade this) and maybe their single brake setup which doesn't allow braking of a wheel that is slipping. Other than this they are great tractors to operate
 
Overdue update, time flies by really quick!

First, I finally managed to get rubber flaps on my impeller. A friend gave me left overs from a company that build the tracks for the snow groomers (Prinoth / PistenBullen kind of machine). The tracks are assembled from reinforced rubber around 8" wide by 1/2" thick with about 6 or more layers of reinforcement. I found that they are surprisingly easy to cut on the thickness, you need a really sharp knife and you slice it carefully by around 2-3mm each pass. If you start straight you will cut straight! You absolutely must not cross a layer of reinforcement during the firsts cuts otherwise you won't be able to get out of it.

IMG_7851.jpg

Then I turned a tool to "drill" holes into it. It's simply a thin tube that is taper toward the end with a small with a smaller hole at the top to be able to push the plugs out of the tool between holes. You can see the tool on the left with the parts. I made slots in the rubber to adjust as required.
IMG_7852.jpgIMG_7853.jpgIMG_7855.jpg

Then I finally assembled the impeller and auger!
IMG_7859.jpgIMG_7860.jpgIMG_7862.jpg

My friend also gave me back my PTO shaft that he successfully welded even if it's cast iron!
IMG_7915.jpgIMG_7916.jpgIMG_7917.jpg

My next task will be to finalize the chute rotation mechanism and to add the 3rd spool valve on my tractor with quick connects at front then it should be ready for duty!
 
Spent the day today working for the first hydraulic circuit, the only one I will install for this year. The plan is to buy 3 6-way splitter to have 4 outputs at the front to control every thing (hitch angle, hitch lift, chute rotation and chute spout) by hydraulics. Is it really necessary? No! I simply want to do that this way.

First is a trick I found to be able to make bends outside of the tractor without loosing reference from the previous bends. I attached the tube to my garage door rails with spring clamps. This allows to have the horizontal and vertical references to align the bend to make.
IMG_7964.jpg

After a lot of trials and errors here is what I managed to do. I HATE drilling in my tractor but I needed to secure the tubes therefore I made a threaded hole "under" the engine at the front and on it I will be able to have 4 tubes on the same screw (2 high, 2 on each side of the screw). The lower tubes are directly on the frame and the other ones are spaced with a 1cm (bit over 3/8") spacer I turned. This will allow me for 4 tubes on each side of the tractor.

This is at the front of the tractor, I will have to cut the tubes to the correct length so the fittings flush with the front of the engine grill
IMG_7965.jpg

This is the 2 first tubes on the right side (when looking from the seat)
IMG_7966.jpg

Here they are going to the valves
IMG_7967.jpg

And here is a bit how they are routed. They are not prefectly straight, nor parallel since I made mistakes with the first tube and I had to unbend it otherwise I had to cross the 2 tubes which is something stupid and over complicated. Also you can see they are bent to avoid the fan AND the rod from the transmission pedal which I had removed since it was always in the way.
IMG_7968.jpgIMG_7969.jpg

The other tubes for this side will have room right under the mid-lift cylinder tubes, I preferred taking the hardest way first otherwise the easier ones would have been in the way while planning/bending the easy ones.

Next step will be to source the fittings to convert tube flares to 1/4" NPT and the long bolts to add the 3rd spool valve. I also need to find a seal for the 3points cylinder's shaft since I overloaded it this summer and it's now leaking a lot ):
 
The project moved forward a bit but I didn't take pictures, I was in a hurry since I was short on time and had to finish the job to return the 37° flaring tool a company lent me for the weekend (they sold me the tube and the fittings I needed).

I installed the 3rd spool valve, from the operator I have 2 spool with float and 1 without float. My 3points hitch was "modified" by a previous owner to allow lifting the rear of the tractor on the accessory (useful to install tire chains!) therefore having a float would help if I want an accessory to drag on the ground without weight from the tractor.

I flared both ends of the 2 tubes and installed the quick connects at the front. I also made a hard tube for the spool valves input from the transmission, this had been modified in the past (I think) using a hose under the rear PTO shaft which was a bit stupid since the shaft was wearing the hose!

Next step will be to make a bracket to hold the fittings at the front of the tractor. I currently think I will use 1/4" thick steel and weld the adapters tube->ntp together on the plate (4 adapters together) and use a socket bolt in the center to secure this to a bracket. This way the fittings wouldn't move, the quick connects would be removable and the tubes could be disconnected also.

I also need to find grade 8 1/4-28 bolts 6" long (this would have been OEM) for my spool valves, I used cheap 1/4-20 threaded rod and it feels wrong, I worry it could break with vibration and pressure. Once again, finding this in Canada is harder than it should be!
 
Today I had to use my blade for the first time ever with the angle cylinder, it helps quite a lot to have it!

Also, and the point of my post, I had to move my snowblower (it's not yet ready for operation) from the 2nd part of my garage in order to store one of my cars for winter therefore I moved the blower with my tractor and I took some pictures of the look. Keep in mind that the hose routing is temporary, I used the only hoses I had laying around, I will probably have hoses made for my needs. Eventually the angle cylinder hoses will connect to the left side of the tractor but this is not for this year.

A hydraulic steering will definitely be required someday for the blower! I'll try to get a kit from a JD 300/400 series, those seem to be appropriate for my tractor.

IMG_8030.jpgIMG_8032.jpg
 
Progress is slow currently, the winter is too early and I must spend too much time on the snow!

I found out (don't know why I didn't earlier) that I need a smaller roller for the front PTO belts tension arm, the bigger pulleys are prenventing the roller from touching the belts, whatever the belt length. I could have made the arm longer but I prefer not doing this to keep the OEM belts during summer. I didn't find any suitable roller therefore I bought 2 bearings and I will make a custom roller with the appropriate diameter. This newer roller should be useable also during summer.

I think I should have found the correct v-belt length to match the bigger pulleys, I should go buy them tonight.

I figured the way I will attach the cable around the chute and I will do differently than what I have seen. From factory there are 2 cables tied at 2 different points (threaded stud that squeeze the cable with a nut) on the chute. Since those studs were not on my chute when I bought it and I forgot to install them, I will add a single one in front with a hole and run a single cable that both ends will be secured to the blower housing. With the 270° rotation mod most people use screw clamps to secure the cable to the hydraulic cylinder but I won't have to do this.

What my concept should allow me is to adjust the rotation range as I like.

I could, if required, make the chute rotate more to one side than the other. Most of the time I am blowing the snow to the right, may be having a greater range on this side could help.

Another option, since I should be able to use the blower at an angle itself and my angle cylinder isn't the right one (it's shaft seems too long... it was probably the lifting one... oops now me hitch requires a short cylinder for lift!) I cannot angle my accessories to the same angle both side (way more to the right), it might help me to have a greater range to the left. I will have to try it and learn what suits me better.
 
Made great progress! Thursday I worked on the belt tension roller, I found the previous timing belt roller from my '05 Passat TDI, it's a bit less wide than the OEM roller but should do the job. It will be easier to use than to start a roller from scratch. I first removed the lips on both side
IMG_8056.jpg

Then I machined random parts I had laying around to make a bushing to reduce the inner diameter. The bearing has quite a big ID since on the Passat this roller has a inner spring (in the bearing) to compensate if the belts gets longer.
IMG_8057.jpgIMG_8058.jpg

Then I figured out that the arm rubs against my big pulleys, I wanted to avoid making one but had no choice.

IMG_8060.jpgIMG_8061.jpgIMG_8062.jpg

And there is what it looks like installed!

IMG_8063.jpgIMG_8064.jpgIMG_8065.jpg

The arm required quite a lot of tuning as (I think) the roller is too close to the lower pulley and has too much impact on the belt and gets them out of the pulleys!
 
I also finished the chute rotation mechanism, I will only need hoses to get it working!

As stated previously my cable routing is special, the center of the cable is in the center of the front of the chute jammed in place through a hole in a welded stud on the chute
IMG_8066.jpgIMG_8067.jpg

The ends are clamped to the blower housing, it's quite close but there was just enough space for the clamps
IMG_8068.jpg

I get a bit more over 2/3 of the rotation, I don't know if I reach the 270° I see everywhere for this mod but I am over 240°.

I will need to make a cover as I don't have the OEM plastic one and it's quite expensive for what it is, I will try to get a rolled stainless sheet and weld ends to it to make a custom cover.

Today I finally tested the blower for the first time, I didn't had control on the chute rotation since I don't have the hoses I need yet. Obviously my v-belt roller was not "tuned" and I got running on only one belt, now it's stretched and way longer than the other one! I don't know if I will need to replace it to get both belts working or if the non-stretched one will actually stretch also.

As for actual performance, this blower is amazing and I didn't even push the engine too much yet. Since it didn't snowed, I tested by moving my snow banks away, the blower has no problem chewing dense/hard snow and throwing it away. The chute was throwing about 3" thick of snow, I didn't think it would get so much out! For this purpose I had to run on the low gear as the banks were higher than the blower, it had way more than it needed to overload the engine.

It is definitely in another world in my opinion compared to single stage snow throwers, I would never have been able to do what I did with a single stage. I know some people prefer single stage but I am definitely not in that group!
 

Attachments

  • IMG_8069.jpg
    IMG_8069.jpg
    168.4 KB · Views: 4
  • IMG_8070.jpg
    IMG_8070.jpg
    167.7 KB · Views: 4
I got my 4 custom hoses and had the chance to test the chute rotation yesterday and it works amazingly well! I will post pictures soon, I don't have any yet.

As for the use yesterday I had about 20cm (8") of wet snow, in fact it was melting therefore quite as wet as it can be. At first I was not too pleased the blower was overpowering the engine and slowing it down quite a lot but once I realized the condition of the snow I figured that with my single stage it wouldn't even throw more than 1.5m (5-6') away when I was throwing it about 5-6m (15-20') away!! Also I was going wayyyy too fast the blower wasn't able to keep up with all I was forcing it to process. I am not used to move slowly with my 1655!

On the other hand I still had one of the belts coming off. After talking with friends and searching online, I will have to make my tension arm longer. What I found is that for outside idlers they must be about 1/3 the way from the smaller pulley and inside they must be 1/3 from the larger pulley. Doesn't seem to be because of driver/driven pulleys, the diameters are to be considered.

Belt Drives - Industrial Wiki - odesie by Tech Transfer (in section Idler Pulleys)
Tensioners Tips | Brewer Machine & Gear (2 last points)

Pictures and more information to come!
 
Something I forgot to mention, sadly with the OEM John Deere configuration it will not be possible to use the snowblower angled. The reason is that the angle pivot point is in front of the joints in the PTO shaft unlike a setup like a loader that has the pivot point between the 2 joints. The current setup gets the PTO shaft joint in a "locked" position at about 10° of angling ): I guess for now it will be straight only.

Now pictures!

Here are are the hoses installed for the chute rotation. They are installed with tie-wraps temporarily until I make a support as I had them made longer so I can have a "floating" loop between the tractor and the snowblower to allow the angling of the blower if it is ever possible. The loop will have it's diameter changed depending on the snowblower angle.
IMG_8080.jpgIMG_8081.jpg

Here are the hoses for the angle cylinder, currently I have a 90° before the quick connects but when I'll have the 4 circuits at front I will get it connected to the other side of the tractor and have the hoses shortened.
IMG_8082.jpgIMG_8083.jpgIMG_8084.jpg

And I also made a new belts tensioner arm longer of 4cm (1.5") than the original one so the roller is about 1/3 from the smaller pulley. So far the belts seem to want to stay where they should.
IMG_8085.jpgIMG_8086.jpg

I am now working on the supports for the hydraulic quick connect to avoid having the hoses suspended by the tubes. I will get 4x 3/8 tubes -> 1/4 NPTM welded together on a 1/4" flat bar and this unit will be bolted to another bracket going to the frame. With 2 of those I will be able to install the 4 circuits (8 quick connects) I need in front of the tractor.
 
I am probably not the only one in this situation, since it's working I am procrastinating finishing the small details on this project!

Still I made small progress fabricating a support for the front hydraulic outlets. I am making a pair of 4 quick connect supports, one for each side since I want 4 circuits at front. I cut 1/4" thick steel into a square and cut out half hexagons in the corners for the 3/8" tube -> 1/4 NPT adapters then I welded the 4 adapters to this plate. The plate has 2 holes that will make it boltable to another part that will reach to original holes in the tractor's frame.

IMG_8096.jpgIMG_8184.jpg

The bracket to reach the frame should be the next ones to come.
 
One more thing that is done!

The bracket is made independently from the 2x2 couplers as it might help with maintenance, the bracket can be removed if needed without having to disassemble the hydraulic circuits. I used 2 holes that were unused at the front of the tractor under the hood pivots. The result is stronger than I thought, nothing moves when I connect the hoses! It is way easier to connect hoses when it's not required to hold the female couplers.

IMG_8186.jpgIMG_8187.jpgIMG_8188.jpgIMG_8189.jpg
 
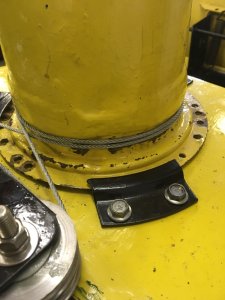
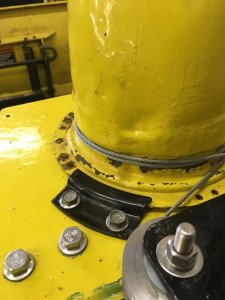
Tiny progress, I made a cheap support using old rods from a table umbrella to prevent the chute rotation hoses from rubbing on the ground. I had those hoses made this long because I was wishing to tilt the blower angled to the left or right. I had them long enough to make a loop that could enlarge/tighten given the angle of the blower.

IMG_8211.jpgIMG_8212.jpg

Also I've used the blower enough to start having an opinion on it.

Power requirement
First, the 16hp Onan is not overkill at all. It does the job but it wouldn't hurt to have more power. Not saying an upgrade is mandatory but it's probably the minimum power for this blower. It could be used with less power but it would be necessary to not use the blower at it's full capacity; move slower and/or don't take full height/width.

I am also watching when the chute is angled the thickness of the snow coming out of the spout, it gets to about 3 inch thick, I find this quite impressive to see!

Vibrations
So far I didn't use the blower at full throttle. I don't think I need it and sometimes I get quite a lot of vibrations, I don't know yet if the RPM has an impact on this or if it's when I overload the blower. I don't know if the auger or the turbine is causing those vibrations but so far each time I simply have to slow down and it will stop.

Noise
The chain is quite noisy, may be it's too slack or the sprockets are worn. May be I'm simply not used to this noise.

Distance
Throwing distance so far is way enough for my needs, somewhere around 25 feet away, more than this and I would have to manage a lot more where the snow is going to avoid damaging my hedges. On the other hand I thought it would be able to throw further than that, again so far I didn't exceed 3/4 throttle.

Uplift stop
John Deere provide an uplift stop for their blower, I don't have one yet and I am not decided if I need one. It probably has to do with preventing damaging the PTO shaft, I will have to look into this. Would be safer to have one if the blower gets lifted by the snow bank.

Shaft support rod
Another thing John Deere provides is a support rod for the PTO shaft. I don't have one and I don't know if it would fit my long PTO shaft but I might have to look into that. For storing the shaft I simply put it up and turn it right until it gets supported by the blower. Is this support rod for storing the shaft? It could be to help aligning the shaft when mounting the blower? An annoying thing is to attach the blower to the tractor, the PTO shaft is too long to be installed after attaching the blower, I must get 2-3 inches away from attaching, place the PTO shaft on the hitch's lower part and then I can move to the blower.

Chute rotation cylinder cover
I don't have the OEM plastic one and it must be modified to fit the 270° rotation modification therefore I won't spend the ~150$ they ask for it only to modify it! Given I store my tractor/blower in my heated garage this is not really causing any issues, it gets full of snow but it melts between each uses. So far nothing prevents the cylinder from doing it's job and I don't think anything could be damaged by not using one. It could be a problem if ice chunks or misc stuff (wood, brick) gets over the blower. I will still make one, mostly to have less snow that I cannot clear before moving the tractor inside. I try to keep my garage as dry as possible therefore less snow inside is less water everywhere. So far I always use the blade to push the snow to one side of my driveway then I blow it and often the snowbank to blow gets way higher than the blower.

General
It's quite a big project to fit those John Deere accessories to the 1655/1855 but I am absolutely glad I did. May be not having used a blower that was so worn (rusted) but otherwise I would do it again. The blower and blade are great, it's easy to use and the tractor is a joy to use with those accessories. I hate even more the snow throwers (1 stage) like the one on my JD 214 and think the snow blowers are way more suited to my needs. I must admit the blowers are way heavier but with a quick hitch this is not an issue.

Oh also "fun" fact, with the counterweight I have and the actual weight of the blower sometimes I can feel the tractor's frame twisting on it's length if I lift the front wheel to rake the ground clean and the blower is not on a common slope with the rear wheels. I definitely will try to avoid doing this to prevent damages to my frame but I can understand the guys adding a frame under the tractors to the rear axle when they install a front end loader; there is a limit to the strength of the frames.
 
Back
Top