Next JD project.

Propane1

Tractorologist
Member
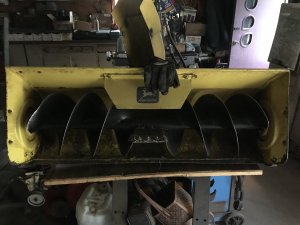
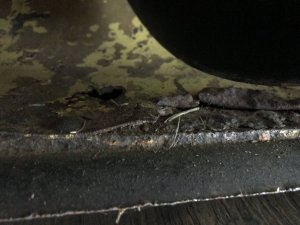
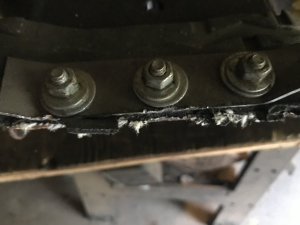
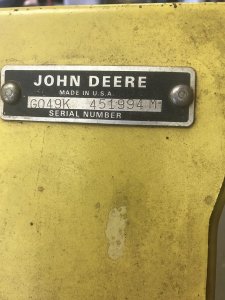
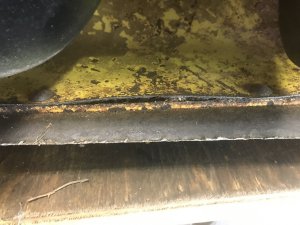
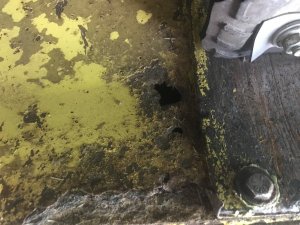
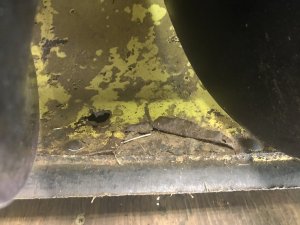
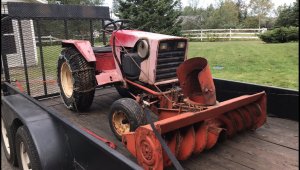
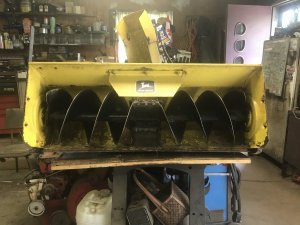
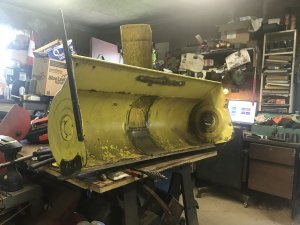
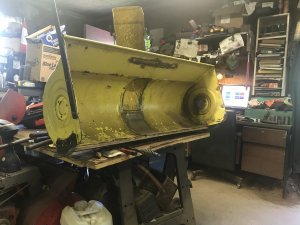
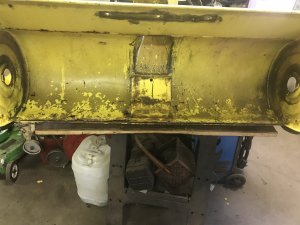
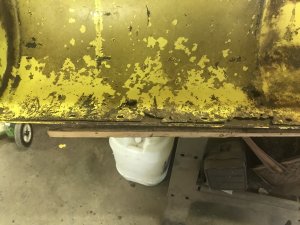
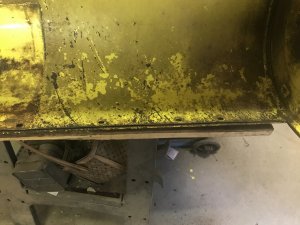
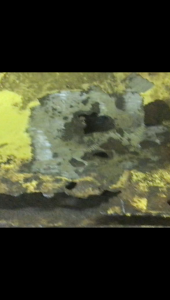
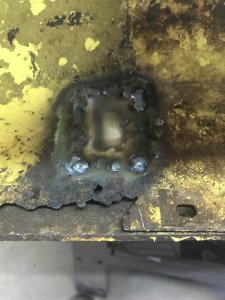
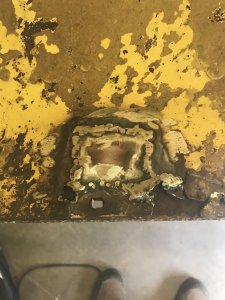
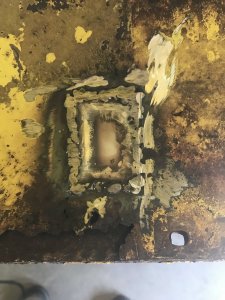
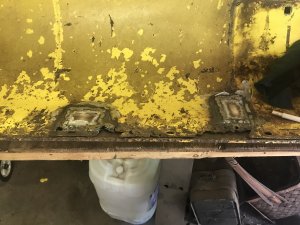
Gunna try and fix some rust on the snowthrower that goes on the JD 140H3. This thrower came of a JD 317. Put those flapper things on it. Never saw any difference, even at the first before they were worn out. Nothing left of them.

Noel
 

Attachments

  • 9346C199-C6D8-454E-B061-185AFAFCEEAF.jpeg
    9346C199-C6D8-454E-B061-185AFAFCEEAF.jpeg
    142.1 KB · Views: 13
  • F2B8FD45-22E3-401C-9361-C5B9E93F15C1.jpeg
    F2B8FD45-22E3-401C-9361-C5B9E93F15C1.jpeg
    161.4 KB · Views: 13
  • 5B9BAF21-E7C9-43CF-BC95-E5B94389455D.jpeg
    5B9BAF21-E7C9-43CF-BC95-E5B94389455D.jpeg
    111.6 KB · Views: 11
Some better pictures and has any one takin one of these augers out. Any tips on that. Is there any manuals that show how to get the auger out. Thanks for any info.

Noel
 

Attachments

  • 8E101B69-E9EA-42DA-B001-6EF5983543E8.jpeg
    8E101B69-E9EA-42DA-B001-6EF5983543E8.jpeg
    219.7 KB · Views: 7
  • C337B94B-6FD6-46DD-9A58-3978A2564644.jpeg
    C337B94B-6FD6-46DD-9A58-3978A2564644.jpeg
    173.4 KB · Views: 6
  • 571183A5-F8A1-490D-9C4C-43493D4BDFA1.jpeg
    571183A5-F8A1-490D-9C4C-43493D4BDFA1.jpeg
    169.8 KB · Views: 5
  • 9F0B7878-37FE-4F80-AEE5-500865E9C55B.jpeg
    9F0B7878-37FE-4F80-AEE5-500865E9C55B.jpeg
    229.7 KB · Views: 5
  • 9ADDAC62-4D79-4DB7-981A-B19D5391EC1F.jpeg
    9ADDAC62-4D79-4DB7-981A-B19D5391EC1F.jpeg
    165.2 KB · Views: 5
Now's the time to get her fixed before winter Noel.
Can't give any tips on the blower but I tried those "flapper things" too and concluded it wasn't worth the time .!! maybe throws another foot or two....maybe.
 
Noel, that blower has locking bearings on the auger. From what I have read, you unbolt the flanges, and then you unlock the bearings by using a punch on the bearing collars. They lock in one direction and unlock in the other. There are a few write ups about them on WFM.
 
Noel, that blower has locking bearings on the auger. From what I have read, you unbolt the flanges, and then you unlock the bearings by using a punch on the bearing collars. They lock in one direction and unlock in the other. There are a few write ups about them on WFM.
Eccentric lock bearings, I'd suggest leaving the housings bolted until you unlock the bearings, if you're lucky there will only be one set of chisel/punch marks in one direction, if so just go the opposite way.
 
Thank you both. I’ll start looking tomorrow. I think the Ford blowers have those bearings. Or I’ve seen them on some thing.

Noel
 
Is the chain sprocket easy to remove?

Will find out tomorrow. Never worked on one before. So all new experience for me. Have to service a Case snow caster soon too, same type of snow thrower as the John Deere. Case is 48” and the John Deere 46”.

Noel
 

Attachments

  • 6424AF59-56DA-4323-A03A-40FE15D9F607.jpeg
    6424AF59-56DA-4323-A03A-40FE15D9F607.jpeg
    324.6 KB · Views: 3
  • C670878A-1AE0-408A-B0DC-6712834C4AC5.jpeg
    C670878A-1AE0-408A-B0DC-6712834C4AC5.jpeg
    173.4 KB · Views: 4
So made a little head way on the thrower. Only took about 45 minutes to get to where I’m at. More done tomorrow, hopefully.

Noel
 

Attachments

  • A52671DE-921E-49F4-9F80-9E7F48FD18E4.jpeg
    A52671DE-921E-49F4-9F80-9E7F48FD18E4.jpeg
    229 KB · Views: 9
  • 9C1F3072-55BE-481A-A5AD-205B26D777D3.jpeg
    9C1F3072-55BE-481A-A5AD-205B26D777D3.jpeg
    238.8 KB · Views: 8
  • 63F55C3B-B6E5-49E5-BA43-B69573BCC853.jpeg
    63F55C3B-B6E5-49E5-BA43-B69573BCC853.jpeg
    175.8 KB · Views: 8
  • 1D2A4B3D-4B97-437D-B270-869B797EA374.jpeg
    1D2A4B3D-4B97-437D-B270-869B797EA374.jpeg
    110.5 KB · Views: 8
  • B8FCA290-EB0A-4B92-A2FE-979B948EE637.jpeg
    B8FCA290-EB0A-4B92-A2FE-979B948EE637.jpeg
    137.3 KB · Views: 8
More head way today. Auger is out. Cleaned things up a bit. Now looking at it wondering what I’m gunna do to fix it.

Noel
 

Attachments

  • 1F6082EB-4FE6-40F4-B584-5A406D3679D2.jpeg
    1F6082EB-4FE6-40F4-B584-5A406D3679D2.jpeg
    136.2 KB · Views: 6
  • 559C186F-7348-4DC5-8D27-C994221CAC13.jpeg
    559C186F-7348-4DC5-8D27-C994221CAC13.jpeg
    104.3 KB · Views: 7
  • 111CEEC6-4CEB-4375-A67B-25D0DB00795C.jpeg
    111CEEC6-4CEB-4375-A67B-25D0DB00795C.jpeg
    170 KB · Views: 6
  • 992C7E5C-89DA-4FD8-8B63-0E134483110E.jpeg
    992C7E5C-89DA-4FD8-8B63-0E134483110E.jpeg
    170.8 KB · Views: 6
  • D726FD6E-DA94-444C-B497-1E652B2254A0.jpeg
    D726FD6E-DA94-444C-B497-1E652B2254A0.jpeg
    166.8 KB · Views: 8
  • AA74BB49-A641-424B-B9E3-EE4C64C702D0.jpeg
    AA74BB49-A641-424B-B9E3-EE4C64C702D0.jpeg
    195 KB · Views: 8
  • C6212C08-B786-42AF-89F8-DCA5EBF6BC57.jpeg
    C6212C08-B786-42AF-89F8-DCA5EBF6BC57.jpeg
    179.1 KB · Views: 8
Thanks Jason. I thought of cutting out all that. But I think I’ll got the route I’m on. I will fix another hole yet. But I’m going to put a piece of 1/16 by 3” or so x 46” across the front. Bolt it down, then bend about an inch of the piece down and up underneath. So I’ll have 2” up top, an inch or so down and under. Those measurements could change. Then I’ll drill holes in the piece I put on and bolt on the scraper. That way I can change it if needed. Very little welding that way.

Noel.
 
Both holes fixed up and two pieces made to cover the rust and front. Bottom part will be bent up and scraper will go on top of that. Still have to make a middle piece. The upper part I will put a bead of seam sealer there. Maybe. Will see about that. So when it’s done. I hoping that if I have to fix something there, because of whatever, I can repair it with out taking the auger out. Should last a while.
And once it’s all done I can undercoat it with something. Thrower is open on each side, so using a runny oil it will run into where I’m working at now.

Noel
 

Attachments

  • 74582706-93EA-480E-AF52-666300E2F899.jpeg
    74582706-93EA-480E-AF52-666300E2F899.jpeg
    190.7 KB · Views: 3
  • 8BD95A6D-B4D1-4CDD-A395-04389CCB8FE6.jpeg
    8BD95A6D-B4D1-4CDD-A395-04389CCB8FE6.jpeg
    208.8 KB · Views: 3
  • 0BFF1AD4-9589-4B80-A279-93783AA2E920.jpeg
    0BFF1AD4-9589-4B80-A279-93783AA2E920.jpeg
    212.1 KB · Views: 3
  • FCC5DC52-0A29-457C-84B7-1757DBC3F59F.jpeg
    FCC5DC52-0A29-457C-84B7-1757DBC3F59F.jpeg
    185.8 KB · Views: 3
Noel, your welds look plenty sufficient to do the job. It's not a beauty contest anyway. Plus the more you weld, the better you will get at it, so keep on welding!

Thanks Daniel. I’ve always had trouble with mig welding. Two reasons. One is, never took the time to clean up what I was going to weld. Two is, couldn’t see what I was welding. So started wearing clip on cheater lens, I think that’s what they are called. Had them for years, never used them. About two months ago I thought I try those clip on things again. Found they worked not bad. My mig welding has improved. What I was welding there was paper thin in places. So not to bad.
I have two pairs of those lenses. I’m using the +125 pair for the welding. Not sure what the +250 would be good for.

Noel
 

Attachments

  • image.jpg
    image.jpg
    86.7 KB · Views: 2
  • image.jpg
    image.jpg
    139.1 KB · Views: 2
Back
Top