Looking good, Marty! Moving along at a great pace, too.
You are using an out of date browser. It may not display this or other websites correctly.
You should upgrade or use an alternative browser.
You should upgrade or use an alternative browser.
Sears suburban 18/6 rebuild w/ Predator 420 swap
- Thread starter TAHOE
- Start date
Looks good Marty. I'm a firm believer we're not getting the quality of paint, can pressure or nozzles in a rattle can no more. I'm so sick of so many different problems this past year. I've used Rustoleum for many years but recently I hate the stuff. If you look at the display shelves with all the fancy colors, nozzles, & caps it looks like their trying to pacify the crafty folks.
Looks good Marty. I'm a firm believer we're not getting the quality of paint, can pressure or nozzles in a rattle can no more. I'm so sick of so many different problems this past year. I've used Rustoleum for many years but recently I hate the stuff. If you look at the display shelves with all the fancy colors, nozzles, & caps it looks like their trying to pacify the crafty folks.
Krylon was my go-to paint for many, many years but I see it going down hill too, doing what you are saying Jim, making fancy, crafty stuff rather than keeping with the stick to anything, fast drying all purpose paint of the past!
DAC
I have never like Krylon paint. Rustoeleum has also gone down hill. The last couple years I have used "Do It Best" branded paint. Don't know who makes it for them. True Value has also been good quality and they make their own paint. This is in the rattle cans and the"bulk" type cans.
Not much update. I just haven't had time to work on this. I did remove bad fender to sand and repaint, but not done it. I had to move the frame, it shifted and fell off straps it was hanging from. Now I have to remove other fender, sand out the big scratch and repaint it 
I decided to put this thing back together and fix all my repaints in the spring since I do not have a inside warm area to paint, pretty much sidelined for painting until spring.
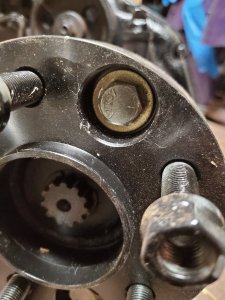
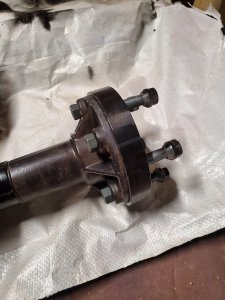
I got my spacers installed that my buddy milled for me, I had to use bolts and washers as my lug bolts have a smaller head versus the spacer seat. I added nuts to back as lock nuts. If the come lose, I'll add some lock tight. They will get repainted too.
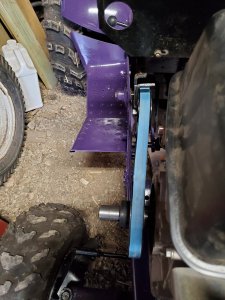
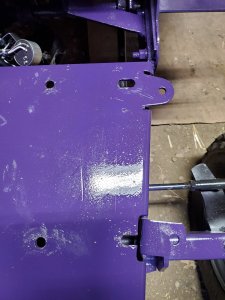
After I got it as a roller, time for engine, the Predator 420, only had an hour run time. The PO drilled frame holes, but belt was misaligned. I removed pulley and ground off some of the collar, but I needed up needed slot holes in the frame to shift it over. That worked and I'm happy with belt alignment. I found the brass bushing for idler pulley is work so that assembly if shifting under belt pressure.
Before
I got my spacers installed that my buddy milled for me, I had to use bolts and washers as my lug bolts have a smaller head versus the spacer seat. I added nuts to back as lock nuts. If the come lose, I'll add some lock tight. They will get repainted too.


After I got it as a roller, time for engine, the Predator 420, only had an hour run time. The PO drilled frame holes, but belt was misaligned. I removed pulley and ground off some of the collar, but I needed up needed slot holes in the frame to shift it over. That worked and I'm happy with belt alignment. I found the brass bushing for idler pulley is work so that assembly if shifting under belt pressure.
Before


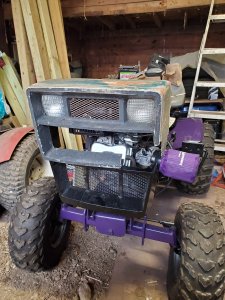
Got motor in and mounted. I will be using factory tank under the seat, removing air box and going to aftermarket filter, but will still have to modify lower grill. Not sure about exhaust, I really want to do a horizontal front facing muffler set up, but that will come once I get upper grill nose rebuilt and hood on. Dash and steering wheel still need stripped of old paint and painted.
Here she is as it sits. I had to remove carb and clean it, she was surging pretty badly. Runs good now and man, it runs about 10 -11 mph, factory was 6mpg top speed. Engine pulley must be larger than factory one. I am also planning on added inner tubes to front wheel (1 wont hold air) and add washer fluid, this thing is light in the front with the lighter engine and then those large back tires.
Really digging the purple with the gray wheels, it's darker put in the sun.
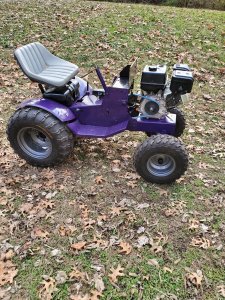
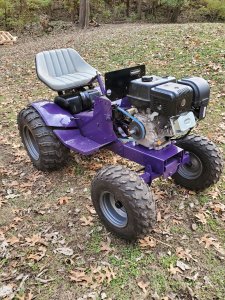
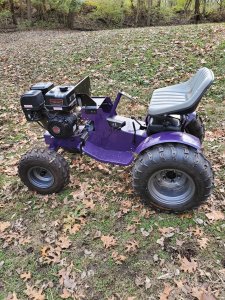
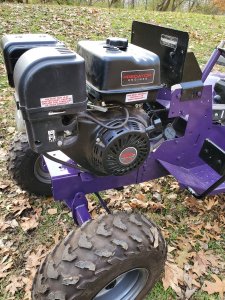
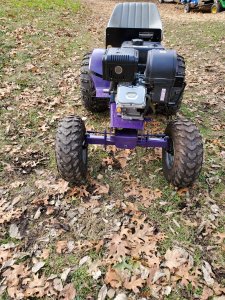
Loving the wide stance, I always disliked that my Sears always felt skinny into the back and tippy.
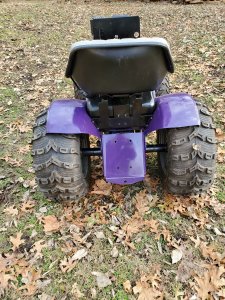
Here she is as it sits. I had to remove carb and clean it, she was surging pretty badly. Runs good now and man, it runs about 10 -11 mph, factory was 6mpg top speed. Engine pulley must be larger than factory one. I am also planning on added inner tubes to front wheel (1 wont hold air) and add washer fluid, this thing is light in the front with the lighter engine and then those large back tires.
Really digging the purple with the gray wheels, it's darker put in the sun.


Loving the wide stance, I always disliked that my Sears always felt skinny into the back and tippy.

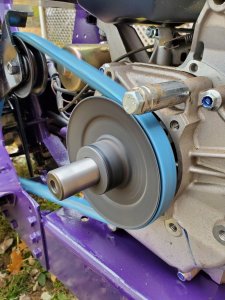
Here I had to make a temporary belt guide, 3/8 bolt with an old socket LOL. I plan to fabricate a metal sleeve around the pulley.
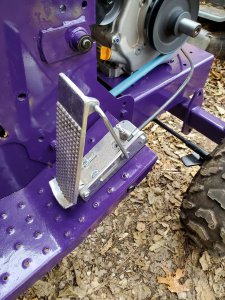
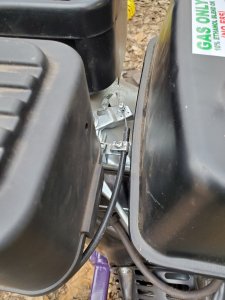
The PO gave me a foot pedal, decided to add it, wow what fun with will be. Now I can clutch and gas like a car LOL. I removed the spring washer from the stock 420 throttle setup and left bolt lose then hooked up cable, works great. There is a second location to hook up a cable, once I get dash on, I will had a cable so I can then set rpms where I want if I don't want to use pedal all the time. I will also add a battery and add another charge stator under flywheel as they only have 1.
I am going to add a momentary push button to kill it as for some reason my switch quit working. I can unplug the low oil sensor, connected that little box to a button/ground and kill it for now.


Wow loving this Marty I'm seeing hot rod tractor all over this. I really like the tires on this. I've been wanting to do a the skies the limit GT too. I like the custom puller designs with the colors, graphics & uniqueness. Its coming along nicely. Just had another thought lol gray ghost flames on the purple hood with chrome stacks.
Just had another thought lol gray ghost flames on the purple hood with chrome stacks.
I've tried to come up with a design for the hood, ghost flames may be the trick.
I thought about a stack, just don't want the noise at ear level and not sure about knocking it off on something
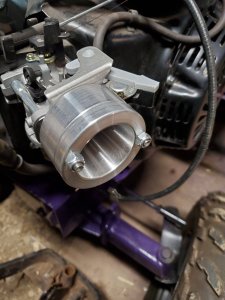
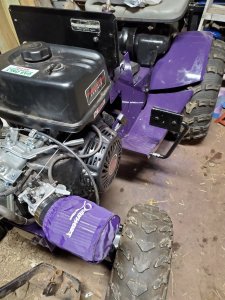
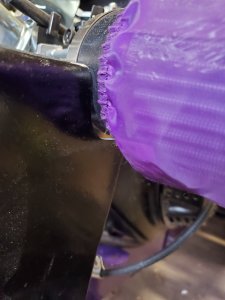
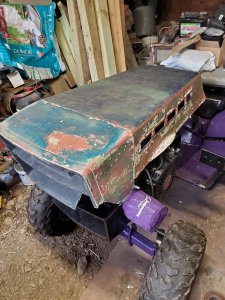
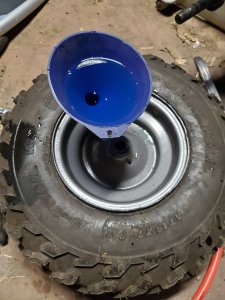
Been doing a little work even though it's been cold. Mounted the new air filter and adapter, still have to install the larger jet. Also mounted lower grill and trimmed iron around filter. Upper grill is rough, gotta make a new hinge system and rebuild the whole corner. Hood has to be stripped and painted. Got both front tires tubed and filled with washer fluid, added about 20#'s per tire...that took forever.
I also removed the key switch from motor so I could mount on dash (it's getting stripped and some bondo work) but switch quit working. I was scratching my head as it no longer worked. Finally realized the box that holds switch is grounded when mounted to motor so rebolted to motor and worked again. Guess I will have to run a ground wire when I install it in dash back to the motor.
I also removed the key switch from motor so I could mount on dash (it's getting stripped and some bondo work) but switch quit working. I was scratching my head as it no longer worked. Finally realized the box that holds switch is grounded when mounted to motor so rebolted to motor and worked again. Guess I will have to run a ground wire when I install it in dash back to the motor.


I really got behind on this Marty! Sorry about that. Looks like you are coming along nicely for having to deal with the cold. I'm still happy with the Predator 420 I put on my MF12G. I used the stock exhaust manifold, cut it and changed the angle, welded it back together and used the muffler that came on it. A notch was needed sort of like you did with the air cleaner.
I can't imagine how long it may have taken to add that washer fluid to the tires! Hope the weather gets a bit milder for you to tinker on it more!
DAC
I can't imagine how long it may have taken to add that washer fluid to the tires! Hope the weather gets a bit milder for you to tinker on it more!
DAC
I really got behind on this Marty! Sorry about that. Looks like you are coming along nicely for having to deal with the cold. I'm still happy with the Predator 420 I put on my MF12G. I used the stock exhaust manifold, cut it and changed the angle, welded it back together and used the muffler that came on it.
DAC
I Like the looks of a stack but am so leaning to do as you did and just lengthen and keep the stock muffler. I did add an aftermarket air filter and larger jet so I may need to open the exhaust some to compensate. I'll figure it out when I ge nose rebuilt and mount hood.
@olcowhand , I was going to put a valve stem in the bottom of a jug with a piece of hose and pressurise it, but was working on other stuff while it gravity fed so it just took a bit.
I like that vent/air bleed idea, Daniel! There's some applications at work where I think it will be a lifesaver!
Yeah stacks look cool but not a good idea for my needs. I like how quiet the Predator muffler is too. I still use the paper element air cleaner that was for the HH120 on the 420 and then the air cleaner can from the HH120 went on my MF8E. That way both tractors use the same air cleaner element and I just buy 5 at a time at a little bit of a discount at Pat's Small engine website. I never thought about playing with the jetting, let us know if you feel like there was a power difference! Maybe you are getting 14 or 15 HP out of that 13 HP engine! Oh---I did change jets but they came with the engine. I can't remember the details but I think 3 different size jets came with it for various elevations. I just used one that fell in the 3400 ft elevation we are here.
DAC
Marty correct me if I'm wrong did you put tubes in the front? If so how did you get 20lbs. per tire by gravity flow. I plan on doing this on two tractors because I want to tube them as well. My thoughts were I had to pressurize the fluid while inflating to get that much weight into the tube.
I never thought about playing with the jetting, let us know if you feel like there was a power difference! Maybe you are getting 14 or 15 HP out of that 13 HP engine! Oh---I did change jets but they came with the engine. I can't remember the details but I think 3 different size jets came with it for various elevations. I just used one that fell in the 3400 ft elevation we are here.
DAC
It is recommend to up the jetting when using the aftermarket air filter, I bought a 41 and 42 jet, I think stock is 39 or 40. Not sure if HP, but all the youtubers that mess with these state they have better throttle response and maybe a hair more top end. Add a better flowing exhaust and its probably and easy 2 more horsepower.
There are upgrade kits to push these motors to 25 or 30 Hp, but for the cost, I'll got buy the predator 670 twin rated at 22 hp and use it, can usually get those on sale for 650-700. The 420 plus upgrades can push 1000 easy.
Marty correct me if I'm wrong did you put tubes in the front? If so how did you get 20lbs. per tire by gravity flow. I plan on doing this on two tractors because I want to tube them as well. My thoughts were I had to pressurize the fluid while inflating to get that much weight into the tube.
The PO had already tubed one of them I tubed the other. Man are these ATV tires seated hard on these wheels, what a pain, the inner diameter must be just a hair smaller then the bead seat on the Sears front rims.
I aired up the tires pretty well to expand the tubes then removed the valve stem and proceeded to fill. I had to step on tire occasionally to burp the air. I am guessing at 20# of weight, maybe a little less. A gallon of washer fluid is around 8# and I put in 2 1/2 gals in each tire. I can hear it sloshing so I can probably add more if I really tried. Also, these are larger ATV tires than stick Sears. They are 19x7, stockers are usually 16x6.5 so I have more volume.
To redo it, I would air up tube, remove valve stem and then make a pressurised gal jug so it would push it into the tube.
I have 6 gals in my rear tires on my other sears, figured those are right around 45# per tire.
