You are using an out of date browser. It may not display this or other websites correctly.
You should upgrade or use an alternative browser.
You should upgrade or use an alternative browser.
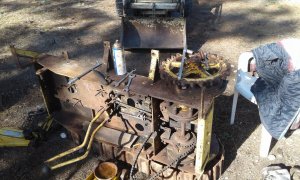
What did I buy
- Thread starter secondtry
- Start date
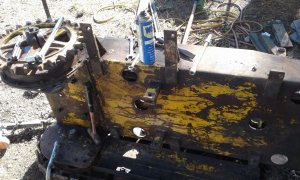
Nope, Agricat.that looks like a struck mini dozer?
Don
If you have a big brass punch whack all the final cover bolts good before trying to remove them so maybe not many will twist off.
I have a big brass hammer. All the other bolts in the cover backed out reasonable but there were three already broken off. Not really sure they were twisted of, may have been broken off by rocks or something. Two of the small bolts in the end of the axle are so worn that a wrench will no longer grip them. May have to weld a nut on top of them to get them out. The one that the wrench still fit came out ok.If you have a big brass punch whack all the final cover bolts good before trying to remove them so maybe not many will twist off.
Don
I find it helps most times if you try to tighten them slightly first. It helps to break them free first & if they do start to round over then at least it's going in the opposite way first.If you have a big brass punch whack all the final cover bolts good before trying to remove them so maybe not many will twist off.
Got back at it. The center bolt on the cap for the sprocket came out fine. Of the three bolts around it two twisted off. Once I got the cap off I welded nuts to the bolts that twisted off and then they came right out. The big bolt that clamps the sprocket to the axle was very stubborn. The 3/4 impact eventually turned the nut and after I turned it back and forth for a while the nut came off. Tried the 3/4 impact on the bolt and achieved nothing. Heat beat more impact nothing. Got out the I" impact, Same results. Center drilled the bolt all the way through. More heating and beating, Nothing, Used the 1" impact again and finally twisted the head off the bolt. At this point the bolt has not moved at all. So now I drill the bolt out about 7/16 and burn the bolt out from the inside. Not to bad a job since it was already pierced with the drill.
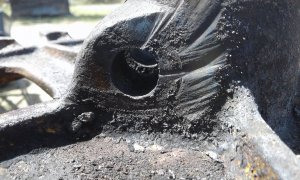
The bolt hole came out clean enough. Now to try to remove the sprocket from the axle without breaking it.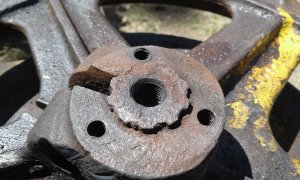
I have applied lots of heat, had cheery red at times but not all over at once. I put a plate over the end of the axle with three appropriate holes and three 5/16 bolts. According to the specs this should apply about 9000 lbs of force, the sprocket didn't notice.
Had a wedge in the split in the hub with no detectable effect
All I can think of now is to just keep worrying it and hope it gives up. Got all the oil burnt off of it now. Think a little muriatic acid would help? I am open to suggestions
Don.

The bolt hole came out clean enough. Now to try to remove the sprocket from the axle without breaking it.

I have applied lots of heat, had cheery red at times but not all over at once. I put a plate over the end of the axle with three appropriate holes and three 5/16 bolts. According to the specs this should apply about 9000 lbs of force, the sprocket didn't notice.
Had a wedge in the split in the hub with no detectable effect
All I can think of now is to just keep worrying it and hope it gives up. Got all the oil burnt off of it now. Think a little muriatic acid would help? I am open to suggestions
Don.
Last edited:
The exposed splines look so rusty I'd grind the lands down flush with the sprocket hub. If you get it moving the splines could bring things to a halt IMO. Just keep spraying Kroil or whatever you have on it hoping enough will soak in to break it loose.
Went back out and worked some more. Chipped, scraped and brushed all the rust I could see. found a wedge with a shallower angle to put in the split. Went back to the plate and bolts, applied heat once more and it moved. Let it cool Hit the wedge a couple more times a d soak with stove oil. From there it was just a matter of pulling what I could then removing the bolts adding more shims under the plate and pulling again. The sprocket is off.
Don
Don
Good news!! lets hope the other side comes apart the same.
I'm hoping for easier. DonGood news!! lets hope the other side comes apart the same.
Pulled the final drive cover.![20210531_163345[1].jpg 20210531_163345[1].jpg](https://tractorfanatics.com/data/attachments/37/37523-855368a93605f9d2133d11ef9bd4b704.jpg?hash=hVNoqTYF-d)
See no indication that it ever in any incarnation held grease. I disposed of about 3 lbs of rust.
![20210531_163318[1].jpg 20210531_163318[1].jpg](https://tractorfanatics.com/data/attachments/37/37524-a7870dd8dd58fb0f7d4134041d76f1c6.jpg?hash=p4cN2N1Y-w)
Would be nice to have some sort of image or drawing to indicate what this pinion originally looked like. Can see where the big bull gear has been scuffing the side on both the frame and the case. Hoping new bushings and thrust washers will take care of that.![20210531_163332[1].jpg 20210531_163332[1].jpg](https://tractorfanatics.com/data/attachments/37/37525-fc072b99f12c68411acf4690c0a039b6.jpg?hash=_AcrmfEsaE)
The bull gear doesn't look terrible, I don't have any idea how much backlash such gears were designed with. I think I have about 29 thou.
Of course all that will change with new bushings. I wonder how thick those thrust washers were original.![20210531_163324[1].jpg 20210531_163324[1].jpg](https://tractorfanatics.com/data/attachments/37/37526-daf63b7dbd616a86a2a7f126e9d38bcf.jpg?hash=2vY7fb1hao)
The track sprocket seems good.
Don
![20210531_163345[1].jpg 20210531_163345[1].jpg](https://tractorfanatics.com/data/attachments/37/37523-855368a93605f9d2133d11ef9bd4b704.jpg?hash=hVNoqTYF-d)
See no indication that it ever in any incarnation held grease. I disposed of about 3 lbs of rust.
![20210531_163318[1].jpg 20210531_163318[1].jpg](https://tractorfanatics.com/data/attachments/37/37524-a7870dd8dd58fb0f7d4134041d76f1c6.jpg?hash=p4cN2N1Y-w)
Would be nice to have some sort of image or drawing to indicate what this pinion originally looked like. Can see where the big bull gear has been scuffing the side on both the frame and the case. Hoping new bushings and thrust washers will take care of that.
![20210531_163332[1].jpg 20210531_163332[1].jpg](https://tractorfanatics.com/data/attachments/37/37525-fc072b99f12c68411acf4690c0a039b6.jpg?hash=_AcrmfEsaE)
The bull gear doesn't look terrible, I don't have any idea how much backlash such gears were designed with. I think I have about 29 thou.
Of course all that will change with new bushings. I wonder how thick those thrust washers were original.
![20210531_163324[1].jpg 20210531_163324[1].jpg](https://tractorfanatics.com/data/attachments/37/37526-daf63b7dbd616a86a2a7f126e9d38bcf.jpg?hash=2vY7fb1hao)
The track sprocket seems good.
Don
Those gears look amazingly good considering the conditions they were in. Must not have run long w/o oil. Makes me wonder if it was rescued from a swamp/marsh.
I was thinking one of those quarry type operations that filled with water.Those gears look amazingly good considering the conditions they were in. Must not have run long w/o oil. Makes me wonder if it was rescued from a swamp/marsh.
Don
Life is getting in the way again.Great project I hope that in the end you are able to breathe life back into it.
Don
Finally got back to this. Made a little progress. Got the broken final drive bolts out. Welded lock washers to the remains of the bolts thinking I would weld nuts to those. That was unnecessary. The washers gave something to grip and they came right out.
So next I decided to take the other side apart. Had to destroy most of the bolts mounting the track frames but that is no big deal because they are through bolts and easy to replace. all the bolts in the final drive cover came right out. The wear on the final drive bushings and shaft is considerably worse than the other side. The gears look about the same or maybe a little better. The spline to the drive sprocket was loose and shows some wear.
Next I plan to take apart the clutch/brake pack and inspect that.
Don
Today I managed to get the clutch pack out. I spent a lot of time looking on the web for an image of the complete clutch pack removed from the machine with no luck.
![20211030_172257[1].jpg 20211030_172257[1].jpg](https://tractorfanatics.com/data/attachments/44/44124-ddcf48acd794845b016f3983b7aee57e.jpg?hash=3c9IrNeUhF)
The arms are moved by the steering levers. They move the inner disc. The outer discs bolt solid to the input shafts for the final drives. Bolts have been removed that go through both discs on one side and have a spring on the outer end which clamps the discs together on the clutch disc between them
![20211030_172401[1].jpg 20211030_172401[1].jpg](https://tractorfanatics.com/data/attachments/44/44125-76e4a3a454886c09be15e8cc10279a50.jpg?hash=duSjpFSIbA)
Above is the hub that the outer disc bolts to.![20211030_172314[1].jpg 20211030_172314[1].jpg](https://tractorfanatics.com/data/attachments/44/44126-190a5597bb5dff88df7ec2f9aaaf1b27.jpg?hash=GQpVl7td_4)
Now above is the clutch disc which bolts to the hub. In the center is the shaft and the bearing it runs in. On the other side of this disc is the clutch disc which is splined to the shaft. on the other side of that is the movable disc controlled--
by the steering levers.![20211030_172323[2].jpg 20211030_172323[2].jpg](https://tractorfanatics.com/data/attachments/44/44127-d42f3cdfe03b8b1d13f08d89b1552ad7.jpg?hash=1C883-A7ix)
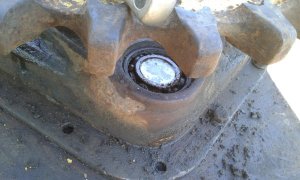
the throw out bearing above does not push but actually pulls the movable disc away from the other releasing the clutch and if the lever is pulled hard enough the disc will be pulled against brake pads to stop that track. I think I finally have my head wrapped around this I hope it will be a help to someone.
Don
![20211030_172257[1].jpg 20211030_172257[1].jpg](https://tractorfanatics.com/data/attachments/44/44124-ddcf48acd794845b016f3983b7aee57e.jpg?hash=3c9IrNeUhF)
The arms are moved by the steering levers. They move the inner disc. The outer discs bolt solid to the input shafts for the final drives. Bolts have been removed that go through both discs on one side and have a spring on the outer end which clamps the discs together on the clutch disc between them
![20211030_172401[1].jpg 20211030_172401[1].jpg](https://tractorfanatics.com/data/attachments/44/44125-76e4a3a454886c09be15e8cc10279a50.jpg?hash=duSjpFSIbA)
Above is the hub that the outer disc bolts to.
![20211030_172314[1].jpg 20211030_172314[1].jpg](https://tractorfanatics.com/data/attachments/44/44126-190a5597bb5dff88df7ec2f9aaaf1b27.jpg?hash=GQpVl7td_4)
Now above is the clutch disc which bolts to the hub. In the center is the shaft and the bearing it runs in. On the other side of this disc is the clutch disc which is splined to the shaft. on the other side of that is the movable disc controlled--
by the steering levers.
![20211030_172323[2].jpg 20211030_172323[2].jpg](https://tractorfanatics.com/data/attachments/44/44127-d42f3cdfe03b8b1d13f08d89b1552ad7.jpg?hash=1C883-A7ix)
the throw out bearing above does not push but actually pulls the movable disc away from the other releasing the clutch and if the lever is pulled hard enough the disc will be pulled against brake pads to stop that track. I think I finally have my head wrapped around this I hope it will be a help to someone.
Don

![20211030_172257[1].jpg](/data/attachments/44/44115-ddcf48acd794845b016f3983b7aee57e.jpg?hash=3c9IrNeUhF)
![20211030_172323[1].jpg](/data/attachments/44/44116-d42f3cdfe03b8b1d13f08d89b1552ad7.jpg?hash=1C883-A7ix)
![20211030_172304[1].jpg](/data/attachments/44/44120-086f1ef95963e3dc37ba4cb4e63cac73.jpg?hash=CG8e-Vlj49)