You are using an out of date browser. It may not display this or other websites correctly.
You should upgrade or use an alternative browser.
You should upgrade or use an alternative browser.
Winter project
- Thread starter jdcrawler
- Start date
I do a lot of 'cross' posting in forums, Ray. Doesn't take long at all to upload the pics and place in you verbage. I just upload to one forum and put in what I want word wise. Then copy and paste that to another forum, adding the pics as I go.I'm not going to waste any more money on photobucket.
Luckily I have all of my photos saved on my own computer and backed up on a flash drive.
I post on three forums and using photobucket made it easier.
Writing up the first post can sometimes take a lot of time to get it worded right and make sure the photos are in the right place.
Then all I had to do is copy that first post and just paste it on the other two forums.
It is going to take a lot more time and effort if I have to do the write up and load photos up on each individual form.
Thanks for the information guys.
I was on another forum earlier I thought I would go ahead and try posting with uploading the photos directly to the forum.
Everything was going well until it said there was a 10 photo limit per post and it wouldn't let me upload anymore.
As you all know ... I can't hardly post anything and stay within that 10 photo limit.
I'm looking for another photo hosting site that will work for me but I haven't found one so far.
I've tried Imgur but not all of the three forums will accept it's link.
I tried dropbox but they have writing next to each photo.
All that is necessary is to make consecutive posts within the limit. A little more time consuming but not much.Thanks for the information guys.
I was on another forum earlier I thought I would go ahead and try posting with uploading the photos directly to the forum.
Everything was going well until it said there was a 10 photo limit per post and it wouldn't let me upload anymore.
As you all know ... I can't hardly post anything and stay within that 10 photo limit.
I'm looking for another photo hosting site that will work for me but I haven't found one so far.
I've tried Imgur but not all of the three forums will accept it's link.
I tried dropbox but they have writing next to each photo.
Don
The R/T tractor and the Shaw conversion tractor both have foot operated brakes as well as a hand operated parking brake.
In using both of these tractors I have realized that it isn't necessary to use the brakes most of the time because they both slow down as soon as the clutch is pushed in.
I do set the parking brake on both of them when I'm showing them so that the tractors don't accidentally roll if someone leans against them.
So .... taking this into consideration along with the fact that I do not have another pedal to match the clutch pedal on the Centaur tractor.
I have decided to just put a hand operated parking brake on the Centaur tractor and of coarse this parking brake can also be used as a regular brake to slow the tractor down when I'm driving it.
I took apart a foot operated emergency brake from a mid 70's car to get the ratchet gear and the locking pawl from it.
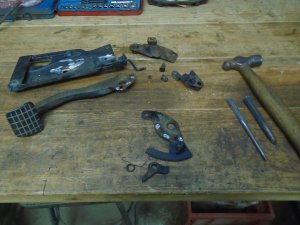
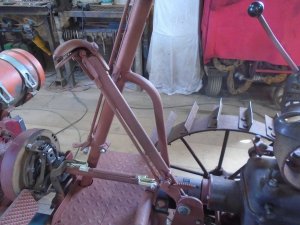
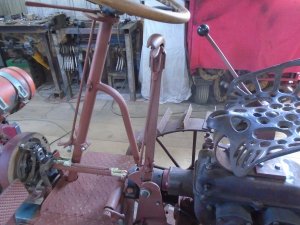
The ratchet gear is mounted to a bracket that bolts onto the tractor frame and the locking pawl is mounted to the arm of an old implement lever.
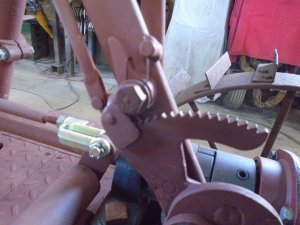
This parking brake lever unit is mounted to the left side of the steering column.
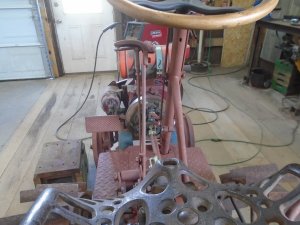
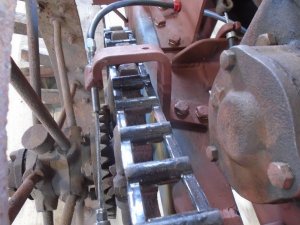
A cable is fastened to the bottom end of the brake arm and the other end of the cable housing is attached to a bracket that goes up over the drive chain.
Because the original conversion was built using mostly square head bolts, I am also using the square head bolts whenever I can.
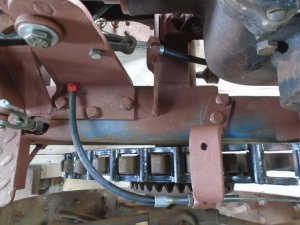
This is a side view of the bracket that I bent up to go over the chain to hold the brake cable.
A side view of the brake lever with the brake released.
And with the brake engaged.
This is the brake assembly with the brake engaged.
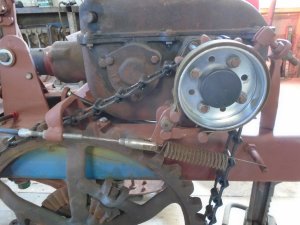
And with the brake released.
I welded a pin onto the top of the brake band and this keeps the band held up away from the drum so there is clearance all the way around between the band and the drum.
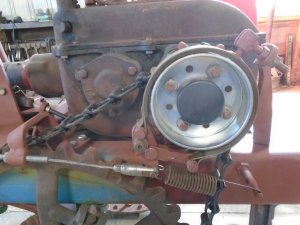
The pin on the brake band fits into this adjustable saddle to hold it in place.
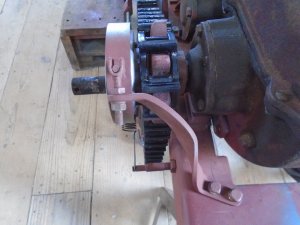
In using both of these tractors I have realized that it isn't necessary to use the brakes most of the time because they both slow down as soon as the clutch is pushed in.
I do set the parking brake on both of them when I'm showing them so that the tractors don't accidentally roll if someone leans against them.
So .... taking this into consideration along with the fact that I do not have another pedal to match the clutch pedal on the Centaur tractor.
I have decided to just put a hand operated parking brake on the Centaur tractor and of coarse this parking brake can also be used as a regular brake to slow the tractor down when I'm driving it.
I took apart a foot operated emergency brake from a mid 70's car to get the ratchet gear and the locking pawl from it.

The ratchet gear is mounted to a bracket that bolts onto the tractor frame and the locking pawl is mounted to the arm of an old implement lever.

This parking brake lever unit is mounted to the left side of the steering column.

A cable is fastened to the bottom end of the brake arm and the other end of the cable housing is attached to a bracket that goes up over the drive chain.
Because the original conversion was built using mostly square head bolts, I am also using the square head bolts whenever I can.

This is a side view of the bracket that I bent up to go over the chain to hold the brake cable.

A side view of the brake lever with the brake released.

And with the brake engaged.

This is the brake assembly with the brake engaged.

And with the brake released.
I welded a pin onto the top of the brake band and this keeps the band held up away from the drum so there is clearance all the way around between the band and the drum.

The pin on the brake band fits into this adjustable saddle to hold it in place.

So cool watching your build Ray! Glad you saved all your pictures somewhere else besides the PB. Many years ago I used one called "Webshots". Lost all my pictures at one point with no explanation and never found the site again either. From then on the only place my pictures are hosted is here at home by me!
DAC
DAC
This Briggs engine came off a portable water pump and all of the controls and electronics were mounted directly onto the engine.
The voltage regulator was attached to the front of starter/generator.
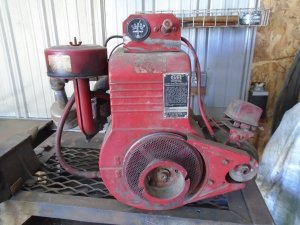
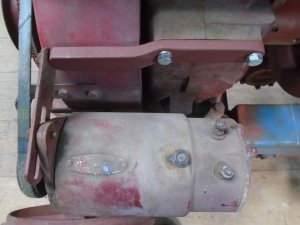
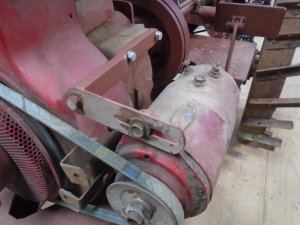
The tension adjuster for holding the starter/generator unit in place was attached to a bolt in the center of it.
I'm going to mount the voltage regulator next to the battery, down under the floor plate.
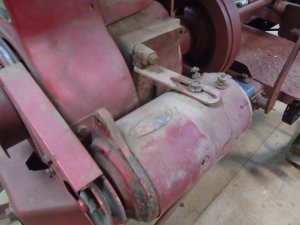
Normally the tension adjuster is mounted to the tab at the front of the starter/generator and with the voltage regulator removed, it looks strange to have the tension adjuster mounted to the center of the unit.
Obviously the thin metal of the flywheel shroud isn't strong enough to mount the tension adjuster bracket to it.
So I have made up a mounting bracket out of 1/2 inch thick steel bar that bolts to the side of the block and extends up along side the flywheel shroud.
The tension adjuster bracket is then bolted to the end of this steel bar.
The voltage regulator was attached to the front of starter/generator.

The tension adjuster for holding the starter/generator unit in place was attached to a bolt in the center of it.
I'm going to mount the voltage regulator next to the battery, down under the floor plate.

Normally the tension adjuster is mounted to the tab at the front of the starter/generator and with the voltage regulator removed, it looks strange to have the tension adjuster mounted to the center of the unit.
Obviously the thin metal of the flywheel shroud isn't strong enough to mount the tension adjuster bracket to it.
So I have made up a mounting bracket out of 1/2 inch thick steel bar that bolts to the side of the block and extends up along side the flywheel shroud.
The tension adjuster bracket is then bolted to the end of this steel bar.


Looks like factory!
Looks great, Ray, I would be willing to bet there was an original bracket that used both of the block holes at one time like you fabricated. The bracket probably broke, and that was the repair. I've got an 8hp briggs that used both of those block holes to mount the starter generator on an old MTD. That bracket did break on me once and I was able to find a replacement back then.
DAC
DAC
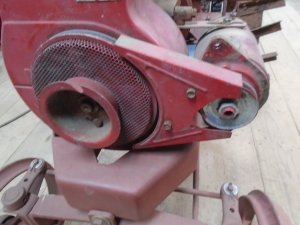
This engine has the Briggs " bikini " belt guard.
This only covers the center area between the flywheel pulley and the starter/generator pulley and leaves the outside of both pulleys open.
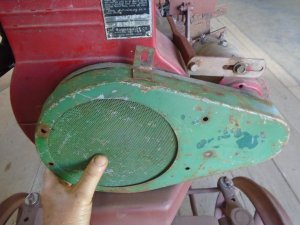
I have an old belt guard but it isn't quite big enough to go over the flywheel pulley.
So, I'm going to build my own belt guard.
I start by cutting a 2-/12 inch wide strip out of sheet metal.
Then I bend up 1 inch to form an angle.
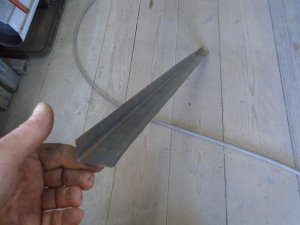
This slick little machine is a foot operated " stretcher / shrinker ".
The 1 inch side of the metal is set in the machine and when I step down on the pedal, the movable jaws grab hold of the metal and pull it together just a little bit to shrink the metal in that small area.
Each time I push down on the pedal it shrinks it a little more and as you can see, it starts to bend the metal around.
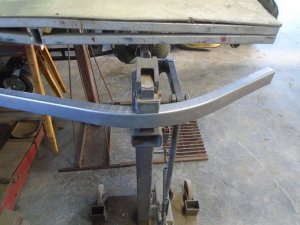
I'm using the old belt guard as a pattern and making my guard just a little bigger.
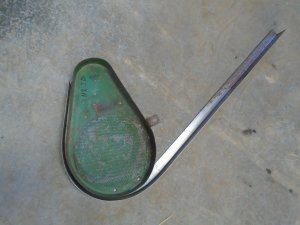
The outside of the guard is finished.
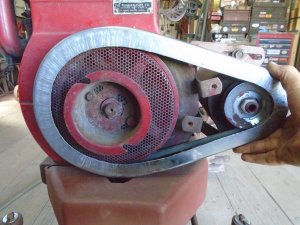
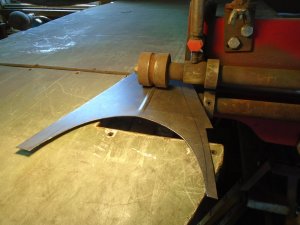
I cut a pie shape piece of sheet metal to fit into the belt guard and I'm rolling a bead in the center of it to strengthen it.
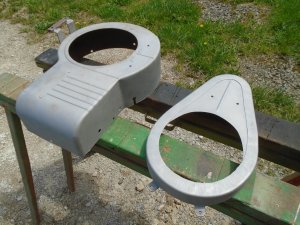
The flywheel cover had to be removed so I can weld nuts on the inside to bolt the guard to it.
While I had it off, I went ahead and sand blasted it and the cover and the belt guard are ready for priming.
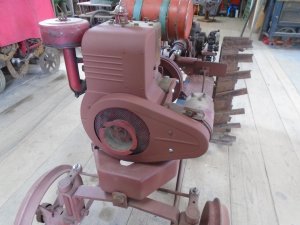
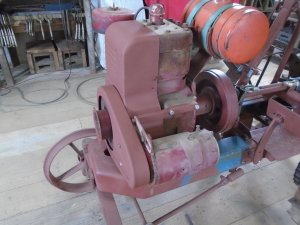
The flywheel cover and belt guard are re-assembled on the engine.
This only covers the center area between the flywheel pulley and the starter/generator pulley and leaves the outside of both pulleys open.

I have an old belt guard but it isn't quite big enough to go over the flywheel pulley.

So, I'm going to build my own belt guard.
I start by cutting a 2-/12 inch wide strip out of sheet metal.
Then I bend up 1 inch to form an angle.

This slick little machine is a foot operated " stretcher / shrinker ".
The 1 inch side of the metal is set in the machine and when I step down on the pedal, the movable jaws grab hold of the metal and pull it together just a little bit to shrink the metal in that small area.
Each time I push down on the pedal it shrinks it a little more and as you can see, it starts to bend the metal around.

I'm using the old belt guard as a pattern and making my guard just a little bigger.

The outside of the guard is finished.

I cut a pie shape piece of sheet metal to fit into the belt guard and I'm rolling a bead in the center of it to strengthen it.

The flywheel cover had to be removed so I can weld nuts on the inside to bolt the guard to it.
While I had it off, I went ahead and sand blasted it and the cover and the belt guard are ready for priming.

The flywheel cover and belt guard are re-assembled on the engine.


You have some skills sir!
Nicely done
Nicely done

