You are using an out of date browser. It may not display this or other websites correctly.
You should upgrade or use an alternative browser.
You should upgrade or use an alternative browser.
Winter project
- Thread starter jdcrawler
- Start date
That will give you traction, for sure. Any idea how much weight per wheel with both weights on ?
Noel
I'm guessing about 80 pounds per wheel.
Small ones about 30 lbs., large about 45 lbs.I'm guessing about 80 pounds per wheel.
This is the original arm assembly for shifting the transmission and someone has welded a bent piece of flat steel to it for a handle.
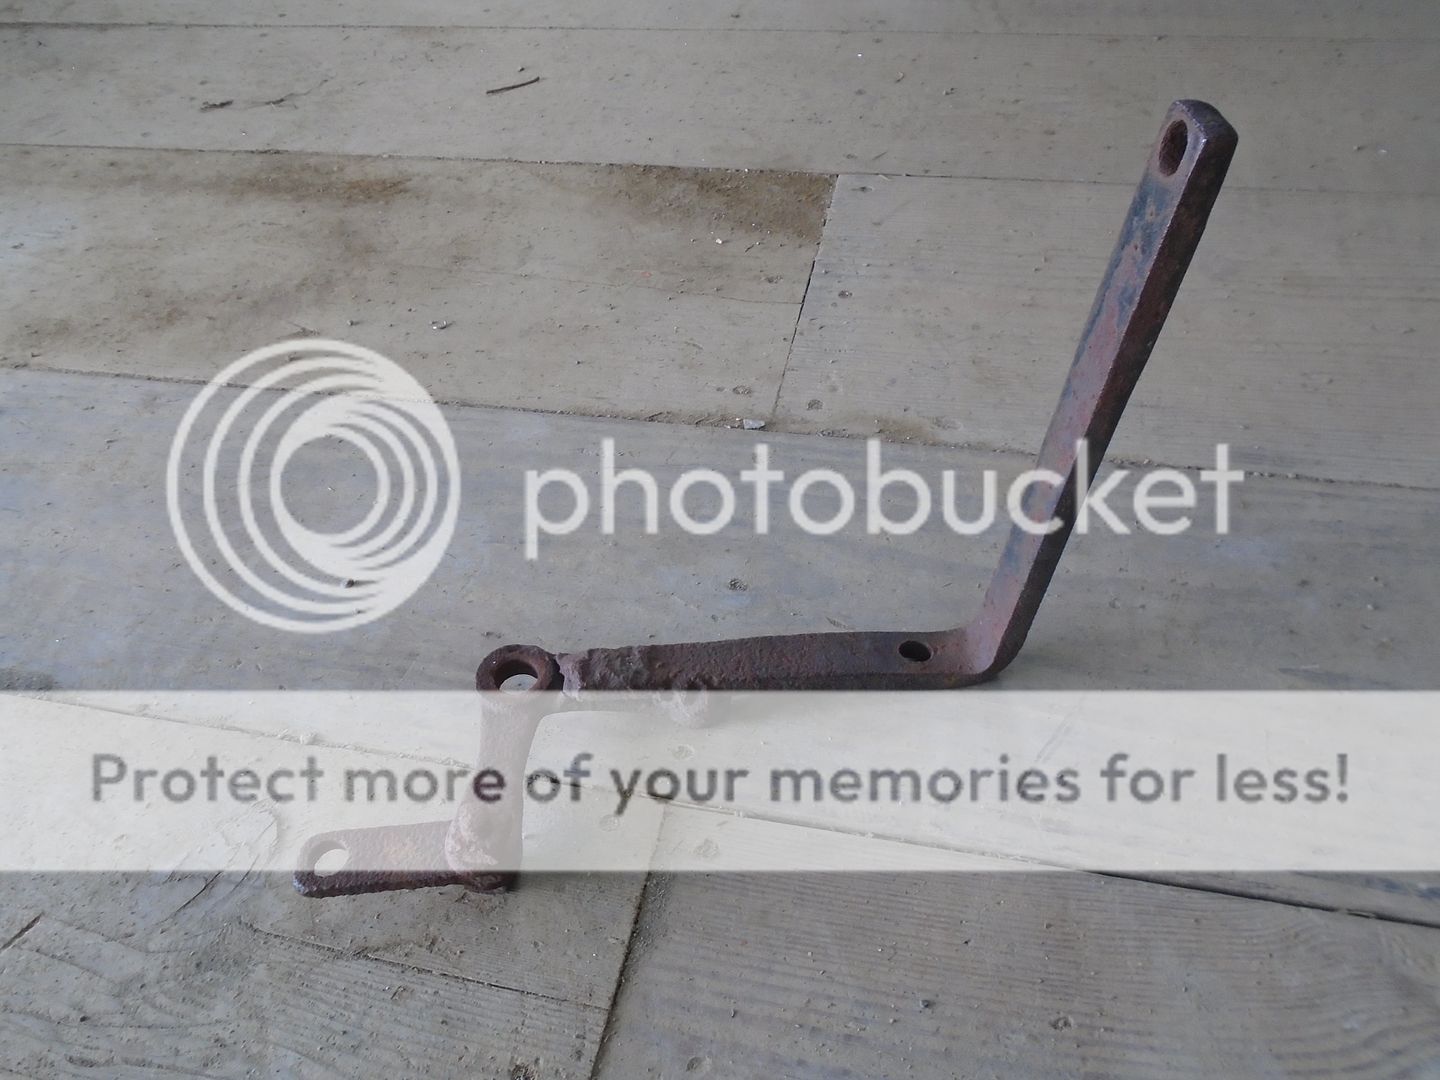
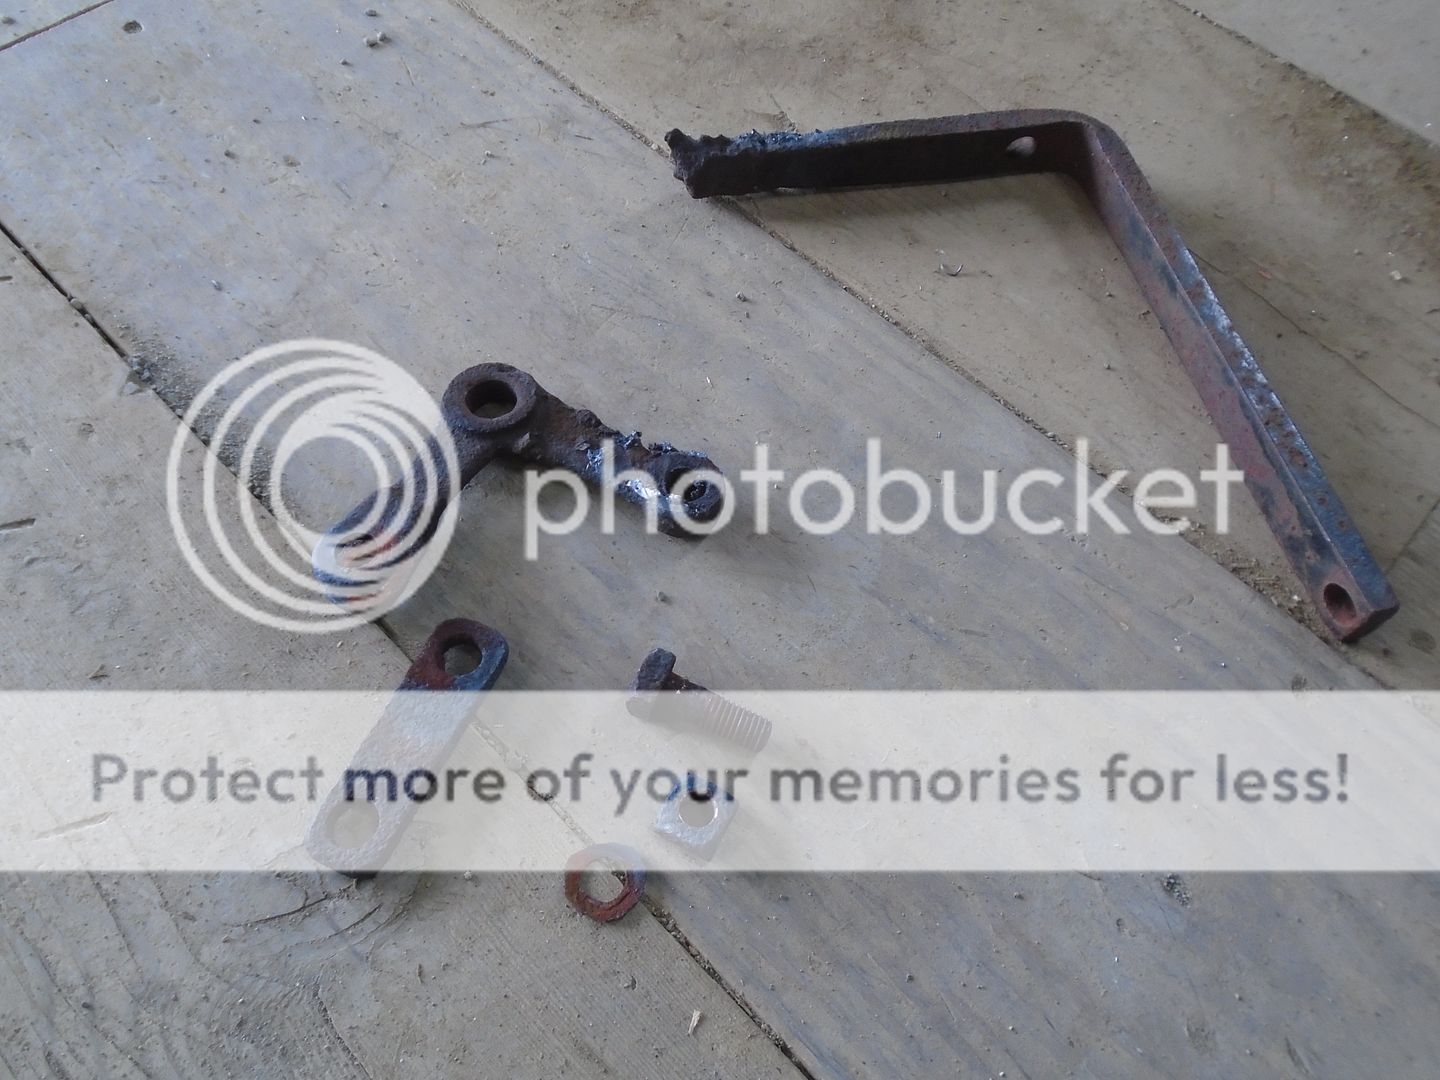
I cut the flat steel bar off and I had to use the torch to heat up the nut and bolt to separate the other pieces.
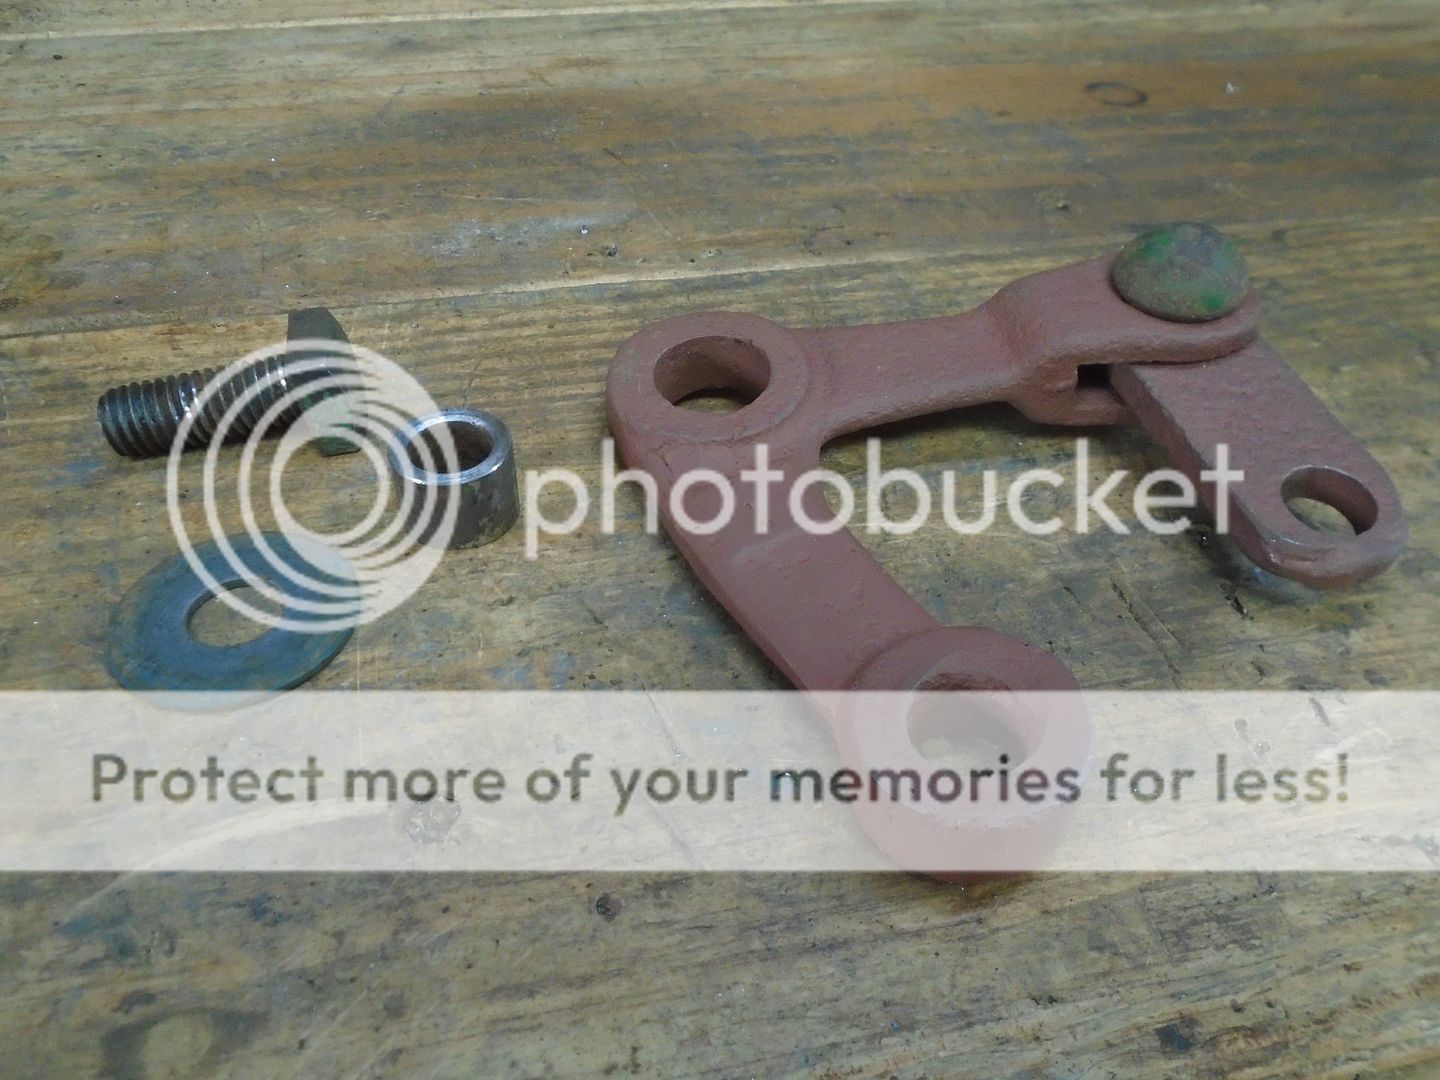
Here is the shifting arm assembly after it is cleaned up.
I'm using a pin instead of a nut and bolt to fasten the two pieces together and I made up a bushing that goes on the bolt on the top of the transmission for the pivot point.
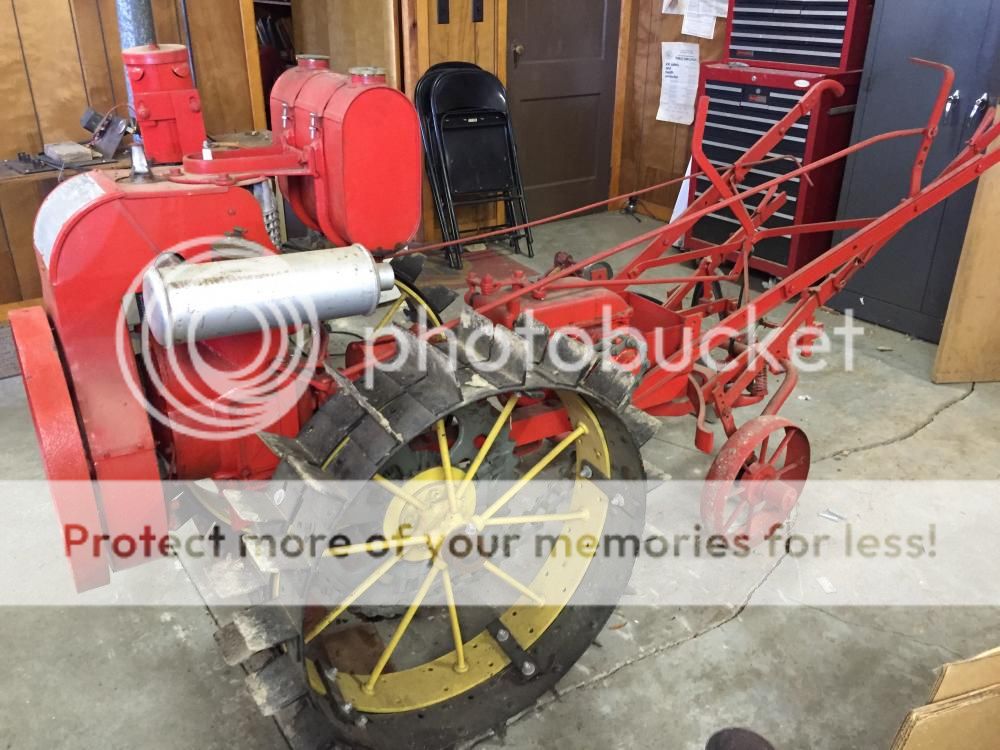
This is a photo of an original walk behind Centaur tractor.
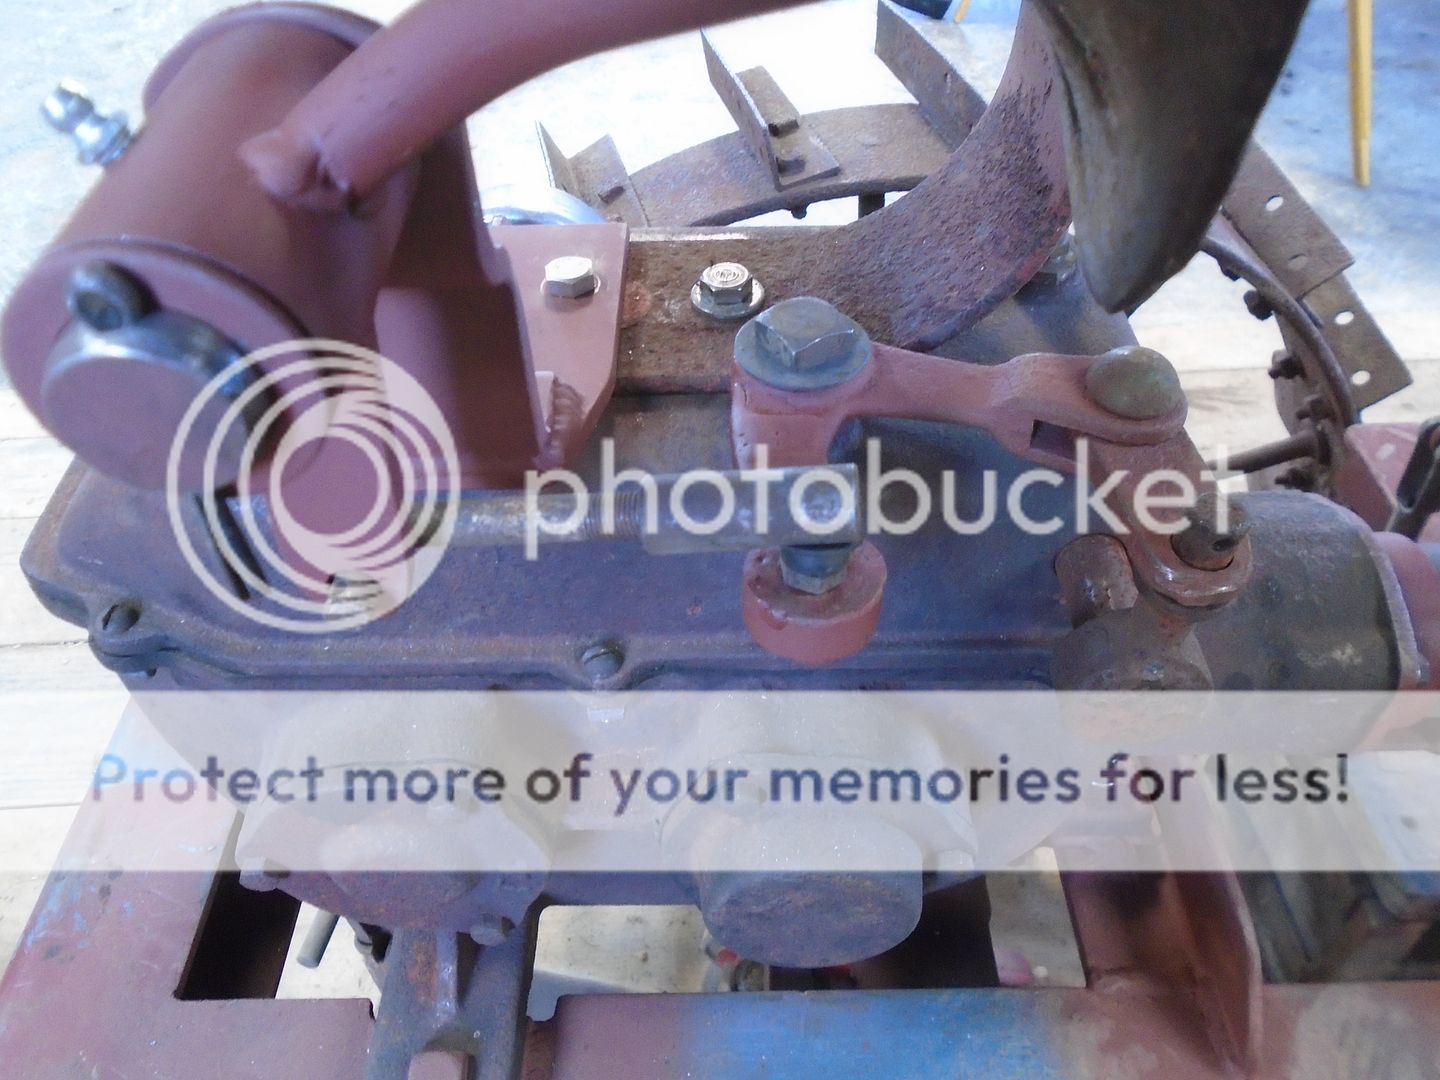
You can see the shift arm assembly bolted to the top of the transmission with a rod going back to a shift lever that is mounted in the center of the handle bars.
With the seat spring mounted on top of the transmission on my tractor, the shift arm has to point out the other way from the original location.
This is the neutral position.

Forward position.
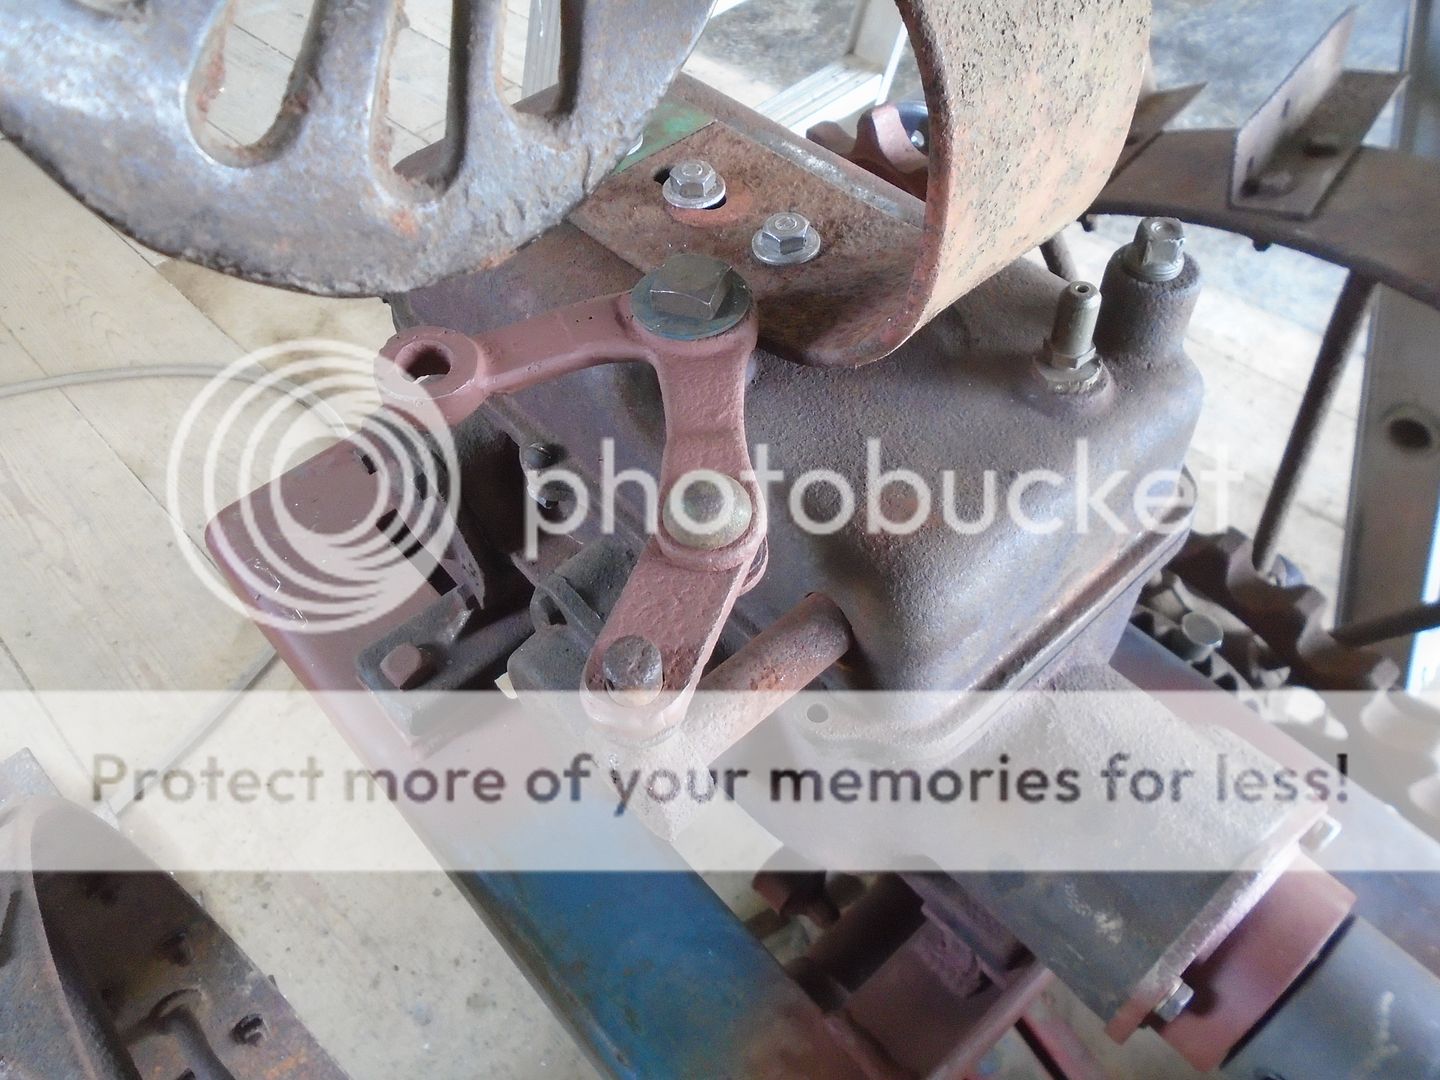
And reverse position.
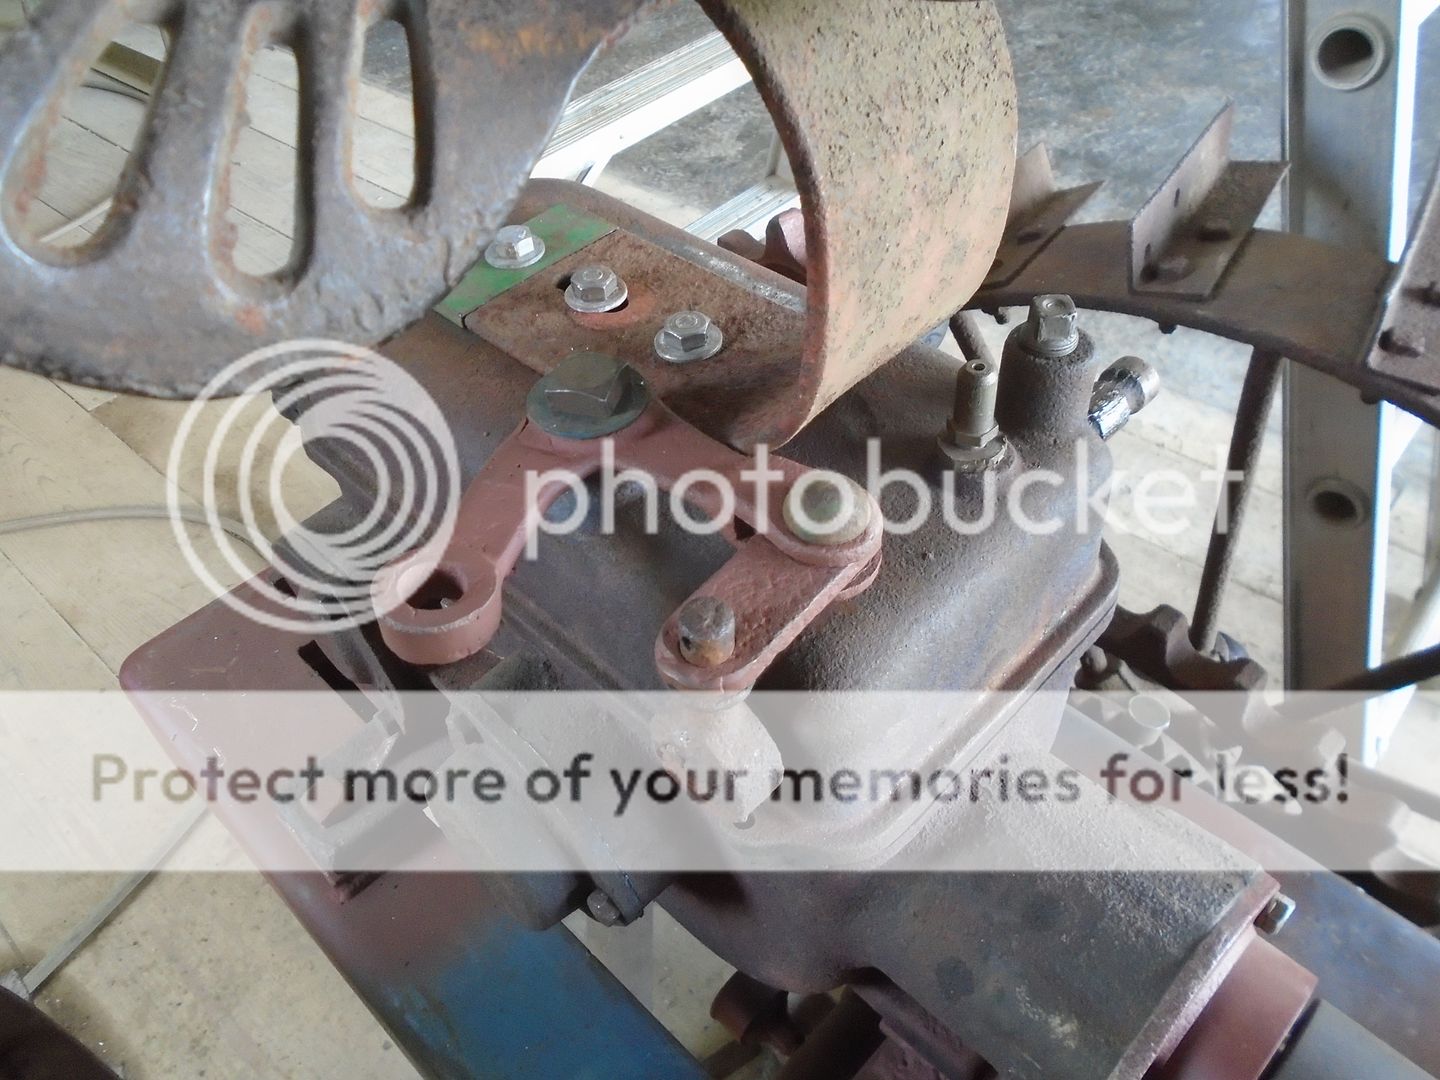
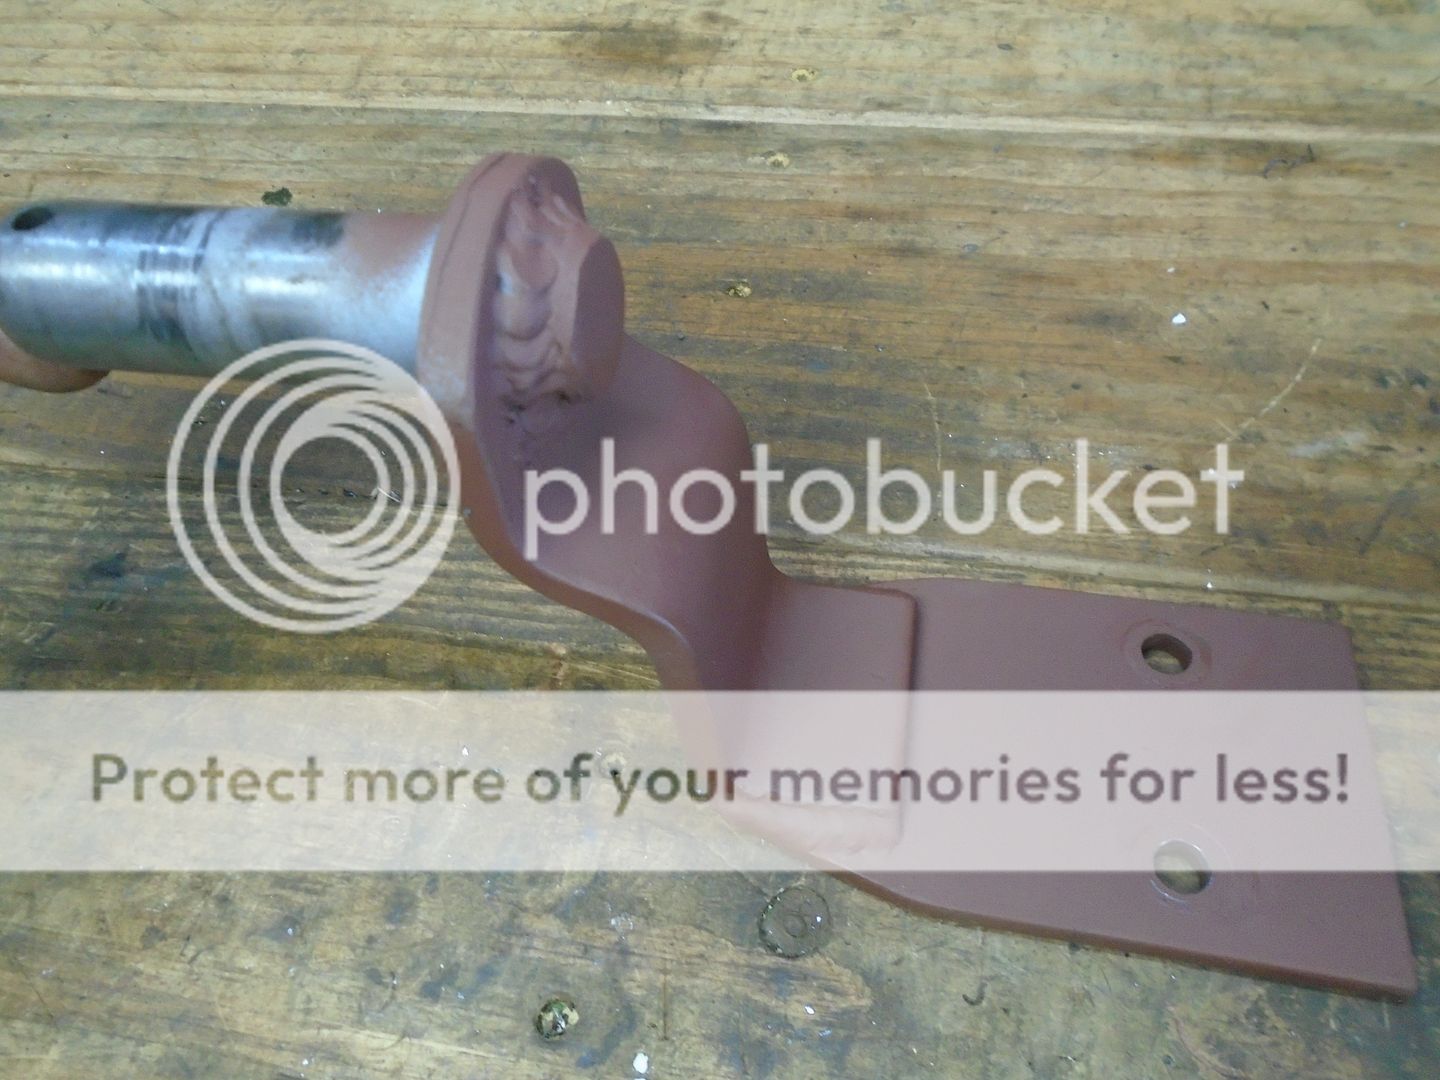
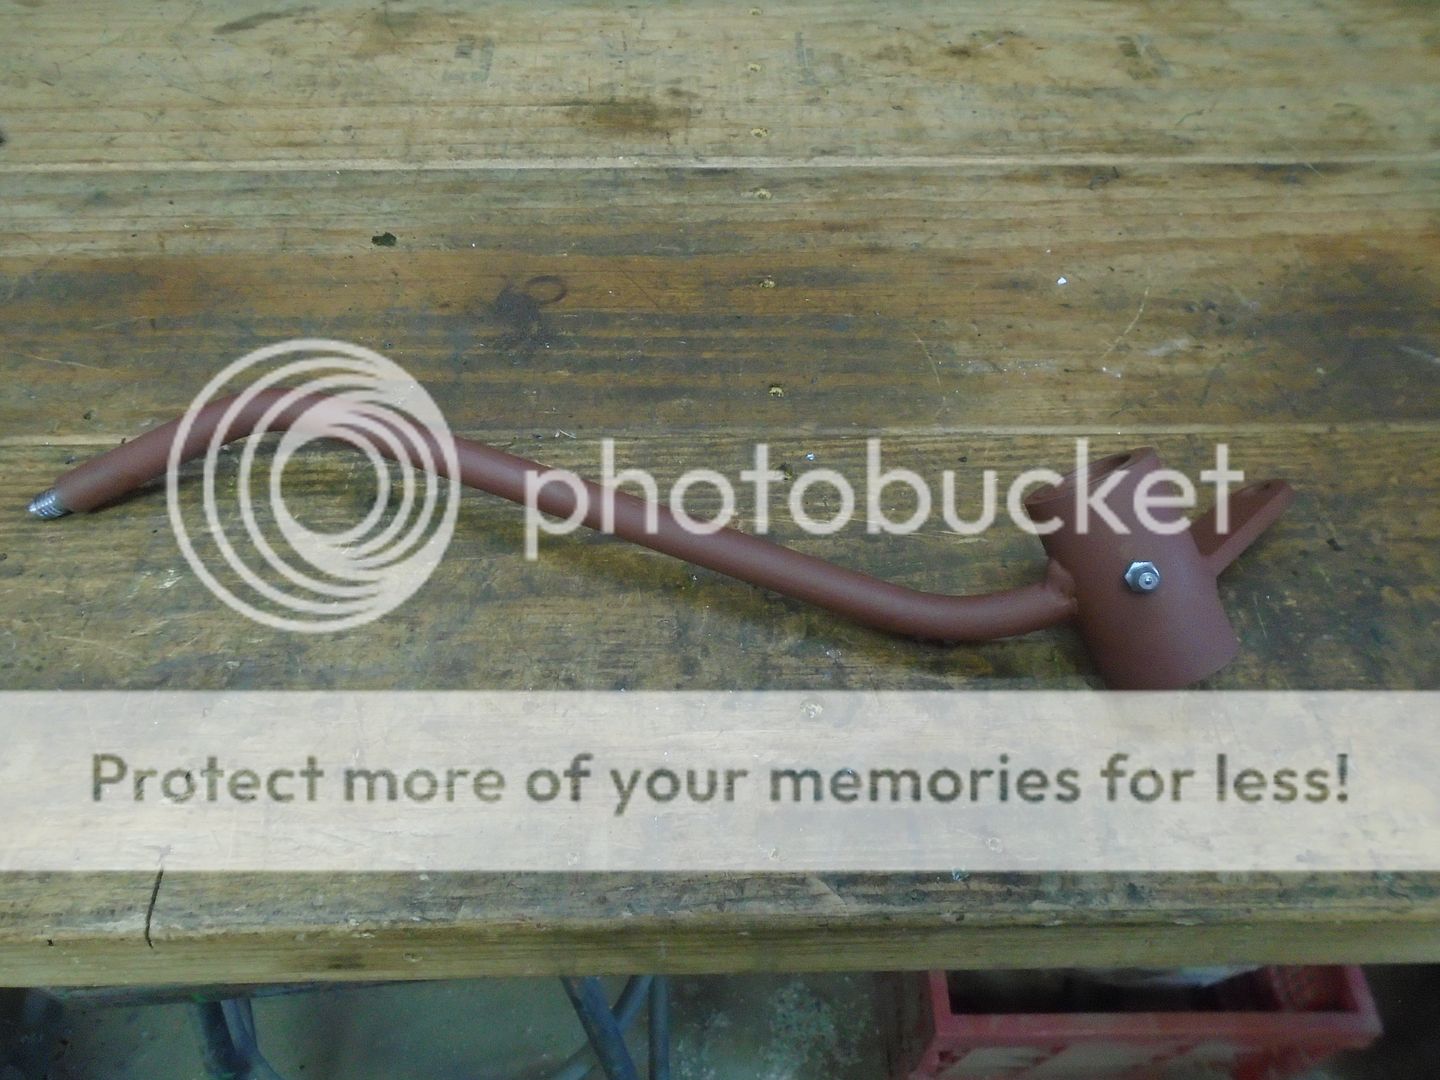
These are the individual parts that I have made up for the shifter handle and the mounting bracket.
The odd shaped bent flat steel bracket on the left is one end of a mounting bracket for a bottom roller on a boat trailer.
It already had a 1 inch hole in it so I found a 1 inch pin and two 1 inch bushings.
I cut a piece of pipe and turned the inside of each end out to the diameter of the brass bushings.
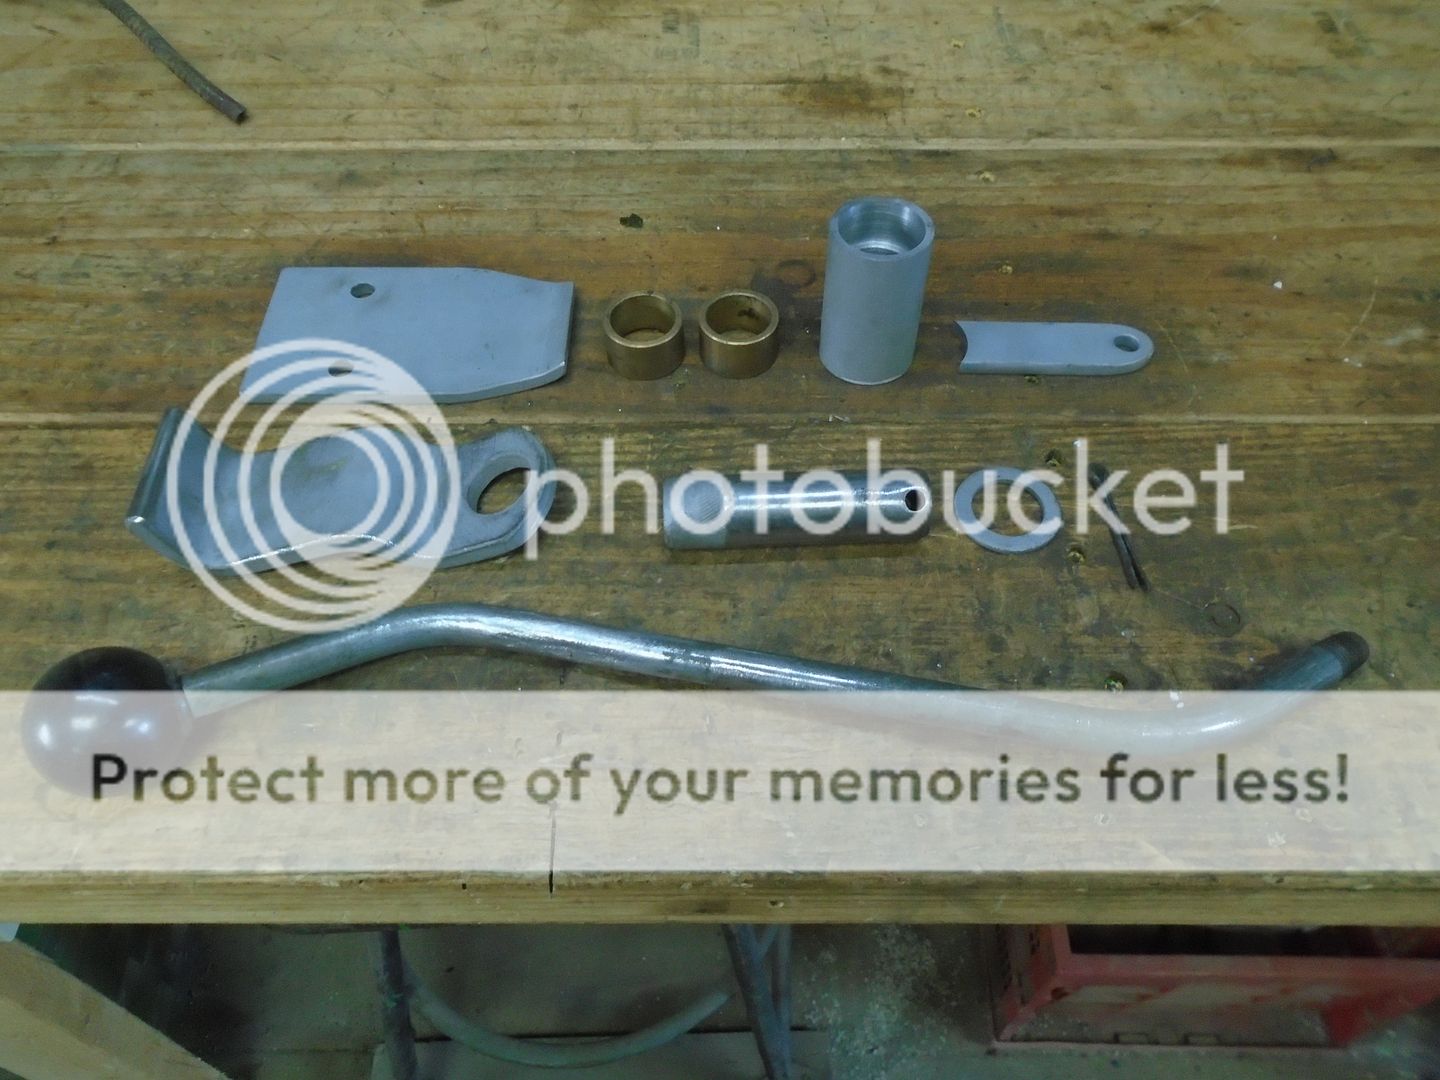
Then the bushings were pressed into each end.

This piece was then used as a guide for the depth for pressing the 1 inch pin into the flat steel bracket.
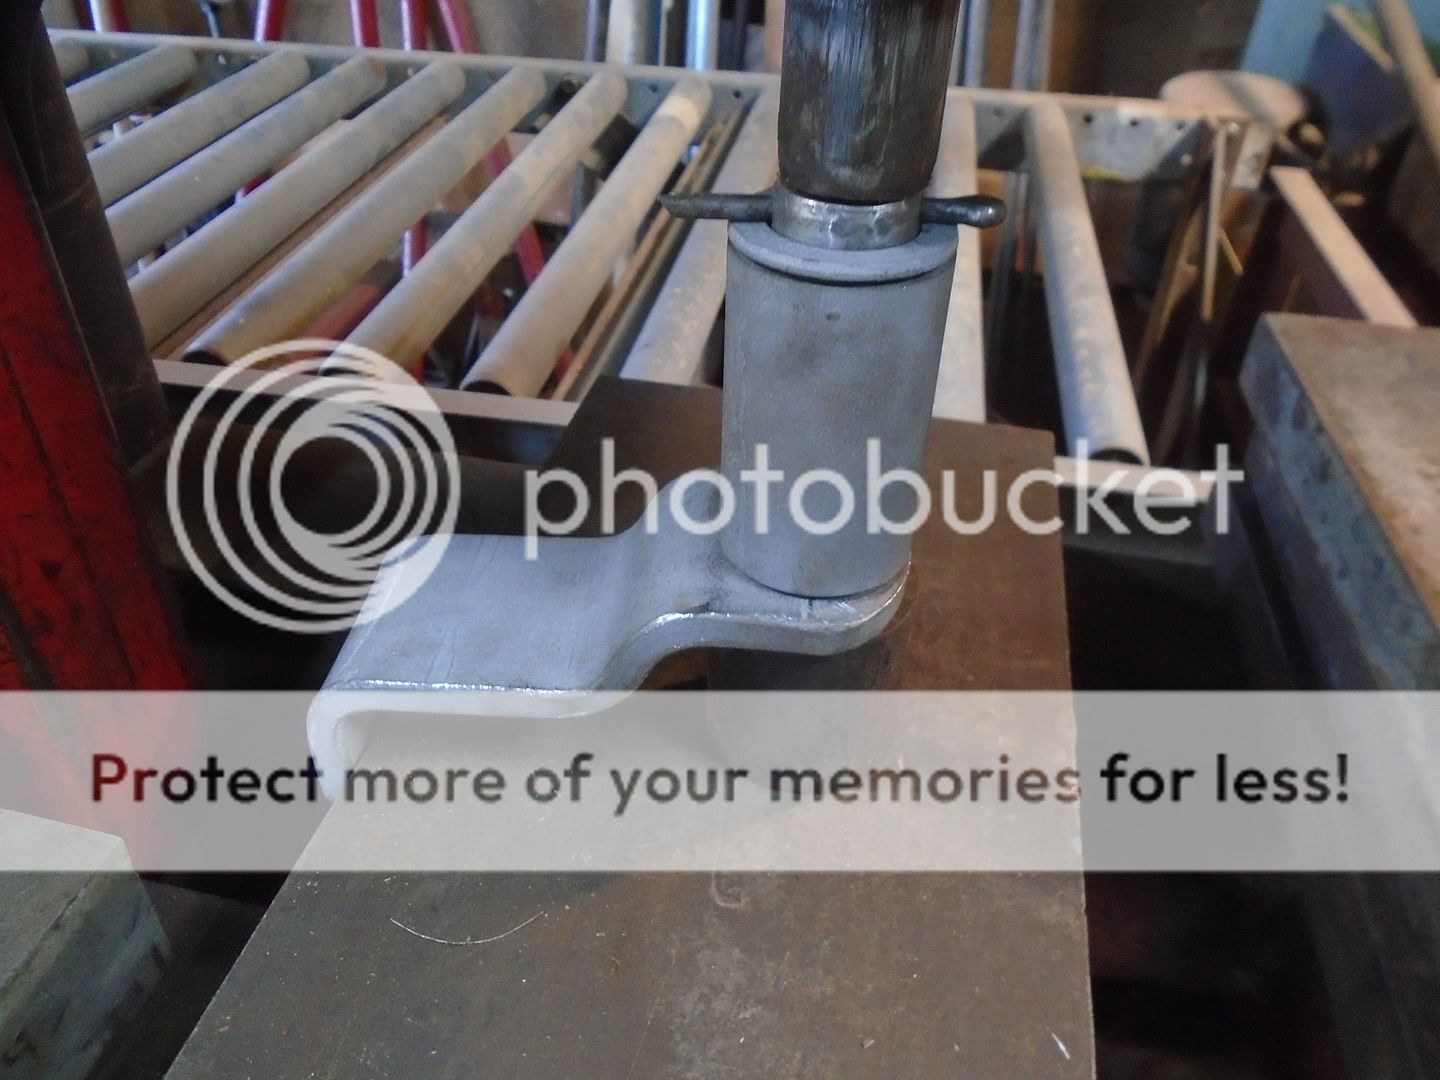
The pin is welded on the back side and the bracket is welded to the piece of flat steel to form the mounting bracket for the shifter handle.
The other parts were welded together to form the shifter handle assembly.
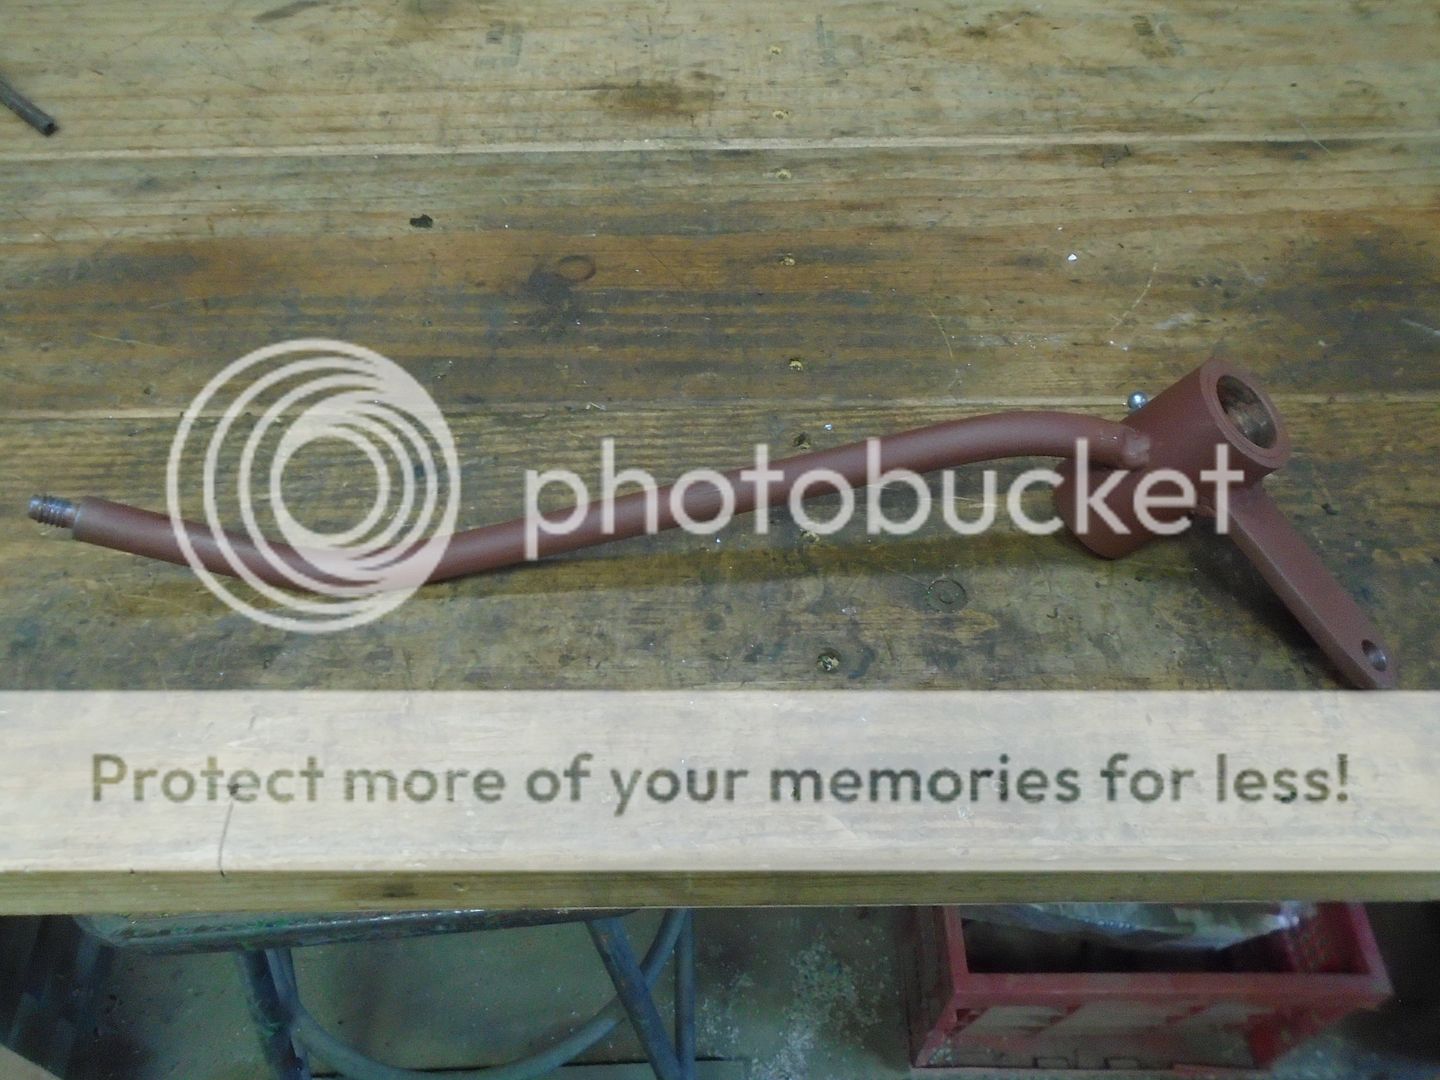
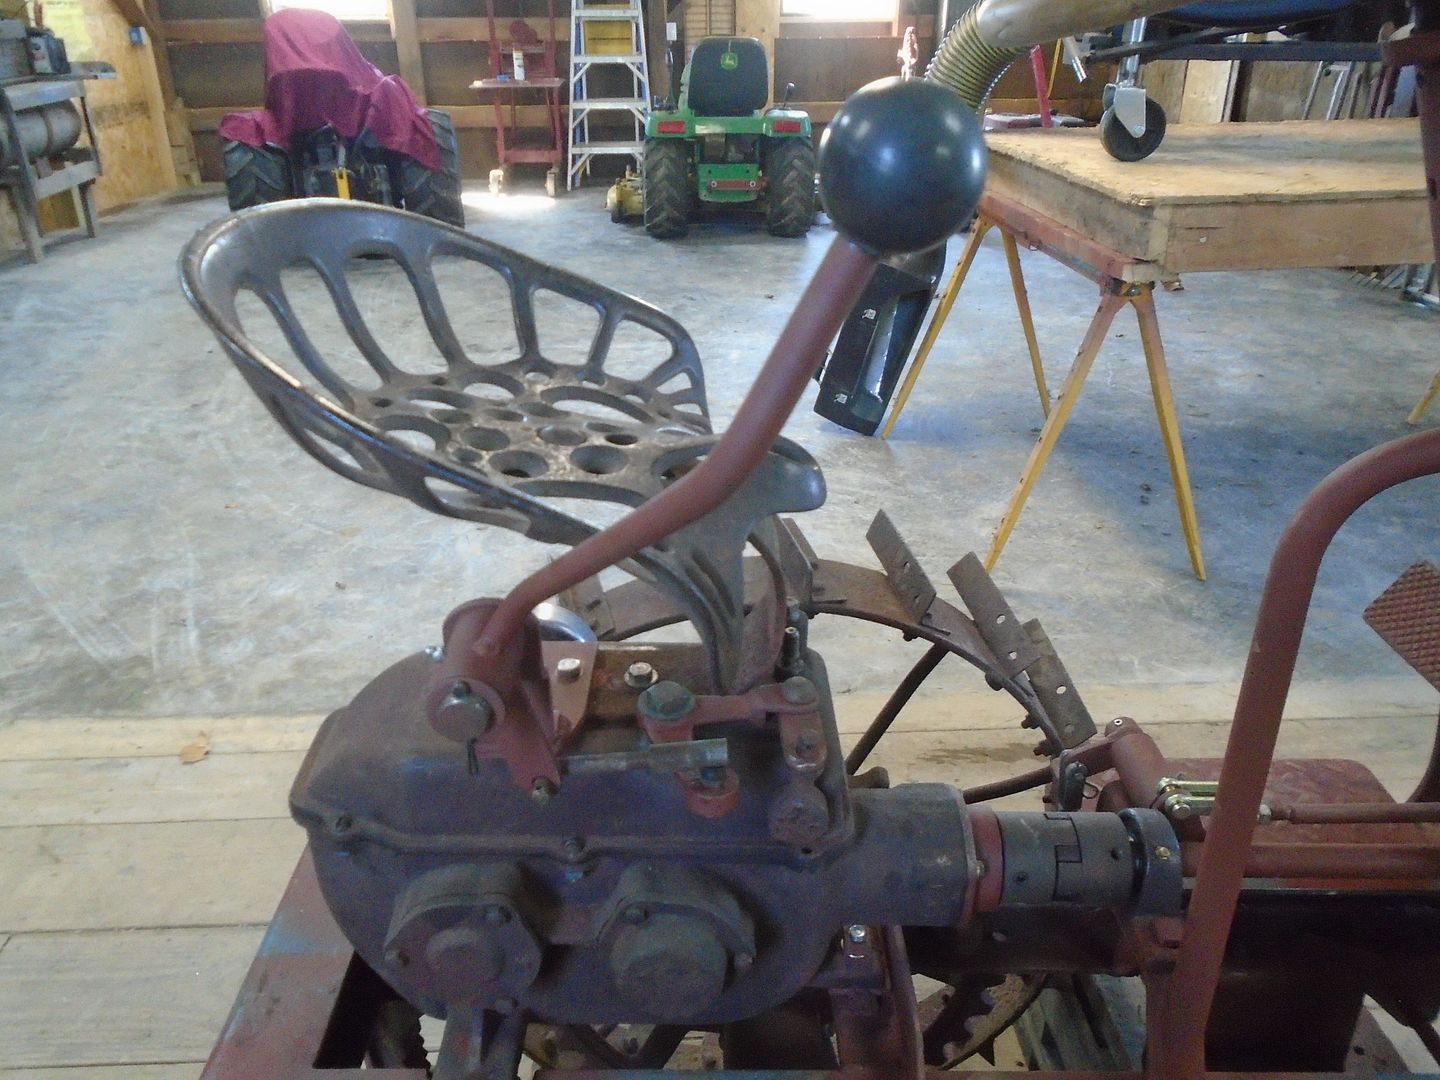
This was then mounted on top of the transmission, under the seat.
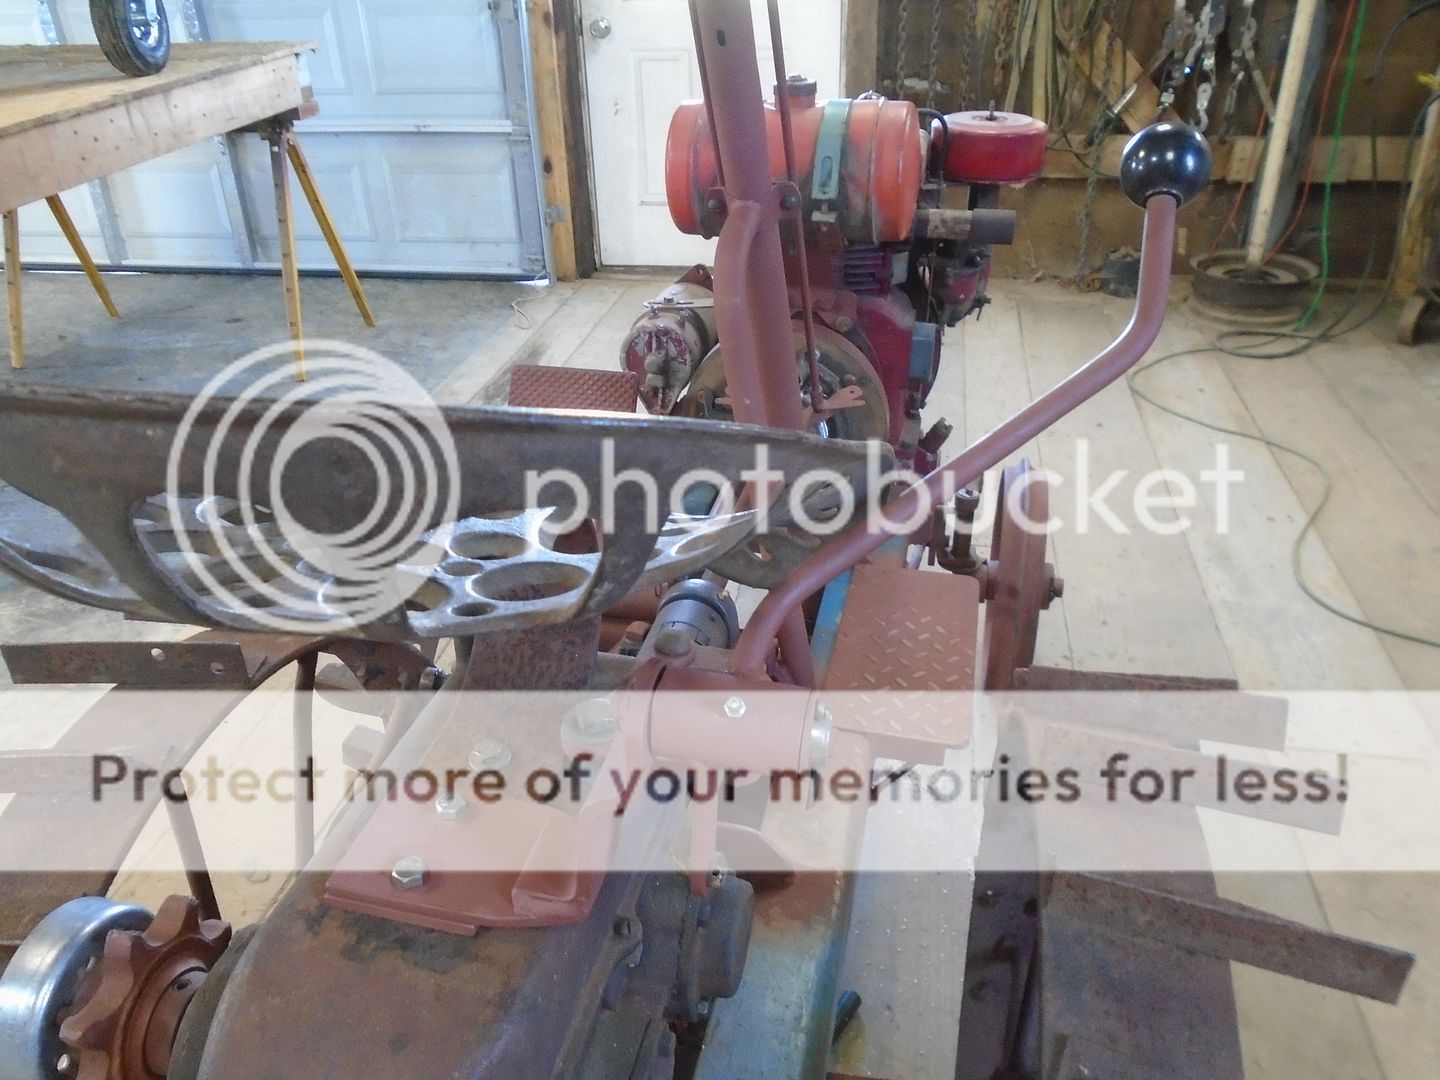
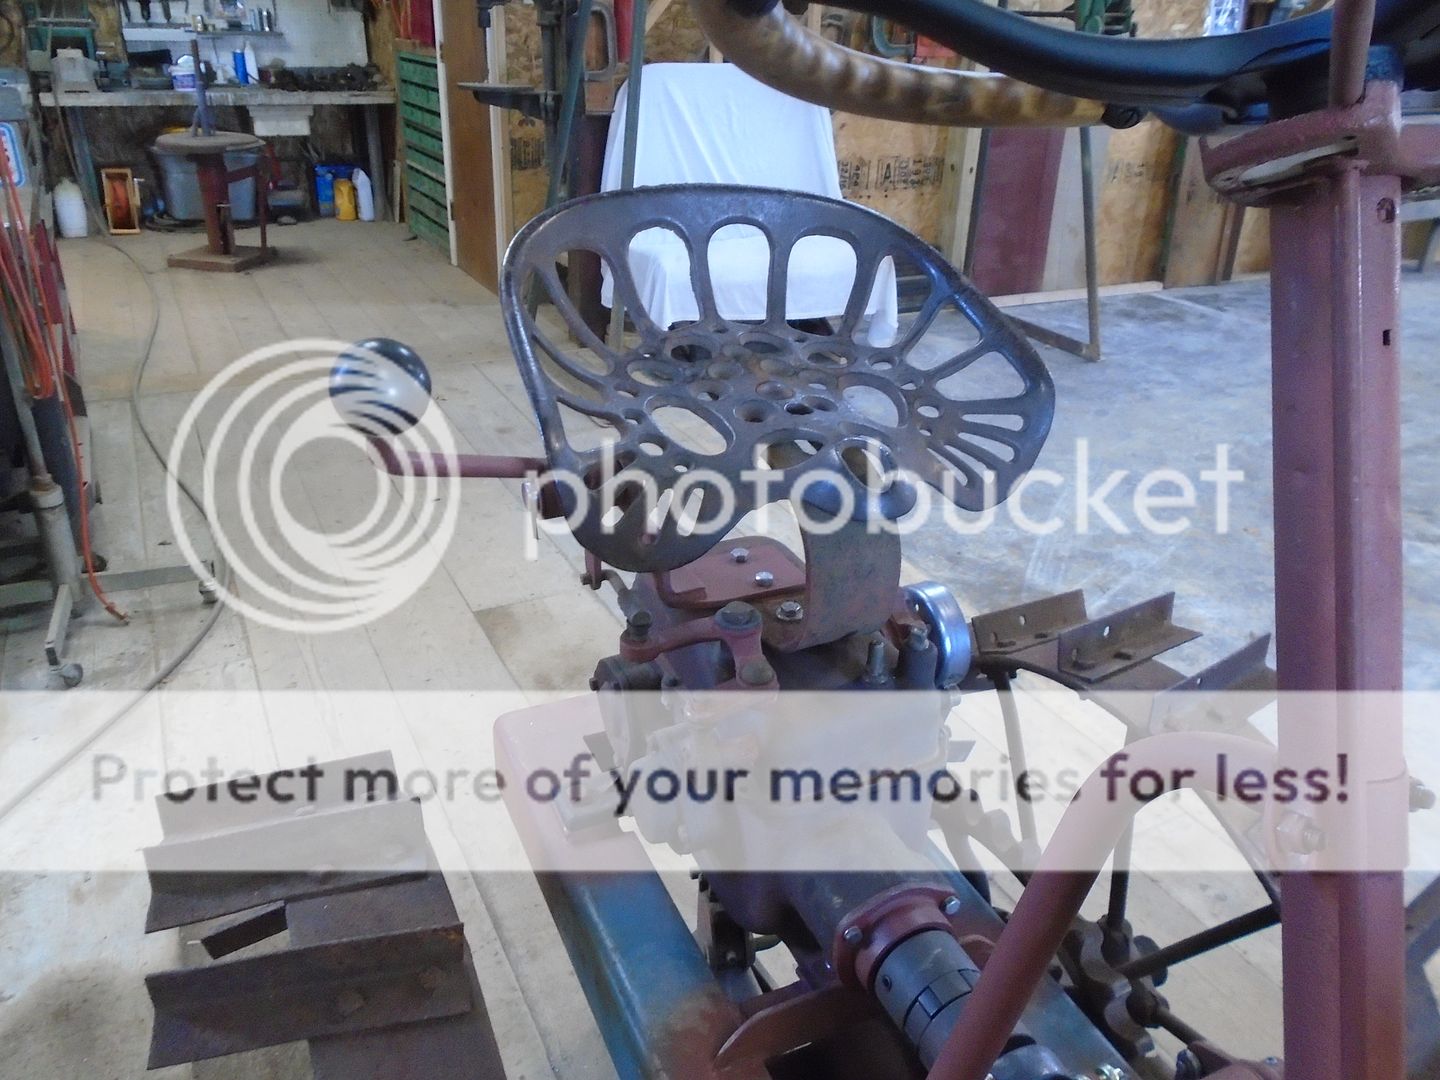
Here is a view of the linkage from the shift lever to the shift arm on the transmission.
The gear shifter works easily and smoothly.
Position of the shift lever in forward gear.
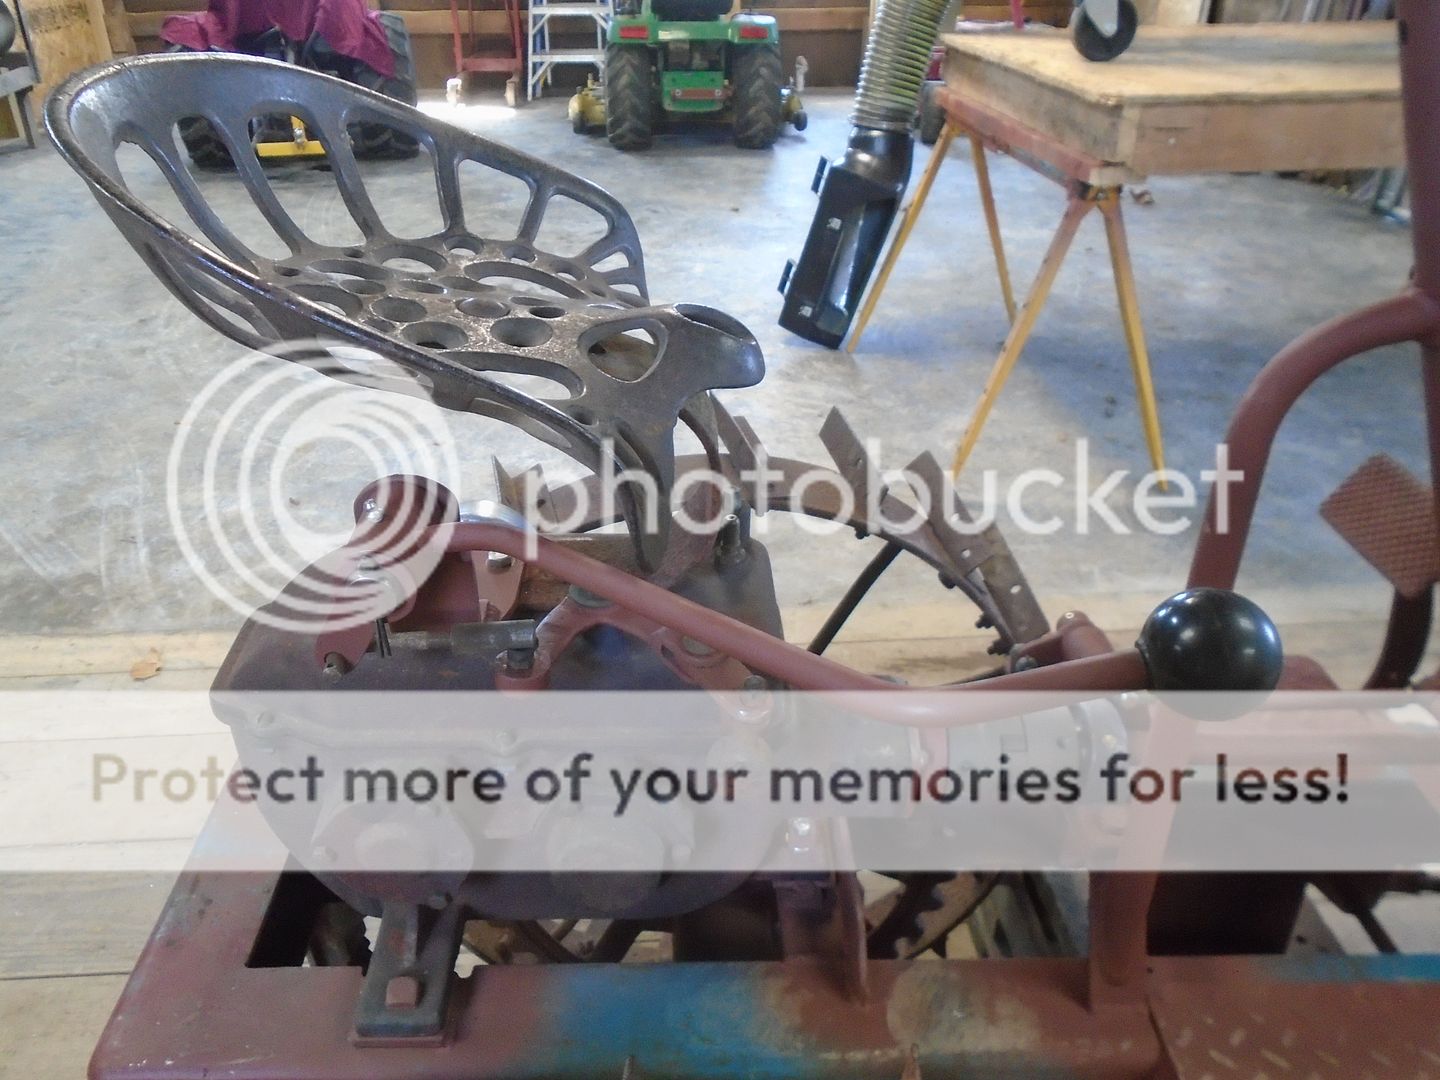
Neutral position.
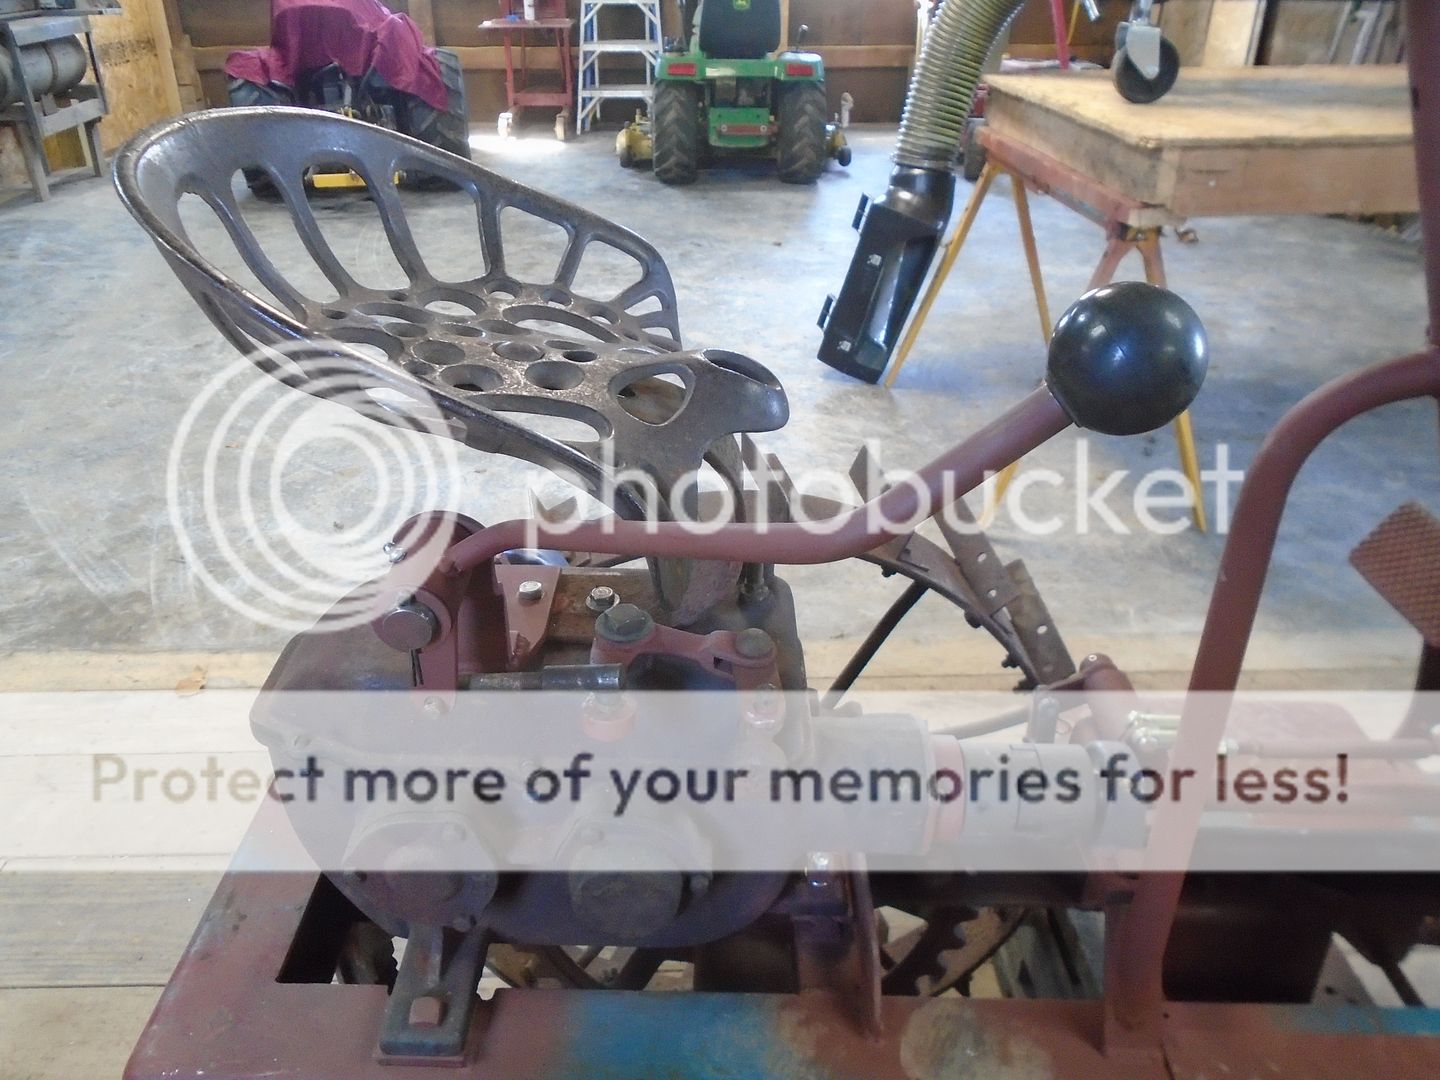
Reverse position.

I cut the flat steel bar off and I had to use the torch to heat up the nut and bolt to separate the other pieces.

Here is the shifting arm assembly after it is cleaned up.
I'm using a pin instead of a nut and bolt to fasten the two pieces together and I made up a bushing that goes on the bolt on the top of the transmission for the pivot point.

This is a photo of an original walk behind Centaur tractor.
You can see the shift arm assembly bolted to the top of the transmission with a rod going back to a shift lever that is mounted in the center of the handle bars.

With the seat spring mounted on top of the transmission on my tractor, the shift arm has to point out the other way from the original location.
This is the neutral position.

Forward position.

And reverse position.

These are the individual parts that I have made up for the shifter handle and the mounting bracket.
The odd shaped bent flat steel bracket on the left is one end of a mounting bracket for a bottom roller on a boat trailer.
It already had a 1 inch hole in it so I found a 1 inch pin and two 1 inch bushings.
I cut a piece of pipe and turned the inside of each end out to the diameter of the brass bushings.

Then the bushings were pressed into each end.

This piece was then used as a guide for the depth for pressing the 1 inch pin into the flat steel bracket.

The pin is welded on the back side and the bracket is welded to the piece of flat steel to form the mounting bracket for the shifter handle.

The other parts were welded together to form the shifter handle assembly.


This was then mounted on top of the transmission, under the seat.


Here is a view of the linkage from the shift lever to the shift arm on the transmission.

The gear shifter works easily and smoothly.
Position of the shift lever in forward gear.

Neutral position.

Reverse position.

Nice work Ray. Just amazing. If I only had some of those skills.
Noel
Skills are easy to develop ... it's only taken me 73 years of learning from my mistakes to be able to do what I can do now.
Very good . My grandfather told me show me a man that never made a mistake and i will show you man that never done anything. I told that to a to lady and she told me that you have to learn others mistake's because you don't live long enough to make all yourself.
thanks Bill
thanks Bill
Ray, any interference with reverse and the seat when your ass is planted in it?
None at all.
I know it looks close in the photos but there is plenty of clearance even with me bouncing up and down on the seat.
That was one of the things that I have learned from past experience in building things.
Well .... photobucket has me stumped.
I have been buying their basic package from them and I am paid up thru December of 2020.
Now they are no longer going to allow photos to be uploaded from that package.
That is why you see writing across some of the photos that I have recently posted.
They will be happy to reinstate my ability to up load photos again if I purchase one of their more expensive packages !
JD just use the uploader here on the site it works great, I told Photobucket where to go years ago they are a total low life outfitWell .... photobucket has me stumped.
I have been buying their basic package from them and I am paid up thru December of 2020.
Now they are no longer going to allow photos to be uploaded from that package.
That is why you see writing across some of the photos that I have recently posted.
They will be happy to reinstate my ability to up load photos again if I purchase one of their more expensive packages !
Last edited:
I second the uploader here. I haven't used photobucket forever. I do use imgur some but one place I post at only allows imgur to be used for linking photos
If by "has me stumped" You mean they have you bent over a stump you may well be correct. Photobucket has destroyed the content in many forums by taking possession of the content and holding it for ransom If you still have the option to edit it might be possible to go back and use the Attach files option to fix what Photobucket has screwed up. Sorry all your work posting here on this thread has been compromised and you victimized by this unscrupulous company but according to there terms of use they may now own all the photos you have uploaded to them and could sue if you use them.Well .... photobucket has me stumped.
I have been buying their basic package from them and I am paid up thru December of 2020.
Now they are no longer going to allow photos to be uploaded from that package.
That is why you see writing across some of the photos that I have recently posted.
They will be happy to reinstate my ability to up load photos again if I purchase one of their more expensive packages !
Don
After seeing this on GTt I went and "copied/save as" all I could access to a file on my computer. They everything locked and was asking for money. After getting my photos I deleted the account, don't need it any more. Only way I could access the photos was using recent uploads.JD just use the uploader here on the site it works great, I told Photobucket where to go years ago they are a total low life outfit
I'm not going to waste any more money on photobucket.
Luckily I have all of my photos saved on my own computer and backed up on a flash drive.
I post on three forums and using photobucket made it easier.
Writing up the first post can sometimes take a lot of time to get it worded right and make sure the photos are in the right place.
Then all I had to do is copy that first post and just paste it on the other two forums.
It is going to take a lot more time and effort if I have to do the write up and load photos up on each individual form.
Get your own domain and hosting. I haven't done it for years, but a lot of time for under 10 bucks a month, you can have www.jdcrawler.com and host all your own pictures.
The last one I had was when I was into mini bikes really heavy. I had www.kitminibikes.com I had 200 gigs of storage, unlimited bandwidth, and I could do whatever I wanted with my hosted files. It made it nice.
I just took all my builds and made a page for each build. Then I'd take each build and break it down by date or area of the build. I'd get a lot of traffic from the forum that i normally posted on and a lot came in from search engines.
I used godaddy.com and paid like 20 dollars annually for the domain and 4.99 a month for hosting.
