You are using an out of date browser. It may not display this or other websites correctly.
You should upgrade or use an alternative browser.
You should upgrade or use an alternative browser.
MF 1450
- Thread starter MFDAC
- Start date
Nice day today, and stayed nice until I got home from work! Opened the overhead door, fired up the K321, let it warm up a minute and got this far out of the shop before it died!
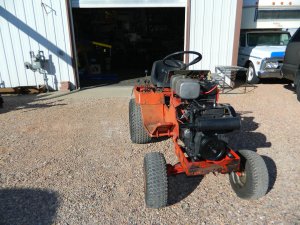
Well no need to panic----it ran out of gas---LOL! Problem is that I haven't filled my gas cans yet. Probably scared of what 91 non-ethanol costs! I'll get them filled this weekend. Still think I was hearing a little "rattle" sound occasionally, but my bad hearing can't tell for sure, or where it's coming from.
Shoved it back in the shop and put the hood on it.
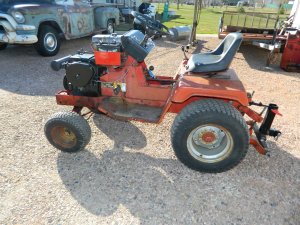
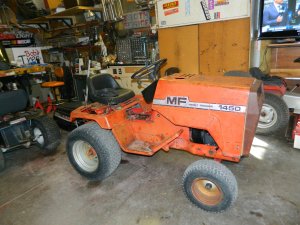
Couldn't put Daniel's spool valve cover on yet, since the cap was on back order at one place and just recently got my money back. I will try Jack's now and start looking for the o-rings to rebuild the spool valve. I'm behind on some other stuff so it may not be right away.
DAC

Well no need to panic----it ran out of gas---LOL! Problem is that I haven't filled my gas cans yet. Probably scared of what 91 non-ethanol costs! I'll get them filled this weekend. Still think I was hearing a little "rattle" sound occasionally, but my bad hearing can't tell for sure, or where it's coming from.
Shoved it back in the shop and put the hood on it.


Couldn't put Daniel's spool valve cover on yet, since the cap was on back order at one place and just recently got my money back. I will try Jack's now and start looking for the o-rings to rebuild the spool valve. I'm behind on some other stuff so it may not be right away.
DAC
Great that you got it out. Gas does help them run. Happened to me last week end. Went to start the John Deere, so we could get the MF 16 in, and only would run if I kept the choke on. Thought, that’s kinda weird. Then all of a sudden, ahhhhh. Out of gas I bet. And sure enough that’s what is was. It had not run since January I think.
Any way. Don’t worry about the noise Doug. Run it for a bit. Change the oil again. See what happens.
Noel
Any way. Don’t worry about the noise Doug. Run it for a bit. Change the oil again. See what happens.
Noel
Yeah the gas is a good idea, Noel---LOL! Ran probably 4 minutes! I too pulled the choke and it ran a bit better, briefly.Great that you got it out. Gas does help them run. Happened to me last week end. Went to start the John Deere, so we could get the MF 16 in, and only would run if I kept the choke on. Thought, that’s kinda weird. Then all of a sudden, ahhhhh. Out of gas I bet. And sure enough that’s what is was. It had not run since January I think.
Any way. Don’t worry about the noise Doug. Run it for a bit. Change the oil again. See what happens.
Noel
That's the plan run it for a while and keep checking the condition of the oil and change it again soon.
Thanks for your support!
DAC
Contact member "Ducky" to see if he still has some o-ring kits for the hydraulic control valves.Nice day today, and stayed nice until I got home from work! Opened the overhead door, fired up the K321, let it warm up a minute and got this far out of the shop before it died!
View attachment 50777
Well no need to panic----it ran out of gas---LOL! Problem is that I haven't filled my gas cans yet. Probably scared of what 91 non-ethanol costs! I'll get them filled this weekend. Still think I was hearing a little "rattle" sound occasionally, but my bad hearing can't tell for sure, or where it's coming from.
Shoved it back in the shop and put the hood on it.
View attachment 50776 View attachment 50778
Couldn't put Daniel's spool valve cover on yet, since the cap was on back order at one place and just recently got my money back. I will try Jack's now and start looking for the o-rings to rebuild the spool valve. I'm behind on some other stuff so it may not be right away.
DAC
I'm probably going to have to use the plumbers tape trick for the center lift float spool valve as both of the places that had new ones listed are on "factory back order".
Sent you a PM Daniel.
I did get the gas cans filled today, so if there is ever a nice day when I'm off work, I can drive this thing around a little more and use it to pull my overhead crane back into the shop!
DAC
Sent you a PM Daniel.
I did get the gas cans filled today, so if there is ever a nice day when I'm off work, I can drive this thing around a little more and use it to pull my overhead crane back into the shop!
DAC
Thought I should revive this year dead thread as I got to work on the MF1450 today. Some of the previous discussion was about a broken spool valve cap. Until it got repaired somehow, the spool valve cover Daniel sent me would not fit. There was also a big help from our late friend KennyP as he sent me the correct lever for one of the lifts. Between Daniel and Kenny I couldn't have done this.
To review, this steel bracket was holding on the broken float valve cap.
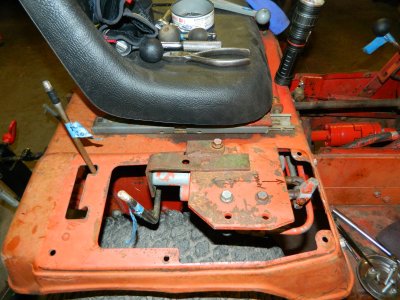
The broken cap without that bracket holding it together.
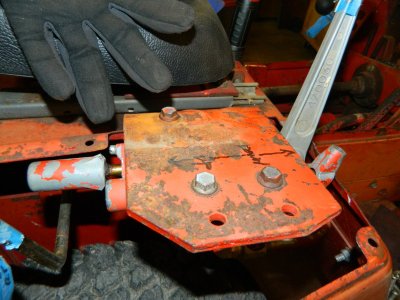
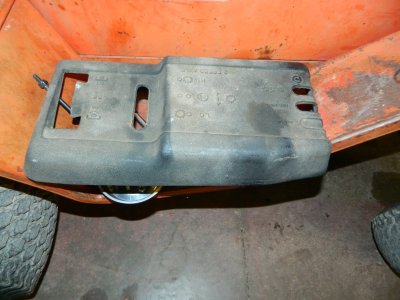
This cover Daniel sent would not fit because of that and a wrong lever on the spool valve.
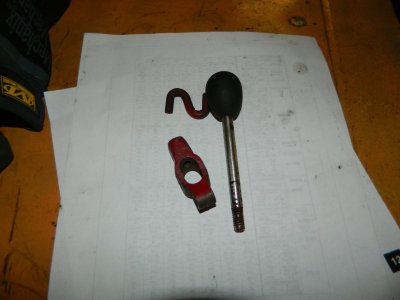
Kenny sent me this lever assembly which was the correct one.
Finally today I did the repair on that broken cap, but plumbers tape I have just seemed too wide. Some of you guys probably remember back in the 70's and 80's buying tape decks for your cars. They always came with a strap to support the back of the player. It is about 1/4" narrower than plumbers tape and this particular piece was EXACTLY the right length! Must be living right for that to happen---LOL! I could make 3 of the bends in the sheet metal brake then used a hand brake for the last one.
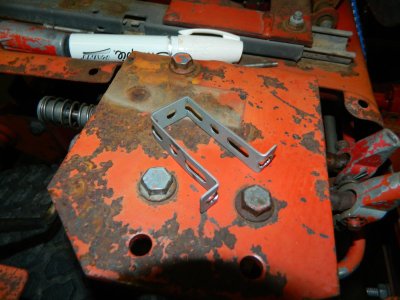
Put the new strap over the broken cap and screwed it into place.
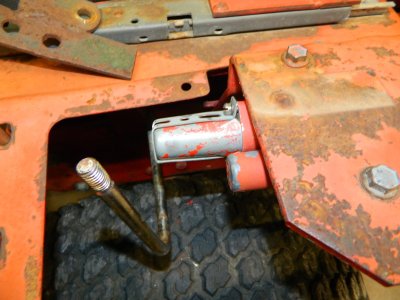
The old bracket.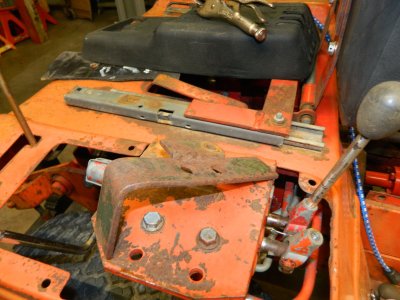
This tractor had been in some kind of a bad wreck like falling out of the back of a pickup or from a moving trailer at one time before I got it. Pretty much everything is bent and tweaked in one way or another. The two speed lever had to be bent into more of an angle to have full swing and also work in the slot of the cover. Went ahead and mounted the cover and it was a bit of a battle to get the bolts into also. The fender pan is far from straight but got it in! Probably someone with a restorable tractor should have the cover rather than this beat to hell one! I appreciate it though, Daniel!
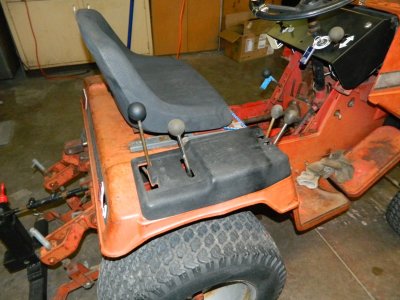
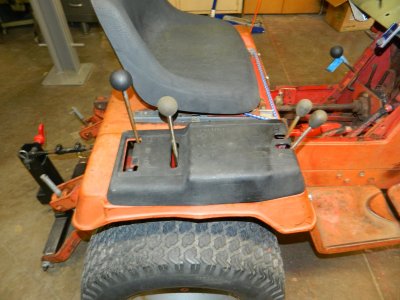
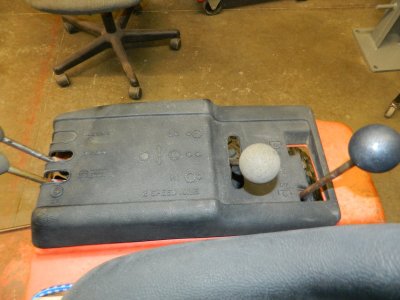
I have no attachments for the center lift or rear PTO yet but maybe someday. Definitely want to try to mount the blade from the MF12G to it some time. That would use the center lift with the float spool.
One of these days I will bend up an 1/8" plate aluminum tunnel cover like I had to do with the dash. Probably would hurt to get a shirt tail or something like that caught in the drive shaft!
DAC
To review, this steel bracket was holding on the broken float valve cap.

The broken cap without that bracket holding it together.

This cover Daniel sent would not fit because of that and a wrong lever on the spool valve.

Kenny sent me this lever assembly which was the correct one.

Finally today I did the repair on that broken cap, but plumbers tape I have just seemed too wide. Some of you guys probably remember back in the 70's and 80's buying tape decks for your cars. They always came with a strap to support the back of the player. It is about 1/4" narrower than plumbers tape and this particular piece was EXACTLY the right length! Must be living right for that to happen---LOL! I could make 3 of the bends in the sheet metal brake then used a hand brake for the last one.

Put the new strap over the broken cap and screwed it into place.

The old bracket.

This tractor had been in some kind of a bad wreck like falling out of the back of a pickup or from a moving trailer at one time before I got it. Pretty much everything is bent and tweaked in one way or another. The two speed lever had to be bent into more of an angle to have full swing and also work in the slot of the cover. Went ahead and mounted the cover and it was a bit of a battle to get the bolts into also. The fender pan is far from straight but got it in! Probably someone with a restorable tractor should have the cover rather than this beat to hell one! I appreciate it though, Daniel!


I have no attachments for the center lift or rear PTO yet but maybe someday. Definitely want to try to mount the blade from the MF12G to it some time. That would use the center lift with the float spool.
One of these days I will bend up an 1/8" plate aluminum tunnel cover like I had to do with the dash. Probably would hurt to get a shirt tail or something like that caught in the drive shaft!
DAC
HA! In my teens she was pretty darn sure she did, Chris! Nowadays, I ain't sure---LOL!Nice work Doug. Can tell your mother didn't raise no dumbbell.
I been lucky so far but I would hate for my luck to run out, Noel! Could be a bad day. Thanks.Nice fix Doug. Ya that would not be good getting any thing caught in the driveshaft.
Noel
It might disappoint you I'm not doing a restoration Jim, but that would be way more work than I want to do. I want this machine to work for me, not the other way around. Got several things to build for it yet to do my yard mule chores. So far it's a great hauler and gravel smoother with the grate I built for the 3 point.Wow 39 pages and I’m just now seeing this project, sorry Doug. That was a good fix. Believe it or not I just seen several of those tape deck brackets in some junk of mine. When I settle down tonight I’ll do some catching up.
DAC
I had forgotten about this thread. Decided to put some work I did on the MF1450 today here. The driveshaft issues have been resolved so I have a lot more confidence in this thing being useable for longer than I had thought.
Today I drained the engine oil and decided to alter the muffler so it doesn't discharge right to the inside of the hood. Let the oil drain while I worked on a idea I got in my sleep a few nights back---LOL!
Some of you may remember that the heat exchanger in the shop furnace developed a hole in it last December. Fortunately it was still under warranty so they sent a new one free.
Threw the old one out in the scrap pile. Thought maybe the tubing from it may be useful sometime. Measured the OD of the muffler discharge then took the calipers out back and measured the ID of the heat exchanger tube. By some stroke of luck it measured about the same!
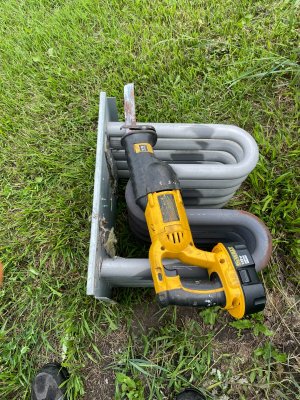
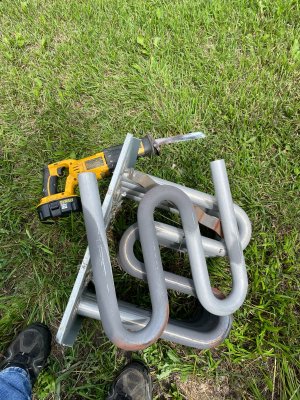
Tested and it is very tight but still will go over the muffler discharge.
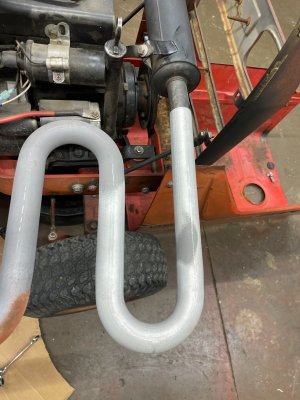
Finished the oil change and cut the end of the muffler off. Cut a piece of that heat exchanger tube about halfway between two bends. Did a little beveling on the muffler and cut a couple of slits in it to give a little movement to drive the extension on. Drove it on with a no bounce hammer.
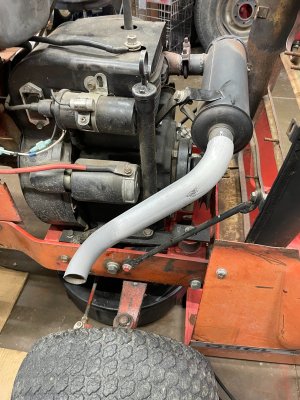
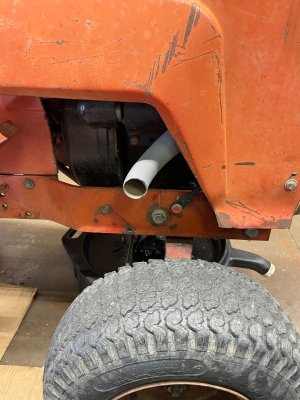
It clears the hood nicely.
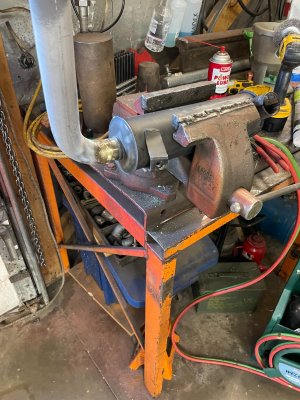
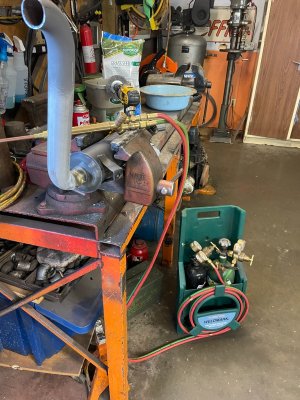
Took the muffler off the engine and put it in a vise. Cleaned everything up with a wire wheel on a drill and got out the little torch. I didn't feel confident enough to use the mig to weld it. Decided to braze instead.
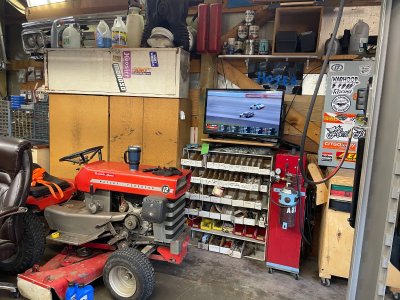
Was a good way to have a race on TV while actually being productive---LOL!
Let it cool, scuffed up everything and wiped it down with brake cleaner. Sprayed it with some high heat black and put it back on the tractor.
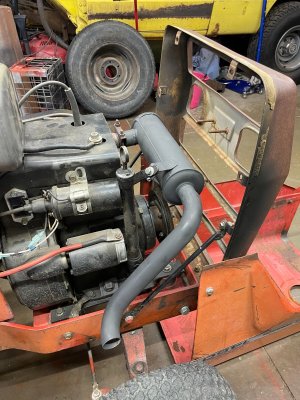
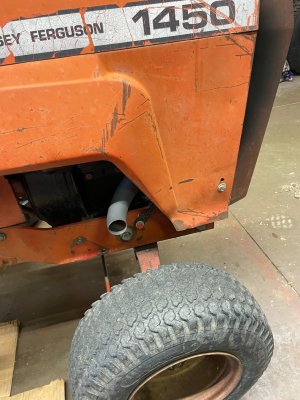
Severe thunderstorm warning was posted so had to call it quits. Put away tools and ran that tractor outside. It didn't even sound like the same tractor! Much quieter! Now I can hear the noise of the Kohler internals---LOL!
Swept the floor and brought Loree's car in.
DAC
Today I drained the engine oil and decided to alter the muffler so it doesn't discharge right to the inside of the hood. Let the oil drain while I worked on a idea I got in my sleep a few nights back---LOL!
Some of you may remember that the heat exchanger in the shop furnace developed a hole in it last December. Fortunately it was still under warranty so they sent a new one free.
Threw the old one out in the scrap pile. Thought maybe the tubing from it may be useful sometime. Measured the OD of the muffler discharge then took the calipers out back and measured the ID of the heat exchanger tube. By some stroke of luck it measured about the same!


Tested and it is very tight but still will go over the muffler discharge.

Finished the oil change and cut the end of the muffler off. Cut a piece of that heat exchanger tube about halfway between two bends. Did a little beveling on the muffler and cut a couple of slits in it to give a little movement to drive the extension on. Drove it on with a no bounce hammer.

It clears the hood nicely.

Took the muffler off the engine and put it in a vise. Cleaned everything up with a wire wheel on a drill and got out the little torch. I didn't feel confident enough to use the mig to weld it. Decided to braze instead.


Was a good way to have a race on TV while actually being productive---LOL!

Let it cool, scuffed up everything and wiped it down with brake cleaner. Sprayed it with some high heat black and put it back on the tractor.


Severe thunderstorm warning was posted so had to call it quits. Put away tools and ran that tractor outside. It didn't even sound like the same tractor! Much quieter! Now I can hear the noise of the Kohler internals---LOL!
Swept the floor and brought Loree's car in.
DAC
That's a nice tail pipe DAC looks OEM bet it did make for a nice soundI had forgotten about this thread. Decided to put some work I did on the MF1450 today here. The driveshaft issues have been resolved so I have a lot more confidence in this thing being useable for longer than I had thought.
Today I drained the engine oil and decided to alter the muffler so it doesn't discharge right to the inside of the hood. Let the oil drain while I worked on a idea I got in my sleep a few nights back---LOL!
Some of you may remember that the heat exchanger in the shop furnace developed a hole in it last December. Fortunately it was still under warranty so they sent a new one free.
Threw the old one out in the scrap pile. Thought maybe the tubing from it may be useful sometime. Measured the OD of the muffler discharge then took the calipers out back and measured the ID of the heat exchanger tube. By some stroke of luck it measured about the same!
View attachment 96683
View attachment 96684
Tested and it is very tight but still will go over the muffler discharge.
View attachment 96685
Finished the oil change and cut the end of the muffler off. Cut a piece of that heat exchanger tube about halfway between two bends. Did a little beveling on the muffler and cut a couple of slits in it to give a little movement to drive the extension on. Drove it on with a no bounce hammer.
View attachment 96686
It clears the hood nicely.
View attachment 96687
Took the muffler off the engine and put it in a vise. Cleaned everything up with a wire wheel on a drill and got out the little torch. I didn't feel confident enough to use the mig to weld it. Decided to braze instead.
View attachment 96688
View attachment 96689
Was a good way to have a race on TV while actually being productive---LOL!
View attachment 96690
Let it cool, scuffed up everything and wiped it down with brake cleaner. Sprayed it with some high heat black and put it back on the tractor.
View attachment 96691
View attachment 96692
Severe thunderstorm warning was posted so had to call it quits. Put away tools and ran that tractor outside. It didn't even sound like the same tractor! Much quieter! Now I can hear the noise of the Kohler internals---LOL!
Swept the floor and brought Loree's car in.
DAC
The exhaust passed through a hole in the front grill. This muffler isn't original. The OE had the exhaust pipe out of the front of muffler body.Yes it does look good Doug...imagine buying the one from the factory...!
Where did the original exhaust supposed to blow out ?
Not directly on the hood ?
Doug's way keeps exhaust out of your face better than factory.
Thanks Chris! I would be lost without my junk out back---LOL!That really turned out professional looking. Looks very good. What the heck would a guy do without an iron pile.
No way I could justify buying MF original parts for this beater Bill! I appreciate your comment! Daniel answered the question.Yes it does look good Doug...imagine buying the one from the factory...!
Where did the original exhaust supposed to blow out ?
Not directly on the hood ?
Thank You Gary, still pulling for you two to get home soon!That's a nice tail pipe DAC looks OEM bet it did make for a nice sound
This is what the muffler looked like when I brought this thing home over 4 years ago now.The exhaust passed through a hole in the front grill. This muffler isn't original. The OE had the exhaust pipe out of the front of muffler body.
Doug's way keeps exhaust out of your face better than factory.
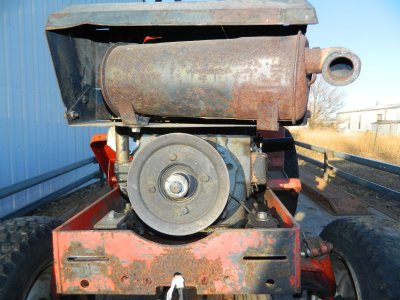
I don't think that was the original one either it was cobbled in and very loose attaching to the engine. Notice the nail stuck through that pipe elbow and what's left of the muffler discharge? That shroud was in bad shape too.
The new one I put on I THINK was some kind of Cub replacement muffler. Seems like it was around 30-35 bucks delivered.
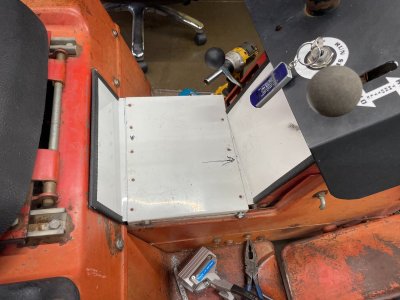
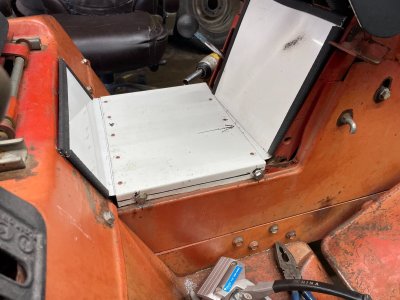
Today I built a crude tunnel cover. Used .040 aluminum since I can get scraps from the racecar guys. I have 1/8" aluminum plate but decided to go with the thinner stuff to make the job easier. Nothing is straight and square on this tractor, so it looks bad. I wanted it one piece though.
Didn't get many pics. Pop riveted together on the tractor. I cut some of that bead material to go around the front and rear sections.
Removed it from the tractor took off the bead and peeled the plastic off it.
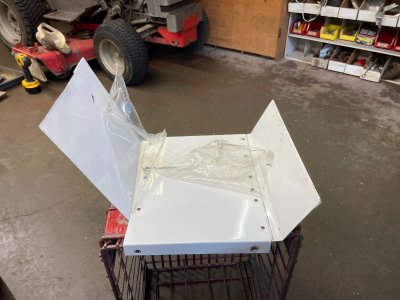
Scuffed with a scotchbrite and cleaned but the satin black paint job failed. Bad spray bomb. It was drippy and spraying smooth one second then rough the next. Hope to give it a quick sand job and start over with a better can of paint tomorrow afternoon.
No pics of that.
DAC
Thanks Chris! I would be lost without my junk out back---LOL!
No way I could justify buying MF original parts for this beater Bill! I appreciate your comment! Daniel answered the question.
Thank You Gary, still pulling for you two to get home soon!
This is what the muffler looked like when I brought this thing home over 4 years ago now.
View attachment 96711
I don't think that was the original one either it was cobbled in and very loose attaching to the engine. Notice the nail stuck through that pipe elbow and what's left of the muffler discharge? That shroud was in bad shape too.
The new one I put on I THINK was some kind of Cub replacement muffler. Seems like it was around 30-35 bucks delivered.
Today I built a crude tunnel cover. Used .040 aluminum since I can get scraps from the racecar guys. I have 1/8" aluminum plate but decided to go with the thinner stuff to make the job easier. Nothing is straight and square on this tractor, so it looks bad. I wanted it one piece though.
Didn't get many pics. Pop riveted together on the tractor. I cut some of that bead material to go around the front and rear sections.
View attachment 96713
View attachment 96714
Removed it from the tractor took off the bead and peeled the plastic off it.
View attachment 96716
Scuffed with a scotchbrite and cleaned but the satin black paint job failed. Bad spray bomb. It was drippy and spraying smooth one second then rough the next. Hope to give it a quick sand job and start over with a better can of paint tomorrow afternoon.
No pics of that.
DAC

