You are using an out of date browser. It may not display this or other websites correctly.
You should upgrade or use an alternative browser.
You should upgrade or use an alternative browser.
Ford model-T tractor converson
- Thread starter jdcrawler
- Start date
I've cleaned the gas tank out twice now but I'm still having a problem of sediment blocking up the hose going from the tank out to the fuel bowl.
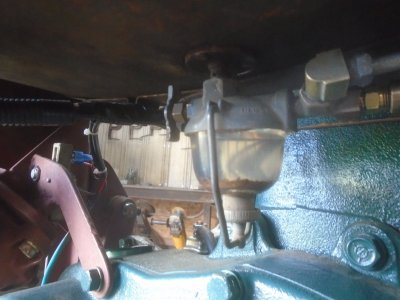
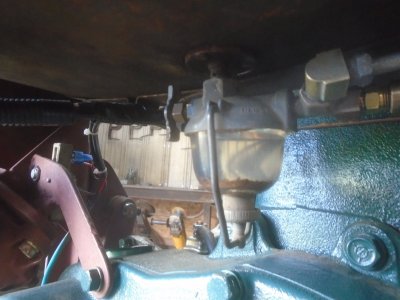
So I have removed the fuel bowl from out on the far right side and hooked it up directly under the tank and rerouted the lines going to the carb and the gas gauge.
The shutoff valve isn't anyway near as hard to reach as I thought it would be and it makes a much nicer looking instillation than having the rubber hoses going out to the fuel bowl.
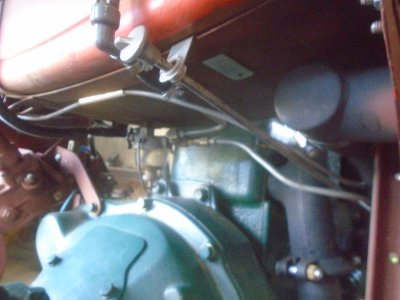
With everything put back together, I took it out for a test run and when I got back, this is how much sediment had collected in the fuel bowel. Eventually, all of this sediment will come out of the tank and at least now it isn't clogging up the line.
Here is a video of that test run.
So I have removed the fuel bowl from out on the far right side and hooked it up directly under the tank and rerouted the lines going to the carb and the gas gauge.
The shutoff valve isn't anyway near as hard to reach as I thought it would be and it makes a much nicer looking instillation than having the rubber hoses going out to the fuel bowl.

With everything put back together, I took it out for a test run and when I got back, this is how much sediment had collected in the fuel bowel. Eventually, all of this sediment will come out of the tank and at least now it isn't clogging up the line.

Here is a video of that test run.
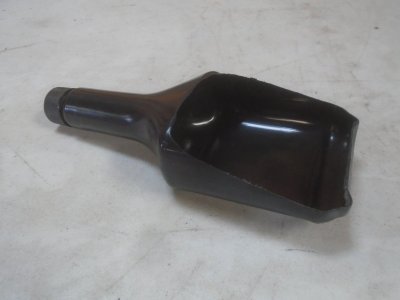
Having the fuel bowl mounted right under the gas tank presented me with another problem .. how to remove the glass bowl without spilling gas all over the bellhousing ? There isn't much room between the fuel bowl and the bellhousing.
I took a flat plastic bottle and cut part of it away.
This fits in easily under the fuel bowl and still leaves room to reach in and unscrew the bowl clamp.
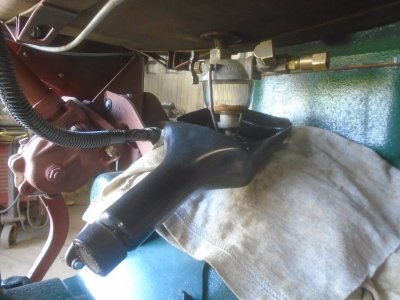
Then I can move the clamp out of the way and just drop the glass bowl into the bottle.
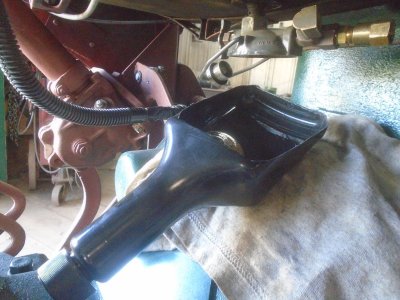
The gas runs down into the neck of the bottle so it doesn't spill out when the bottle is moved out from under the fuel bowl. The neck of the bottle makes a nice handle and makes it easy to move around without spilling any of the gas.
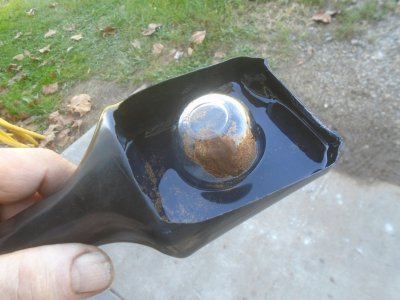
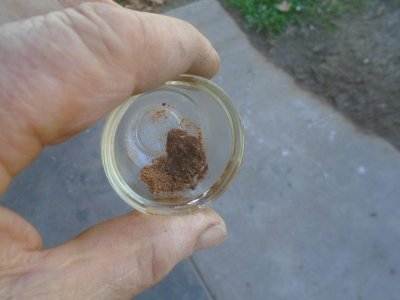
Taking a closer look at this sediment and it looks like sand. That makes sense because this tank came off an old portable compressor that would have been used out on construction sights where there is a lot of sand and dust flying around.
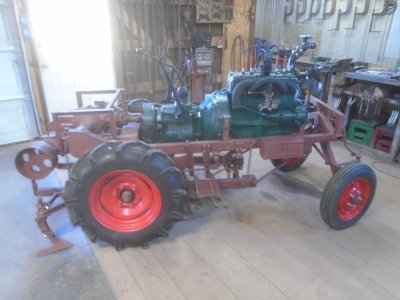
So .. with that little problem solved, it is time to take the tractor apart so it can be painted. I've gotten everything off and the engine is ready to be lifted off the frame.
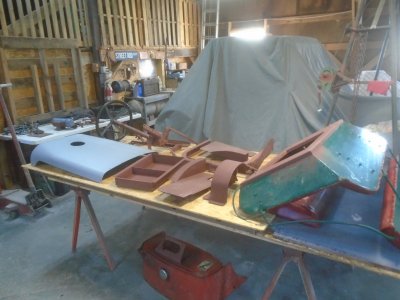
There are two tables of parts.
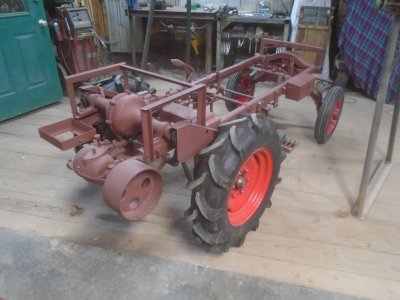
The engine and cultivator frame are removed and once the wheels are removed, the frame will be ready to start working on getting it ready to paint.
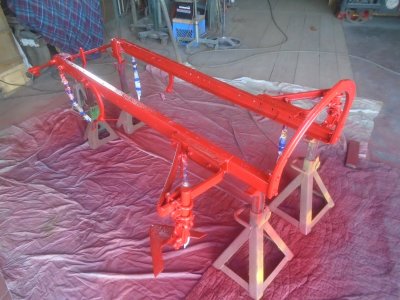
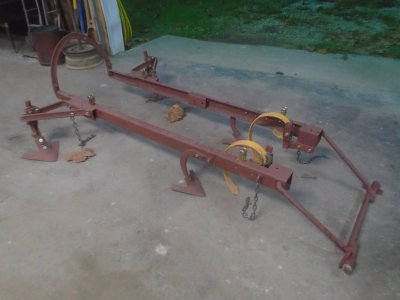
Here is the cultivator frame.

I took a flat plastic bottle and cut part of it away.

This fits in easily under the fuel bowl and still leaves room to reach in and unscrew the bowl clamp.

Then I can move the clamp out of the way and just drop the glass bowl into the bottle.

The gas runs down into the neck of the bottle so it doesn't spill out when the bottle is moved out from under the fuel bowl. The neck of the bottle makes a nice handle and makes it easy to move around without spilling any of the gas.

Taking a closer look at this sediment and it looks like sand. That makes sense because this tank came off an old portable compressor that would have been used out on construction sights where there is a lot of sand and dust flying around.

So .. with that little problem solved, it is time to take the tractor apart so it can be painted. I've gotten everything off and the engine is ready to be lifted off the frame.

There are two tables of parts.

The engine and cultivator frame are removed and once the wheels are removed, the frame will be ready to start working on getting it ready to paint.

Here is the cultivator frame.

I wasn't planning on taking any photos of the painting because you have all seen plenty of those from me.
Over the years I've gotten into the habit of categorizing the difficulty of the individual steps of building each project.
Then I try to tackle the most difficult ones first. My reason is that they are going to have to be done sooner or later and if I get them taken care of right away then the rest of the job goes much easier because I'm not thinking all the time that I still have to do that !%#&$@! job and worrying on how hard it's going to be.
I've also found that quite often ( but not always ) the !%#&$ job turns out to be not as hard as I thought it would be. Either way, it's done and I don't have to worry about it thru the rest of the project.
So .. with the painting, I tackled what I figured would be the hardest job first and that was painting the seat frame.
I painted it last evening and after I unmasked it today, I realize that I should have taken a photo of it all masked up.
Anyway .. here it is.
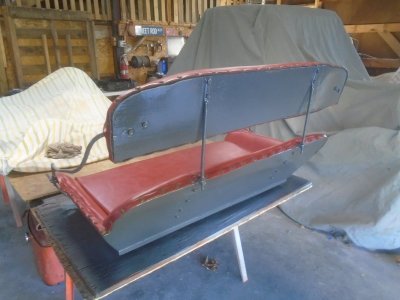
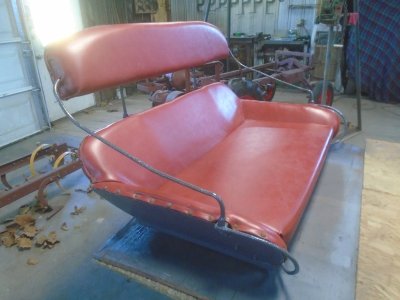
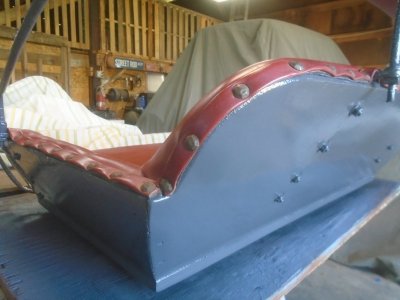
The reason I considered this to be the hardest thing to paint was because the upholstery had to be all taped off, going up and down over all the bumps between the upholstery tacks and fitting the tape around over the rolled edges.
It took me about two and a half hours just to tape it off.
Over the years I've gotten into the habit of categorizing the difficulty of the individual steps of building each project.
Then I try to tackle the most difficult ones first. My reason is that they are going to have to be done sooner or later and if I get them taken care of right away then the rest of the job goes much easier because I'm not thinking all the time that I still have to do that !%#&$@! job and worrying on how hard it's going to be.
I've also found that quite often ( but not always ) the !%#&$ job turns out to be not as hard as I thought it would be. Either way, it's done and I don't have to worry about it thru the rest of the project.
So .. with the painting, I tackled what I figured would be the hardest job first and that was painting the seat frame.
I painted it last evening and after I unmasked it today, I realize that I should have taken a photo of it all masked up.
Anyway .. here it is.


The reason I considered this to be the hardest thing to paint was because the upholstery had to be all taped off, going up and down over all the bumps between the upholstery tacks and fitting the tape around over the rolled edges.
It took me about two and a half hours just to tape it off.

Great work as always.
I have the rear of the frame lifted up to make it easier to paint the underside.
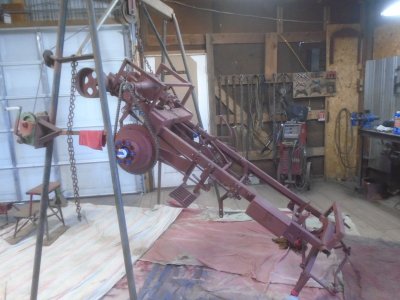
I know the lift cable is more than strong enough to hold this frame up but, just in case something would brake, I also hook a safety chain around the cross beam and the lift chain.
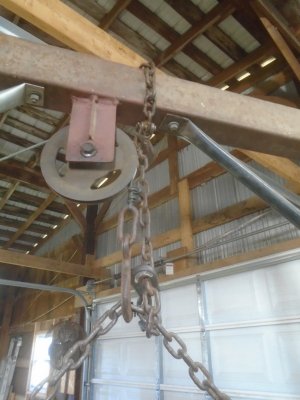
Once I get the insides of the rear wheels painted, then the frame can be lowered down onto stands and the lift chain can be removed to paint the underside of the frame in that area.
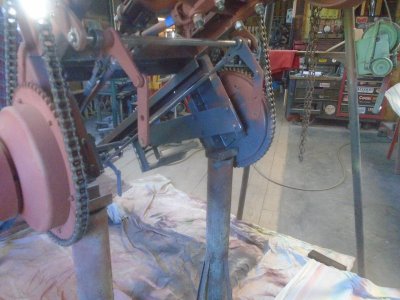
With everything on the underside painted from the rear angle, the front of the frame is lifted up and set on stands so the underside can be painted from the front angle.
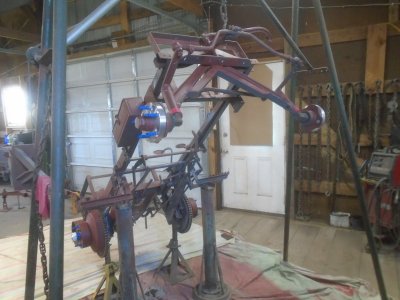
Then the frame is set down level and the rest of it is painted from the top.
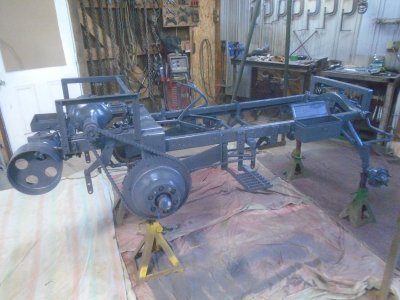

I know the lift cable is more than strong enough to hold this frame up but, just in case something would brake, I also hook a safety chain around the cross beam and the lift chain.

Once I get the insides of the rear wheels painted, then the frame can be lowered down onto stands and the lift chain can be removed to paint the underside of the frame in that area.

With everything on the underside painted from the rear angle, the front of the frame is lifted up and set on stands so the underside can be painted from the front angle.

Then the frame is set down level and the rest of it is painted from the top.

Looking good.
Looks like the old McCormick Deering colors.That is a nice color combo
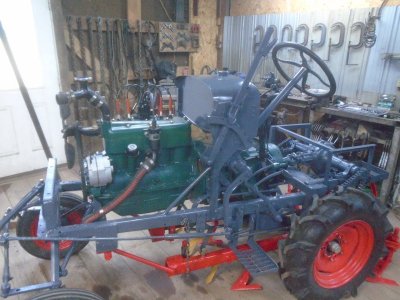
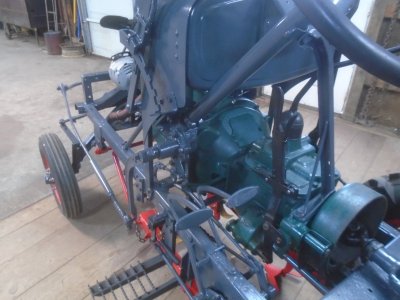
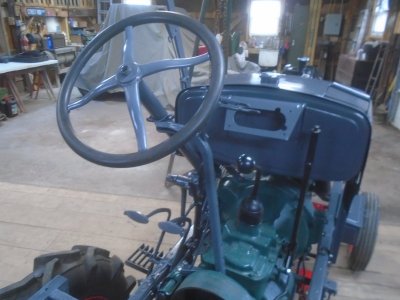
It got up to 55 degrees for a couple of hours today so I went out and did a little work on the tractor.
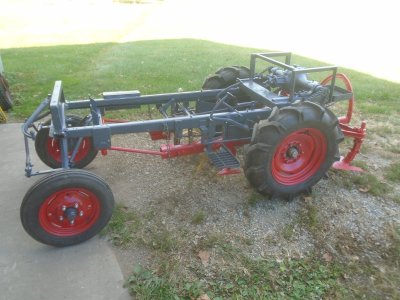
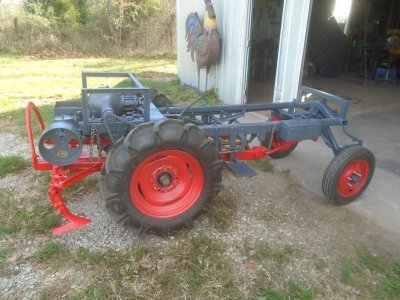
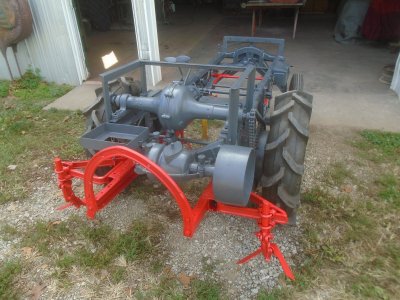
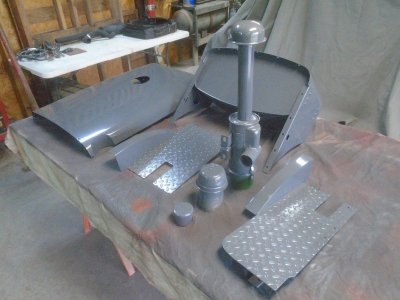
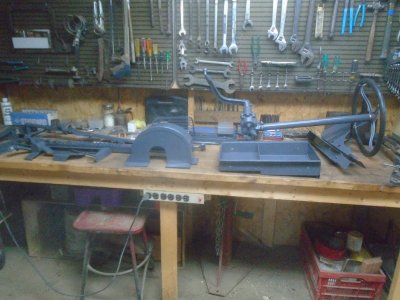
I had painted the rest of the parts back in November before the weather turned cold and here they are.
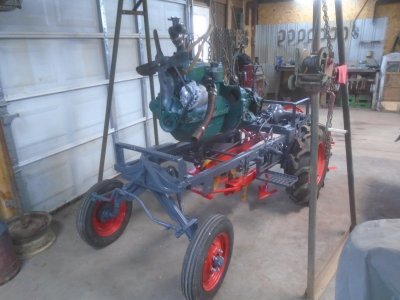
Getting ready to set the engine back down into the frame.
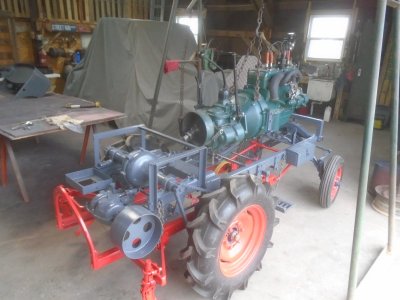
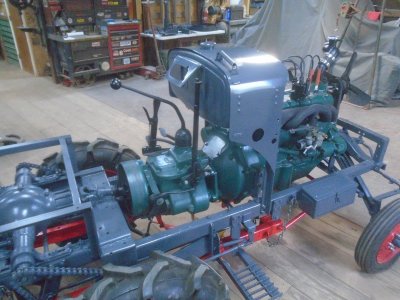
The engine is bolted back in place.
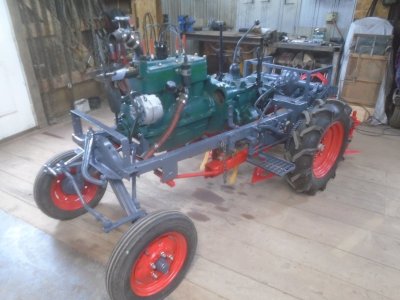
I got the gas tank mounted also before I quit for the day.
I had painted the rest of the parts back in November before the weather turned cold and here they are.


Getting ready to set the engine back down into the frame.


The engine is bolted back in place.

I got the gas tank mounted also before I quit for the day.

It will look better than probably did when it was converted.
Looking awesome.

