Your not going to have anything left over for a tip!Gained back $78.36. Now I am going to lunch.

You are using an out of date browser. It may not display this or other websites correctly.
You should upgrade or use an alternative browser.
You should upgrade or use an alternative browser.
Homemade with leftovers
- Thread starter CRF6179
- Start date
Haven’t done anything on this all week. The wife told me to stay out of the shop for a few days and let my arms heal.
Taking an aspirin daily let’s me bruise easily and slow to stop bleeding.
She suggested going to CVS and getting a couple of the compression arm sleeves and wear them when I am in the shop.
Might stop some of the nicks and scratches.
Taking an aspirin daily let’s me bruise easily and slow to stop bleeding.
She suggested going to CVS and getting a couple of the compression arm sleeves and wear them when I am in the shop.
Might stop some of the nicks and scratches.
Attachments

Been there still doing that.Haven’t done anything on this all week. The wife told me to stay out of the shop for a few days and let my arms heal.
Taking an aspirin daily let’s me bruise easily and slow to stop bleeding.
She suggested going to CVS and getting a couple of the compression arm sleeves and wear them when I am in the shop.
Might stop some of the nicks and scratches.

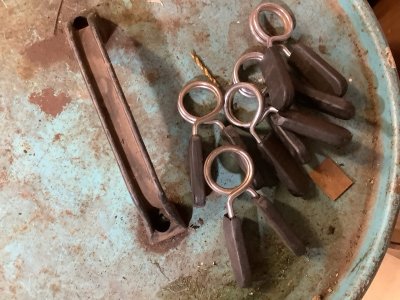
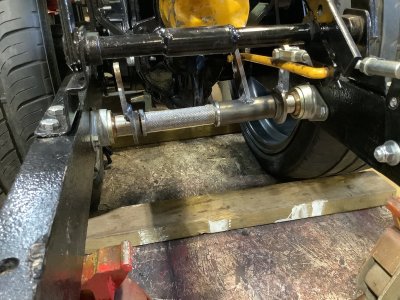
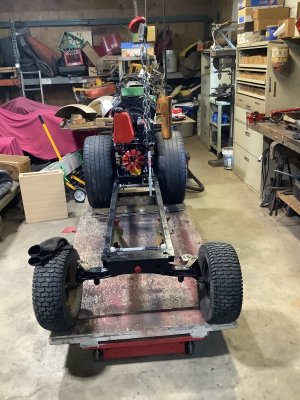
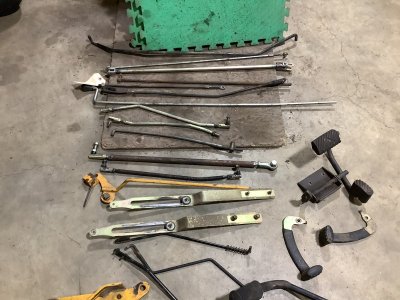
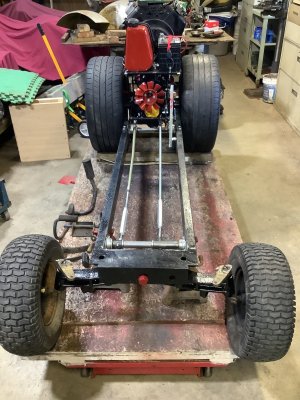
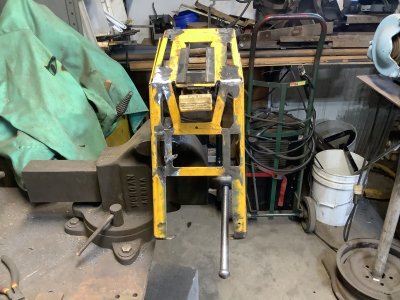
My main goal with this tractor is not to buy anything for it. I am trying to create whatever I need. In order to hook up the linkages for the brakes and the directional control I needed to come up with two cross shafts. Some time ago I picked up some barbell weights cheap. The two dumbbell handles kept saying me, me, me. They are1” in diameter and plenty long enough. Along with some leftover bearings I got the start on the linkages. Just don’t know what to do with the spring clamps now.
Attachments
-
 7969097C-2DAE-475D-AB3B-F285CC26FEA4.jpeg177.4 KB · Views: 8
 -
 F1B28095-C533-4167-A367-6907A92EF69A.jpeg214.8 KB · Views: 8
 -
 1CF0FFBF-ECCC-4467-8283-C987A17BD5B9.jpeg226.9 KB · Views: 8
 -
 FF25D373-7598-47C2-875B-AFE480900133.jpeg229.3 KB · Views: 8
 -
 688BEA4B-6F0E-4570-A1E0-195E0C548597.jpeg283 KB · Views: 8
 -
 82B147D9-3628-4178-B6CA-BA1A2A733C0E.jpeg298.7 KB · Views: 8

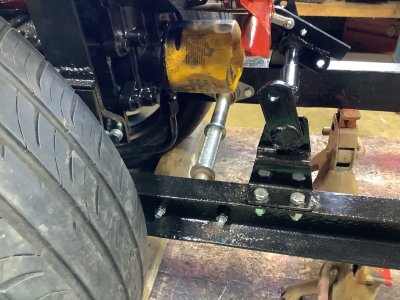
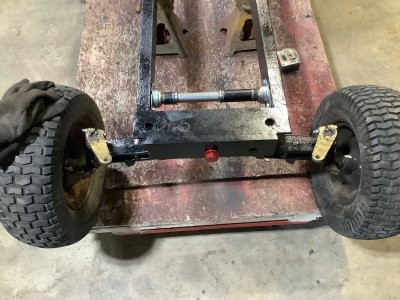
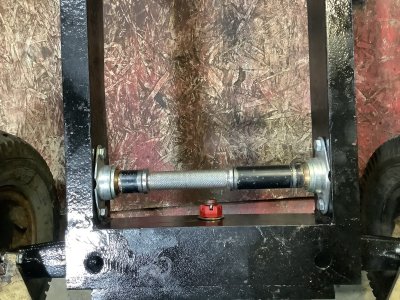
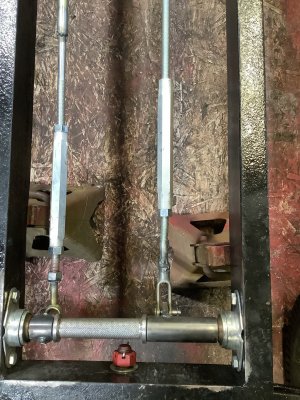
I managed to get some of the linkages figured out. The bracket on the left end in the picture will hook up to the directional/speed control pedal. The bracket at the other end hooks up to the linkage and bracket on the transaxle.
They will be welded to the shaft after the linkage from the brake pedal is configured. The bracket in the center is hooked up to the brake/return to neutral linkage. It is welded to a sleeve and spins on the cross shaft. The sleeve needs another bracket welded to it for the link from the brake pedal.
I need to figure out the positioning of a seat,pedals, front axle and steerin.
Attachments
-
 AE5BA38F-19A1-4B99-85D8-68777F611877.jpeg228.5 KB · Views: 13
 -
 F5B32A2D-B7F6-4907-92D3-7410135455BD.jpeg282.7 KB · Views: 11
 -
 CBE03322-CC7B-4E8C-9B97-891CC48EFEF4.jpeg219.4 KB · Views: 11
 -
 30167FAF-AF18-4803-BCF7-199DE9580A0C.jpeg274.6 KB · Views: 11
 -
 904BBF62-803E-40FA-8D74-20D4CFA4A50B.jpeg263.4 KB · Views: 11
 -
 FE4555D1-60D8-4617-8E58-CB754CAABC8E.jpeg319.5 KB · Views: 10
Give them to the wife for Christmas. When she asks what they are for tell her you don't know she's the one that asked for them. That should be good for an evenings conversation.Just don’t know what to do with the spring clamps now.
I have a new one waiting til the fab work is done.Looks like you better buy an oil filter though---LOL! Nice work Rick!
DAC
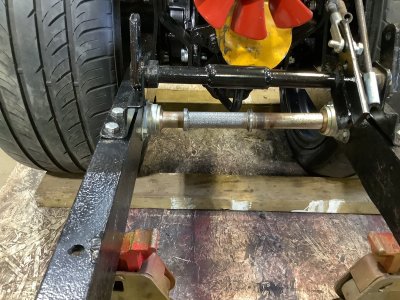
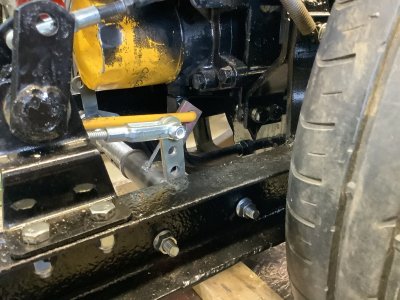
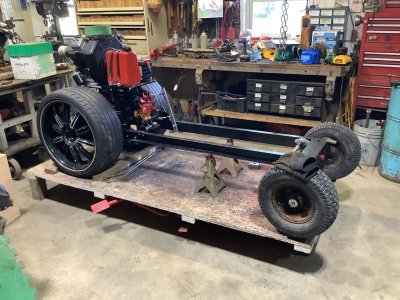
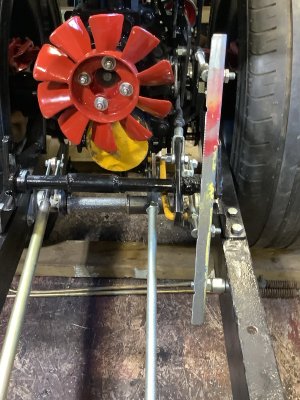
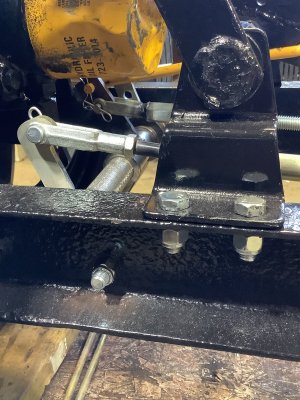
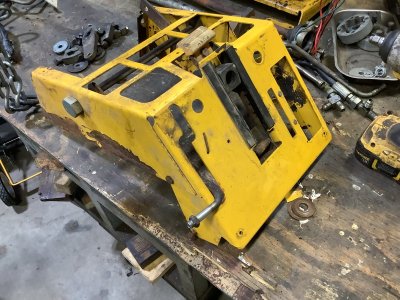
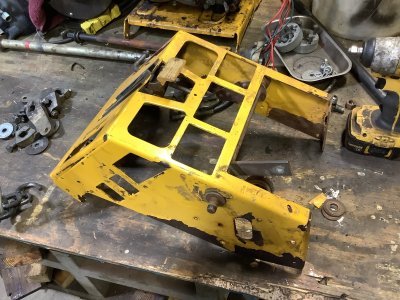
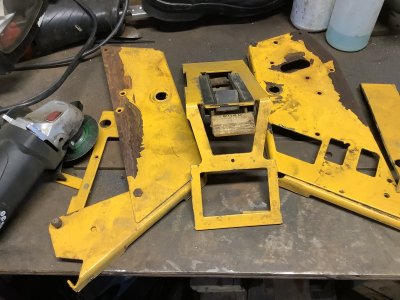
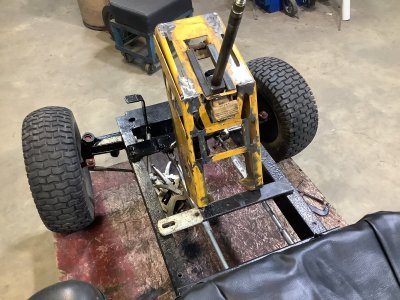
Got a little done over the past few days. Made the mount for the front axle. It took some cutting, milling, drilling and welding.
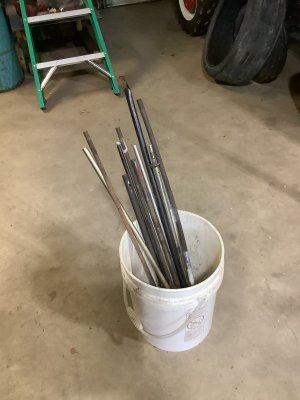
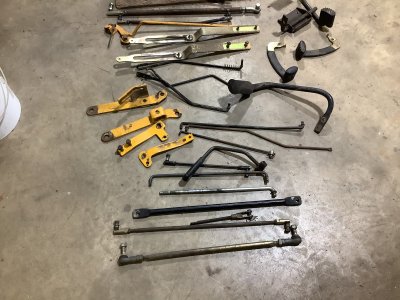
Then after I tried the test fit it took some cursing, grinding, cursing, then painting. While the paint dried I mounted the cross shaft for the brake and directional control pedals. I will need to configure the positioning for the pedals and their linkage to the rear cross shaft. I drug out all the pedals and linkage out of the corner along with some rods and tubing. Somehow it will fit.
Then after I tried the test fit it took some cursing, grinding, cursing, then painting. While the paint dried I mounted the cross shaft for the brake and directional control pedals. I will need to configure the positioning for the pedals and their linkage to the rear cross shaft. I drug out all the pedals and linkage out of the corner along with some rods and tubing. Somehow it will fit.
Attachments
-
 D55BC215-9F31-4A9A-859E-C3C4A0F41DE2.jpeg381.6 KB · Views: 15
 -
 1D531B7B-EE9D-432E-B566-CC17051C4CFF.jpeg408.1 KB · Views: 15
 -
 25E57592-DC38-41AB-A73C-43A85E433087.jpeg258.4 KB · Views: 14
 -
 19056232-6AFD-4177-B181-4B6CEF4201C0.jpeg256.5 KB · Views: 13
 -
 E5537A93-28E4-49CA-933D-F91EEA4E8A0B.jpeg361.7 KB · Views: 12
 -
 15D493A7-E264-4BED-9761-FDE59AF62DFC.jpeg234.9 KB · Views: 12
 -
 AE9A3296-C1E2-4B84-BB1C-A5FFC6A70AA9.jpeg142.5 KB · Views: 16
 -
 519E827F-AF43-4F74-830B-DBEA18871F61.jpeg243.5 KB · Views: 16
 -
 C7618F24-70A0-4C90-8F10-2881A5F7A306.jpeg238.6 KB · Views: 18
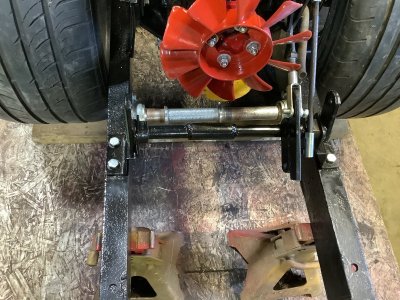
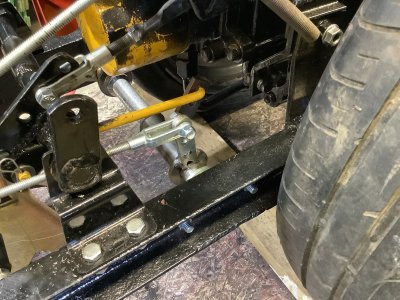
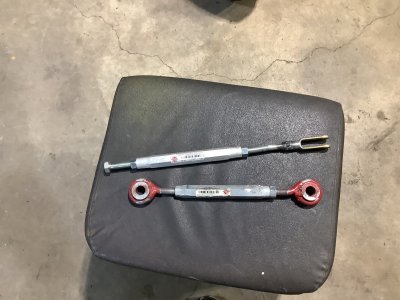
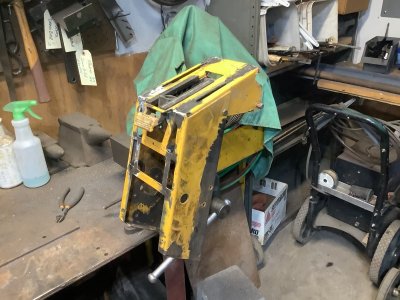
Managed to get the linkages from the front cross shaft hooked up to the rear cross shaft. I found two 1/2” turnbuckles and wanted to use them for the linkages .Broke my rule and actually bought a 3’ piece of 1/2” all thread. Used it on the brake pedal linkage. Made that so much simpler. Probably next thing is to locate the seat, which will help set the pedal position. This may be a little camped for me, but any body under 6 foot should be ok. The worst part of this build will be the power steering hook up.
Attachments
-
 BEB6D752-FAD2-4AE5-924E-CB3EB32E8D60.jpeg207.2 KB · Views: 10
 -
 1C00AD37-5475-427E-8F26-991DB0AB049B.jpeg249 KB · Views: 10
 -
 C21A5E55-A2E4-4744-B4BE-99239903634B.jpeg324.7 KB · Views: 9
 -
 AE783354-B874-45B7-A354-ADB0A640BA1F.jpeg241.2 KB · Views: 8
 -
 A598F921-98E0-4E50-94CE-76AB861EF4EC.jpeg276.8 KB · Views: 8
 -
 21EF2E0E-10DD-4F77-A21C-7E35515B61B5.jpeg256.7 KB · Views: 10
Last edited:
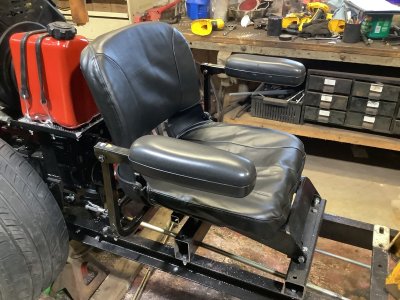
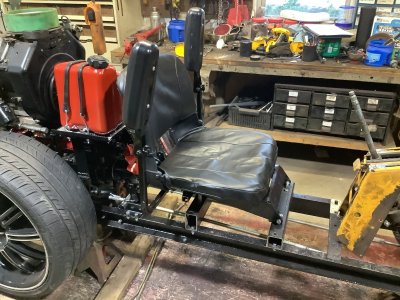
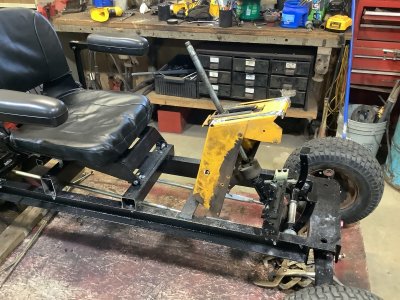
Work on this has been hit and miss. And I keep forgetting to take pictures. I have managed to position the steering valve and column. I installed a different seat. Trail95 gave me a seat from a mobility scooter. I ordered a replacement seat cover and installed it instead of the race car seat.
Attachments
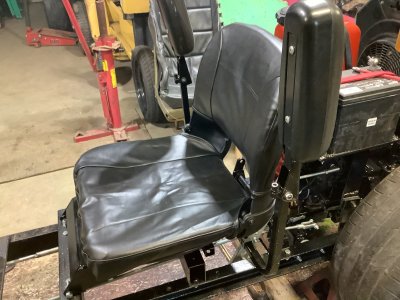
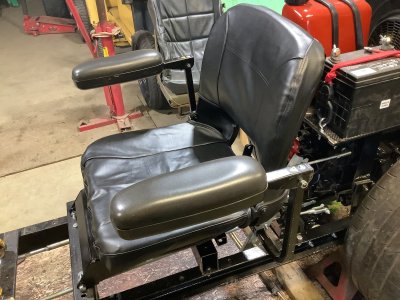
Looks like it could use a bit more foam to take the wrinkles out.Work on this has been hit and miss. And I keep forgetting to take pictures. I have managed to position the steering valve and column. I installed a different seat. Trail95 gave me a seat from a mobility scooter. I ordered a replacement seat cover and installed it instead of the race car seat.
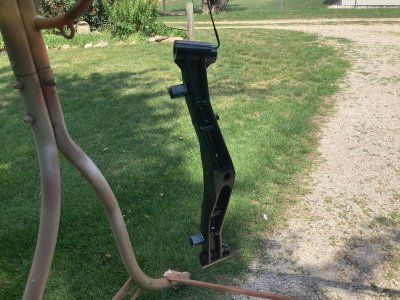
I want to keep the tilt feature for the steering column. I had kept the dash column from the Cub Cadet that donated the power steering. It was too wide for what I wanted. So I removed four inches from its width. It is now just sitting in the frame until I determine it’s best position. I need to scrounge a steering wheel before I nail it down.
Attachments
-
 BE6DC518-9629-4711-A05E-BE382FF9AAF8.jpeg273.2 KB · Views: 9
 -
 D5CB900A-92C9-4C35-A7D6-20EC0561AF82.jpeg273.7 KB · Views: 10
 -
 2C32233A-8CF1-410B-A797-FF5DA8CCAB68.jpeg205.7 KB · Views: 9
 -
 CEEB2726-1383-4ECE-8951-FEF44049825B.jpeg224.5 KB · Views: 9
 -
 013CDE56-9E8B-4E09-BDDC-C6F7C735FFB0.jpeg253.1 KB · Views: 9
 -
 C69A9BE7-A7EF-45D5-8000-054A01B8C2C5.jpeg206.6 KB · Views: 9
 -
 22E82121-CE89-4A9D-8AF2-806C639ECD1A.jpeg280.1 KB · Views: 10
I did have a bunch of steering wheels in the barn. I will check today to see if I still have them.I want to keep the tilt feature for the steering column. I had kept the dash column from the Cub Cadet that donated the power steering. It was too wide for what I wanted. So I removed four inches from its width. It is now just sitting in the frame until I determine it’s best position. I need to scrounge a steering wheel before I nail it down.
Daniel that's called retirement. The trick is to retire "before" your health keeps from doing what you want.Projects like this Rick makes me know one day I will stop doing so much repair work for others so I can do projects for myself,