Workin' on the Old Tractors

I had mentioned this next tractor in my thread on the farmall 230 about a week ago so I will repost it here to get everything in one place.

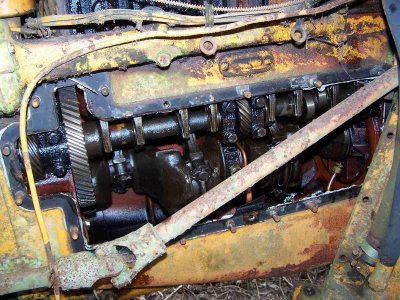
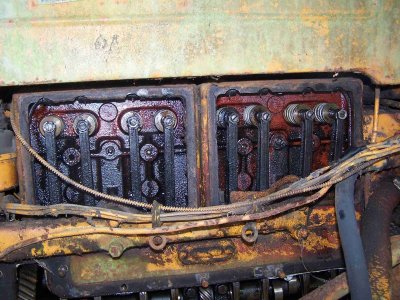
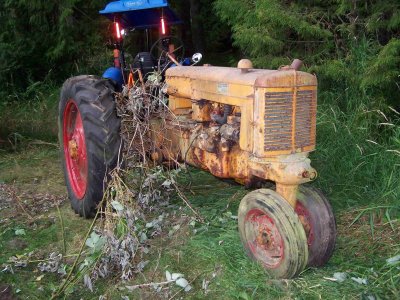
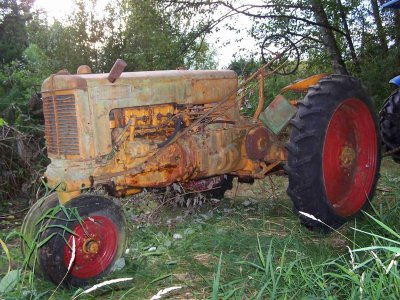
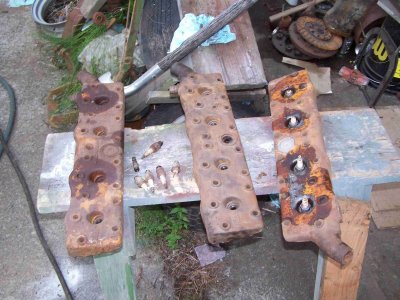
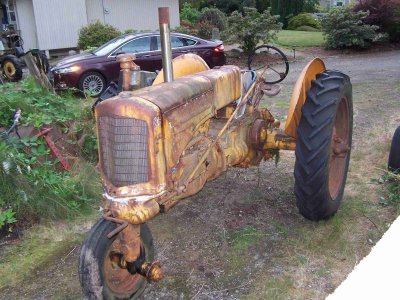
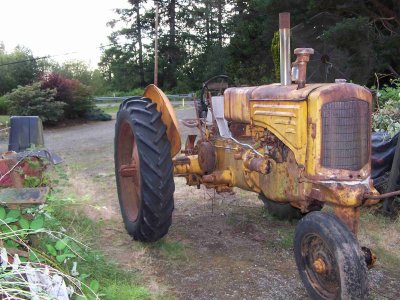
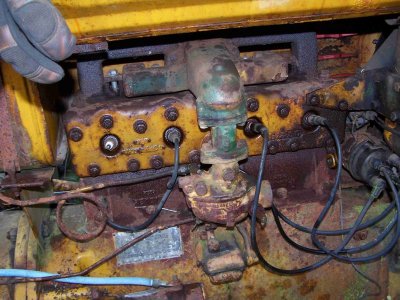
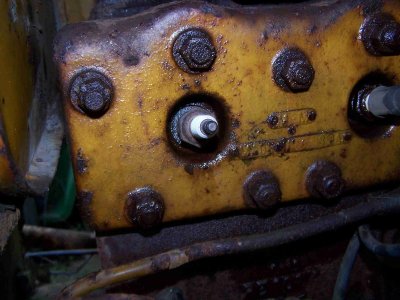
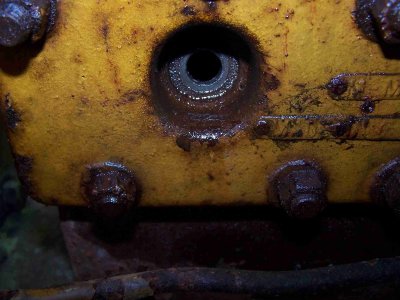
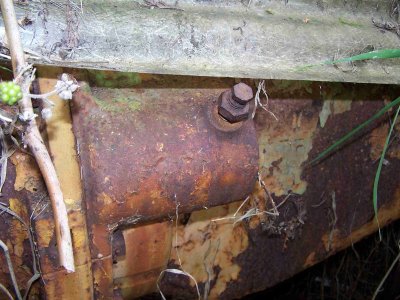
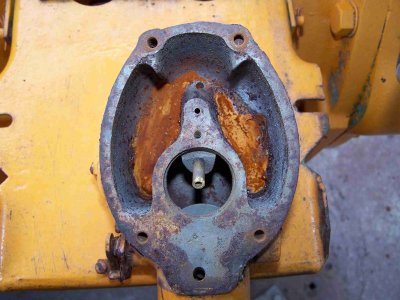
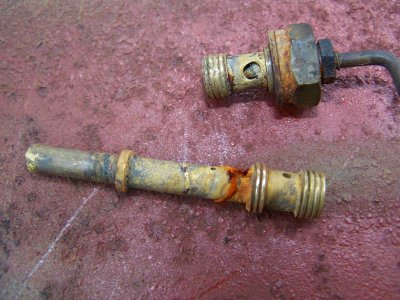
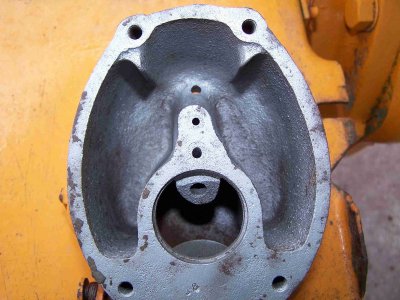
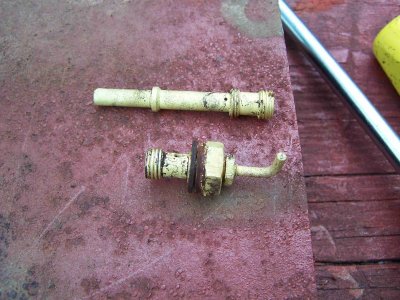
My brother stopped in again today(AUG. 11th) and we decided to open up the tractor with the stuck engine and see how bad it is. The tractor is a Minneapolis Moline ZA and they can be opened up pretty easily. Pulled the side cover off of the crankcase and things look pretty good. I used my bore scope to look up at the bottoms of each bore. Found 2 that have just a couple rust streaks. Then check the top of the bores thru the spark plug hole. Again just a couple of small surface rust areas around the top of a couple pistons. I think if I let it soak for a few weeks we might be able to bump it loose. It looks like this was caused from condensation. Here are a few pics.
 

Attachments

  • 100_6422-m.JPG
    100_6422-m.JPG
    352.4 KB · Views: 4
  • 100_6423-m.JPG
    100_6423-m.JPG
    342.1 KB · Views: 4
  • 100_6424-m.JPG
    100_6424-m.JPG
    357.9 KB · Views: 4
Today I got another wheel and tire to mount up in place of the blown out tire that is the reason this tractor has sat so long. Once it was on I pulled it out of the blackberries with the New Holland. With the ATF/Acetone mix sitting in the cylinders for a week I put it in gear and bumped it a couple times. The engine broke free with out much effort. A few exhaust valves are sticky and not getting much better so I will probably have to pull the head and remove the valves to clean the stems and guides. Not hard to do on these, just need to get some gaskets. I will take this as a win on this tractor.
 

Attachments

  • 100_6469-m.JPG
    100_6469-m.JPG
    399.2 KB · Views: 6
  • 100_6470-m.JPG
    100_6470-m.JPG
    342.9 KB · Views: 6
  • 100_6471-m.JPG
    100_6471-m.JPG
    340.2 KB · Views: 5
  • 100_6472-m.JPG
    100_6472-m.JPG
    312.7 KB · Views: 5
  • 100_6473-m.JPG
    100_6473-m.JPG
    309.6 KB · Views: 5
Now for some bad news(not that bad). Worked on the MM ZTU getting the ignition working. Figured before we try to get it to pop on starting fluid we would clean the plugs and squirt some oil in the cylinders. Plugs came out fine but the rear spark plug hole had some threads that didn't look to good. When we installed the plugs that bad one just stripped out completely. Not a big deal but the head needs to come off. We can heli-coil it or I have my choice of 3 spare heads to put back on. Just need another set of gaskets.
 

Attachments

  • 100_6464-m.JPG
    100_6464-m.JPG
    241.3 KB · Views: 9
  • 100_6474-m.JPG
    100_6474-m.JPG
    311.4 KB · Views: 7
  • 100_6475-m.JPG
    100_6475-m.JPG
    285.3 KB · Views: 7
  • 100_6476-m.JPG
    100_6476-m.JPG
    263.1 KB · Views: 7
  • 100_6477-m.JPG
    100_6477-m.JPG
    205.9 KB · Views: 7
  • 100_6480-m.JPG
    100_6480-m.JPG
    199.7 KB · Views: 9
I was watching a couple of videos on the tube the other day, a machine shop was re-doing two complete sets of Moline cylinders. It was pretty neat seeing all the different things they had to do to actually work on those side valve engines.
Was that on "Jims Automotive Machine Shop, Inc". I watched those where he bored a set and sleeved a set of cylinders. We have several sets that need to be bored. We have a boring bar but need to get a different hone setup for doing blind holes.
 
I cleaned up the commutators on both the Moline and John Deere starters and put them back together. The moline got a new solenoid also. Had the moline together before I remembered to take pics. Need to make new gaskets to go under the starter commutator/brush covers. Both crumbled when I pulled the covers off.


Attachments

  • 100_6466-m.JPG
    100_6466-m.JPG
    212.4 KB · Views: 7
  • 100_6489-m.JPG
    100_6489-m.JPG
    172.7 KB · Views: 6
  • 100_6490-m.JPG
    100_6490-m.JPG
    219.1 KB · Views: 5
  • 100_6492-m.JPG
    100_6492-m.JPG
    168.6 KB · Views: 6
  • 100_6495-m.JPG
    100_6495-m.JPG
    150.2 KB · Views: 6
  • 100_6496-m.JPG
    100_6496-m.JPG
    158.3 KB · Views: 6
  • 100_6494-m.JPG
    100_6494-m.JPG
    178.1 KB · Views: 6
  • 100_6497-m.JPG
    100_6497-m.JPG
    238.2 KB · Views: 7
Got the starter set back in the ZAU. The lock nut on the tapered mounting bolt was rusted and stuck. Heated it up and got about 1/4 turn in either direction. Tried more heat but the end of the tapered bolt broke off. It appears that it was repaired at one time by boring out a nut and welding it on top of the tapered bolt. I may try to repair this one or check through the spare parts for another one. Need to pull the carb off and clean if necessary. If all goes well I may try to start it tomorrow.
 

Attachments

  • 100_6498-m.JPG
    100_6498-m.JPG
    153.4 KB · Views: 3
  • 100_6499-m.JPG
    100_6499-m.JPG
    147.6 KB · Views: 3
  • 100_6500-m.JPG
    100_6500-m.JPG
    177.8 KB · Views: 3
  • 100_6501-m.JPG
    100_6501-m.JPG
    166.6 KB · Views: 3
  • 100_6502-m.JPG
    100_6502-m.JPG
    124 KB · Views: 3
  • 100_6503-m.JPG
    100_6503-m.JPG
    140.4 KB · Views: 3
Got the starter set back in the ZAU. The lock nut on the tapered mounting bolt was rusted and stuck. Heated it up and got about 1/4 turn in either direction. Tried more heat but the end of the tapered bolt broke off. It appears that it was repaired at one time by boring out a nut and welding it on top of the tapered bolt. I may try to repair this one or check through the spare parts for another one. Need to pull the carb off and clean if necessary. If all goes well I may try to start it tomorrow.
I think some models of Allis and John Deere (like the LA) used that tapered bolt
 
Are you thinking grease it up good and then tap it?
I was thinking of adapting a small hose to your shop vac and sticking it into the cylinder through the spark plug hole after inserting the Heli-coil. This is a low rpm engine with loose tolerances so I wouldn't worry so much about those little chips hurting anything. If it was something like a car engine than I would pull the head. I've had air cleaner screws get stuck in the head of the pistons and they didn't hurt the cylinders, heads or valves at all. Banged up the head of the piston a little but they run fine after removing the screw.
I would have the piston all the way down so the hose can reach around the piston head.
I can understand taking the head off but if you have a bore scope I'd try the vacuum first.
 
Talked it over with my brother and since I have gaskets coming and a choice of spare heads we will just swap it out. Then we can repair the other head when or if we need to. I found another tapered bolt in one of the parts tractors. Had to dig it out of the blackberries. The nut was stuck on it also but with heat it came apart without galling. I'll get it cleaned, primed, and installed.
 

Attachments

  • 100_6504-m.JPG
    100_6504-m.JPG
    263.3 KB · Views: 2
  • 100_6505-m.JPG
    100_6505-m.JPG
    455.2 KB · Views: 2
  • 100_6506-m.JPG
    100_6506-m.JPG
    262.4 KB · Views: 2
  • 100_6507-m.JPG
    100_6507-m.JPG
    256.4 KB · Views: 2
Pulled the crab bowl off. Had some rust in the bottom but not bad. Bead blasted the bowl and ran the jets thru the sonic cleaner.
 

Attachments

  • 000_0211-m.JPG
    000_0211-m.JPG
    207.1 KB · Views: 4
  • 000_0213-m.JPG
    000_0213-m.JPG
    275.5 KB · Views: 4
  • 000_0214-m.JPG
    000_0214-m.JPG
    231.8 KB · Views: 4
  • 000_0215-m.JPG
    000_0215-m.JPG
    266.4 KB · Views: 4
Congratulations on getting it running
Can’t tell much from the recording. How’s it sound to you?
Pretty much like it always has sounded. This had a lot of wear in the bores when we went through it. I think it had around .015 taper in the bores so it has a little piston noise. I'll take it for a short spin in the driveway tomorrow.
 
Back
Top