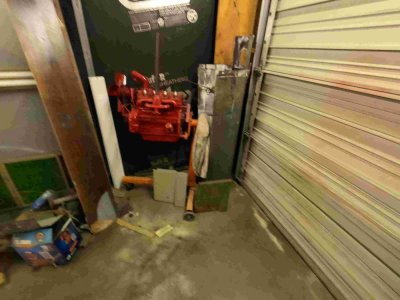
Sounds good Chris I got more than few hours/day on one of those, Dad went from a B Farmall to a Z like that in about 1950 what an upgrade in powerWe got it fired up today. Its running pretty good so I pulled the fuel tank off for cleaning. Spent a few hours adjusting the clutch and trying to get the governor working at low throttle. It works fine from mid throttle on up. The brakes were really dragging so I drove it some holding the brakes on to help clean the rust buildup off of them. Lots of bugs to work out but should be a good show tractor when we get done with it.

You are using an out of date browser. It may not display this or other websites correctly.
You should upgrade or use an alternative browser.
You should upgrade or use an alternative browser.
Workin' on the Old Tractors
- Thread starter cjet69
- Start date
I was glad to here it run again. May start working on the ZAN that had the stuck engine next. It has a couple sticky valves so it will be a similar job to this one with head removal so we can get at the valves. Gotta take advantage on these projects when my brother is around. He acts as the foreman and keeps things moving. Need to finish up my Farmall 230 so I can use the paint booth for the gas tank on the ZAU. The JD AO just needs the carb assembled and it should be ready to attempt a start up.Sounds good Chris I got more than few hours/day on one of those, Dad went from a B Farmall to a Z like that in about 1950 what an upgrade in power
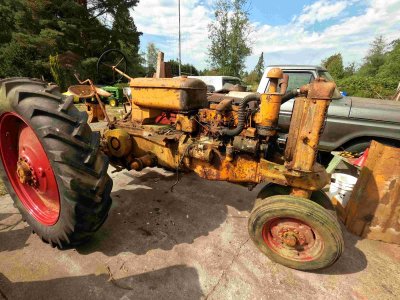
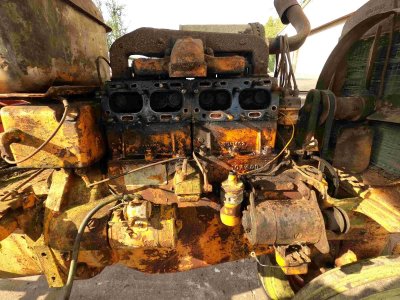
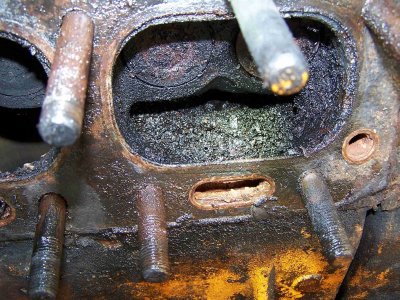
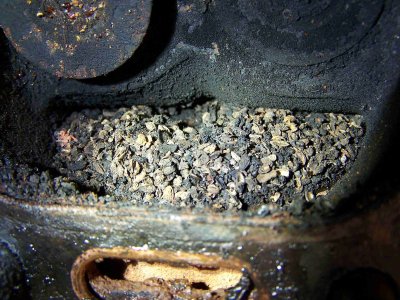
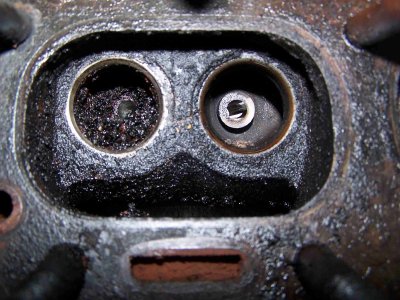
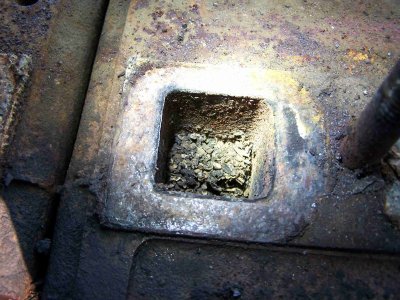
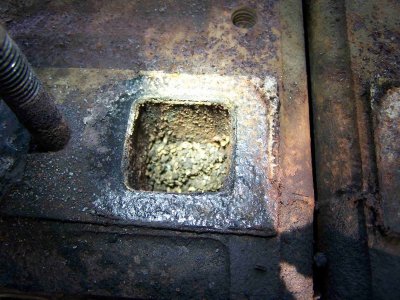
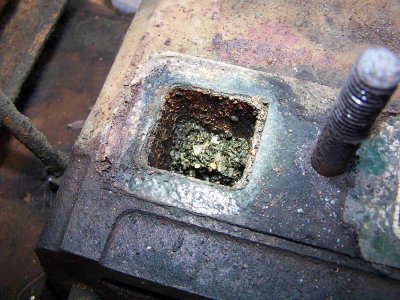
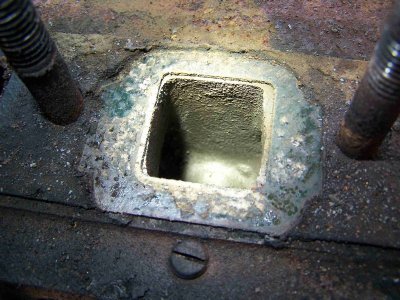
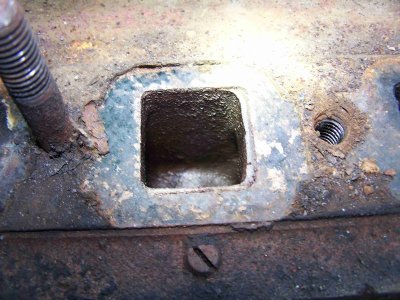
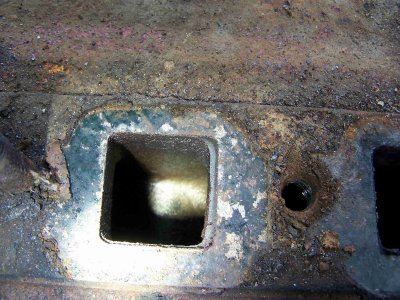
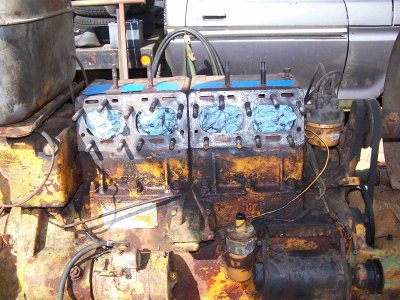
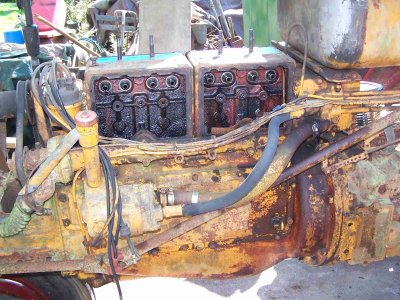
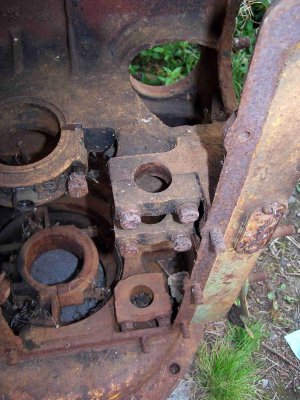
My brother helped me move the MM ZAN to the concrete pad in front of the shop. He had other stuff to do so I thought I would work at pulling the head. These are a pain in the backside because the gaskets really stick and they usually have rust buildup around the studs. This one was no exception. You can just barely get a screw driver or chisel at the corners to put some pressure on it. That wasn't working so I broke out the acetylene torch to warm it up enough to soften the head gaskets. A couple round of heat and I got the head moving and finally removed. Wow, this engine has a lot of carbon crud and not sure what else on top of the pistons and in the port of one valve that I removed. Need to finish removing valves and then see how far I want to go with it at this time.
Attachments
-
 GOPR4861-m.JPG316.7 KB · Views: 10
 -
 GOPR4862-m.JPG324.9 KB · Views: 9
 -
 GOPR4865-m.JPG325.9 KB · Views: 7
 -
 GOPR4866-m.JPG326.8 KB · Views: 7
 -
 100_6587-m.JPG414.9 KB · Views: 7
 -
 100_6588-m.JPG306.7 KB · Views: 7
 -
 100_6595-m.JPG318.6 KB · Views: 7
 -
 100_6599-m.JPG287.3 KB · Views: 7
 -
 100_6600-m.JPG271.8 KB · Views: 7
 -
 100_6601-m.JPG222.1 KB · Views: 9
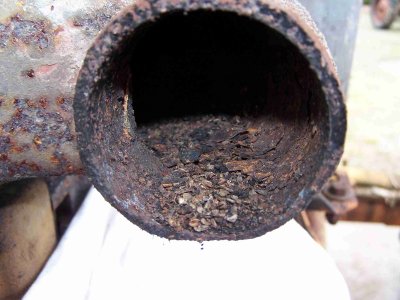
I don't remember it burning oil or smoking in any way when I was using it. This much loose debris on top of the pistons would blow out if it was fired up so I don't know whats caused it. I don't think any rodents could get into the exhaust but maybe I will pull the manifolds to make sure. Guess I could run my bore scope in for a look. I do know that when I ran it and got it warmed up good the oil pressure would drop. Might be the bearing clearances are too much or it could be wear in the oil pump.Was it running rich or burning oil?
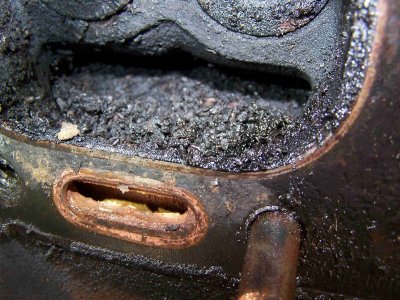
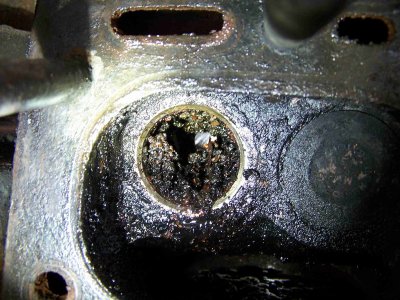
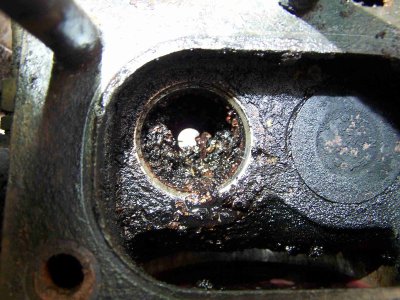
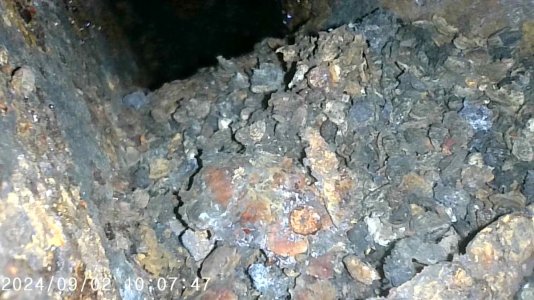
Pulled the muffler and found more of this crud laying in the exhaust. Used my borescope to take a pic inside just above where the manifold turns down into #4 cylinder exhaust port. Looks the same. Pulled the #4 intake valve and it is pretty clean.
Attachments
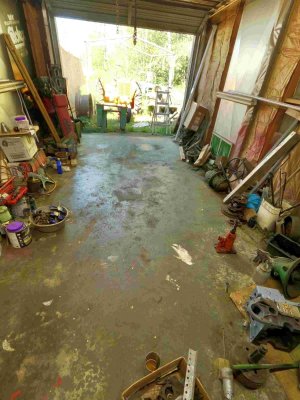
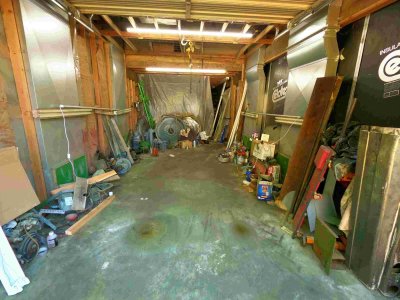
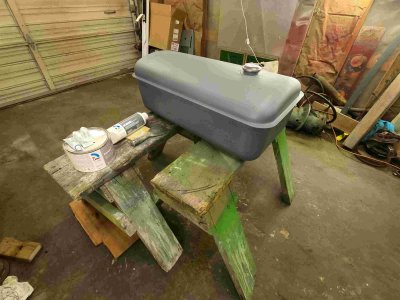
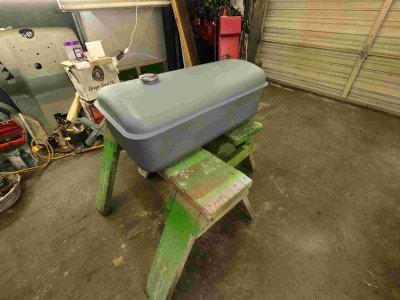
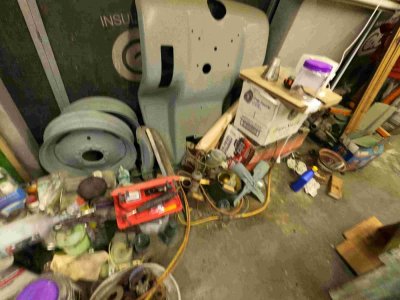
With the Farmall 230 out of my paint booth I was able to clean about half of the crud out of the center. Most of the remaining stuff is tractor parts for a couple JD L's, a Farmall H, Farmall cub engine, and some JD and MM wheels. Need to clear some area in the main part of the shop to move this stuff into. I set up the MM ZAU replacement fuel tank on some saw horses so I can fill in the rust pits and get it shot with High-Build primer.
Attachments

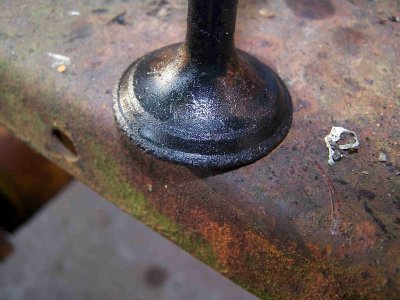
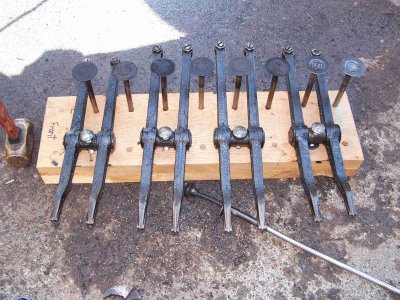
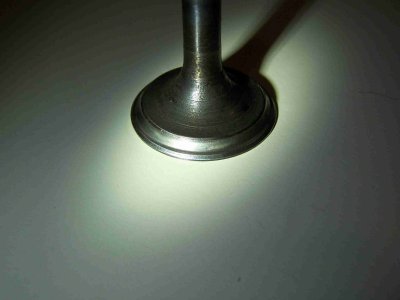
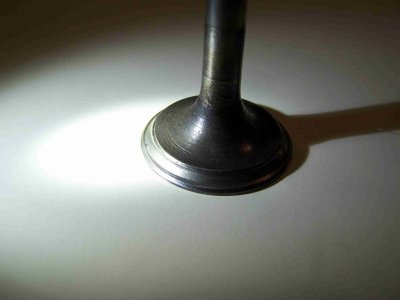
Removed the intake/exhaust manifold to vacuum all of the loose crud from the exhaust ports and tops of the pistons. Exhaust side of the manifold had a bunch in it also. All of the intakes look clean. Removed all of the valves which look pretty bad. I put one in the valve grinder and by the time the face cleaned up it had a nice sharp outer edge. May need to replace them but that would mean new guides and probably hardened seats installed. Not sure if I want to go that far at this time. If I do, I would look at doing the rings and bearings also. This is the problem with opening these things up, you always find stuff that needs fixing.
Attachments
-
 100_6604-m.JPG284.1 KB · Views: 9
 -
 100_6605-m.JPG288.9 KB · Views: 8
 -
 100_6606-m.JPG323.1 KB · Views: 6
 -
 100_6607-m.JPG276.6 KB · Views: 6
 -
 100_6608-m.JPG247.9 KB · Views: 6
 -
 100_6609-m.JPG329.4 KB · Views: 8
 -
 100_6611-m.JPG314 KB · Views: 8
 -
 100_6612-m.JPG330.3 KB · Views: 8
 -
 100_6613-m.JPG360.5 KB · Views: 9
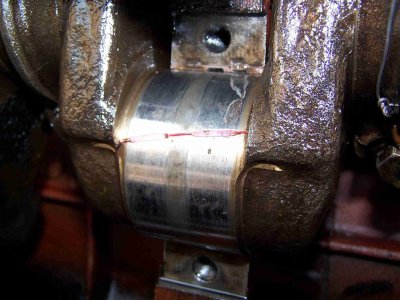
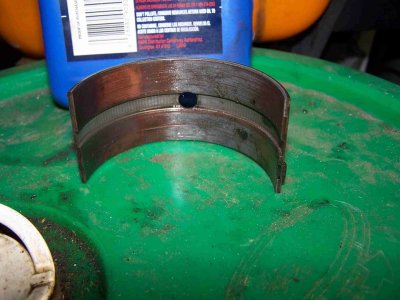
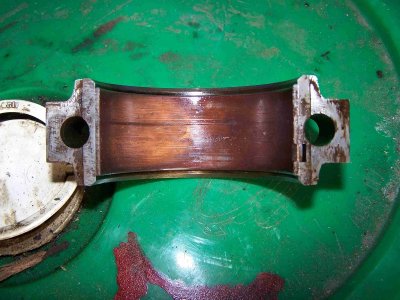
Spent the day looking at the main and rod bearings to see if we could find why this tractor would lose oil pressure when it was warmed up. Started by hooking up the preluber tank and found oil streaming out of the center main and around the rods. When we pulled the bearing caps we mostly found only copper left. Used some red plasti-gage that goes up to .006" and it was at or beyond max. Specs say .001 to .003 for rods and .0015 to .0035 for the mains. I think we found why the oil pressure was dropping. I have a set of std. rod bearings that I started installing and they brought the rod clearance back to .003" which is max. I found the #2 rod is probably out of round because with the new bearing in it the engine was hard to turn over and the new bearing was polished at the parting line. I do have more rods I can check through to see if I have a better one. I can't get to the rear main without pulling the engine but was able to put a better looking used center main in that got me to .004/.005 clearance which is better than the .006/.007. The crank rod journals have about .004/.005 wear in them so The crank should be ground. I have a couple extras in the shop so they need to be dug out and measured to see if one is usable as is. At this point I am mainly figure which way to go as far as get it good enough and run it or make it a longer term project and do it right. If I do the later I will need to find some money to spend on it. First 2 pics show how much wear in the valves there is.
Attachments
Yep, Just have to decide how far I want to go with it. Parts are getting hard to find but I hear Welters Farm Supply in Verona, MO. is the place to call.Yea shes got a bit of wear, but for light duty you may get by with what your doing for a while
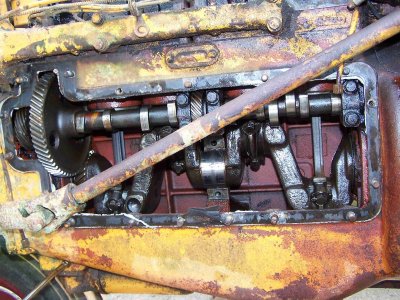
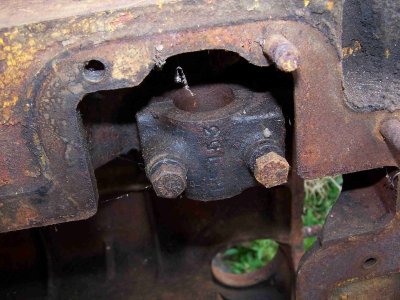
That brings up another odd thing in these engines. The cam runs in the block without a replaceable cam bearings. It has bolt in caps so you would have to take some material off of the caps and then line bore it.It wasn’t unusual back in the day when doing an on the farm overhaul to replace all the bearing inserts and skip the cam bearings. After one or two of those the oil pressure doesn’t stand a chance of being great.

Wow..don't know if I ever heard that..That brings up another odd thing in these engines. The cam runs in the block without a replaceable cam bearings. It has bolt in caps so you would have to take some material off of the caps and then line bore it.
Makes me wonder how many of the old timers would line bore those blocks..
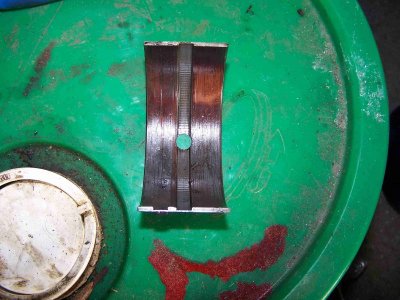
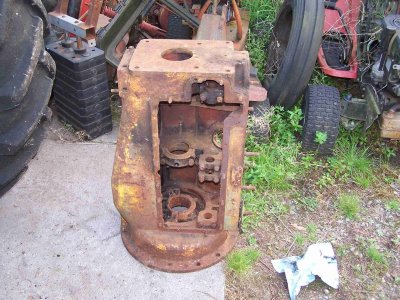
With all of the problems with this ZAN engine I have pretty much decided to pull it out to work on it. It will probably be a slow process where I will buy parts or get machining done as I can afford it. I cleaned up a couple of spare cranks to see how they measure up. Both had some rust on them when I tore down the engines they were in but not bad. One could probably be used as is though it is .001/.002 below minimum dia. on the rods and mains. The other looks like it would need to be ground to .020 under on the mains and .010 on the rods. I found a few places to get bearing but the are pricey. I will probably just get the crank ground. New valves and guides are available for around $175 or there are some chevy valves that will work for around $100/$120. Then I would get hardened seats put in. The unknown at this time is what shape the bores are in.
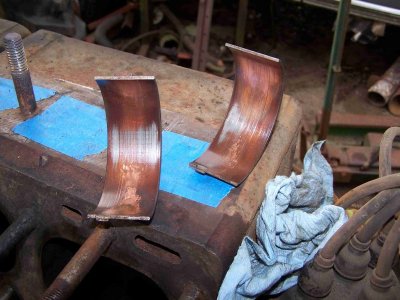
I have an old block that I dug out that I will bolt in so I have a rolling chassis. I took some pics of the caps that bolt the cam in. Not many engines that you can pull the camshaft out of the side. I need to get this out of the way and finish up some other things before winter sets in. Have a few more tractors to get running also.
I have an old block that I dug out that I will bolt in so I have a rolling chassis. I took some pics of the caps that bolt the cam in. Not many engines that you can pull the camshaft out of the side. I need to get this out of the way and finish up some other things before winter sets in. Have a few more tractors to get running also.
Attachments
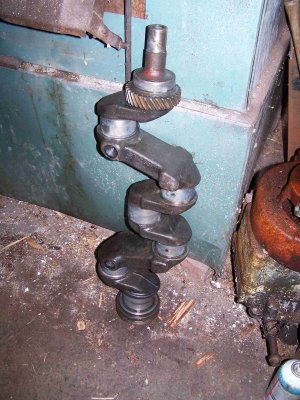
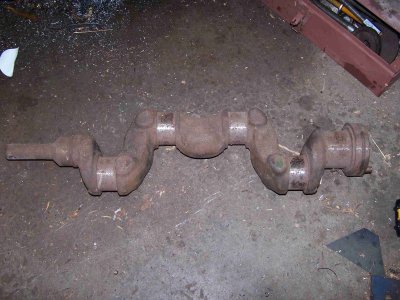
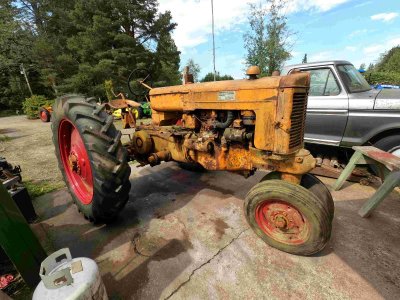
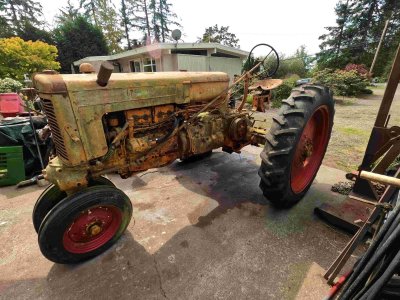
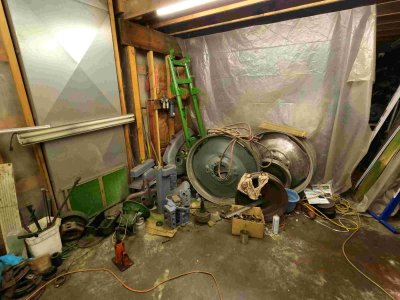
While I was digging out crankshafts I pulled out the one for our Minneapolis Moline RTU. I used to drive this around some years ago. Its torn down for an engine rebuild also. We got stalled out trying to find overbore pistons for it. I think Welters Farm Supply may have some that will work. The other option would be to sleeve it back to standard. Dug out some old pics when it was a runner and one after the engine was torn down.

-m.jpg")
-m.jpg")
I think I paid $600 for it. It wasn't running but I could turn it over with the hand crank and the PO said he had it running years earlier. I put a battery in it, cleaned the carb, and it fired up. It came with a extra set of rear tires that were old but looked good. A few years after I mounted them up I walked by the tractor and noticed a lean. The whole sidewall blew out of one rear tire. I now see the other side bulging with only 8 psi in it. Its going to need a set of rear tires when I get it going. I'm eyeing a used set at the local auction going on right now. The cost of restoring one of these tractors far exceeds what I would get out of it but I get enjoyment out of doing it.
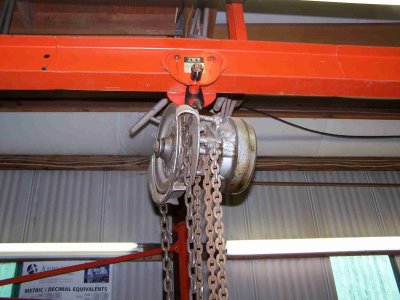
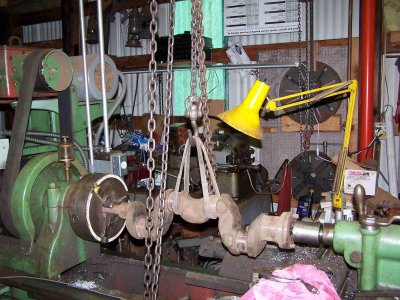
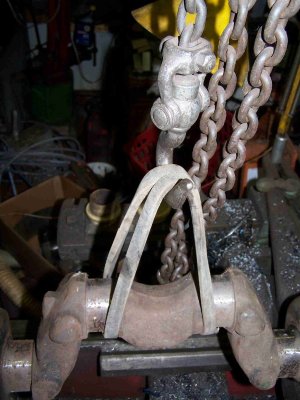
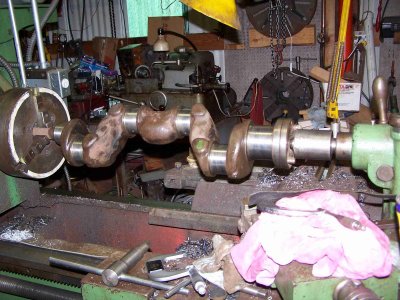
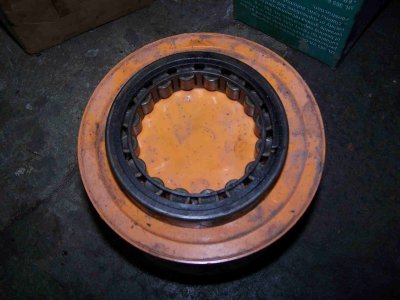
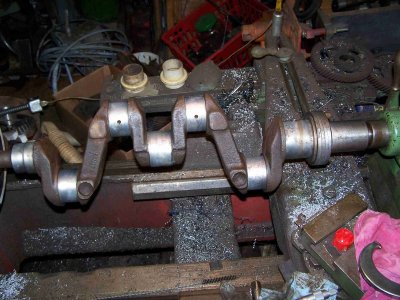
Swapped the ZA crank for the RTU crank on the lathe and cleaned up the journals a bit. We will see how it measures up and decide whether this should be ground or not. Decided to work smarter today and used the chain hoist above the lathe to swap cranks rather than the armstrong method. The roller bearing is what the R and ZA engines use for the front main. The ZA has a center and rear insert type main and the R only has the front roller and rear insert. Now the ZT has ball bearing front and rear main bearings with an oil collar in the center. R, ZA, and ZT engines use the same cylinder assemblies with the 3 5/8 bore. They have slight variations in the crankcase and different crank strokes. The R has 165 cu. , the ZT has 185 cu. , and the ZA has 206 cu.