Sears suburban 18/6 rebuild w/ Predator 420 swap

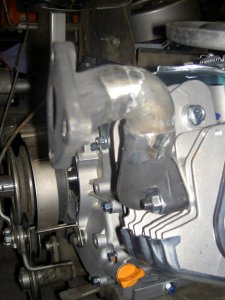
Pulled the stock muffler off the predator, removed the spark arrestor and then removed muffler from the "header". I ended up drilling a couple 1/4" holes or so straight into baffle then into outlet pipe maybe allowing a little more flow. Also port matched the header to muffler a little, I could see an exhaust ring where they didn't match up. May not help, but makes me feel like it does haha. It really didn't make it louder at idle or fixed rpm, but it is louder when quick revving and will pop a little, sounds kind of cool. I think I'm going to cut and just move the muffler once I get hood ready to go on.
@MFDAC may need some pointers on how you did yours.
Hopefully this will give enough extra flow to compensate for air filter and larger jet.

I also bought a new brass bushing for clutch idler, the pulley tilts sideways a little when engaged, hopefully this will line it back up.

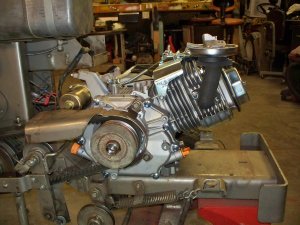
I think I took some pics of modifying the exhaust manifold if that is what you are referring to, Marty? I wanted mine quiet as possible so there was no substantial modification to the muffler, just the pipe and the grill surround notch.

I don't have time tonight, but sure will find what I can tomorrow night after work!

DAC
I remember seeing pics on GTT, I can go back if you don't have time to find any.
Whay type of pipe did you use to extend? I guess this is just steel? Grinds like it is.
 
I remember seeing pics on GTT, I can go back if you don't have time to find any.
Whay type of pipe did you use to extend? I guess this is just steel? Grinds like it is.

Hey Marty, it took me a bit to remember what I was seeing in the few pictures I took. Memory sucks sometimes. I did have a pretty lengthy post on GTT about doing this repower and there were several attempts and changes along the way.

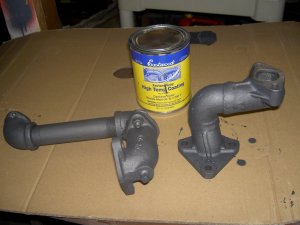
It looks like I cut the Honda clone exhaust , added a black pipe 90* elbow and welded it back together. Probably not "port matched" very well like you are trying to achive---LOL! Originally the muffler stuck straight up and I wanted it sticking out the side so I wouldn't have to chop up the hood. Here's a couple pictures.

Exhaust before being cut. Muffler removed.
Engine swap 004.jpg

This pic is after cutting welding and fitting. I oriented the muffler mount flange so the discharge points straight down.
Engine swap exhaust 005.jpg

I know that welding cast is more of a process than I did but it seems to be working for 3 years now.
Ignore the pipe on the left, I didn't use it.
Engine swap exhaust.jpg

Finished product
getting ready for snow 001.jpg

Hope this may help, Marty.

DAC
 
Hey Marty, it took me a bit to remember what I was seeing in the few pictures I took. Memory sucks sometimes. I did have a pretty lengthy post on GTT about doing this repower and there were several attempts and changes along the way.

It looks like I cut the Honda clone exhaust , added a black pipe 90* elbow and welded it back together. Probably not "port matched" very well like you are trying to achive---LOL! Originally the muffler stuck straight up and I wanted it sticking out the side so I wouldn't have to chop up the hood. Here's a couple pictures.

Exhaust before being cut. Muffler removed.
View attachment 21378

This pic is after cutting welding and fitting. I oriented the muffler mount flange so the discharge points straight down.
View attachment 21379

I know that welding cast is more of a process than I did but it seems to be working for 3 years now.
Ignore the pipe on the left, I didn't use it.
View attachment 21380

Finished product
View attachment 21381

Hope this may help, Marty.

DAC
Yep, that gives me ideas, thanks
 
Here I had to make a temporary belt guide, 3/8 bolt with an old socket LOL. I plan to fabricate a metal sleeve around the pulley.

View attachment 20061


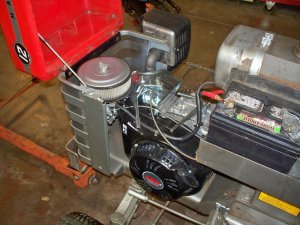
The PO gave me a foot pedal, decided to add it, wow what fun with will be. Now I can clutch and gas like a car LOL. I removed the spring washer from the stock 420 throttle setup and left bolt lose then hooked up cable, works great. There is a second location to hook up a cable, once I get dash on, I will had a cable so I can then set rpms where I want if I don't want to use pedal all the time. I will also add a battery and add another charge stator under flywheel as they only have 1.
I am going to add a momentary push button to kill it as for some reason my switch quit working. I can unplug the low oil sensor, connected that little box to a button/ground and kill it for now.

View attachment 20062
View attachment 20063
Sorry to necro post on this one but these tractors are getting rare

I have a ss12 with the tecumseh solid state and I just swapped to a predator (6 I believe) and I’m looking for ANY help on how to mount/fab/replace the “clutch” pulley

It was bolted to the top/side of the tecumseh so not sure if I should chop it up and try to make something??
Welcome.
Not sure about getting rare, Sears made almost 1.5 million of the suburbans from 1959 to 1980, I myself have 9 of them and a couple parts tractors.

My 16/6 has the clutch assembly mounted to the side of the tractor, but here is a couple videos that might give you some direction.


Finally been doing some more work on the hood for the purple Sears, I have a tractor show I want to take it to this weekend.

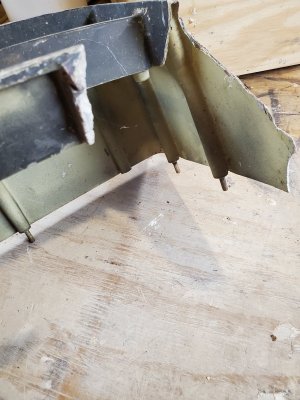
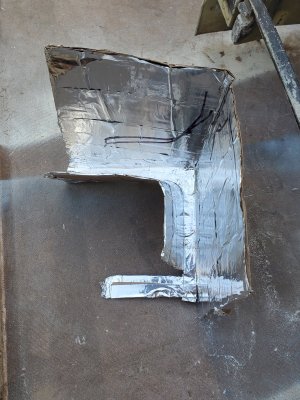
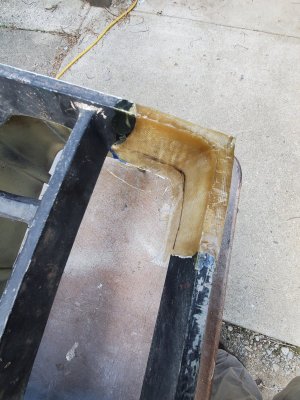
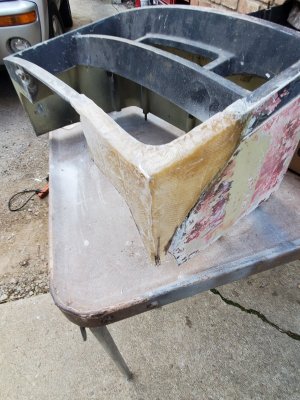
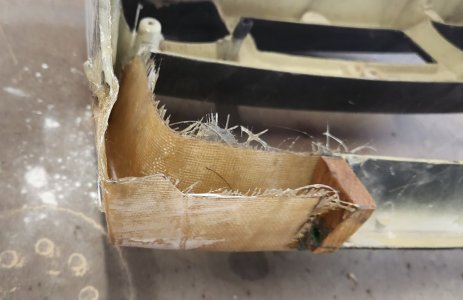
Here are the pics from where I started a few years ago. The corner was completely gone so I made a cardboard form lined with aluminum duct tape. I laid in a layer of fiberglass mesh/resin.

20220419_193712.jpg20220419_193723.jpg20220423_185920.jpg20220427_192616.jpg20220427_193930.jpg
 
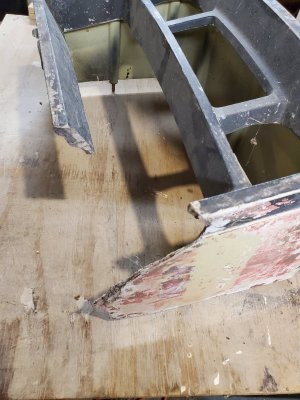
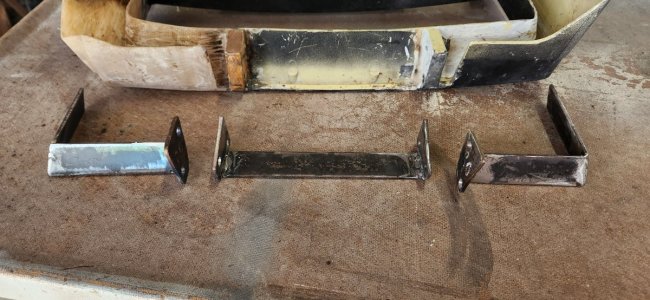
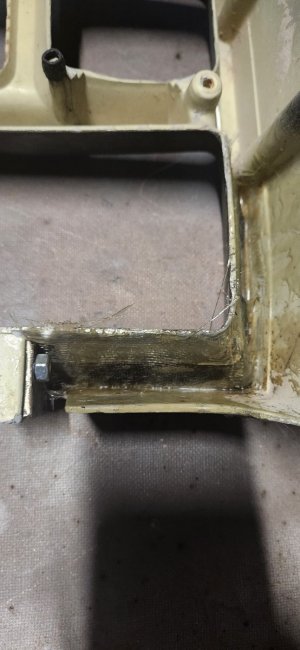
The Sears upper grills were made from.a fiberglass material and break at the hinges, the thinnest area that should be the strongest.
I decided to build a metal inner structure and then fiberglass them into the hood. I struggled with my crappy HF 90 flux core, but the welds will hold. I also laid in another layer of mesh before I installed the metal supports. 20251003_140811.jpg
20251004_162307.jpg

20251004_163451.jpg

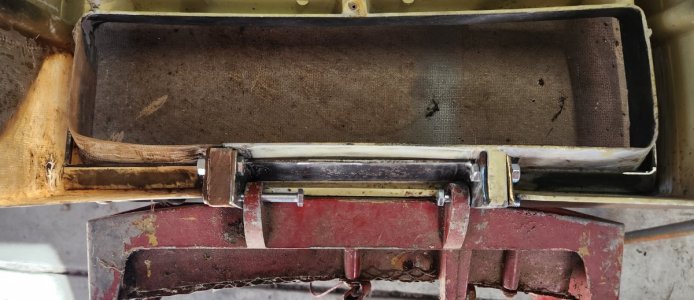
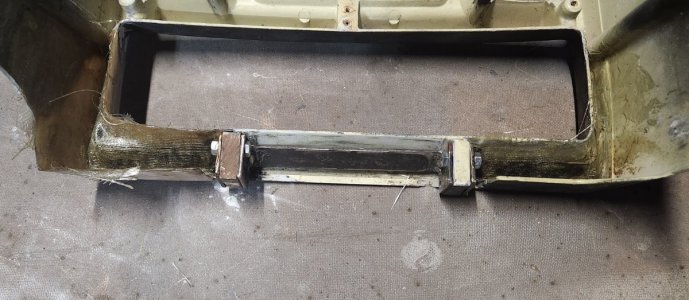
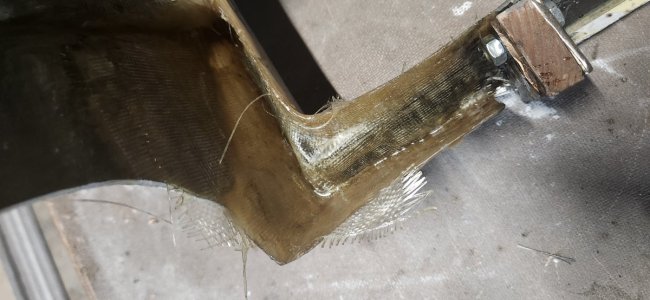
Once I bolted in the supports, I laid 2 layers of mesh/resin over the metal to hopefully bond to hood. I may go back and just pour some resin in the "trough" of the hood just to thicken that area.
20251005_190358.jpg
20251005_190408.jpg20251005_190414.jpg

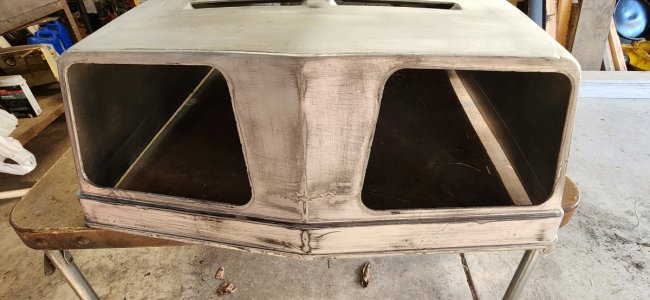
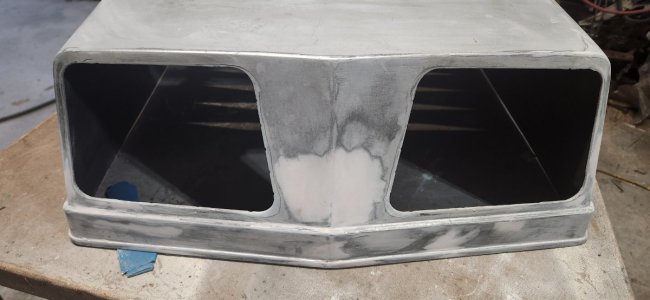
Next will be sanding and bondo work on the front.


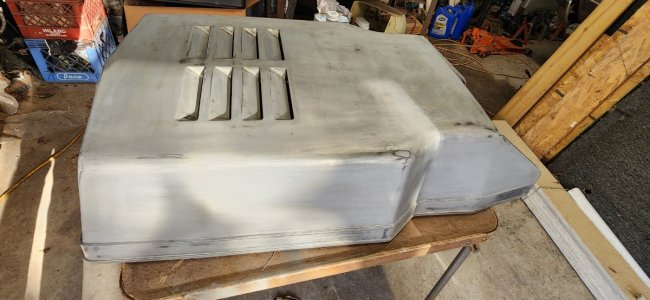
I also sanded and did some bonding work on my spare FF hood. I may take it to show if I can get it running.
20251004_174356.jpg20251004_174403.jpg20251005_190333.jpg
 
The Sears upper grills were made from.a fiberglass material and break at the hinges, the thinnest area that should be the strongest.
I decided to build a metal inner structure and then fiberglass them into the hood. I struggled with my crappy HF 90 flux core, but the welds will hold. I also laid in another layer of mesh before I installed the metal supports. View attachment 99199
View attachment 99200

View attachment 99201

Once I bolted in the supports, I laid 2 layers of mesh/resin over the metal to hopefully bond to hood. I may go back and just pour some resin in the "trough" of the hood just to thicken that area.
View attachment 99202
View attachment 99203View attachment 99204

Next will be sanding and bondo work on the front.


I also sanded and did some bonding work on my spare FF hood. I may take it to show if I can get it running.
View attachment 99205View attachment 99206View attachment 99207
I know where there is a Corvette you can start on.
 
Boat shop that rebuilds transoms understands all the physics of fiberglass, stress points, etc. and would be a super good place to have that kind of work done.
I bet they could, but I'm paying for my time and materials, not theirs.

I know where there is a Corvette you can start on.
Only if my name was on the title haha.
 
I bet they could, but I'm paying for my time and materials, not theirs.


Only if my name was on the title haha.
I was thinking the same thing, Marty! I bet a boat shop would charge a premium to work on tractor parts! I much as I hate fiberglass work, your end product is well worth it! Nice job!

There is a shop here in Rapid that specializes in Corvette body work. Maybe Rick wants to bring it here---LOL!

DAC
 
Back
Top