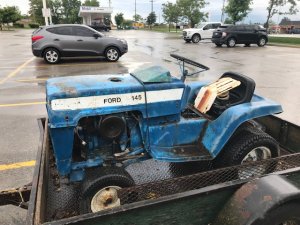
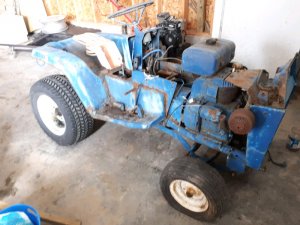
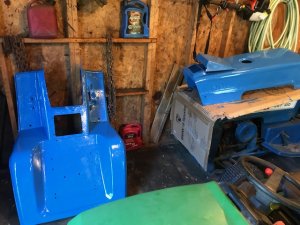
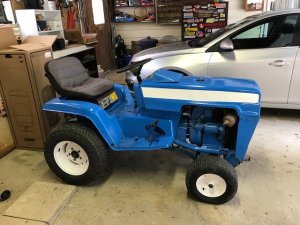
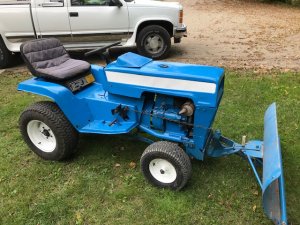
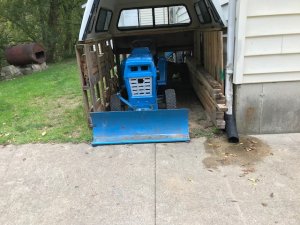
I picked up this tractor cheap a couple of weeks ago. Got it running and the seized brakes etc loosened up. It ran so good that I decided to make it look a bit better. The tin is pretty rusty with some holes through, so it just got a Rustoleum brush job. I think it's going to be my winter snow pusher this year. Got to get the blower put on one of my other Fords yet.

You are using an out of date browser. It may not display this or other websites correctly.
You should upgrade or use an alternative browser.
You should upgrade or use an alternative browser.
What are you currently working on??
- Thread starter backwoods
- Start date


I had that thrower ona 1512 Cub diesel last winter. Worked great as the diesel had plenty of power. Bought this tractor & thrower w/o an engine early last spring. Could not find a decent Kohler engine with 150 miles so decided to go with the Briggs Vanguard 16 hp. Took some work and modification but it is back to running again. I have 75 wheel weights for it and I may have to put them on.
Seems a few of us expecting a early winter. I installed snow tires on both our vehicles and moved a couple loads of firewood nearer the garage and fired up the walk behind snowblower.
I’m just waiting for a good dump of that white stuff, that will get a lot of people whining and crying about not getting crops in...
I’ve been ready since last winter, blade never came off Massey 14
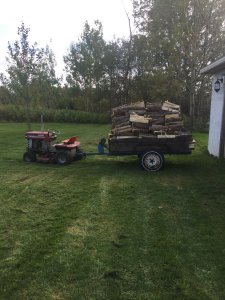
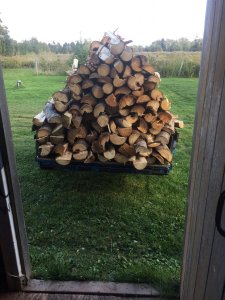
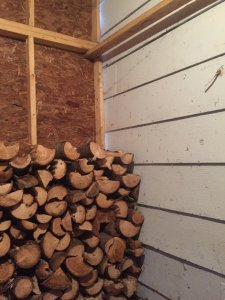
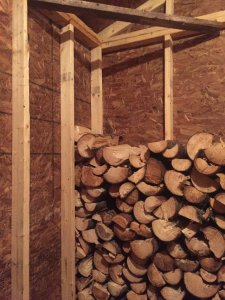
Well the MF 7 did its job with out any trouble. And never lost a stick. Stacked all the wood in shed. My back is sore.
Noel
Noel
Attachments

I’m just waiting for a good dump of that white stuff, that will get a lot of people whining and crying about not getting crops in...
I’ve been ready since last winter, blade never came off Massey 14
I'm whining and crying and not even a farmer---LOL!
Being ready don't mean you have to like it though! My MF8E is ready too except I think I'll put the wheel weights from the 12G on it.
DAC
Pretty much set for winter here, 316K has the cab and blower mounted year round, the 110 has the 43 blade on it, the 112 has the 37A blower mounted on it, and lastly the 420 has the extended 54 blade ready to hook up. The only thing left for me is to pickup the 47 snow blower mount for the 420. My uncle has his 300 ready with a 54 blade, his 112H has a 37A blower on it, his 214 has a older 42 blade mounted, and finally his WH GT14 just needs the blade put on the mount. Two years ago he was just down to his 214, this year he has all of his running and all but one of mine for backups. I keep my tractors at his place because he's got the room for them.
Your uncle must live nearby, @JDJake ? I would dig seeing a pic of your herd of Deeres!
I did have to work on the MF12G half way through mowing today, the Predator 13 HP fuel screen in the tank plugged up. Fortunately there was only half a tank or so. I was able to unbolt the tank and tip it sideways to pull the fuel line off. On those Honda style engines the screen is in the fuel line fitting on the tank and the fuel shutoff is on the carb!
The big project was fixing a rust area on my wife's 2006 GMC Denali. It was a weekend project. It didn't come out perfect but hopefully it will at least slow down any further deterioration. The morons at GM had put some spray foam in a spot behind the fuel filler and of course that acted like a sponge. There was only about a 1" slot through the taillight hole to work through carving that crap out of there, then I was able to get engine passage cleaning wire brushes in there after scraping it well with some 3/4" flat stock steel. Then I sprayed several coats of rust encapsulator on the backside. When that dried, a couple coats of undercoating was sprayed in the hole. I used the HF flexible camera and it looks like everything was well coated.
Outside was normal body work and paint prep. I ordered a kit of correct paint and clear coat (spraybombs). Have to wait a couple weeks before I can buff it out but it shines pretty well as is. I'm going to buff the hood at the same time as the clear on it is oxidizing and of course the clear had peeled in a couple small spots.
He's about 25-30 miles away. He has experience with older car engines ( amateur drag racer in his youth), but small engines and electric are his bane, so he leaves that for me. If the weathers nice this coming weekend I'll see about getting lineup photo. A few have been moderately restored, most are in their work clothes. Don't you just love when people use spray foam insulation in autos?Your uncle must live nearby, @JDJake ? I would dig seeing a pic of your herd of Deeres!
I did have to work on the MF12G half way through mowing today, the Predator 13 HP fuel screen in the tank plugged up. Fortunately there was only half a tank or so. I was able to unbolt the tank and tip it sideways to pull the fuel line off. On those Honda style engines the screen is in the fuel line fitting on the tank and the fuel shutoff is on the carb!
The big project was fixing a rust area on my wife's 2006 GMC Denali. It was a weekend project. It didn't come out perfect but hopefully it will at least slow down any further deterioration. The morons at GM had put some spray foam in a spot behind the fuel filler and of course that acted like a sponge. There was only about a 1" slot through the taillight hole to work through carving that crap out of there, then I was able to get engine passage cleaning wire brushes in there after scraping it well with some 3/4" flat stock steel. Then I sprayed several coats of rust encapsulator on the backside. When that dried, a couple coats of undercoating was sprayed in the hole. I used the HF flexible camera and it looks like everything was well coated.
Outside was normal body work and paint prep. I ordered a kit of correct paint and clear coat (spraybombs). Have to wait a couple weeks before I can buff it out but it shines pretty well as is. I'm going to buff the hood at the same time as the clear on it is oxidizing and of course the clear had peeled in a couple small spots.
View attachment 18167View attachment 18168View attachment 18169View attachment 18171View attachment 18174
He's about 25-30 miles away. He has experience with older car engines ( amateur drag racer in his youth), but small engines and electric are his bane, so he leaves that for me. If the weathers nice this coming weekend I'll see about getting lineup photo. A few have been moderately restored, most are in their work clothes. Don't you just love when people use spray foam insulation in autos?
Do you have one at home when the snow piles up? I don't know how to see your profile pic bigger so that's why I ask. That must not be all of them? I dig them wearing their history!
The stuff that was in there was even more dense and rubbery than spray foam, it was almost like a sponge! WTH!
DAC
Thinking about bringing the 316 here, plus a walk behind. I have a total of nine, my uncle has 5, +1 that is currently half stripped to be restored. Then he has a WH GT14 we redid about 4 years ago. We pretty much use all of them off and on, they aren't garage queens. I could list them and the attachments we have, take about a quarter of the page. 
Doug, a couple of question on the body work. Did you replace the metal or just sanded it well. And what is the green paint on there. Hard to tell, for me any way, from the pictures. End result looks great. And I like how you got the 55 in the picture too.
I have a spot on my truck like what you had on yours. I can see a lot of body work in my future next spring on my 05 ranger.
Noel
I have a spot on my truck like what you had on yours. I can see a lot of body work in my future next spring on my 05 ranger.
Noel
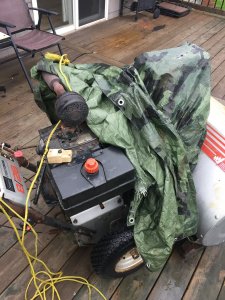
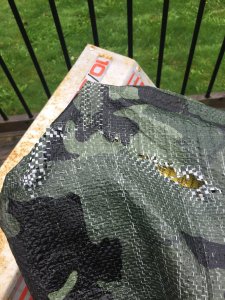
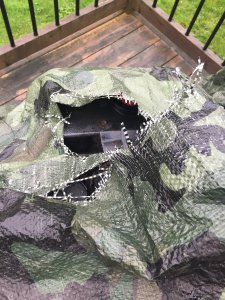
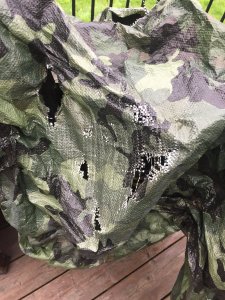
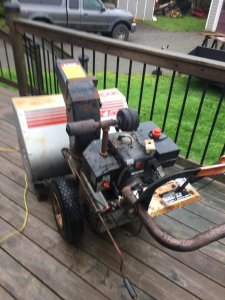
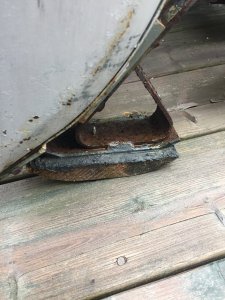
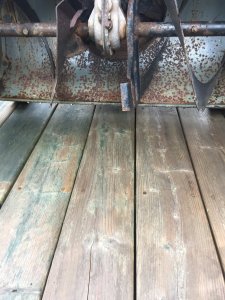
Got my snowblower that I use for my deck going today. Tarps don’t last to long out in the sun. Used three old blowers to make one two years ago. Put wooden shoes on it for the runners so won’t damage the wood on the deck as much. And this blower had no chains. So that’s also good for the deck. It’s alittle big for the deck , but it works. Only used it maybe five times in the last two years. What do yas think of my dual exhaust. Hehe. Gotta have a little fun.
Noel
Noel
Attachments
-
 B7B3812A-CB6F-4CAA-BB67-237E7B52C5BB.jpeg265.8 KB · Views: 7
 -
 E44AB16A-7B3A-4458-960A-09A5168AA3EB.jpeg280.4 KB · Views: 7
 -
 D7FC7437-3628-402D-94F4-B6968E2E45B9.jpeg277.8 KB · Views: 7
 -
 97BA152B-3A70-4F91-B871-FDA13E8AC784.jpeg336.2 KB · Views: 8
 -
 087B30FE-14F3-436F-91BE-811D7C6D5CAC.jpeg174.6 KB · Views: 9
 -
 8B034633-84F4-4F6B-9F40-43DBF8A1EDBB.jpeg269.7 KB · Views: 10
 -
 DAC3E516-35BF-409B-9081-4758F123764B.jpeg221.1 KB · Views: 9
 -
 B0AA0214-DDB3-4DAB-AB47-EBE6068FD458.jpeg226.6 KB · Views: 8
 -
 FBD7ADB3-54E7-43F6-B445-A8794F5907DB.jpeg230.7 KB · Views: 7
Cool exhaust! I have some 1" thick plastic type stuff here I use for runners. Might be able to make you some up and send them!Got my snowblower that I use for my deck going today. Tarps don’t last to long out in the sun. Used three old blowers to make one two years ago. Put wooden shoes on it for the runners so won’t damage the wood on the deck as much. And this blower had no chains. So that’s also good for the deck. It’s alittle big for the deck , but it works. Only used it maybe five times in the last two years. What do yas think of my dual exhaust. Hehe. Gotta have a little fun.
Noel
Doug, a couple of question on the body work. Did you replace the metal or just sanded it well. And what is the green paint on there. Hard to tell, for me any way, from the pictures. End result looks great. And I like how you got the 55 in the picture too.
I have a spot on my truck like what you had on yours. I can see a lot of body work in my future next spring on my 05 ranger.
Noel
Hey Noel, no, I didn't replace any metal. Might need to if this doesn't slow down the rust. Besides time, I've got less than a hundred bucks into this so as they say "you get what you pay for". We use rust encapsulator at work a lot since corrosion is out of control there and decided to try it here. I used an 80 grit wheel to grind out the rust bubbles down to bare metal. Couldn't see pinholes but they had to be there. After cutting out the "sponge", scraping and wire brushing the backside where there was no scaly rust, the encapsulator was sprayed on the backside. It was an awkward angle so it got a couple of wet coats. After letting that dry well, I stuck the HF inspection camera in there, and everything turned a solid black like it is supposed to. After that 4 or 5 pinholes were visible due to the encapsulator weeping into the holes from the back. Last thing I did before starting outer bodywork was undercoat the backside, with a couple generous coats. I did a skim coat of bondo, sanded smooth and the green paint is "etch" primer. It's also a sandable filler like regular primer but is supposed to stick better. Everything was done with spray bombs.
The trees and house shade everything so much this time of year, I had to park her truck sideways in the driveway to get a few hours sunlight on that fresh paint! That's why the '55 photo bombed the picture---LOL!
Don't know if this info may help your issues. Not sure if it's going to help mine!
DAC
I almost forgot that to post about getting ready for what I call a blizzard tonight! I gave the $40 snowblower another test run and everything seemed to work fine. The skids were on the lowest level so I raised it up to 3/4". Got the wheel weights from the MF12G mounted on the MF8E so it should be ready too. The poor MF12G looks kinda nekkid without the wheel weights!
DAC


DAC
Trip to the farm today, I have some dead trees I need down, cut one Hickory & two Oaks today. Brought a Gator load of wood back to a local shop where I loaf sometimes. Two brothers who do mechanic work, they heat their shop, I get free labor!