1990 Craftsman 917.254450 (RED) 2020 update

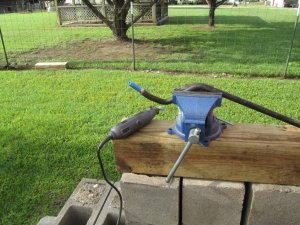
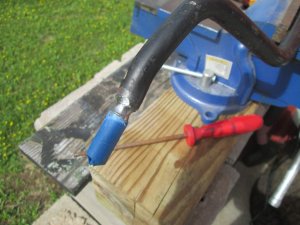
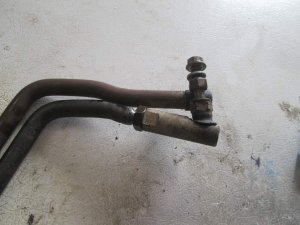
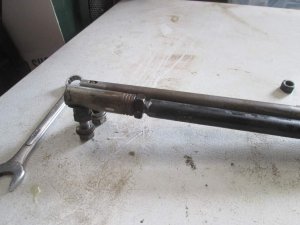
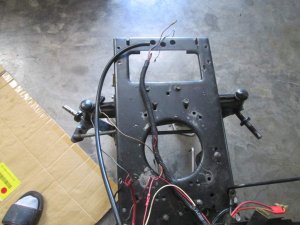
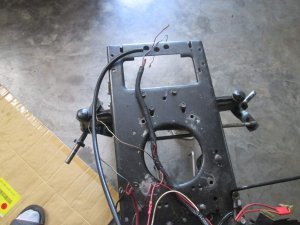
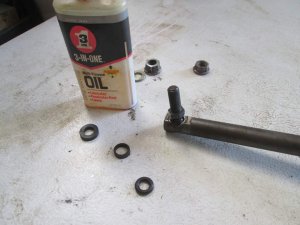
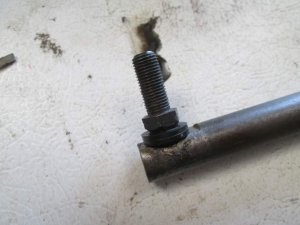
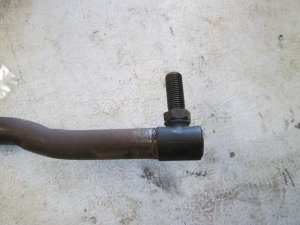
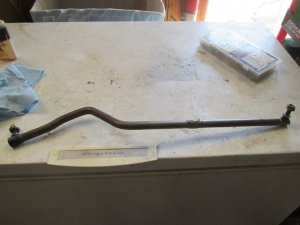
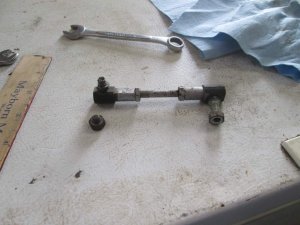
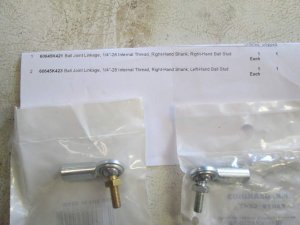
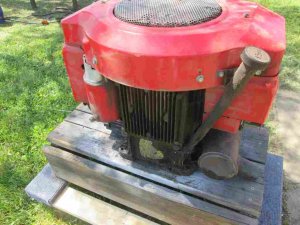
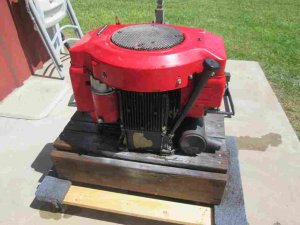
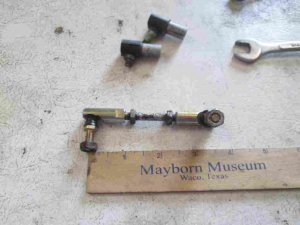
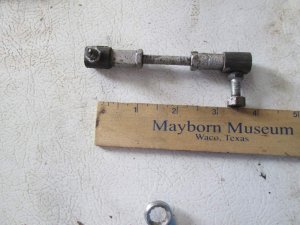
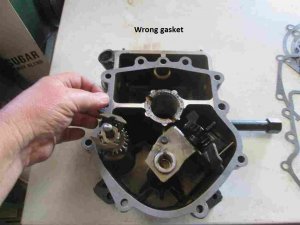
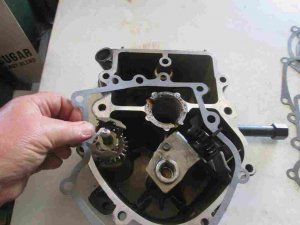
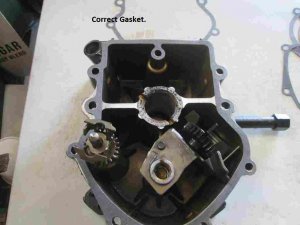
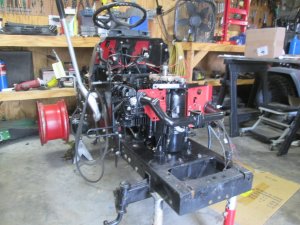
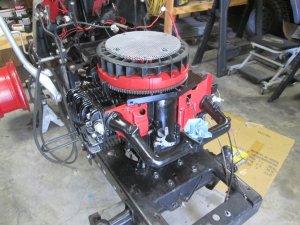
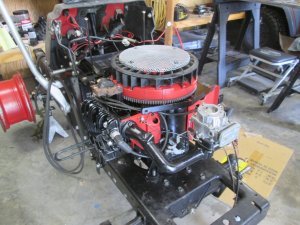
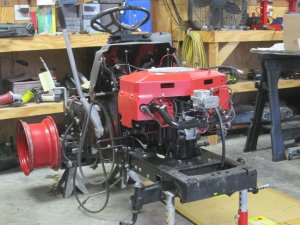
Worked on the modified drag link today, I figured if I could make a gutter (not sure the correct term, Guess I need to watch more Abom-79) to allow the lock nut to go further back which should allow me to be able to get this the same length as the OEM one. Still have a sharper bend on one end that I like but the swivel allows enough give to line it up. Got it installed and I have full left and right travel operation with no rubbing. I also replaced a seal on the OEM one as it is still tight and will make a good spare.

I did run into another steering issue that I’ll address tomorrow.
 

Attachments

  • 1.jpg
    1.jpg
    143.7 KB · Views: 3
  • 2.jpg
    2.jpg
    65.6 KB · Views: 3
  • 3.jpg
    3.jpg
    72.1 KB · Views: 3
  • 4.jpg
    4.jpg
    64 KB · Views: 3
  • 5.jpg
    5.jpg
    73.5 KB · Views: 3
  • 6.jpg
    6.jpg
    71.6 KB · Views: 3
  • 7.jpg
    7.jpg
    68.6 KB · Views: 3
  • 8.jpg
    8.jpg
    49.6 KB · Views: 3
  • 9.jpg
    9.jpg
    64 KB · Views: 3
  • 10.jpg
    10.jpg
    50.9 KB · Views: 3
After getting the Daughters road side find evil Craftsman push mower sorted out, I was able to turn my attention back to RED. Dash tower is installed.
SpaceX is still hard at it.
 

Attachments

  • 1.jpg
    1.jpg
    56.9 KB · Views: 7
  • 2.jpg
    2.jpg
    84.8 KB · Views: 7
  • 3.jpg
    3.jpg
    92.4 KB · Views: 7
Argggg! I am finding (or not) one of the hardest things is remembering where I put parts. going through the tear down pictures and I can't locate the belt guides I took off several months ago. So, I stand in the middle of the shop with a flash light and slowly spin in a circle.
 

Attachments

  • 1.jpg
    1.jpg
    62.2 KB · Views: 4
I installed the transaxle but broke the shifter tie rod. I looked it up at Jacks, P/N 532166230 $31.49 (ouch).
Went to McMasters Carr and found these. I comfirmed I can run a 1/4-28 tap into the threads, and the tie rod nut fits the stud.

Can someone check to see if these are what I need? Will replace both ends.
RH 6058K25 and LH 6058K222 (The RH is the broken one) $4.76 each.


Attachments

  • 1.jpg
    1.jpg
    94.4 KB · Views: 4
  • 2.jpg
    2.jpg
    73.4 KB · Views: 4
  • 3.jpg
    3.jpg
    76.7 KB · Views: 5
  • 4.jpg
    4.jpg
    70.3 KB · Views: 3
Pressure washed RED's engine and drained the oil in preparation to open it up and replace the rings and gaskets. (Space X still at it hard).
I am the only one that travels between the house and shop.
 

Attachments

  • 1.jpg
    1.jpg
    25.3 KB · Views: 7
  • 2.jpg
    2.jpg
    31.8 KB · Views: 6
  • 3.jpg
    3.jpg
    35.9 KB · Views: 6
  • 4.jpg
    4.jpg
    26.4 KB · Views: 6
  • 5.jpg
    5.jpg
    29.6 KB · Views: 6
  • 6.jpg
    6.jpg
    22.6 KB · Views: 7
  • 7.jpg
    7.jpg
    35.5 KB · Views: 6
Gonna have to weed-eat that trail better, tall weeds in the middle!
 
Started dis-assembly and realized the gasket kit I ordered over a year ago doesn't have head gaskets or seals. I have another box full of misc seals and several old head gaskets. I'll continue with the break down and cleaning. I can order head gaskets later if needed. I'll see if I have enough old gaskets before breaking the new ones out.
 

Attachments

  • 5.jpg
    5.jpg
    29.6 KB · Views: 6
  • 10.jpg
    10.jpg
    27.5 KB · Views: 6
  • 11.jpg
    11.jpg
    27.7 KB · Views: 6
  • 12.jpg
    12.jpg
    21.1 KB · Views: 6
  • 13.jpg
    13.jpg
    136.5 KB · Views: 6
  • 14.jpg
    14.jpg
    122 KB · Views: 6
Correct shifter tie-rod ends arrived. Using the previous picture to adjust the linkage.
 

Attachments

  • 101.jpg
    101.jpg
    19.5 KB · Views: 4
  • 102.jpg
    102.jpg
    76.7 KB · Views: 4
Got a surprise when I pulled the valve covers. Any idea what this would have come off of? I am guessing a vale seal. Everything else looks good, main goal was to hone and put new rings in. I guess I’ll need to pull the valves to check the seals.

To check the valve clearance, I had to make sure the tappets were fully retracted.

Book says intake .006 - .008 and exhaust .009 - .012

The side that has the seal spring is in spec. Side 2 – Intake .007 and exhaust .008

Side 1 - Intake .010 and exhaust .012

I have 3 new valve seals and a new set of valves and tappets. These are hard to adjust though. I may just check the valve seals and leave well enough alone.
 

Attachments

  • 1.jpg
    1.jpg
    29.4 KB · Views: 4
  • 3.jpg
    3.jpg
    9.9 KB · Views: 3
  • 4.jpg
    4.jpg
    24.6 KB · Views: 3
  • 5.jpg
    5.jpg
    22.8 KB · Views: 3
  • 6.jpg
    6.jpg
    32.4 KB · Views: 4
  • 7.jpg
    7.jpg
    26.3 KB · Views: 4
  • 8.jpg
    8.jpg
    30.7 KB · Views: 3
  • 9.jpg
    9.jpg
    22.8 KB · Views: 3
I was correct about the little spring going to the valve seal. I have a new replacement seal for this one. Took a lot of pictures, and gathering all the specifications. I plan to check the old ring gaps and compare to the new replacement rings. I marked all the valves and tappets as to where they go.

Found another mystery part and figured out it was part of the governor retainer. I also found new top and bottom seals, I’ll need to order new head gaskets, I’ll get a few sets as I have three of these engines.
 

Attachments

  • 1.jpg
    1.jpg
    11.9 KB · Views: 5
  • 2.jpg
    2.jpg
    17.6 KB · Views: 5
  • 3.jpg
    3.jpg
    26.3 KB · Views: 5
  • 4.jpg
    4.jpg
    22.9 KB · Views: 5
  • 5.jpg
    5.jpg
    23.2 KB · Views: 5
  • 8.jpg
    8.jpg
    24.7 KB · Views: 5
So, for my 62nd birthday I spent the day remoted into work at the City, and cleaned the parts to the 18 hp Brigs opposed twin 42A707 1238-01 1995 date code. This engine has leaked oil for a while now and was crudded up pretty bad. I Pressure washed inside and out, simple green, wire brush, small screwdriver, and putty knife was used, and lots of elbow grease. All parts are clean now.

I plan to go over all the gasket areas and be extra clean on those tomorrow.
 

Attachments

  • 0.jpg
    0.jpg
    30.9 KB · Views: 6
  • 1.jpg
    1.jpg
    53.2 KB · Views: 6
  • 2.jpg
    2.jpg
    30.9 KB · Views: 6
  • 3.jpg
    3.jpg
    51.9 KB · Views: 6
  • 4.jpg
    4.jpg
    23.5 KB · Views: 6
  • 5.jpg
    5.jpg
    36.7 KB · Views: 6
I am thinking that if I lap the valves longer on the out of spec side I should get a tenth or so back in spec. Guess we will see when I get to that point.
This has to be one of the longest mower rebuild (not restore) I have done.
I have a full can of red paint and a can and half of black. thinking of using those up on the engine.
 

Attachments

  • 6.jpg
    6.jpg
    32.4 KB · Views: 3
Not sure why my posts don’t show up in “What’s New or New Posts” oh well, latest update. I now know why I had an oil leak! While sorting out the gaskets I noticed there are several types. (I know some are for shimming) but there are some with a red sealant, and two different types. I used the one without sealant but had the three bottom holes. I realized that I couldn’t hone with the sump on so I pulled it. I placed the three-bottom hole gasket on the sump and it didn’t look right. I went back to the tear down pictures, and sure enough that was the gasket that was installed. The correct gasket only has one bottom hole. The 3-hole gasket looks correct on the block which is why I used it. The 1-hole gasket should solve my problem. Spec says 0.66 end play so I need to find a way to measure just using digital calipers.

Also, I found the new head gaskets.
 

Attachments

  • 2.jpg
    2.jpg
    24 KB · Views: 4
  • 3.jpg
    3.jpg
    154.7 KB · Views: 4
  • 4.jpg
    4.jpg
    35.5 KB · Views: 4
  • 5.jpg
    5.jpg
    91.6 KB · Views: 4
  • 6.jpg
    6.jpg
    61.2 KB · Views: 4
  • 7.jpg
    7.jpg
    19.9 KB · Views: 4
  • 8.jpg
    8.jpg
    60.5 KB · Views: 4
  • 9.jpg
    9.jpg
    87.1 KB · Views: 4
Honed and checked the ring gaps this morning. After washing the block after honing I came up with the following for the rings. My honing skills are not great, but this should be fine.

Cyl #1 Old ring 1 (.027) New ring 1 (.009) - Old ring 2 (.025) New ring 2 (.016).
Cyl #2 Old ring 1 (.022) New ring 1 (.009) - Old ring 2 (.030) New ring 2 (.009).

Cleaned up the piston groves and installed the new rings. While getting ready to install the crank and cam I decided to do a video explaining why I had an oil leak, and almost would have not fixed it.


Attachments

  • 0.jpg
    0.jpg
    23.7 KB · Views: 4
  • 100.jpg
    100.jpg
    55.5 KB · Views: 4
  • 200.jpg
    200.jpg
    41.8 KB · Views: 4
  • 300.jpg
    300.jpg
    55.3 KB · Views: 4
  • 400.jpg
    400.jpg
    71.6 KB · Views: 4
  • 500.jpg
    500.jpg
    46.1 KB · Views: 5
  • 600.jpg
    600.jpg
    79.9 KB · Views: 5
  • 700.jpg
    700.jpg
    75 KB · Views: 5
Pistons and valves installed. I could have used some small hands. After lapping here is what I have
Cyl #1 Intake .010 - Exhaust .012
Cyl #2 Intake .007 - Exhaust .008

Book says,
Intake .006 - Exhaust .009

I could pull the valves out of the junk engine to see if I can get #1 closer, but that would need lots of extra effort. I think I'll leave well enough alone.
 

Attachments

  • 1.jpg
    1.jpg
    73.3 KB · Views: 5
  • 2.jpg
    2.jpg
    48.8 KB · Views: 5
  • 3.jpg
    3.jpg
    71.6 KB · Views: 4
  • 4.jpg
    4.jpg
    55.6 KB · Views: 4
Done for the weekend (Have to go into the office tomorrow) Used up the rest of the red and black paint on the tins. Still need to work on the bolts. Decided to move the block to the mower before more weight is added (like the fly wheel) and it will make it easier to work on. Being back to work will slow this down (not in a hurry) and I plan to try and get at least one thing done each evening.
I also mowed the yard again today. No weed whacking or edging, all riding, took 3-1/2 hours.
 

Attachments

  • 5.jpg
    5.jpg
    72.5 KB · Views: 4
  • 6.jpg
    6.jpg
    51.5 KB · Views: 4
Almost have the engine back together, I need to install the gas tank before I can add the fuel filter. Before that I need to add grease to the trans-axle and install the top pulley.
 

Attachments

  • 101.jpg
    101.jpg
    191.5 KB · Views: 3
  • 102.jpg
    102.jpg
    203.6 KB · Views: 4
  • 103.jpg
    103.jpg
    198.1 KB · Views: 4
  • 104.jpg
    104.jpg
    189.2 KB · Views: 4
Back
Top