
You are using an out of date browser. It may not display this or other websites correctly.
You should upgrade or use an alternative browser.
You should upgrade or use an alternative browser.
John Deere 60 repairs
- Thread starter cjet69
- Start date
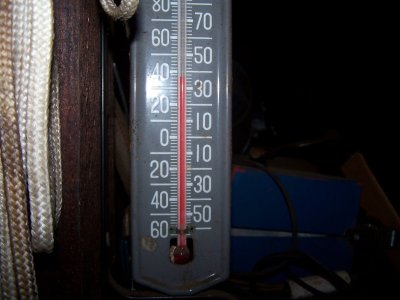
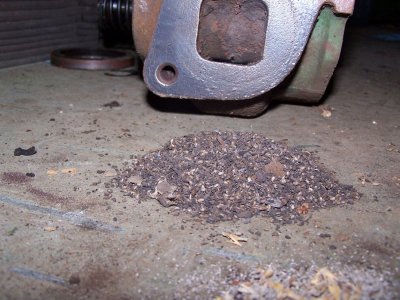
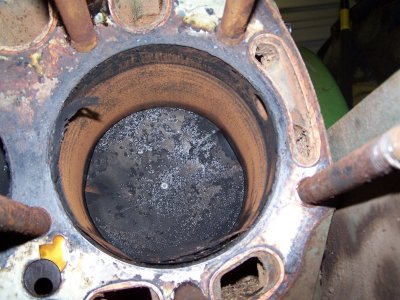
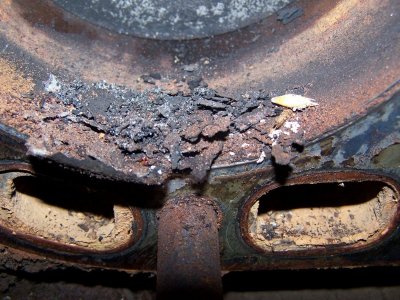
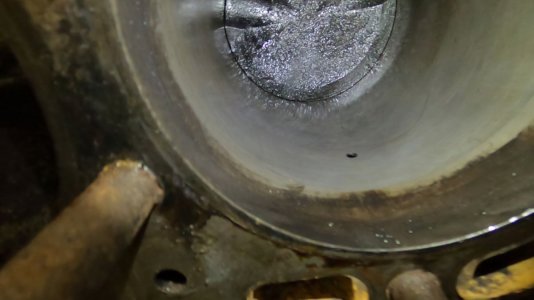
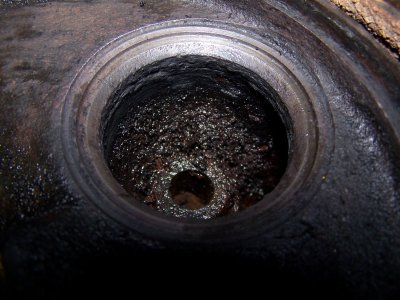
Just got back in from pulling the head. The shop is cold, 36°F on the old thermometer, and I didn't want to waste wood and propane for 1/2 hour of work. Glad I pulled it with all of the crud in the cylinders and ports. A lot of it is carbon, but also quite a bit of rust granules. Big pile of rust came out of the exhaust port when I turned the head over. It was stacked up against the exhaust valve where could have easily fallen into the cylinder if you turned it over. Everything I see so far should clean up pretty easily and I just need to pull the valves to check out the seats and faces.
Attachments
My fingers go numb when handling cold tools. Never used to bother me but I guess the circulation isn't what it was. I think -12°F is colder than we keep the freezer. Oh yea 36*F is a bit cool to work in for any amount of time good thing you pulled the head but as you say it will clean up. Its -12*F here this morning but its bright and sunny suppose to warm some in a couple of days
 We got a little unexpected snow this morning. Might be an inch on the ground. Thursday the temps should be in the 40's for both highs and lows so I will get back on this project with a little heat in the shop.
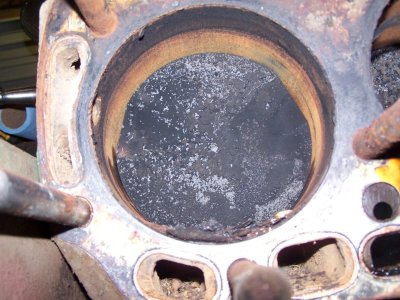
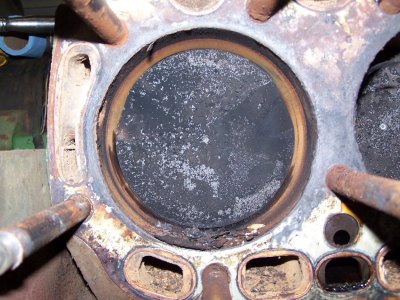
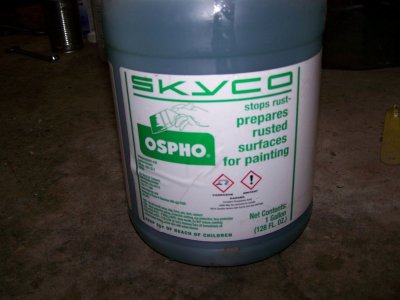
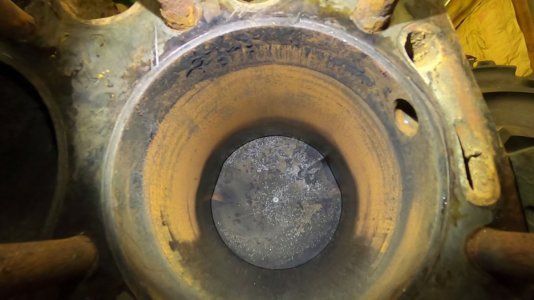
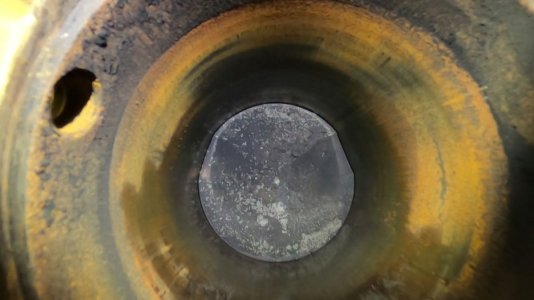
I got the shop warmed up a little and thought I would see if I could clean the rust out of the cylinders. After rolling the engine over I found the rust was limited to the area above where the pistons had stopped in the bores. I decided to try some Ospho on a shop towel and some scotch brite. It worked great, cutting thru the rust with ease. After cleaning I wiped it all down and shot a good coating of WD-40. This will all get a good cleaning before assembly starts. I also sucked up the big mouse nest in the water jacket. It was bigger than I thought. I then moved to the head to start removing valves. First valve I tried is stuck. This is an exhaust valve that had all of the rust and debris in the port. I'll get some penetrant on it and see if It will loosen up without any damage. I think it will if I take my time. Probably a good thing that I didn't roll the engine over before I took it apart or I might have bent a pushrod.
Attachments
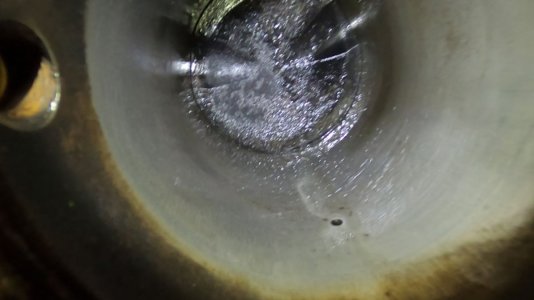
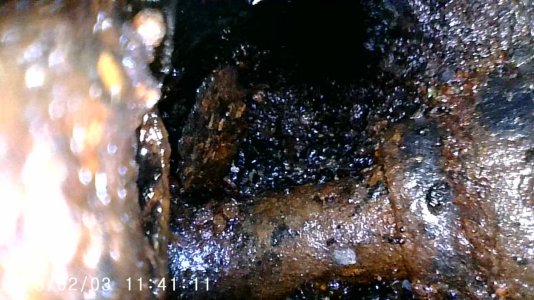
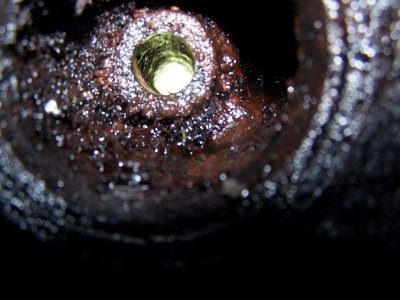
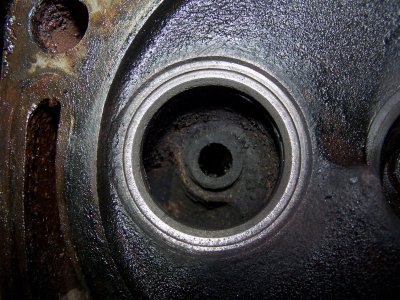
With the pile of rust poured out of the exhaust port I sprayed some WD-40 down the port last night hoping it would coat the valve stem that you can't see. Today I took my borescope out to see what the valve stem looks like. Not Good. I put some acetone/ATF mix on it so we will see if that works down between the valve and guide. Hopefully the rust didn't go up the guide to far.
Attachments
Well, we have the first casualty in this project. After many attempts trying to get this valve out it finally started moving but got really tight again. While trying to push it back the valve head snapped off. Must not have had things squared up. Anyway, with the damage already done, I got the stem pushed out. Lots of dry looking rust in the guide. Probably need to get both the valve and guide but I will clean it up first to see what shape the guide is in.
Attachments
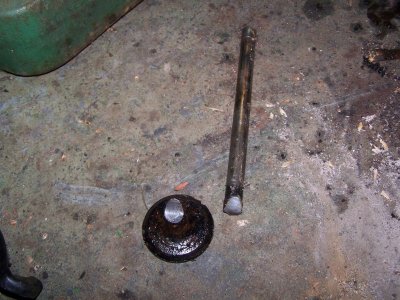
I was going to hit the like button but I don't want to give you the idea that I liked what happened.Well, we have the first casualty in this project. After many attempts trying to get this valve out it finally started moving but got really tight again. While trying to push it back the valve head snapped off. Must not have had things squared up. Anyway, with the damage already done, I got the stem pushed out. Lots of dry looking rust in the guide. Probably need to get both the valve and guide but I will clean it up first to see what shape the guide is in.
Good luck on the rest of it.
Yea the guide looks pretty dry but it may clean up ok with a reamer I put that under Sh-t happens categoryWell, we have the first casualty in this project. After many attempts trying to get this valve out it finally started moving but got really tight again. While trying to push it back the valve head snapped off. Must not have had things squared up. Anyway, with the damage already done, I got the stem pushed out. Lots of dry looking rust in the guide. Probably need to get both the valve and guide but I will clean it up first to see what shape the guide iorin.
I was going to hit the like button but I don't want to give you the idea that I liked what happened.
Good luck on the rest of it.
I really didn't expect this valve to be stuck that bad. I wonder if this port was the litter box for the mice and rats. The rest of the valves just slid right out.Yea the guide looks pretty dry but it may clean up ok with a reamer I put that under Sh-t happens category
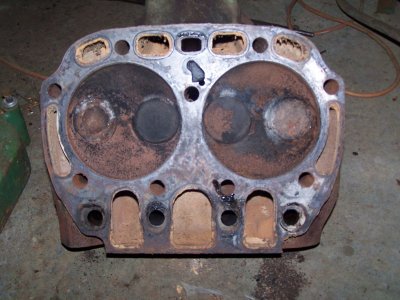
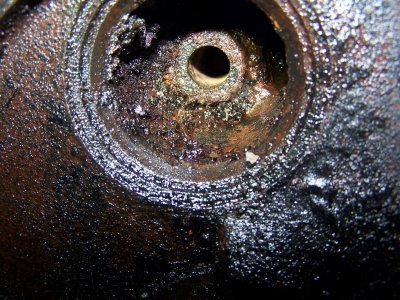
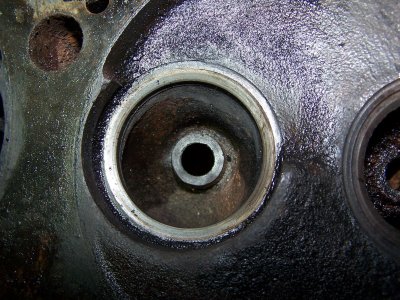
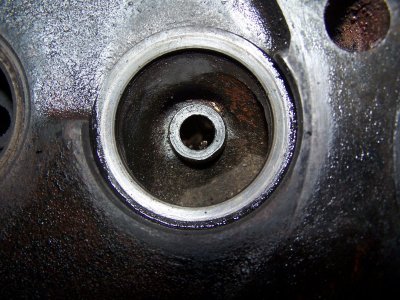
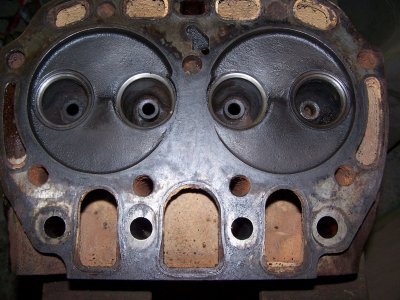
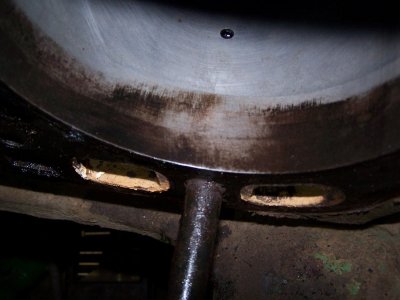
Wire brushed the valve seats. The bad exhaust valve seat looks a little rough, but I think it will clean up. The other exhaust seat has a little pitting that will clean up just fine. The 2 intakes look nice. The pics in order are bad exhaust, intake, intake, and exhaust.
Attachments
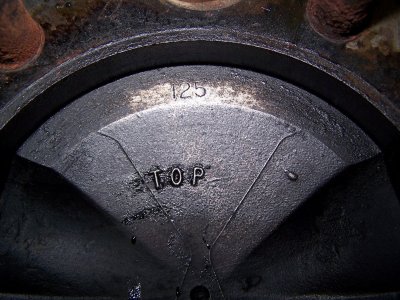
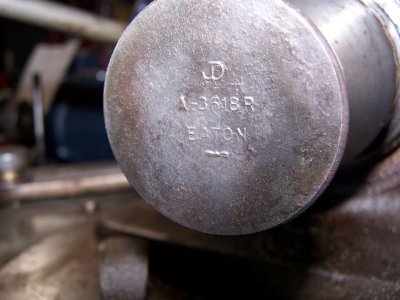
While cleaning the cylinders out I noticed little to no bore wear. After closer inspection I found aluminum pistons with .125 stamped into them. This tractor must have been rebuilt shortly before my dad and uncle picked it up.
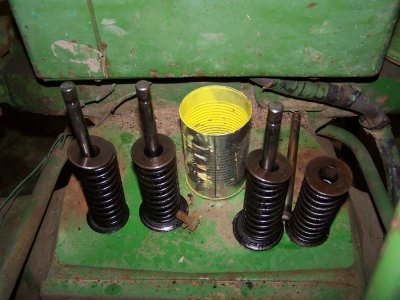
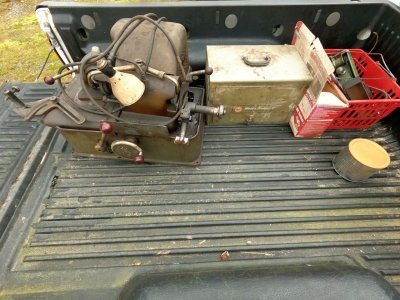
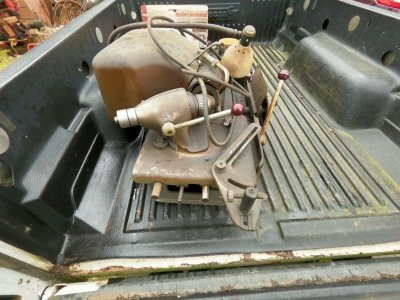
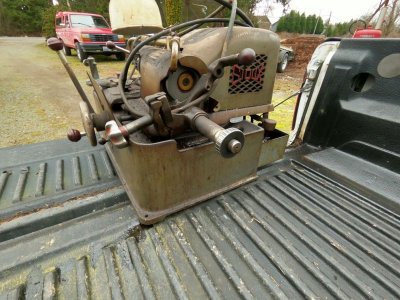
Took inventory on our valve grinding pilots and stones. I thought dad had done a John Deere A head decades ago, but apparently not. The pilots and stones we have aren't big enough for these valves and seats. I order some stones and a pilot today along with some grinding oil. The oil is for the Sioux 645L valve grinder that we picked up last year. My dad and brother worked on the chuck that wouldn't release and got that feed up. Then cleaned out the coolant/grinding oil tank. If we can get everything working this will be the first use for this valve grinder.
Took inventory on our valve grinding pilots and stones. I thought dad had done a John Deere A head decades ago, but apparently not. The pilots and stones we have aren't big enough for these valves and seats. I order some stones and a pilot today along with some grinding oil. The oil is for the Sioux 645L valve grinder that we picked up last year. My dad and brother worked on the chuck that wouldn't release and got that feed up. Then cleaned out the coolant/grinding oil tank. If we can get everything working this will be the first use for this valve grinder.
Attachments
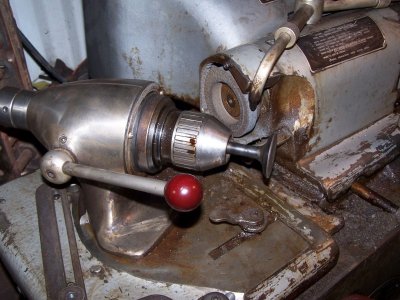
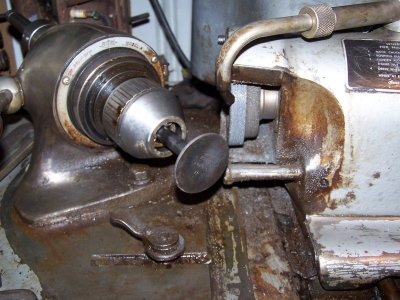
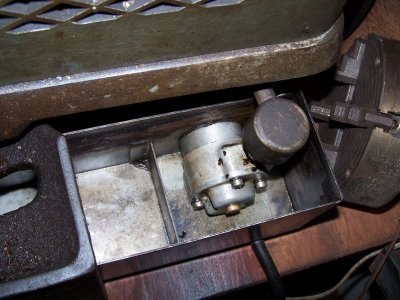
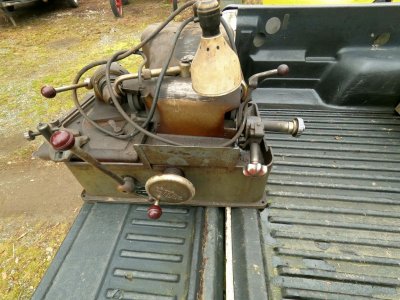
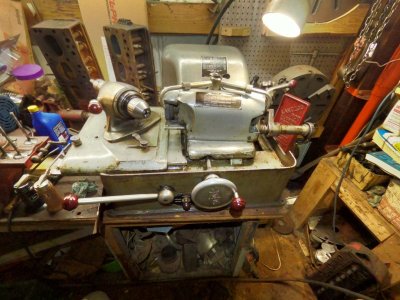
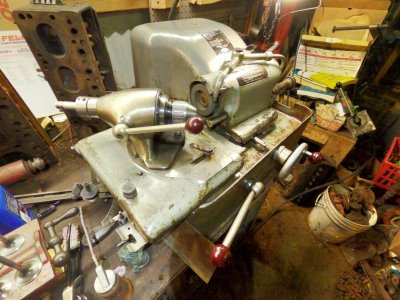
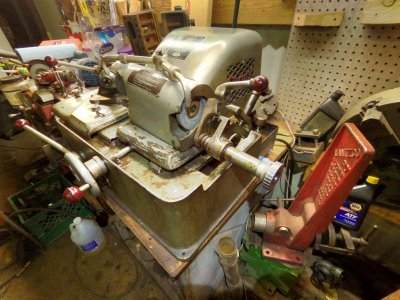
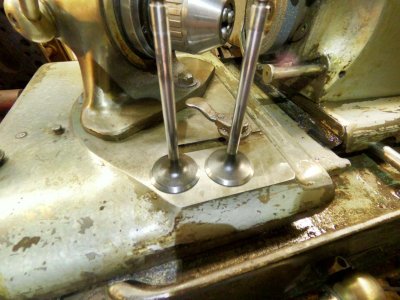
My brother spent the weekend doing some more cleaning on the Valve machine. Its looking pretty good now. Got the coolant/grinding oil tank cleaned and flushed with some ATF. Drained the ATF and poured in the grinding oil. Did a test grind on a couple of old valves. The first cuts weren't smooth, kind of a chattery look. Dressed the stone and that straightened it up. The only thing we need now is a chamfering attachment. Some pics from when we first brought it home to camp are how it looks now.
Attachments
-
 GOPR2128-m.JPG242.7 KB · Views: 8
 -
 GOPR2130-m.JPG227.1 KB · Views: 10
 -
 GOPR2132-m.JPG248.6 KB · Views: 9
 -
 GOPR2133-m.JPG249.4 KB · Views: 8
 -
 GOPR3527-m.JPG201.2 KB · Views: 9
 -
 GOPR3528-m.JPG220.7 KB · Views: 9
 -
 GOPR3529-m.JPG211.4 KB · Views: 9
 -
 GOPR3530-m.JPG209.1 KB · Views: 9
 -
 GOPR3531-m.JPG184 KB · Views: 9
