I might have misunderstood you Doug, but the factory Massey top link is a 5/8" pin on the implement end & the clevis hoop that's on your 3 point rock shaft should be 1/2" unless someone drilled it larger.There is nothing that company doesn't have it seems, Kenny! Thanks for the link! We get a lot of stuff from them at work, and I should have been able to think of them!
I will probably build one with spherical, bearings, Jason. I'm not too keen on the 1/2" pin in a 5/8" hole. If this tractor gets to the point I can't afford to do any more repairs, like major hydro or transaxle problems, it will get parted out. You will be the first one in line for that pto shaft!
DAC
You are using an out of date browser. It may not display this or other websites correctly.
You should upgrade or use an alternative browser.
You should upgrade or use an alternative browser.
MF 1450
- Thread starter MFDAC
- Start date
I agree that spring is not right! Here's a manual for you:Worked on it a bit longer tonight after the day job. Got the choke rod bent where I think it will work. Pulled out the throttle cable and sprayed it with some Yield. Only took a few minutes and the wire pulled right out of the housing. Straightened the wire tapping on it with a hammer on the anvil. Housing wasn't kinked anywhere. Cleaned the wire with a scotchbrite and it slides nicely now. Put that back on the tractor and hooked them both up. Both cables and the new choke link seem to be moving fine. Still have to bend a "Z" in the bottom of the choke link but I will do that when the carb comes back off for the vent tube and cover gasket installation. Also have to read up on adjusting that governor. That spring seems so stout it's hard to imagine the governor will pull the carb to idle. Don't want that thing to rev so tight the first time it fires that it dumps it's guts!
DAC
View attachment 34565 View attachment 34566
Attachments
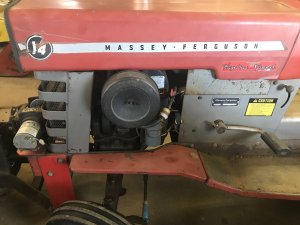
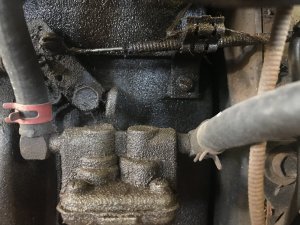
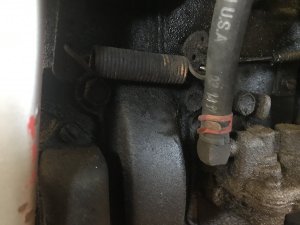
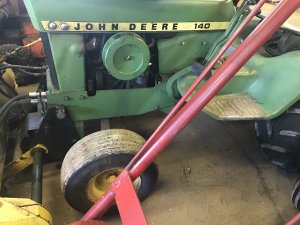
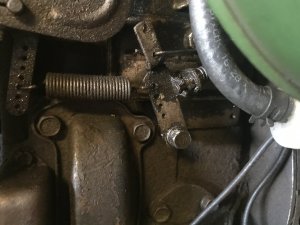
Some pictures of my MF 14 and JD 140H3 Doug. Any way. I’m not sure why there would be a long spring. But maybe that’s the way that engine was made for the MF 1450.
Noel
Noel
Attachments
-
 1549AD17-DA00-4D50-A71B-127D7866AA95.jpeg149.4 KB · Views: 10
 -
 F92A281B-6E73-4F8A-96E3-CA4D3A942136.jpeg233.2 KB · Views: 10
 -
 9C1A76EC-4971-4654-B977-AF1980E2E348.jpeg156.2 KB · Views: 10
 -
 6CC84D6A-4C12-49AA-8FB5-320EDBA1879A.jpeg181.6 KB · Views: 10
 -
 EABCAF7E-E2F0-4B95-929D-4168DA29D878.jpeg154.2 KB · Views: 10
That's a very useful link, Gary, Thanks! I just wish my serial number sticker wasn't destroyed. Doesn't look like it is stamped any where either.Hi Doug you can download any Kohler manual you need here https://kohlerpower.com/en/engines/manuals
Been reading along your making good progress when you et it going you'll have a good tractor
Going to the next page, for some reason the site isn't letting me quote stuff from 2 different pages.Some thing doesn’t look right there Doug. I think all my Kohlers have a short spring. Maybe different model than mine. I’ll take a look today and get some pictures if I see some thing.
Noel
DAC
Between Gary and Kenny, I have a bunch of good info now. The spring you described sounds correct, but I have no model number to reference a new one. More about that when I comment to Noel.I'll have to check at my uncles this weekend Doug, I might have a couple stashed away. A kohler manual is indispensable, it gives you everything you need to know about your motor, from setting the points, to the governor and spring settings on your throttle linkage. It's the K series bible.
I sure didn't think that looked right and thanks to you guys I know it's not. Now the trick will be finding a correct one!I agree that spring is not right! Here's a manual for you:
The engines you have look quite a bit different than this one, Noel. The manuals show 3 different governor springs, 2 shorter ones that look a lot like yours, and a long one like Jake described earlier. That long spring must be required for this air filter setup. The coil is on the other side on this engine too. I did get a part number from the manuals for the long one so I'm hoping that will lead me to a place to buy a correct one. The long one coiled part is still about the same length as yours, but then there's a long straight part going to the pivot where the throttle cable connects which is in a different place on the engine than yours too.Some pictures of my MF 14 and JD 140H3 Doug. Any way. I’m not sure why there would be a long spring. But maybe that’s the way that engine was made for the MF 1450.
Noel
Didn't get time yet to search the spring part number but at least only one long spring seems to be what's needed. Since I have no model number hope the part number will work!
DAC
I might have misunderstood you Doug, but the factory Massey top link is a 5/8" pin on the implement end & the clevis hoop that's on your 3 point rock shaft should be 1/2" unless someone drilled it larger.
I'm the one that misunderstood, Jason! When you said 5/8 hole, It didn't dawn on me that was the implement end! Sorry about that! My clevis hoop pin is definitely 1/2".
I appreciate all your comments and help!
DAC
Whoa! Now things may get more complicated, Jake! The manuals do list a long spring but of course that may mean that spring was on a JD originally along with the whole engine!There are a couple different throttle-governor linkages, Propane has the short linkage version. The setup you have Doug is the same setup that is on my JD 200 series, which makes me wonder if your 1450 had a heart transplant in the past.
DAC
Kohler made several different versions of throttle setups and oil pans to fit several different uses of the K series motors. The long spring listed in the manuals is the one you need Doug. Oh, and your motor should be a K321AQS or very similar. K321 means its a K series 14hp, the last three letters (or more) denote other features like oil pan type, pull or electric start, etc. The manual should have a section that goes over the codes.
Last edited:
Cool, Jake, I'll do some searching! Gary, (MNGB) said earlier that the "S" means electric start and the "Q" means quiet. Maybe that "Q" designation is something to do with that air filter drawing from the blower housing. All this info is going to find the stuff needed to fire this engine!Kohler made several different versions of throttle setups and oil pans to fit several different uses of the K series motors. The long spring listed in the manuals is the one you need Doug. Oh, and your motor should be a K321AQS or very similar. K321 means its a K series 14hp, the last three letters (or more) denote other features like oil pan type, pull or electric start, etc. The manual should have a section that goes over the codes.
DAC
This thread is fun to watch, a "rescue" MF! It feels like going again through all I did on my 1655! I didn't realize how close the 14xx are to the 16xx in term of construction!
I've been hoping for so long to find that male PTO shaft (which looks original) for the rear of the tractor and you had it there stuck on your tractor? I am jealous life is not fair! haha
I've been hoping for so long to find that male PTO shaft (which looks original) for the rear of the tractor and you had it there stuck on your tractor? I am jealous life is not fair! haha
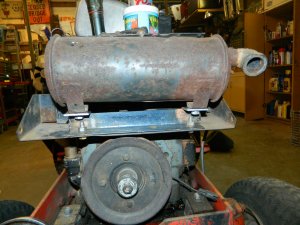
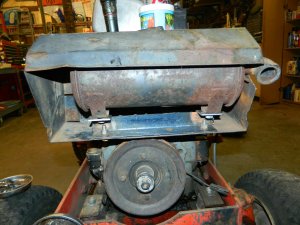
That's good to know, Jake! Part of that muffler extension on this tractor is pot metal and is cracked, but I messed with it a little today, and think bolting it back on will keep it solid if I watch how I tighten it up! Don't think it's the correct muffler either. I like quieter tractors so hope it can live up to it's "Q" designation if it becomes a runner!Gary and you are right about the Q designation, it denotes the style of air filter housing and the fact that the exhaust and muffler tend to be more enclosed with tin work extending off the motor housing.
DAC
This thread is fun to watch, a "rescue" MF! It feels like going again through all I did on my 1655! I didn't realize how close the 14xx are to the 16xx in term of construction!
I've been hoping for so long to find that male PTO shaft (which looks original) for the rear of the tractor and you had it there stuck on your tractor? I am jealous life is not fair! haha
Sure glad you enjoy this thread, Mac! I figured it's annoying since I'm such a greenhorn on anything hydro, Kohler and 3 point. Learning curve is still vertical!
I don't know if the PTO shaft will ever get used again even, but I'm glad Daniel filled me in on how to remove it! I do want to find some kind of attachment to put it to work if this tractor sees service again!
DAC
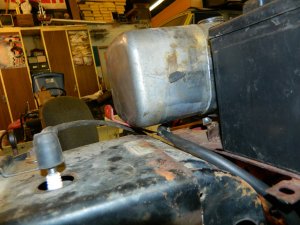
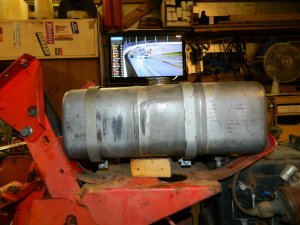
Got a little done today. Took the carb and lifter cover off, cleaned the filter and put the cover back on. Installed the tin behind the carb, bent the "z" in the choke rod and assembled that. Then cut some fuel line between the pump and carb and installed that. Mocked up installing the MF12G fuel tank and a battery. The fuel tank needs to sit at least 1-1/2" higher than the bottom of the original tank did to clear the blower housing. Didn't start hacking on the old fuel tank mounting yet though. It will still clear the hood, but the cap hole won't line up. My other two MF's require opening the hood to fuel up so it won't be any different on this one!
I got a governor spring ordered today also. Ordered that on Amazon so my wife will pay for it----LOL! 15 bucks shipped.
DAC
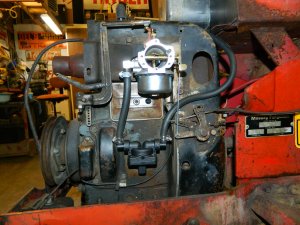
I got a governor spring ordered today also. Ordered that on Amazon so my wife will pay for it----LOL! 15 bucks shipped.
DAC


That little breather hose came in today. It's got a "cone" shape on the air cleaner housing end so it will be pretty simple to pull through when it goes on. It would be in the way of carb adjustments when this thing gets fired up!
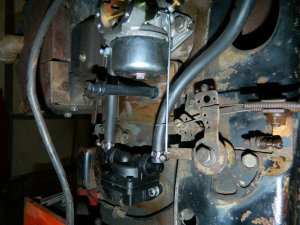
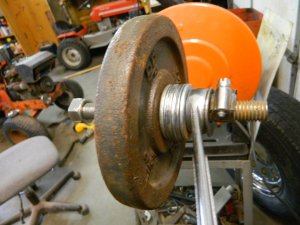
Had a bunch of errands to do so didn't get out to the shop until after noon. Put that hose in and got distracted to that bent steering wheel. It has been bothering me that it's in decent shape beside being flattened and bent. There was an old 15" wheel laying out back and that is a 15" steering wheel. I built a "press" out of a barbell weight and some all thread.
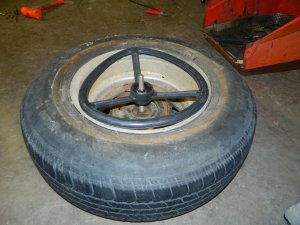
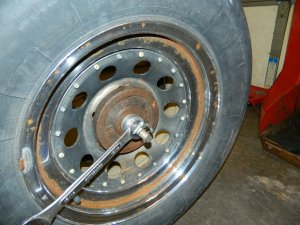
Hammered on it with the electric impact and started seeing improvement!
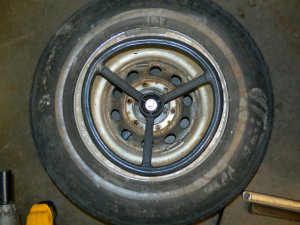
Overbent it a bit since it was probably going to spring back some.
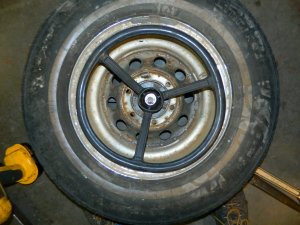
Took it out of the jig, and it will be useable now! Far from perfect but reasonably round again.
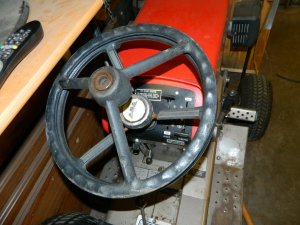
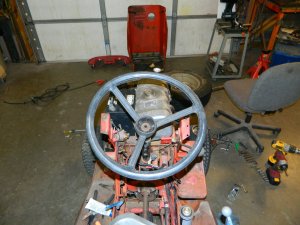
This is the contraption that did the job. Had to cut the all-thread a couple times as it would get too long for the deep well impact socket.
That's all the fun for today! Back to the day job tomorrow.
DAC

Had a bunch of errands to do so didn't get out to the shop until after noon. Put that hose in and got distracted to that bent steering wheel. It has been bothering me that it's in decent shape beside being flattened and bent. There was an old 15" wheel laying out back and that is a 15" steering wheel. I built a "press" out of a barbell weight and some all thread.


Hammered on it with the electric impact and started seeing improvement!

Overbent it a bit since it was probably going to spring back some.

Took it out of the jig, and it will be useable now! Far from perfect but reasonably round again.


This is the contraption that did the job. Had to cut the all-thread a couple times as it would get too long for the deep well impact socket.

That's all the fun for today! Back to the day job tomorrow.
DAC
Last edited:

