My new 1943 South Bend 9c lathe

Chris, I have oil in all of the cups. I also cleaned and put oil on the back shaft when I had it apart to mount on the bench. Also, when the motor acts up I can still spin everything freely.

Don, my motor has a 2” pulley. The back shaft has a 5” pulley. I think the probability pulleys where a 4 inch and 10 inch if I remember. The smaller pulleys have the same ratio.
 
Bottom line is what speed is your material turning? Lathe speed is measured if ft. per min, not rpm. This varies a lot with the diameter of of your work piece. That is why I went with a tread mill DC motor & controls. I made up a quick ref. chart using my digital tach to convert different size work from rpm to fpm. Most tread will motors will be in the 1.5 - 2 hp range. Plenty of power so run one of the v belts a little lose for slippage in case you need it. I run fro 1.5" motor to 4", then from 1.5 to 4" again. Motor rpm varies from 250 up to 4K.
 
Bottom line is what speed is your material turning? Lathe speed is measured if ft. per min, not rpm. This varies a lot with the diameter of of your work piece. That is why I went with a tread mill DC motor & controls. I made up a quick ref. chart using my digital tach to convert different size work from rpm to fpm. Most tread will motors will be in the 1.5 - 2 hp range. Plenty of power so run one of the v belts a little lose for slippage in case you need it. I run fro 1.5" motor to 4", then from 1.5 to 4" again. Motor rpm varies from 250 up to 4K.

I do not know the speed, I understand that it changes with the diameter and I will have to see what works best.
 
My cousin gave me the 1/3 HP motor, it seems to be working much better with that motor. Here is a picture of it mounted on the box. I look forward to putting it to use in the near future.
 

Attachments

  • B570D78F-FB73-478A-AA8C-849B97FD7222.jpeg
    B570D78F-FB73-478A-AA8C-849B97FD7222.jpeg
    137.1 KB · Views: 19
I got a set of HSS bits to replace the worthless cheap carbide bits. I remember somebody earlier saying they had a set of these, and didn’t use them much, now I see why.

Here is my first try at grinding a tool bit.
089C0388-08BB-45A9-B4CA-6515AEB511DB.jpeg

I know threaded rod is less than ideal... but it was nearby.
2E786A36-8807-41C2-BE87-66765E56035A.jpeg

Now that I am over the initial excitement of having a newly ground bit I realize that I really should have just got a piece of stock. I am actually a bit embarrassed to say that I tried this, but I will tell you anyway. I faced it off and turned the threads down some. The compound needs the backlash adjusted. I think that the movement is causing some chatter.
 
Today I made my first real part! I have played around with steel a little, but not much. I needed a bushing for the steering column on the 67 PK and used delrin. I thought that a plastic would be a great material to learn on since it is so soft. Long story short, I am very happy with the result. Here is the long story:

Of course, my first step was to chuck a piece of stock up.
CC5D969A-AC60-4E67-973C-678B789A3E60.jpeg

Next I faced, and turned down the stock to the smaller diameter I needed.
C2A68CDC-F179-4059-8A42-3E4E5A338B3D.jpeg

I then turned the larger side, followed by a 3/4 hole in the center. After I drilled the hole, I was ready to part it off.CB242F09-220A-4A00-A833-48948F71B7D0.jpeg

After parting, I did a test fit and noticed it would not fit over the steering shaft, immediately I knew this would be an issue. The chuck I have now has about 0.020 runout. Still, I decided to hope for the best. I used one of the cheap carbide bits to bore the hole. In a perfect scenario, I would have a 4 jaw for this, I will have to add that to my wish list. Even with the 3 jaw, I was able to enlarge the hole to fit perfectly.
8B5639F3-6788-41C3-841B-E98C52A161F2.jpeg

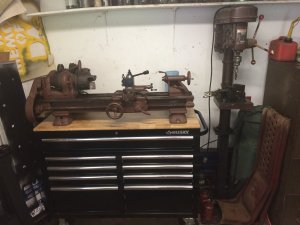
The column has no more play, and I am very happy with the result. I definitely need to clean the indicators on the dials, as they are very hard to read, I will likely color fill them also. A light on the underside of the shelf above the lathe is priority before I use it again. I kept telling myself I need to hook up a better switch, but have yet to do it. I need to do that also, I do not like reaching over the chuck for the switch.

Here are some pictures of it being assembled. The finish came out decent, the rest fits marred up the outside and ruined the nice finish; however, it will not be seen.
7247630E-8492-4D6F-9BA9-7CB4F1049C69.jpeg
3882D435-34D3-4652-A04F-FA88580C3CF4.jpeg
2821B769-26FF-4CB3-8D0F-8A4D33DF7DE1.jpeg
E48D4CE2-404E-4875-BBAE-1D5845ECF8A7.jpeg
 
If you can do all your critical cuts in one go without removing the piece from the chuck until finished runout in a 3 jaw chuck presents no problem providing of course you have sufficient stock to start with. Some times it takes lots of planning. the only advantage of 3 jaw self centering chuck is speed. Work holding on a lathe is a very deep subject. I have gone so far as to use supper glue to stick a piece of material to the face of the jaws to make a facing cut. Don
 
Most of the lathes we can afford are about wore out when we get them. Cannot expect the accurcy for them as one can from a $10K lathe, unless we drop a bunch of $$ into it. I would not worry about 0.002" run out. Lighter cuts and a few more passes & keep the fpm/rpm high enough.
 
Yes Dan, tons of fun!

Chris, I just checked again and it has 0.004” runout on the outside of the chuck. I put a piece of delrin in the jaws and it had 0.020” runout. I am not sure if it is the stock or the jaws... or if I am measuring wrong.
 
Not knowing the history of the machine can be a problem. I would guess that the chuck is mounted on a backing plate and you have no idea if it was properly fitted or not. There are many tutorials on the web describing how to check and improve run out. You can easily switch from getting you needed work done to chasing perfection on your lathe. Some times I have to remind my self It ain't rocket science Don
 
  • Like
Reactions: Alc
Without looking over your shoulder my guess would be that the delrin is out of round. .004 runout isn't bad for a machine that old. Something I started doing years ago is to mark one jaw on the chuck. Then mark your work piece to match the mark on the chuck. If for some reason you need to remove your project from the chuck you can then reinstall it later with no runout. Seems to work pretty good when turning the piece around also although not perfectly.
 
Ryan you might want to take a practice cut on some stock and mark one jaw and the stock location , turn it a little to see how much runout , then go back to the original location to see how close it will run true . That might help if you ever need to remove something to test fit . Sorry , I didn't refresh my computer and Chris said the same thing lol
 
I like the idea of marking a jaw, and my work. I will start doing that!

Don, it does have a backing plate mounted chuck. It has 3 bolts, and 2 location pins.
 
Back
Top