What are you currently working on??

You are busy with the tractors, Noel!

I've had plenty going on, but not anything with tractors. Today was designing and cutting a few stickers for a race car, scrapping out junk taking up room in the shop and repairing my computer chair. Ran out of gas for the welder, dang it! Got the chair tacked together without gas but will have to get some to do a decent weld job.

DAC
 
For the last month or so, every evening is spent forcing sum eddicashun into JR. Finally tomorrow is the last day of school! Looking forward to getting back to my projects again. Like finishing the kitchen paint and garden.
 
I have a Case in my garage, but haven't touched it. My middle hoodlum and I are replacing the fuel line and cleaning the carb on a go-cart so we can sell it--we put steer tires on it over the weekend. I'm laying ceramic tile in my bathroom and putting new flooring and breadboard wainscoting in a friend's bathroom and their laundry room.
 
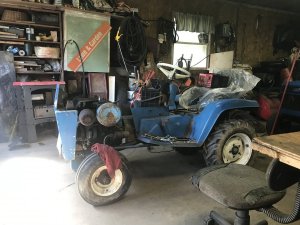
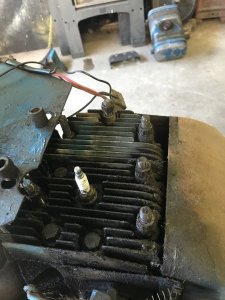
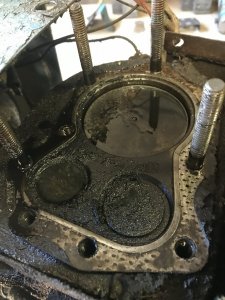
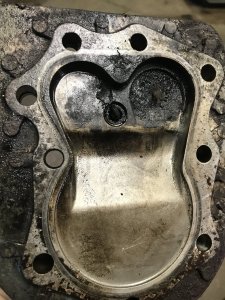
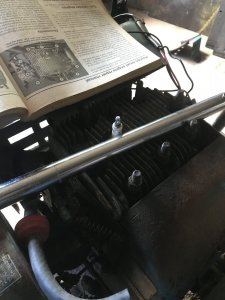
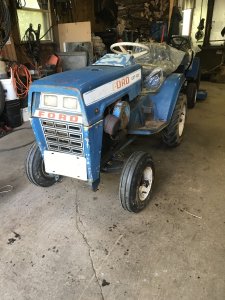
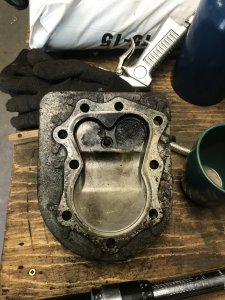
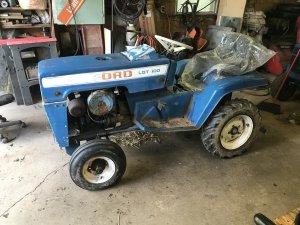
Got another one done. LGT100 Ford a.k.a Frankie and sometimes grunt. Any way changed the head. Spark plug hole was striped. Had been for a few years. But lately on idle you could see the plug move up and down. So figured I’d fix it. Greased and oiled the tractor. Checked rear end fluld and checked for water in rear end. Charged the battery. Checked lights and pto operation. Cleaned out the hay from around the driveshaft. Got into a hay field late last year. Grunt will be planting potatoes next week. And disking a old potato growing spot and putting grass seed on it.

Noel
 

Attachments

  • 6F667F23-1872-4769-AA0F-D388DBF9F5A6.jpeg
    6F667F23-1872-4769-AA0F-D388DBF9F5A6.jpeg
    208.9 KB · Views: 6
  • BC6F1BB8-5081-4C9C-BD92-0F671296CB07.jpeg
    BC6F1BB8-5081-4C9C-BD92-0F671296CB07.jpeg
    196 KB · Views: 6
  • 72072D9D-83EB-4EA9-9C8B-E06C17F34FFA.jpeg
    72072D9D-83EB-4EA9-9C8B-E06C17F34FFA.jpeg
    219.7 KB · Views: 6
  • CF691EFB-61F2-4649-B945-BE2F30D72CB0.jpeg
    CF691EFB-61F2-4649-B945-BE2F30D72CB0.jpeg
    331.5 KB · Views: 6
  • 2C464AEB-8A5C-44C3-9A57-A0CB48EBB6C4.jpeg
    2C464AEB-8A5C-44C3-9A57-A0CB48EBB6C4.jpeg
    164.7 KB · Views: 8
  • 739F79D9-36EB-4CAE-BD9F-E7C283FC6937.jpeg
    739F79D9-36EB-4CAE-BD9F-E7C283FC6937.jpeg
    257.6 KB · Views: 8
  • AD95EDE1-7B15-4CA7-BF83-D6B8605043C1.jpeg
    AD95EDE1-7B15-4CA7-BF83-D6B8605043C1.jpeg
    260.8 KB · Views: 8
  • 67301B55-9C39-4610-9D0D-7CDE0148561D.jpeg
    67301B55-9C39-4610-9D0D-7CDE0148561D.jpeg
    241.2 KB · Views: 8
No tractor work lately, last couple of nights in the garage have been spent welding, cutting and a little grinding. Not as much grinding as some of my welding projects entail. Welder was running great. I had a little problem yesterday, welding 45* corners out of 2 inch square tube.my Auto darken hood needed new lenses as the other ones were well used and pitted. Started to have problems seeing and following seams with the bead. New lenses for the hood and much better.

One of my son's friends that boards horses gave him a pile of tube and a drawing and told HIM to "build this". Idk where this is going to be set up at but they wanted a handrail 128" long, 36" tall, with 1 vertical center divider and 2 horizontal ones. Of those, a 2" tube one at 18" high with the other being 1" square tube at 9" from the ground. It was going to be built in my garage instead of his anyway but I wasn't expecting the pile to be dropped off and the job passed off onto me / but it was.
We talked about this, whether to have it at 38 or to cut the legs off 2" each, the boy wanted to just weld the top rail to the tops of the vertical legs and cut caps for the ends of the top rail, I 45'd the top rail and the end legs)/ it's a stronger joint and eliminated the need to cap anything off.
I welded up the legs, great so far. I cut the center leg to 34" (36"-- the thickness of the top rail) and welded it in place, at this point still great.
It was when I went to weld in the 1st half of the middle horizontal 2" tube, and now since welding in the middle vertical leg I had some wobble to it while laying on the garage floor, I had my wife come out to hold the other end of the tape measure so I could cut the center horizontal rails, still square in the corners but slightly warped the other direction. But all centered and measurements were good, the same from either end towards the middle.
I had her stand on the middle leg (with the handrail laying flat on the floor) while I squared up and welded in the 1st section of 2" horizontal lower rail/ and stopped there for the night. Everybody decided to stop by last nite, to BS and slow my progress.

So today after work I headed to the garage to continue, and when I went to remeasure for the 2nd horizontal 2" tube on the other side of the vertical center leg I got a different number than yesterday. 1st real sign of problem. Ok , checked everything welded out so far for plumb and square, all checked out.
But when I went to measure with the tape for the 1" square tube at 9" up I got 5/8 " difference either side of the center. Did it warp that bad from the heat of welding or did the guy get me "banana bar"?
Nick (the kid) did come by and help me finish up today which was good. Welded in the 2nd 2" middle" tube.
We then took 2" ratchet straps and tied one outside leg to my 2 post lift, and had 2 people stand on the horizontal rail (upside down) which while cranking on the ratchet strap trying to pull the center leg towards the "big" half, and cut the 1st 1" tube (what was now the "short" side) a bit long and wedged it into place with a hammer, and tacked it in, under tension. I cut the 2nd 1" tube and put it into place, it came out a bit short, I found a piece of 2-1/4" exhaust pipe (hey it was handy) which I cut to match the space between the 1st side 1" tube to 2"tube, as a jig/spacer to match the height of the 2nd 1" tube to the 1st one and welded that 1" in. The scrap exhaust pipe worked great as a spacer to set the 1" on top of, while I welded that at each end.

Now last night, when I last set it up right on the garage floor, (note above where I had left off) and all 3 legs sat perfect on the concrete.
Tonight when we went to weld on the feet for mounting, the ends were fine, but the center (which we did last) had 1/2" of daylight underneath, with the plate beneath the center leg. In the same place within the garage, as I was working last nite, even. We're not talking sheet metal here. This was 0.090" thick walled 2" square tube. I found some 1-1/2" tube and tacked it to the mounting plate, stuck that inside/under the center leg, and ran off probably a 1/2 a roll of mig wire to weld in the gap/ and tie it in to the center leg.

It came out level and plumb somehow but with all the fighting of distortion from the heat, it's a miracle that I'm not sure how happened. I certainly wouldn't have expected this much problem keeping everything square.
 
Last edited:
Wow I hope I haven't scared everyone off nobody posted here in a while.
Sitting in my truck with the AC on in the vet parking lot with one of the cats who is wailing more than he has in about 5 years put together,had the window down and he got quiet, it's 90 here and was getting warm in here, so I started the truck and turned the air back on and stupid (his name is really Monster) is wailing away again.
Just a checkup and rabies shot.
Gotta wait outside til they call me, again stupid. Never had to make a vet visit like this before.
 
Today I received the driven speedometer gears and c-clips that I ordered for our 1981 Ford Bronco. I had ordered 18, 19, and 20-tooth gears to see which one would make the speedometer indicate correctly. (The original one must have disintegrated and fell in to the transfer case..... I drained the case, but found no pieces, so I had no idea which one was in there originally).

I chose to use the 19-tooth gear first..... appears to be dead-on according to a speedometer app on the phone.

About a 5-minute fix!
 
Tractor work today was on the first MF14 I rebuilt. I have had I parked in front of the garage for a couple of days and today I noticed and oil leak, turned out to be a loos line on the hydraulic lift valve. I noticed when it was running there was a high pitch whine by the engine (k341). I did some checking with it running and found it was coming from the blower housing. I did some checking and notice it did not have the 2 bottom bolts holding the housing. After trying for 30-40 minutes with no luck of just putting the bolts in I decided to lift up the left side of the engine for a better look and found the bottom bolt was broken on both sides. Only way to fix it is to pull the engine out of the tractor, took the flywheel off and the bearing plate off. I put the bearing plate in the vise mark both bolts with center punch and drilled through both bolts. I ended up breaking off one easy out, ended up putting some heat on the housing but neither bolt would move. Started looking around on my engine part bench found another bearing plate and ended up installing it on the engine. Tomorrow am I will be putting the engine back in the tractor along with the grass screens which were also missing.
 
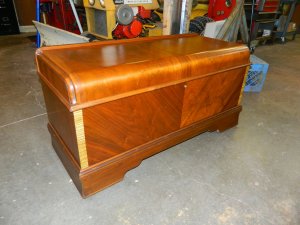
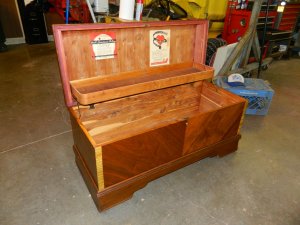
Nice job on the chest Doug. take a picture of my aunts. They look the same.


Noel

Today is ,,, Mowing Monday Doug. Don’t forget.
 
Nice job on the chest Doug. take a picture of my aunts. They look the same.


Noel

Today is ,,, Mowing Monday Doug. Don’t forget.
Thanks! That would be cool to see her cedar chest, Noel! This particular one was new in 1939.

Yes, I'm going to make a mowing report in a few minutes!

Looks very nice. Good job.

I'm sure she would be happy that her cedar chest is fixed up.

I appreciate that Aaron! Yeah, it always made her happy to see pictures of old stuff from the family, and now this possession of hers is presentable enough for use again. As much as that thing moved all over the US and South America, it should have earned a lot of frequent flyer miles---LOL!

DAC
 
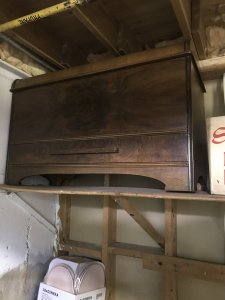
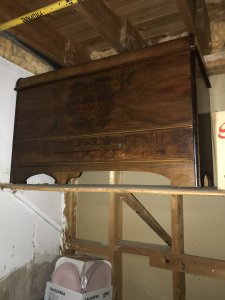
Well not quite the same Doug. And can’t get good pictures. Up on a shelf waiting to go to its new owner in Ottawa. This chest would have been bought between 1940 and 1945.

Noel
 

Attachments

  • 62C698BE-00CC-4FEA-BE50-C0DE8CE8EEFE.jpeg
    62C698BE-00CC-4FEA-BE50-C0DE8CE8EEFE.jpeg
    132.2 KB · Views: 5
  • EE249E6E-0FBE-4A78-9BE8-A04A2C47A763.jpeg
    EE249E6E-0FBE-4A78-9BE8-A04A2C47A763.jpeg
    145.3 KB · Views: 5
  • 9446DB1A-F491-4E88-AD16-8BF3F96E16DF.jpeg
    9446DB1A-F491-4E88-AD16-8BF3F96E16DF.jpeg
    136.6 KB · Views: 5
  • 548FC321-B744-493A-ABD2-63521DD7E5ED.jpeg
    548FC321-B744-493A-ABD2-63521DD7E5ED.jpeg
    128.3 KB · Views: 5
That looks like a nice piece of furniture, Noel! It has that same rounded front lid. Appears this one may have a drawer in it too. I just hope it gets much kinder handling than ours did during shipping.

DAC
 
The a/c condenser won’t cycle up. No compressor, no fan. Buzz from capacitor. By the time I tested it, too late to run somewhere. But then I checked, no one has it in stock. Amazon will have one here tomorrow.
$15.02
Bet the bill from a repair service would be $200 +, and rightly so, but that’s a lot of beers.
 
Back
Top