What are you currently working on??

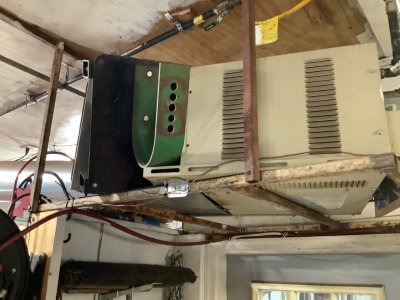
I started unpacking the new garage door opener and possibly installing it yesterday. After unpacking, I found NO installation manual. I had to search the model online and download it. I also watched a video of a guy installing it. By that time, the temps starting dropping and I came in.
Also washed some of the salt off the Dodge, it's got enough rust on it already.
 
Needed a belt guard for the roper. Have nothing here resembling one. Did have a piece of expanded metal. No idea how I ended up with it, but it sacrificed itself for the cause. Went to Dollar General and picked up a poster board. Used it to make a template. Then cut out the expanded metal. A little on the large side but it covers everything.
Need to scrounge something for running boards.
 

Attachments

  • IMG_1704.jpeg
    IMG_1704.jpeg
    404.9 KB · Views: 9
  • IMG_1705.jpeg
    IMG_1705.jpeg
    338.8 KB · Views: 10
  • IMG_1706.jpeg
    IMG_1706.jpeg
    195.8 KB · Views: 7
  • IMG_1708.jpeg
    IMG_1708.jpeg
    329 KB · Views: 6
  • IMG_1710.jpeg
    IMG_1710.jpeg
    398.2 KB · Views: 8
  • IMG_1711.jpeg
    IMG_1711.jpeg
    344.6 KB · Views: 8
  • IMG_1712.jpeg
    IMG_1712.jpeg
    372.1 KB · Views: 8
  • IMG_1713.jpeg
    IMG_1713.jpeg
    285.5 KB · Views: 10
Snow plow lights needed adjusting last night so I did that and everything worked fine. Got up this morning to plow and then the plow stopped working!!! o_O

Spent the morning wrestling with connections and wiring and valve and hoses trying to figure out WTF is going on. Spent some quality internet time reading other people's troubleshooting and got a few pearls but not the diamond in the rough. It turned out that after having this plow 10+ years the problem was one of the connections for the valve solenoids.. The 'drop down valve was open and causing the electric control gizmo to fault. Now that I knew what valve was what I traced that wire.. I pulled the solenoid to wire harness connection apart and found paint on the conductor pin?!?!? I scraped all of the paint off and applied dielectric grease to the thing and put it back together and Viola- It finally works!! Then a polwing I went 6 hours later..
 
Made a plate to cover the space around the shifter.
Found a piece of aluminum diamond plate. Already close to the right size. Cut out the middle and screwed it down.
The plate was a freebie from Trail95. When he cleared out his shop and garage I picked up several small pieces.
This one came in handy.
Still looking for something to make foot boards out of.
(Been eyeballing the running boards on the neighbors truck):rolleyes::rolleyes::rolleyes:
 

Attachments

  • IMG_1716.jpeg
    IMG_1716.jpeg
    317.7 KB · Views: 7
  • IMG_1717.jpeg
    IMG_1717.jpeg
    327 KB · Views: 7
Got up wednsday and it was 63* in the house so called my HVAC and a guy showed up about an hour later and as it turned out he wasn't the knowable on Water Furnaces so he said he would talk to someone who knew this type. Next day another guy showed up and he found a contacter was bad. It has also been tripping the breaker so I have to get one of those.
 
Grabbed some angle iron, and welded some foot boards. Would like to civer them withexpanded metak if I can find some heavy enough. Probably use sheet metal and some stick on traction sheets since I have that.
 

Attachments

  • 20250123_085927.jpg
    20250123_085927.jpg
    261.4 KB · Views: 8
  • 20250123_091045.jpg
    20250123_091045.jpg
    269.8 KB · Views: 8
Grabbed some angle iron, and welded some foot boards. Would like to civer them withexpanded metak if I can find some heavy enough. Probably use sheet metal and some stick on traction sheets since I have that.
Rick I'm sure you said over the years...but that tractor don't look like no Roper...at least the hood..heck maybe that's the only thing..
 
Ugh
I'm working on the 2nd F250 in a little over a month where the oil dipstick tube rotted off. Another 6.2 gas. First one was 2012 4wd this one is 2017 2wd. Got the ac sucked down, fan off, starter off and nuts off the exhaust flange so far... Still gotta pull the ac compressor, the exhaust manifold and the motor mount....
I hope I don't have to pull the pan on this one
If so that means engine removal ... And people wonder why I HATE Ford's.... Their better ideas usually AIN'T.
But this miserable state I live in, and am employed, by loves them... At least the bean counters do. The saying that goes "if it weren't for Ford's my tools would rust" was never truer.
We're starting to see a few Chevy's and Dodge chargers mixed in but not many.
Could be worse.... At least they don't stoop to imported brands. They do that and I'm transferring to the local state Park as soon as they get an opening at that point/ , I'll mow grass plow snow and cut trees for the 10 years I have to go before I can retire before I touch a Toyota a Nissan, a Hyundai, a honduh , or a Kia...
 
Last edited:
Yesterday I reconfigured my weiding cart. It did not have a shelf for the welder. Got tired of squatting down to change settings or wire.
Added a shelf and painted it with a hammered look grey paint. One of the $2 spray cans from a store close out sale.
 

Attachments

  • 20250127_145901.jpg
    20250127_145901.jpg
    213 KB · Views: 8
  • 20250127_153442.jpg
    20250127_153442.jpg
    180.5 KB · Views: 8
  • 20250127_153454.jpg
    20250127_153454.jpg
    208.5 KB · Views: 8
Today the temperature got up to 47*. I had some parts ready to paint and decided today is the day.
I put the parts in front of the furnace outlet to heat up. Warmed the paint cans also.
While things were warming up I set up a wind block/paint booth. Shook up the cans of paint in my custom paint mixer. :D
Turned up the heat in the bathroom.
After priming and top coating the are hanging in an 80* bathroom.
After Bout 5 hours the temperature has been returned to normal. Should be good and dry tomorrow.
Used the $2 paint from the store closing. The Rustoleum orange paint was the thinnest I have ever painted with.
I have more runs than the Cubs scored all last season.
 

Attachments

  • IMG_1720.jpeg
    IMG_1720.jpeg
    248.3 KB · Views: 15
  • IMG_1721.jpeg
    IMG_1721.jpeg
    279.9 KB · Views: 19
  • IMG_1722.jpeg
    IMG_1722.jpeg
    278.1 KB · Views: 16
  • IMG_1723.jpeg
    IMG_1723.jpeg
    360.1 KB · Views: 15
  • IMG_1725.jpeg
    IMG_1725.jpeg
    225.2 KB · Views: 13
  • IMG_1726.jpeg
    IMG_1726.jpeg
    268.5 KB · Views: 12
  • IMG_1724.jpeg
    IMG_1724.jpeg
    299 KB · Views: 18
Got the hood and seat/bracket reinstalled on the Frankenstien tractor today.
Sun shining and 60*. Time for a photo shoot.
Tractor is going back into the shop and figure out putting on a crane or boom on the back.
 

Attachments

  • IMG_1727.jpeg
    IMG_1727.jpeg
    542.6 KB · Views: 12
  • IMG_1728.jpeg
    IMG_1728.jpeg
    539.3 KB · Views: 15
  • IMG_1729.jpeg
    IMG_1729.jpeg
    504.8 KB · Views: 11
  • IMG_1730.jpeg
    IMG_1730.jpeg
    481.4 KB · Views: 9
  • IMG_1731.jpeg
    IMG_1731.jpeg
    526.5 KB · Views: 9
  • IMG_1732.jpeg
    IMG_1732.jpeg
    525.3 KB · Views: 9
  • IMG_1733.jpeg
    IMG_1733.jpeg
    502.4 KB · Views: 9
  • IMG_1734.jpeg
    IMG_1734.jpeg
    411.5 KB · Views: 9
  • IMG_1735.jpeg
    IMG_1735.jpeg
    457.3 KB · Views: 14
Last edited:
Spent the last couple days building components for the crane.
Got it all figured out. With a lot of welding, cussing, grinding, cussing, cleaning cussing.
After a few minor alterations it all fit together and functioned.
Goes from 13” to 83” at the end of the arm.
Lifted my 220 lbs. easily.
Pull 4 pins to remove the vertical post, the arm, and actuator.
I can still pull a wagon with the drawbar or install a ball in the receiver to move my trailers.
May get to paint it all tomorrow.
 

Attachments

  • IMG_1738.jpeg
    IMG_1738.jpeg
    321.7 KB · Views: 18
  • IMG_1739.jpeg
    IMG_1739.jpeg
    317.8 KB · Views: 18
  • IMG_1741.jpeg
    IMG_1741.jpeg
    282 KB · Views: 16
  • IMG_1743.jpeg
    IMG_1743.jpeg
    397.8 KB · Views: 13
  • IMG_1744.jpeg
    IMG_1744.jpeg
    415.1 KB · Views: 10
  • IMG_1747.jpeg
    IMG_1747.jpeg
    361.7 KB · Views: 10
  • IMG_1749.jpeg
    IMG_1749.jpeg
    355.4 KB · Views: 21
Spent the last couple days building components for the crane.
Got it all figured out. With a lot of welding, cussing, grinding, cussing, cleaning cussing.
After a few minor alterations it all fit together and functioned.
Goes from 13” to 83” at the end of the arm.
Lifted my 220 lbs. easily.
Pull 4 pins to remove the vertical post, the arm, and actuator.
I can still pull a wagon with the drawbar or install a ball in the receiver to move my trailers.
May get to paint it all tomorrow.
do you have something set up for front weight, or is that v-twin heavy enough, Rick? Looks great. My crane plugs into the 3 point receiver on the T-bar so it is a little further behind the rear axle.

DAC
 
do you have something set up for front weight, or is that v-twin heavy enough, Rick? Looks great. My crane plugs into the 3 point receiver on the T-bar so it is a little further behind the rear axle.

DAC
The battery and gas tank sit high and in front of the engine.
Below them is a post set up to receive weights.
I can stack up 5 bar bell weights as needed.
 

Attachments

  • IMG_1729.jpeg
    IMG_1729.jpeg
    504.8 KB · Views: 8
Back
Top