
You are using an out of date browser. It may not display this or other websites correctly.
You should upgrade or use an alternative browser.
You should upgrade or use an alternative browser.
What are you currently working on??
- Thread starter backwoods
- Start date
Got my mowing at the farm done with the 2025R this morning, along with a little loader work. The driveshaft shield did it's job, no winding grass this time! I'll wait til later in the season for the rest of what I'll mow, I kicked up a big spotted fawn this morning, don't want to hit one of those! Heavy grass was a little slow going with the 5' cutter, but the 2025 handled it OK. Mostly mowing weeds in the trails today.
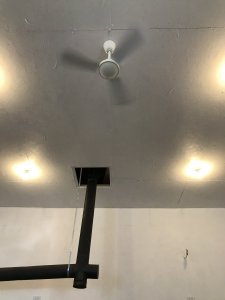
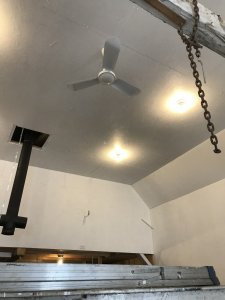
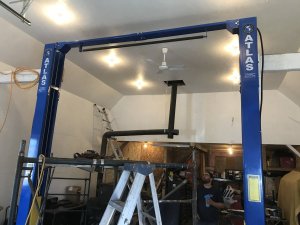
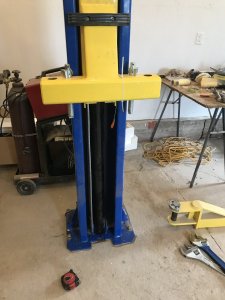
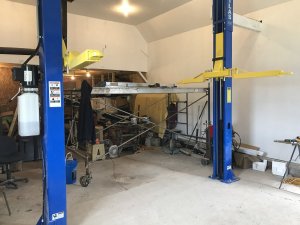
Helped put a fan in the shop today. And unboxed the hoist and stood up the columns, to get a look for set up.
Noel
Noel
Attachments
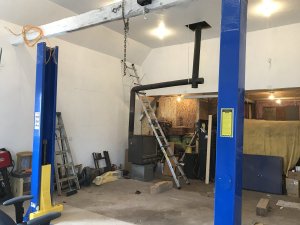
You guys removing that beam across the middle ?
Had a first for me today! Customers JD D100, putting new spindles, blades and deck belt. It had an issue starting like the starter bushings were bad. Got all the new parts on it, went to start it, it wouldn't turn over. Rotated the engine back a bit to let the starter get going and the engine just locked up. Have to use a pry bar to turn it at the flywheel. Piston is sill working. Think it's in the upper crank area just below the flywheel. Briggs is good for having the crank turning in the aluminum housing up there. No bushing at all.
Those Intek engines were only designed for about 500 hours. They build them cheap to sell, not last unfortunately.
Like just about everything else these days....
Finally have the chicken coop area 90% finished. Enclosure is done completely and the coop itself just needs the trim and roofing done. Its taken way longer than I thought it would.
The chickens are living in it and seem to be doing well. They are growing fast...
The chickens are living in it and seem to be doing well. They are growing fast...
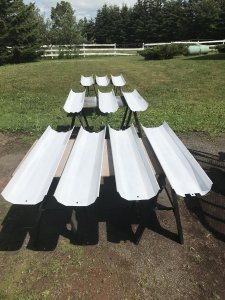
Son has been saving these for 7 years that he got from his work when they were gunna throw them out. He has had a vision about fixing up the old barn and use these light fixtures in it. Well today he cleaned them and I painted them. They will be going up in a few weeks.
Noel
Noel
Attachments
Put a new plug on the trailer to eliminate the adapter from the small round to the large 7 pin round which is standard. Checked the triler wiring out with a battery and jumpers. All ok as I figured it would be. Put the plug on and no left tail or turn and no left marker lights. Got to dig deeper but suspect it is in the left tail/turn lamp assembly. One of the sealed units, or supposed to be.
finished the shingles on the chicken coop last night since it is supposed to rain today. Now I need to empty the bed full of trash out of my truck at the dump so I can go pick up some wood for trim boards. It'll be ready for paint and I can have it done.
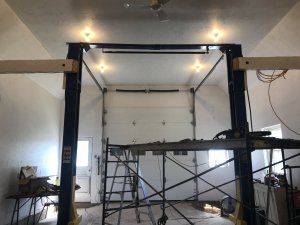
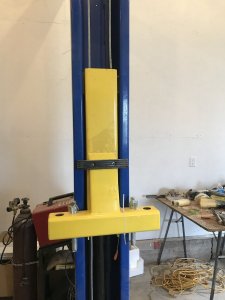
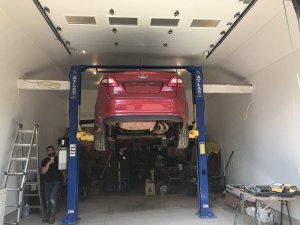
Took out the wood beam beside the hoist today. Secured the rest of the beam to the hoist. And drilled the other column so it can be anchored. Just a matter of tightening the bolts in the hoist parts and floor anchors. Power maybe to it tomorrow. Still have to get hydraulic fluid. Put hoses together and fill with the fluid. We want to run it up and down a few times before we do the final tightening of all the bolts and anchors.
Noel
Noel
Attachments
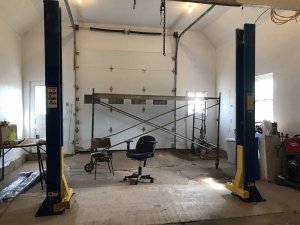
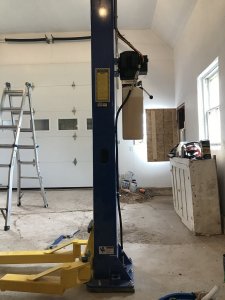
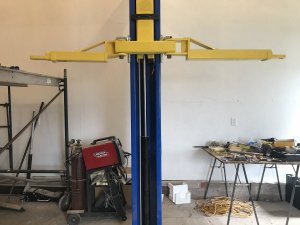
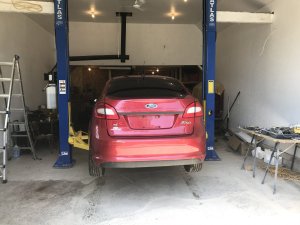
So. A little more done with the hoist today. Power is hooked up, all assembly bolts tight, other than the anchor bolts. Will run the hoist up and down a few times, empty, just to settle things in, before torquing. The anchor bolts are snugglely, but not torqued yet. They need to be torqued to 85 ft lb. So will do it in stages, 50,70 and 85. And let them sit for a 10 to 15 minutes in between. May not have to do that. But that’s what I want to do. Plus may put small car on hoist and lift it just off the ground to put weight on while torquing. Still have to put the hydraulic fluid in and bleed air out. So hopefully it goes up and down tomorrow.
Noel
Noel
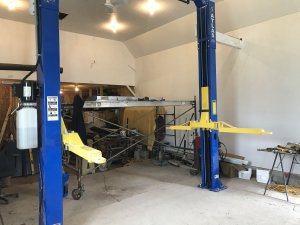
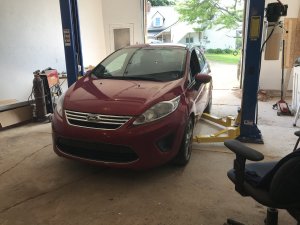
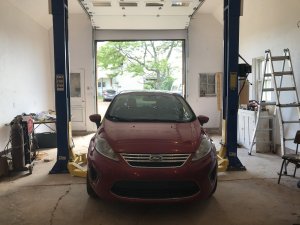
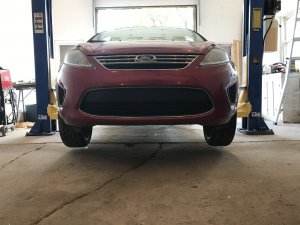
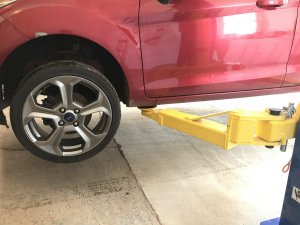
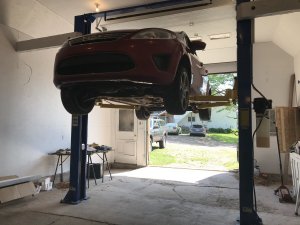
So. That’s the end of the hoist installation. Filled it with fluid. Bleed the air out. Adjusted cables. Adjusted one lock. Put it up and down a few times. Rechecked a few things. One cable was dragging on some metal up top. Adjusted that. Torqued all the floor bolts. Put a small car on it, and put it up and down a few times. My heavens, it’s a great thing. No more layin on the beepin floor.
Noel
Noel
Attachments
-
 E782E3C3-39D8-43F3-9970-5782054DF2F8.jpeg155.3 KB · Views: 8
 -
 CF7F7E2C-A28F-43E6-939F-BE9AAD4761F6.jpeg122.3 KB · Views: 8
 -
 E3DAC6E4-82DA-4633-86EE-A9AB602065E4.jpeg157.6 KB · Views: 8
 -
 20CE41E8-5476-4E26-9BAE-FD2B68302B30.jpeg155.4 KB · Views: 8
 -
 2369F0A6-618A-4F66-8B5F-77303F6C21F0.jpeg157.3 KB · Views: 8
 -
 FF18FAE3-BA87-4EC7-A75C-BA5EC8D7F0B1.jpeg140 KB · Views: 8
Few more pictures.
Noel
Noel
Attachments
-
 50483BA9-D131-48AB-8E24-89F173934FA4.jpeg178 KB · Views: 7
 -
 90E67A17-B8DF-48BC-92A3-5D6DA1B54589.jpeg169.3 KB · Views: 7
 -
 D0ED6470-2BF8-457D-AF11-9D5165492235.jpeg171.6 KB · Views: 7
 -
 3BA46B84-2698-4362-B476-7136972D1DBA.jpeg153.7 KB · Views: 7
 -
 90C057E8-2DFF-4187-8C9F-DC9B4EA0CBE3.jpeg152.5 KB · Views: 8
 -
 912FB5B0-F998-4830-B140-876C2B5EA666.jpeg168.2 KB · Views: 9
 -
 BB6B8006-F3BF-4ED4-AAA6-F9B35249A8B9.jpeg137.8 KB · Views: 9