You are using an out of date browser. It may not display this or other websites correctly.
You should upgrade or use an alternative browser.
You should upgrade or use an alternative browser.
What are you currently working on??
- Thread starter backwoods
- Start date

You already had the engine?Well the Husqvarna tiller is a no go! Trans has stripped gears in it! Gonna use the Predator engine elsewhere. Look for a new thread!
I have a tiller here too that I got in "not running" condition, I did get mine running, but can't get it to idle, carb is apparently beyond hope, runs pretty good at high speed/but smokes when I go wide open with the throttle (bypassing the governor with my fingers momentarily) the last engine I had that did that the smoke went away after a fresh oil change with new straight 30, hope this one does the same///
If not I'll have to see if a 8hp Briggs will bolt up with same crank height, etc in place of a H60 Tecumseh. I have a good used one in the shed. Still planning on flipping this machine, hopefully the tiller (running) and the engine can go separately but if I can and have to I'll combine the two.
Other issue with the 6 was the rodent motel under the shroud. Motor seems quite tired when running, compared to condition of rest of the machine. But runs more than good enough to test out the trans and tine drive which is good.
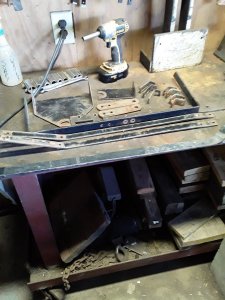
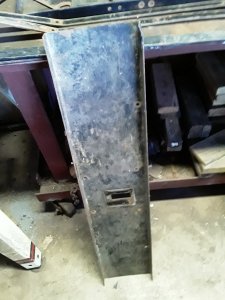
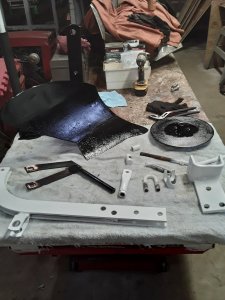
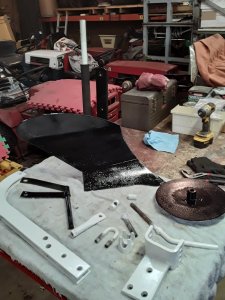
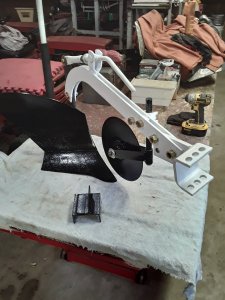
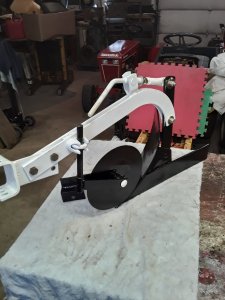
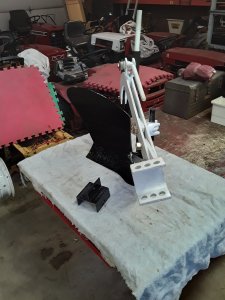
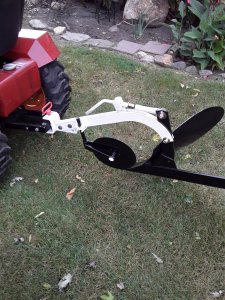
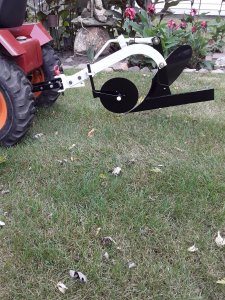
I got around to refurbishing the old Brinly plow. I dismantled it. Cleaned it, then painted it. After drying I reassembled it with new hardware.
I left the black paint on the plowshare and moldboard until and if I plow with it. Then I'll sharpen and polish them. The extra piece on the bench is an adaptor to use the sleeve hitch as a drawbar.
I left the black paint on the plowshare and moldboard until and if I plow with it. Then I'll sharpen and polish them. The extra piece on the bench is an adaptor to use the sleeve hitch as a drawbar.
Attachments
-
 20200930_091603.jpg191.2 KB · Views: 8
 -
 20200930_091645.jpg188.1 KB · Views: 8
 -
 20200930_095039.jpg187.9 KB · Views: 8
 -
 20200930_095050.jpg153.3 KB · Views: 8
 -
 20200930_095100.jpg172.1 KB · Views: 8
 -
 20200930_095640.jpg364.4 KB · Views: 8
 -
 20200930_095650.jpg429.5 KB · Views: 8
 -
 20200930_095737.jpg436 KB · Views: 8
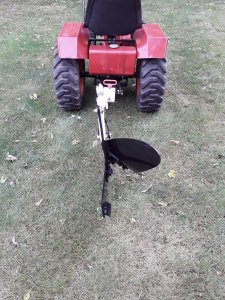
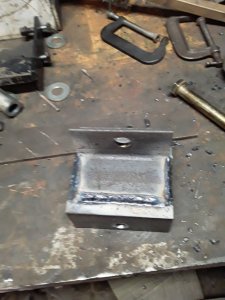
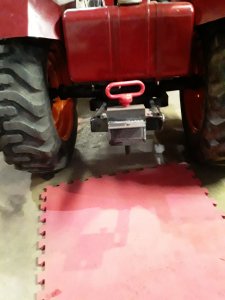
By putting the sleeve hitch on the Speedex I had nowhere to hitch up either of my wagons or the sulky. So I made an adaptor to mount on the sleeve hitch so I could pull something with a tongue. I had a piece of angle iron that was the perfect width if I welded two pieces together. After drilling two 5/8ths holes I found spacers the right size to hold that dimension while I welded it. A third piece was cut and drilled, then welded on the side.
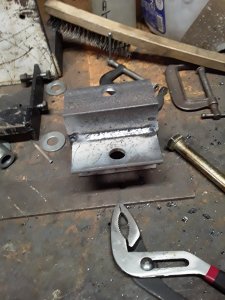
After welding , cleaning and painting it fits nicely on the sleeve hitch, using the adjusting bolts to snug it in place.
After welding , cleaning and painting it fits nicely on the sleeve hitch, using the adjusting bolts to snug it in place.
Attachments
-
 20200929_163615.jpg120.8 KB · Views: 13
 -
 20200929_165411.jpg138.7 KB · Views: 13
 -
 20200929_165416.jpg154.5 KB · Views: 13
 -
 20200929_170204.jpg142.3 KB · Views: 13
 -
 20200929_170221.jpg175 KB · Views: 11
 -
 20200929_170233.jpg123.8 KB · Views: 11
 -
 20200929_170511.jpg133.8 KB · Views: 12
 -
 20200929_183820.jpg150.3 KB · Views: 13
Nice solution for the problem!By putting the sleeve hitch on the Speedex I had nowhere to hitch up either of my wagons or the sulky. So I made an adaptor to mount on the sleeve hitch so I could pull something with a tongue. I had a piece of angle iron that was the perfect width if I welded two pieces together. After drilling two 5/8ths holes I found spacers the right size to hold that dimension while I welded it. A third piece was cut and drilled, then welded on the side.
After welding , cleaning and painting it fits nicely on the sleeve hitch, using the adjusting bolts to snug it in place.
Working on two flat tires this morning. Front on the H16XL with front blade was flat yesterday in the shed. Tried to air it up and found a short split in the center of the tread. Have to replace that one. Second one is the rear on the IH 1650. 12" wide tire with chains and 75 lb weight. Slow leak that need addressed before winter as that has the snow thrower on it. Biggest issue is getting that weight off and back on without smashed fingers.
I have found that a 4X4 (3.5" X 3.5") is just about perfect for the bottom of the weight to rest on for installation/removal. Keeps your finger from between it and the floor.Working on two flat tires this morning. Front on the H16XL with front blade was flat yesterday in the shed. Tried to air it up and found a short split in the center of the tread. Have to replace that one. Second one is the rear on the IH 1650. 12" wide tire with chains and 75 lb weight. Slow leak that need addressed before winter as that has the snow thrower on it. Biggest issue is getting that weight off and back on without smashed fingers.
T
That works good Kenny. I have a light duty floor jack I lay a 2X6 on and the weight on that. Actually, getting the weight on the wheel is easier than getting it in the right position. Maybe we need a H&**(%@ ?I have found that a 4X4 (3.5" X 3.5") is just about perfect for the bottom of the weight to rest on for installation/removal. Keeps your finger from between it and the floor.
Naw! Just a sky hook! But I seem to have misplaced mine!T
That works good Kenny. I have a light duty floor jack I lay a 2X6 on and the weight on that. Actually, getting the weight on the wheel is easier than getting it in the right position. Maybe we need a H&**(%@ ?
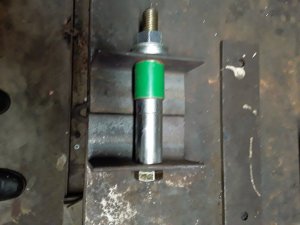
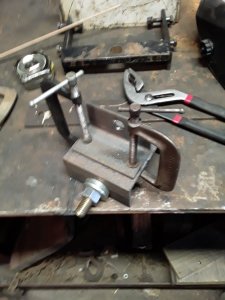
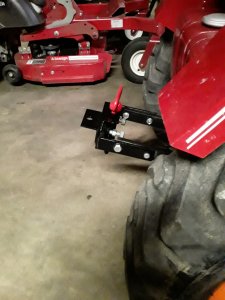
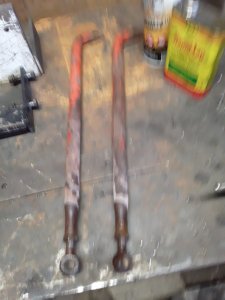
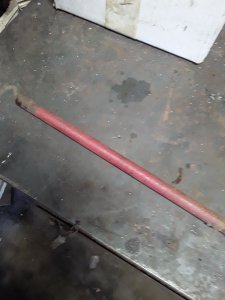
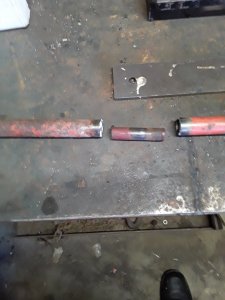
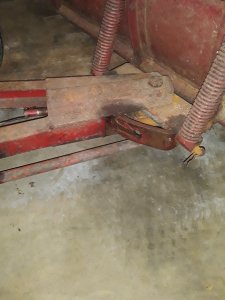
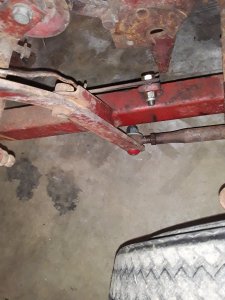
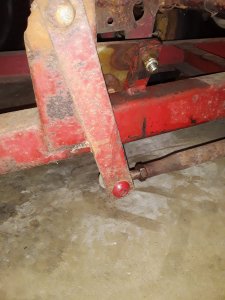
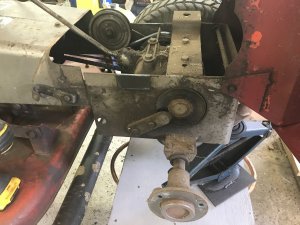
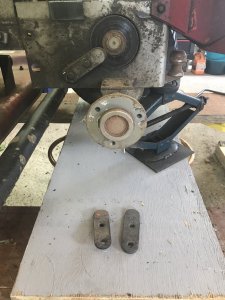
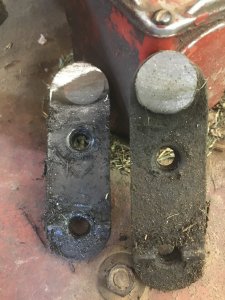
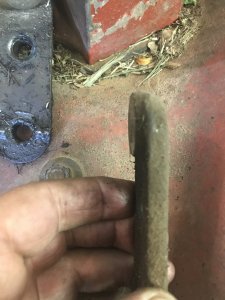
I have a Wheel Horse 856 with a snow blade that requires some TLC. The rod connecting the pivot lever to to blade was missing. After taking a few measurements and scrounging through the scrap metal pile I came up with a solution. I had a couple adjusting arms off of an old mower deck. After freeing the rod ends and chasing the threads, the two pieces were cut to length and welded together. I chamfered the end of each piece and inserted a section of 5/8ths rod to stiffen it. Before completely welding it I did a test fit and verified it would work. The new rod is now adjustable and the patina matches the tractor. It actually a lot heavier than needed, but it was what I had on hand ,and I don't mind overkill.
Attachments

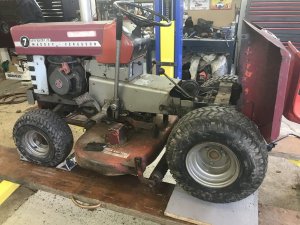
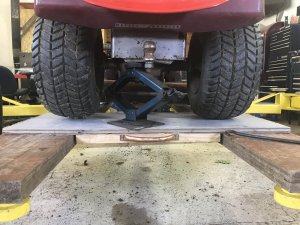
New brake pads on the MF 7 today old ones worn out after 15 years. Turned the rotor too. Repaired seat bracket. Had a few cracks. Put fuel stabilizer in gas and cleaned deck. That’s it for this year. No more cutting grass.
Noel
Noel
Attachments
-
 BD77EC2E-A312-4F67-A4B4-327BDB66658B.jpeg236.5 KB · Views: 7
 -
 6210C78B-BD67-44CF-980C-7A894B4EC8D0.jpeg246.1 KB · Views: 7
 -
 318E570E-AF1B-4EDD-B78D-B71617F6E6F9.jpeg194.7 KB · Views: 7
 -
 813A4CFE-D627-41FA-94C3-AFEA06ED67CF.jpeg210.1 KB · Views: 7
 -
 67908565-525A-4A9C-8EA2-89DDA89A54C3.jpeg205 KB · Views: 7
 -
 5D048240-E0AA-4EF8-A5EB-987ACC020CE0.jpeg177.6 KB · Views: 7
 -
 580A836B-4F9E-406C-9959-C9D4DCCB59F7.jpeg103.5 KB · Views: 8
 -
 162F264B-D10F-47F5-B6AA-013CE4990885.jpeg201 KB · Views: 8
 -
 9E8145C7-7294-49A3-98F6-F98FBB0D493B.jpeg182.8 KB · Views: 8
Last edited:
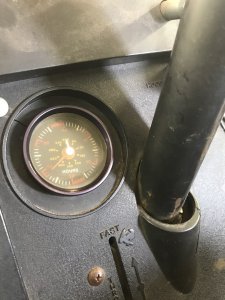
I would like to get at the amp gauge, on the dash, of my 446, 1982 Case. Seems like every thing in the way. Does it maybe just pull up out of the dash. Took the steering tower cover off and ya can’t see nuthin. Same with up top. And the tower all one piece. Don’t see any where to remove it.
Anybody have any ideas. Thanks.
Noel
Anybody have any ideas. Thanks.
Noel
Attachments

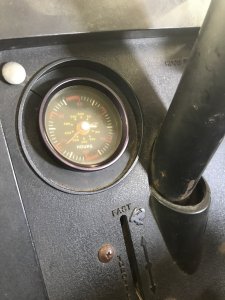
Wish i could help Noel! Not only have I never seen a round hour meter like that Ford, I've never seen one of those Case tractors up close before. Obviously there has to be a way, but it sure looks like a lot of stuff may have to be removed to get at that ammeter.
DAC
DAC
Thanks Doug. Ya. Different type of hour meter, and it takes a little looking at it to figure out how it measures.
And the Case is not charging. Need a regulator. Have two used ones, but not the same hook up. Will see tomorrow if we can get one to work. And I’d like to see the amp meter working. I‘m just wondering if wires are hooked up.
Have you had the 55 out lately ? Soon time to store away. Rambler and mustang will be put away with in the next two weeks.
Noel
Gauge should come out top side, but there is probably a u shaped bracket on the backside clamping it to the dash. Usually just one nut holding it on.I would like to get at the amp gauge, on the dash, of my 446, 1982 Case. Seems like every thing in the way. Does it maybe just pull up out of the dash. Took the steering tower cover off and ya can’t see nuthin. Same with up top. And the tower all one piece. Don’t see any where to remove it.
Anybody have any ideas. Thanks.
Noel
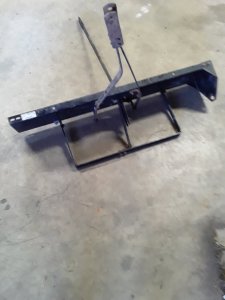
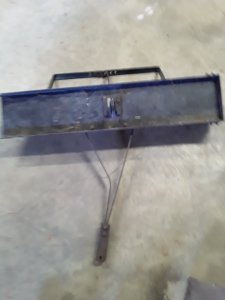
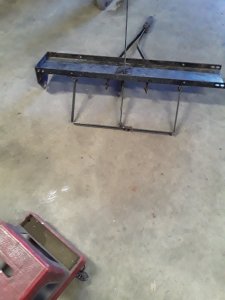
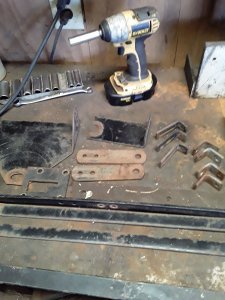
I was working on the Elec-Trak yesterday and every other time I turned around I was tripping on this thing. I think it was originally a dethatcher.
I don't remember how I got it but it now decorates my steel stash. It gave up several brackets, some flat stock and a plate that will be nice for making some battery trays.
I don't remember how I got it but it now decorates my steel stash. It gave up several brackets, some flat stock and a plate that will be nice for making some battery trays.