I never even knew you had this Nick, THATS COOL!! You did a great job on the restoration, I hope you show it with your real tractors.I haven’t been doing much with my real tractors recently, but I finished up my JD pedal tractor that I restored. I actually finished this about 10 years ago, but never got the decals for it. I recently saw a set on eBay and bought them and put them on. It’s officially done now.
View attachment 98601View attachment 98602View attachment 98603View attachment 98604View attachment 98605

You are using an out of date browser. It may not display this or other websites correctly.
You should upgrade or use an alternative browser.
You should upgrade or use an alternative browser.
What are you currently working on??
- Thread starter backwoods
- Start date
My stepdad finally painted his garage door after 32 years, its the red one on the right. He said he had to replace some of the rotted wood on the bottom of it. He used Behr staining which I posted pictures of here too….


All prepped for stain…..

All done…..

All prepped for stain…..
All done…..
Thank you! I just may take it to some shows, I was already thinking about that.I never even knew you had this Nick, THATS COOL!! You did a great job on the restoration, I hope you show it with your real tractors.
Pulled the wood splitter up to the shop to get running to hopefully sell. Been parked outside with tub over the engine since the building it was in disappeared in the tornado over a year ago. Pulled the shroud off that old cast iron 10 hp B&S and as expected and mouse hotel. Bot it all blew out and cleaned up found they had been chewing some on the plug wire so taped that up good. Then noticed there are two bare wires from the magneto twisted together and a small loop at the end. Have no idea where they were attached but am sure they go to ground. No spark when I pull it over, plug looks real good so will have to get that solved first. Got the flywheel cleaned up and the ends of the plates on the mag. Back was done for the day so that is where I left it. This is a rope start engine, no charging, lights or any of that stuff. Any other suggestions for those two bare wires let me know. Other two wires are to the plug and points. Ground the sparkplug to kill the engine. Real old school.
Last edited:
Finally found the info I needed. The two wires are normally not used in this setup. The ignition coil is bad, open between the plug wire and the coil base. Rusted up pretty bad so not surprising. New one should be here Saturday. Put the new points, condenser and lug on it this morning. Fun trying to keep the .10 setting right as it changes every time you tighten the lock nut on that adjusting screw. Have to set the points at about .12-.13, then tighten the nut and it bring them back to .10"
Got done with those slotcars tonight. Gets a little tougher every year---LOL! Had to use the magnifier in the first pic for all of it, and getting shakier don't help a bit!

Tried not to get color repetition in body color groups. Hard to be different on all 36 cars though.


DAC
Tried not to get color repetition in body color groups. Hard to be different on all 36 cars though.
DAC
When I was custom building HPO scale modal railroad grain cars I used a magnifying glass on all of it. Used to be a lot of the elevators had their own hopper car(s). Most were pink but being all PS2 hopper cars the tiny id stuff was the same. Just had to custom make up the elevator name, etc. Had a good run on them for over a year, then got the market saturated and no more calls for them.
Finished up getting the old wood splitter ready to sell this morning. Put the points, condenser and plug on it the other day. New ignition coil came Saturday so put it on this morning. Started and ran on the first pull. Those old Briggs are hard to beat if you get the points and coil gapped right.
Sounds like you had a good run with the grain cars, Rog! This is the first year lettering those invitational cars I had to use that lighted magnifier the whole time.When I was custom building HPO scale modal railroad grain cars I used a magnifying glass on all of it. Used to be a lot of the elevators had their own hopper car(s). Most were pink but being all PS2 hopper cars the tiny id stuff was the same. Just had to custom make up the elevator name, etc. Had a good run on them for over a year, then got the market saturated and no more calls for them.
Glad the splitter is working good and ready to sell!
DAC
Those cars look neat lined up the way you have them. As the years ago by those lighted magnifiers become more important. I use a head band light quite a bit too. Helps to see down inside the cover or receiver when putting a gun back together. I sure like that target trigger I put in the Ruger 10-22. Very light and short movement, then takes a tiny bit more to trip the sear. Real short release till it is ready to fire again.
Last edited:
Thanks, Rog. I appreciate it. Karl picked them up a few minutes ago. He loved the cars but seems kind of pessimistic about how many may show up for the race. They normally get 25-30 racers. He will take out a few cars that are too fast and take out a few that are too slow, to make up the filed for the racers that show up. Still has actual on track testing to do.Those cars look neat lined up the way you have them. As the years ago by those lighted magnifiers become more important.
DAC
Cast iron? I'm on my 3rd set of points on mine. And probably only 2 tanks of gas worth in that time. One aftermarket set (Napa)! One OEM set ($40 from the local mower shop, box said genuine Briggs/ China) and most recently an OLD NOS (new old stock); OE set of Briggs points. I finally don't have to sand them every time I go to use that air compressor which isn't very oftenFinished up getting the old wood splitter ready to sell this morning. Put the points, condenser and plug on it the other day. New ignition coil came Saturday so put it on this morning. Started and ran on the first pull. Those old Briggs are hard to beat if you get the points and coil gapped right.
Yep, cast iron from top to bottom. a3 years, last 2 ½ years outside as no place inside to store it. Had a plastic tub over the motor and sometime I think that is worse than leaving them out in open air. Traps the moisture in an they rust up faster. These were aftermarket made in Taiwan. Look like they OEM with only the plug wire and one tab for the condenser wire. Worked and that is what counts.
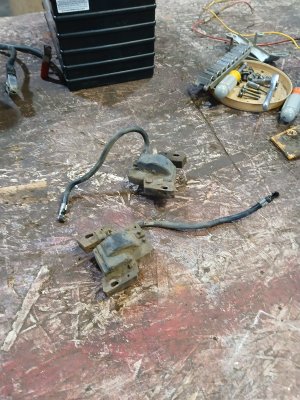
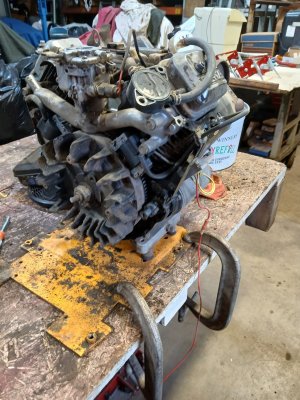
Finally home long enouhh to spend time in shop. 16 hp briggs needrd two new coils and kill wire harness. Previous owner fried them.
Got those replaced and it test fired on the bench.
Now need to figure out what to do with it.
Got those replaced and it test fired on the bench.
Now need to figure out what to do with it.
Attachments
Had to do a lot of running around in town today, Loree is home sick so had to do some things for her as well. Didn't get out to the shop until 3. Ran the GT5000 in to look at that crooked mowing deck.
I have been using a level on the pulleys. I figured that is more accurate than trying to measure on an oddly shaped deck shell. The left outer spindle shows the same so the deck shell itself shouldn't be twisted.


As you can see it is way the he!! off! Front and left side low.
Before I raised it up with the bridge crane this left front deck wheel got straightened. Had to use a pipe wrench with a cheater. It was toed out from banging into things.

Raised the front up and noticed a sticker on the underside of the left footboard. The same dum@$$ engineer must have figured this sticker location that also designed the deck mounting configuration!

The front mount to adjust the deck isn't too bad to work with.

I think the mount can be pinned into the lower hole, then the nuts adjusted in front accordingly.
Now reaching the side adjusters is where this gets really ridiculous. I will be drawing blood doing that for sure! Two views of the right adjuster.


And a couple views of the left one.


It is possible the link with the "LH" on it is bent. This thing used to mow level when I first revived this tractor from freebie junk. It is mounted so rigidly to the tractor that there is no forgiveness at all when the operator hits something and it is generally the left front deck wheel that hits something. The height difference between deck raised and lowered is only a couple inches.
It's too bad that the deck mounting is so poorly designed when the deck and tractor themselves seem to be very good pieces. Still glad I didn't buy this thing though---LOL!
I did have the deck out from under it not long after I brought it home and remember hoping I would never have to do it again!
Better consult a manual to see if I am missing something to make adjustment a little easier.
DAC
I have been using a level on the pulleys. I figured that is more accurate than trying to measure on an oddly shaped deck shell. The left outer spindle shows the same so the deck shell itself shouldn't be twisted.
As you can see it is way the he!! off! Front and left side low.
Before I raised it up with the bridge crane this left front deck wheel got straightened. Had to use a pipe wrench with a cheater. It was toed out from banging into things.
Raised the front up and noticed a sticker on the underside of the left footboard. The same dum@$$ engineer must have figured this sticker location that also designed the deck mounting configuration!
The front mount to adjust the deck isn't too bad to work with.
I think the mount can be pinned into the lower hole, then the nuts adjusted in front accordingly.
Now reaching the side adjusters is where this gets really ridiculous. I will be drawing blood doing that for sure! Two views of the right adjuster.
And a couple views of the left one.
It is possible the link with the "LH" on it is bent. This thing used to mow level when I first revived this tractor from freebie junk. It is mounted so rigidly to the tractor that there is no forgiveness at all when the operator hits something and it is generally the left front deck wheel that hits something. The height difference between deck raised and lowered is only a couple inches.
It's too bad that the deck mounting is so poorly designed when the deck and tractor themselves seem to be very good pieces. Still glad I didn't buy this thing though---LOL!
I did have the deck out from under it not long after I brought it home and remember hoping I would never have to do it again!
Better consult a manual to see if I am missing something to make adjustment a little easier.
DAC
Last edited: