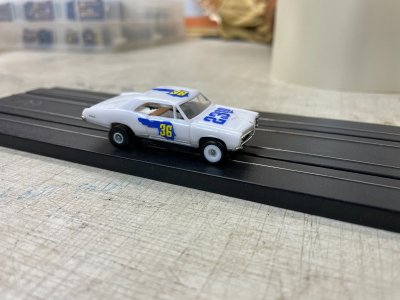
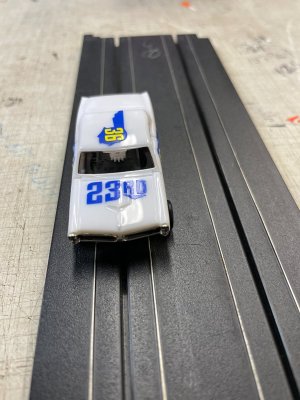
What are you currently working on??

Have a Ruger 10-22 Carbine .22 cal. completely apart for a good cleaning and upgrade. Will put a new target trigger and some new springs in when it goes back together. Probably won't get to it for a couple days. Race on this afternoon and the Chiefs play at New York this evening. Have the last VA cancer Dr. video conference tomorrow. Last time they never showed up for the vid-conf. after 1/2 hour. Nurse that does it on our end was to get off at 3:30 and we had been ready since 2:50. She said it is your call. I said lets go home. Drove 120 miles for nothing. Have to go as the VA is paying the bill. Everything else is done locally now.
 
Last edited:
Changed the oil in both my escape and pickup and then unloaded the 3 garden tractors I took to the show. The Economy became stuck in 2nd gear yesterday. I ended up dragging it off the trailer in front of the garage. No issues with the other 2 tractors. To get the top of the transmission off on the Economy the sheet metal for the steps has to come off. 6 bolts all together 2 to bolt the seat down, 2 up front and 2 for the rear fenders. The 2 up front and the 2 for the fenders were all replaced due to rust and wear. I did find the brake pedal for the left axle under the floor pan, all this time I thought it just had one brake pedal. I did not find anything broke in the transmission just the half ball on the end of the shifter jammed behind a shaft and part of the fork. I was able to place it where it should have been and put the top back on the transmission. I will have to watch it shifting to not jam it in gear.
 
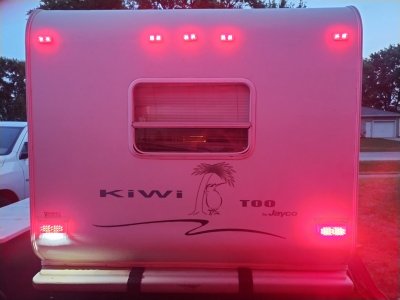
Replaced all the outside lights all the way around the camper today with LED's
Only 100 trips up n down the ladder...
Pop the lens off the old ones, unscrew, get a scraper under the old light and break the caulking bond, unplug the ones I had enough wire to do so, (cut the rest off in place and use my butane solder iron to solder the short wires ones in place) being to my tailgate (makeshift workbench). Barrel crimp the original pigtails to the new lights, solder the barrel crimps, apply heat shrink, wipe old caulk residue off camper body with a lacquer thinner soaked rag, recaulk and screw the new light down. Rinse repeat 11 times. 4 orange up front, (2 high, 2 low around the corners) and 7 reds (5 up high and 1 each side at waist level around the corner)..... I put new LED tail lights on last weekend just because the tabs were broken off the driver side one) and the difference was so much there I had to replace the clearance lights with LED's too. These clearance lights I got have 10 separate LEDs per fixture, 2 groups of 5 each. The original lights had a single #194 bulb per fixture. I thought all of the conventional style had at least had 2, 194s in them? The ones I've replaced in the past, have.
I wound up having to go to Ace and buy a box of #10x1 sheet metal screws as the original #8s acted stripped, at least 1 per fixture when I went to install the new lights with them. . As long as I had to make the run, I bought stainless ones.
The new lights a came with new screws but they were only #6 diameter... Definitely unusable on this case.
 

Attachments

  • IMG_20250921_190401670_HDR.jpg
    IMG_20250921_190401670_HDR.jpg
    97.6 KB · Views: 9
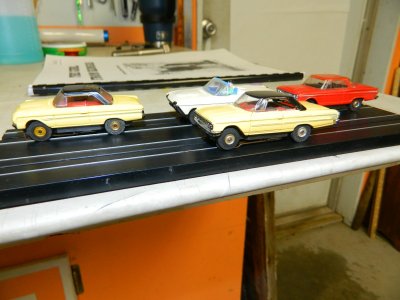
These are slot cars, Rog. I guess the guide pins don't show up well in the pictures. Thats why the front tires don't touch the table in this picture.
View attachment 98529

DAC
I wondered about those front wheels and didn't dawn on me they were slot cars. I think the ones we had did not have the smaller wheels up front but probably mistaken. Been 60+ years ago.
 
I wondered about those front wheels and didn't dawn on me they were slot cars. I think the ones we had did not have the smaller wheels up front but probably mistaken. Been 60+ years ago.
They did have the same size wheels and tires back then, Rog. These modern chassis have definitely modified the original design a lot.

These cars have the original wheel and tire and setups from about 1963.
DSCN3699.JPG

Took a break this afternoon for a couple hours and got the pain stimulator battery charged up again. Was showing up red on the controller and not doing much any more. Usually do that during the race on Sunday but forgot it this past Sunday.
The stimulator must still be helping then if you can feel the difference between charged and low charge!

DAC
 
They did have the same size wheels and tires back then, Rog. These modern chassis have definitely modified the original design a lot.

These cars have the original wheel and tire and setups from about 1963.
View attachment 98589


The stimulator must still be helping then if you can feel the difference between charged and low charge!

DAC
It is definitely working, had it on for a while this evening.
 
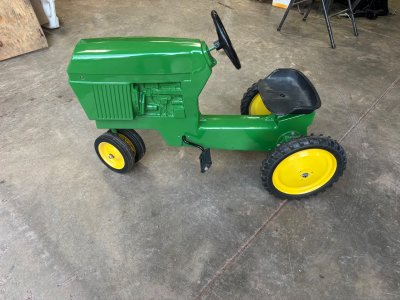
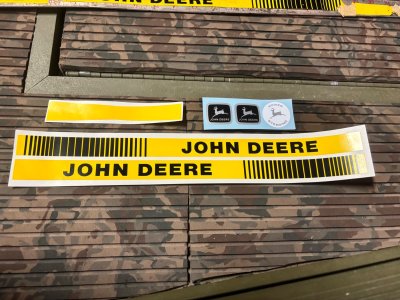
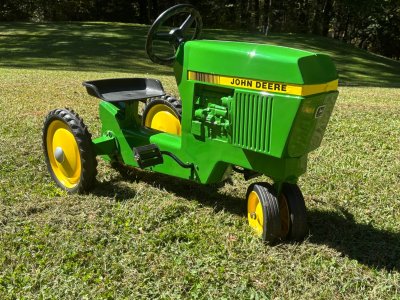
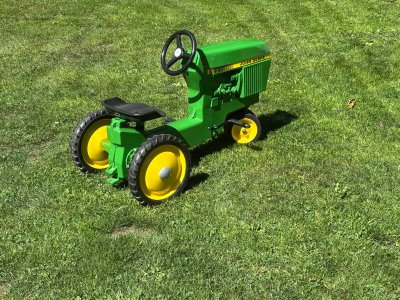
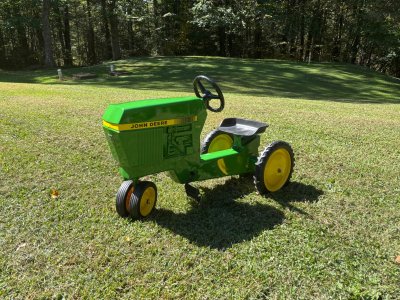
I haven’t been doing much with my real tractors recently, but I finished up my JD pedal tractor that I restored. I actually finished this about 10 years ago, but never got the decals for it. I recently saw a set on eBay and bought them and put them on. It’s officially done now.
IMG_2556.jpegIMG_2566.jpegIMG_2600.jpegIMG_2591.jpegIMG_2595.jpeg
 
Looks great Nick.
Have any idea how old it actually is..?
Thanks Bill. I would guess late 70s-80s, but I have never actually tried to figure that out. Now I’m going to have to do some research on it. It belonged to my older cousins who are now in their mid-late 30s. Our grandparents bought it for them at a flea market, so I assume it was at least a few years old when they got it.
 
Spent the biggest share of the day getting the power cable removed from the old house to the old wood shop. Tied in at the breaker box, run it through the wall then down through the floor to the basement of the old house. I run 1½" PVC under ground to the old wood shop, then up through the floor and into the breaker box. Sure glad I put it in PVC as I could push it out to the end of the cable. Run a 16' 2X2 under the old wood shop and fastened the power cable to that. Pulled it out from under the trailer and the PVC and had it free after about an hour. Have enough to run overhead from the container to a new power pole. REC will take it from there and tie it in at the house pole. Hope to get that done this week yet. Wasn't a bad job just took a lot of extra back and forth doing it alone.
 
I haven’t been doing much with my real tractors recently, but I finished up my JD pedal tractor that I restored. I actually finished this about 10 years ago, but never got the decals for it. I recently saw a set on eBay and bought them and put them on. It’s officially done now.
View attachment 98601View attachment 98602View attachment 98603View attachment 98604View attachment 98605
Beautiful little tractor, Nick! Nice work, especially for being a 10 year old paint job! Those front wheels look almost like a brand new pair I have that I tried to give away on here a couple times. I even offered to pay the shipping once---LOL!

Spent the biggest share of the day getting the power cable removed from the old house to the old wood shop. Tied in at the breaker box, run it through the wall then down through the floor to the basement of the old house. I run 1½" PVC under ground to the old wood shop, then up through the floor and into the breaker box. Sure glad I put it in PVC as I could push it out to the end of the cable. Run a 16' 2X2 under the old wood shop and fastened the power cable to that. Pulled it out from under the trailer and the PVC and had it free after about an hour. Have enough to run overhead from the container to a new power pole. REC will take it from there and tie it in at the house pole. Hope to get that done this week yet. Wasn't a bad job just took a lot of extra back and forth doing it alone.
You put in a good day there, Rog! Glad you are feeling well enough! Hope you can show us some pictures of your progress on it!

DAC
 
Beautiful little tractor, Nick! Nice work, especially for being a 10 year old paint job! Those front wheels look almost like a brand new pair I have that I tried to give away on here a couple times. I even offered to pay the shipping once---LOL!
Thanks Doug! Too bad I didn’t know you back then, I probably would have taken them wheels. I have no use for them now unless I someday get another one of these.
 
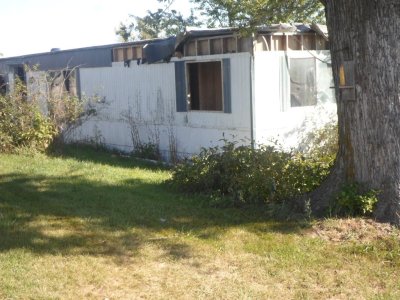
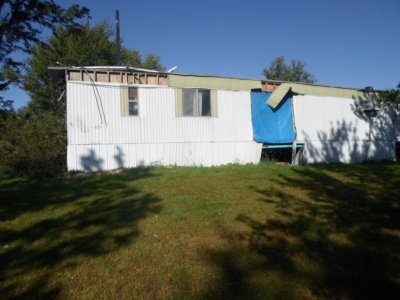
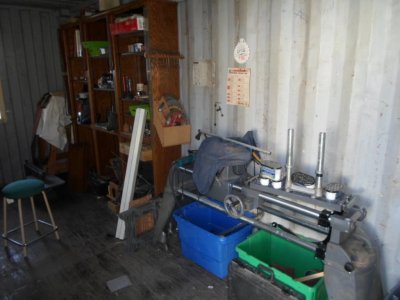
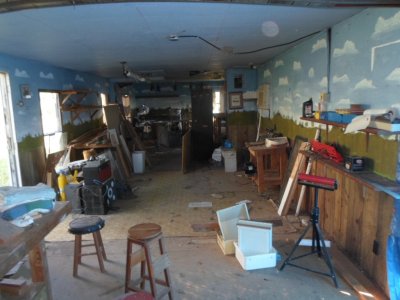
Got the breaker box out of the old woodshop/trailer this morning. Fencing pinchers make short work of the wires right at the box. Cleaned up and ready to go in the container woodshop. Few pictures:
SAM_2380.JPG SAM_2382.JPG
Storm end of a 14X70 mobile home/ trailer house I used as a wood shop for several years. Was 3 windows where that blue tarp is.

SAM_2384.JPG SAM_2387.JPG
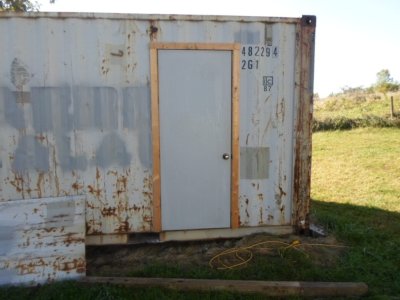
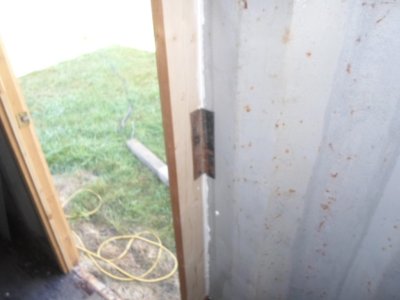
Walk in door installed in the side of the container. 4 of those angle iron brackets on each side of the door frame to hold it in place. Once I get power there will tack weld each one to the container wall. Door and jamb can be replaced in the future if need be.

SAM_2385.JPG SAM_2386.JPG

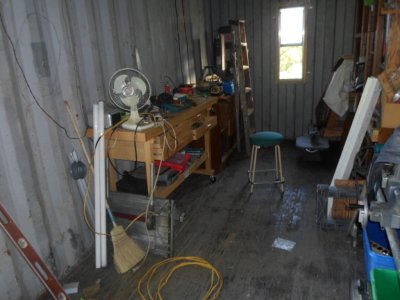
Inside of the container serving as my wood shop down the road. That book case has all adjustable shelves, everything is 3/4" Oak plywood, 7' tall and 8' long. Had to cut it in two to get it in the old shop. Glued it back together and it stayed solid. Took it out through that opening covered with the blue tarp. Window in the East end came from the one bathroom in the old shop. Put in the same as the door but lighter brackets. So far no leaks.

SAM_2379.JPG

Remains of the inside of the old shop. So far this part is dry except for one leak that white trash can is sitting. That tall army green file cabinet came from the clerk of courts office about 30 years ago. 1" x14" drawers for all the different forms they had to have. Now it is on on computer. Would sure like to give that to some sucker so I would not have to mess with it. That this is mighty heavy. Will probably be the last to go with a chain around it and drag it out onto the ground where the loader can get at it. There are 3 of those smaller power stations for the various tools. All are Shopsmith and will but use on the 510 Shopsmith now. 11" band saw, 14" scroll saw, 6" jointer, Oscillating drum sander, dust collector and probably some others I forgot about. Next step is power to the shop, then I can get it painted yet this fall. The other container has power to it. This used to house my HO model railroad before the wood shop that is why you see the clouds painted on the wall.
 
Got the breaker box out of the old woodshop/trailer this morning. Fencing pinchers make short work of the wires right at the box. Cleaned up and ready to go in the container woodshop. Few pictures:
View attachment 98742 View attachment 98743
Storm end of a 14X70 mobile home/ trailer house I used as a wood shop for several years. Was 3 windows where that blue tarp is.

View attachment 98744 View attachment 98745
Walk in door installed in the side of the container. 4 of those angle iron brackets on each side of the door frame to hold it in place. Once I get power there will tack weld each one to the container wall. Door and jamb can be replaced in the future if need be.

View attachment 98746 View attachment 98747

Inside of the container serving as my wood shop down the road. That book case has all adjustable shelves, everything is 3/4" Oak plywood, 7' tall and 8' long. Had to cut it in two to get it in the old shop. Glued it back together and it stayed solid. Took it out through that opening covered with the blue tarp. Window in the East end came from the one bathroom in the old shop. Put in the same as the door but lighter brackets. So far no leaks.

View attachment 98748

Remains of the inside of the old shop. So far this part is dry except for one leak that white trash can is sitting. That tall army green file cabinet came from the clerk of courts office about 30 years ago. 1" x14" drawers for all the different forms they had to have. Now it is on on computer. Would sure like to give that to some sucker so I would not have to mess with it. That this is mighty heavy. Will probably be the last to go with a chain around it and drag it out onto the ground where the loader can get at it. There are 3 of those smaller power stations for the various tools. All are Shopsmith and will but use on the 510 Shopsmith now. 11" band saw, 14" scroll saw, 6" jointer, Oscillating drum sander, dust collector and probably some others I forgot about. Next step is power to the shop, then I can get it painted yet this fall. The other container has power to it. This used to house my HO model railroad before the wood shop that is why you see the clouds painted on the wall.
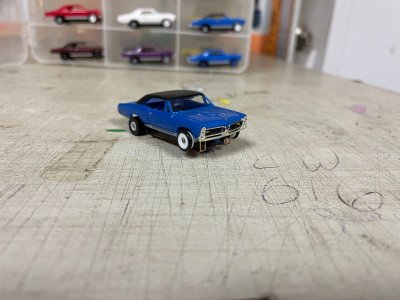
Great pics, Rog! Kinda sad the old trailer house got so much tornado damage! Pretty cool you painted it up so nice for a backdrop for the railroad setup you sold. If I was closer, I'd probably be the sucker to take that cabinet. I have a lot of old brochures, maps and architectural drawings that would probably lay nicely in there. Probably should throw all that stuff away but can't do it yet.

DAC
 
I got the first test mule done for the HO scale GTO slotcars I'm going to letter. The guy in charge likes it so he said go for it. I always start with the highest number to make sure things fit properly all the way through.

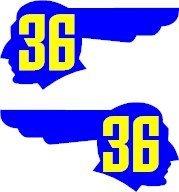
Design I came up with using a "Chief Pontiac" silhouette. That logo is more 1950's but since it is a Pontiac I decided to draw one up and see what it looks like.

Computer art.
2025 Inv.jpg

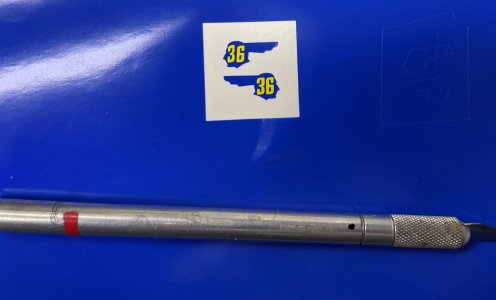
After cutting and building the door graphics.
IMG_3282.jpg

He approved that so I went ahead and made roof and hood stickers too and installed them on a car. The roof one is a bit bigger than the doors.
IMG_3286.jpg

IMG_3287.jpg

The club boss says it is "racy". At least he didn't say racist!

Now all I have to do is organize the colors of cars where there isn't duplicate colors side by side and make color decisions for 34 more plus make sure they all go back in the box in the same place they came out of! Next weeks side job.

DAC
 
Back
Top