You are using an out of date browser. It may not display this or other websites correctly.
You should upgrade or use an alternative browser.
You should upgrade or use an alternative browser.
And more junk.
- Thread starter MFDAC
- Start date
Every time I came across those you described, they went in the garbage, Chris! I started collecting these things back in the 1980's for ballast on go-karts---LOL! Time to use them for something.At least you ended up with the good weights and not those plastic concrete things that were given to me. Next time I fill in the burn pit I think they are all going in there.
Sure wish I had enough land to have a burn pit!
DAC
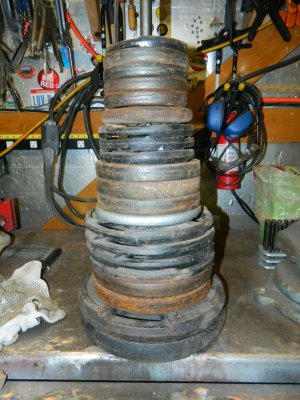
Using Roger's idea I had some time today to mock up a possible weight mount. I don't think the steel I used here is strong enough but at least the mount can be visualized. This setup will only hold about 160#. The stack of weights is 21" tall but the frame width is only 15". If I widen it at the front, then the hood won't open far enough to work on the engine.
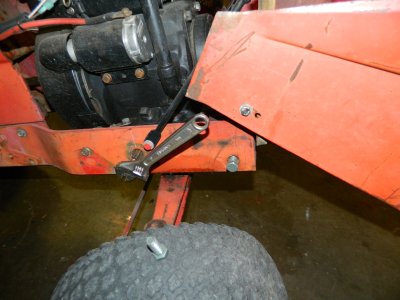
There are two 1/2" threaded holes in the frame on each side that can be used. Cleaned up the threads in them.
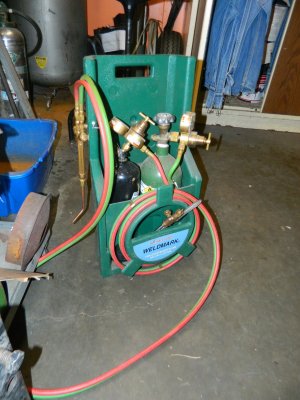
Bolted on some straps that was laying around there. Didn't have to drill them but they were bent up. Must be some kind of hardened steel as beating on them with a 4# hammer didn't phase them. Had to get the torch out to heat the bent areas to straighten them.
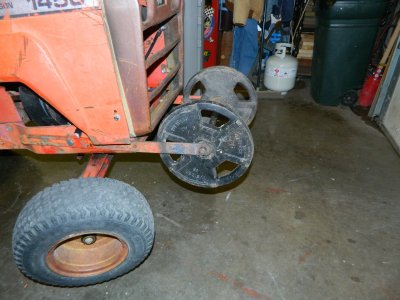
Bolted on with the two 12" 25# weights. Had a piece of 1" solid rod just long enough for the mock up too.
Hooking the crane to the MF12G worked good for raising the front of the 1450 to make it easier to work on.
Much wider would give hood clearance problems.
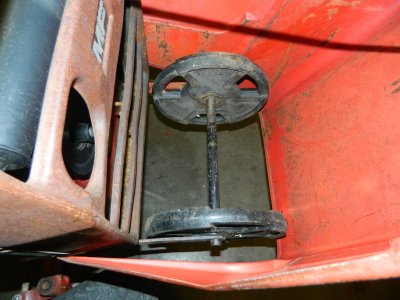
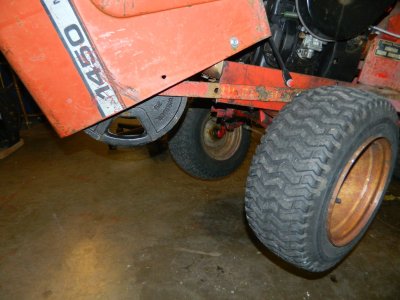
There's 3, 1/2" holes that a strap welded between the two can be bolted to the frame through.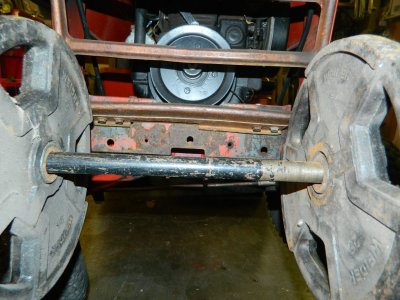
Set the front end on the floor and there is good ground clearance.
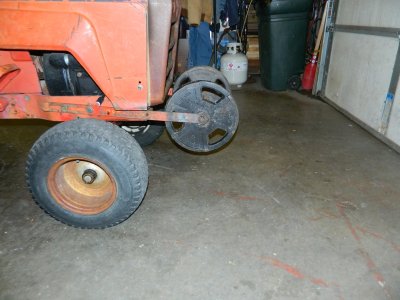
I hate to have to go buy steel but it may come to that. Not looking good for finding anything around here.
At least I can see what I'm up against now.
DAC

There are two 1/2" threaded holes in the frame on each side that can be used. Cleaned up the threads in them.

Bolted on some straps that was laying around there. Didn't have to drill them but they were bent up. Must be some kind of hardened steel as beating on them with a 4# hammer didn't phase them. Had to get the torch out to heat the bent areas to straighten them.

Bolted on with the two 12" 25# weights. Had a piece of 1" solid rod just long enough for the mock up too.

Hooking the crane to the MF12G worked good for raising the front of the 1450 to make it easier to work on.
Much wider would give hood clearance problems.


There's 3, 1/2" holes that a strap welded between the two can be bolted to the frame through.

Set the front end on the floor and there is good ground clearance.

I hate to have to go buy steel but it may come to that. Not looking good for finding anything around here.
At least I can see what I'm up against now.
DAC
Nice stack of old weights Doug. Looks like it’s going to work out good. I have a scrap yard about a half hour away I like a lot. I also have a welding shop about 15 minutes away that I can buy new steel from reasonably mostly off falls. Like you I still hate to buy it.
I had a barrel full of bed rails at one time mostly from people just tossing them out. I’ve used them a lot over the years.How about an old bed rail? Those things a usually real stout iron to cut or drill. I grab every one I can get hold of at auctions.
There are scrapyards around here, but none of them will sell scrap to the public! They buy it, crush it up and ship it out. There are two new steel companies, one I won't deal with and the other is expensive but very good service.Nice stack of old weights Doug. Looks like it’s going to work out good. I have a scrap yard about a half hour away I like a lot. I also have a welding shop about 15 minutes away that I can buy new steel from reasonably mostly off falls. Like you I still hate to buy it.
Any and all suggestions are welcome Chris, including yours---LOL! The smallest channel I have is 4"x1-1/2" and that would be too bulky. Now if I split a piece of that channel, it may be about right though! Good thought!If I can make a suggest? Going from your photos is there a chance you'd have some 2" or 3" channel iron to use in place of the strap. It would be stronger and might keep you from buying metal.
How about an old bed rail? Those things a usually real stout iron to cut or drill. I grab every one I can get hold of at auctions.
You have me thinking about that now, Roger! I do have a lot of bed rail around here. That stuff can be pretty hard to drill but I have heated up spots before where I needed to drill to take the temper out of that spot and it seems to help. Seems to weld fine though.I had a barrel full of bed rails at one time mostly from people just tossing them out. I’ve used them a lot over the years.
It is handy stuff to have around Jim!
The strap that I used on the mock up is 1-1/2"x1/4" I have normal 1-1/2"x 1/8" angle iron. The bed frame steel I could measure quick is 1-1/4"x 1/8". As stated though the bed frame is harder steel. There has to be a 1" hole for the weight shaft to go through. Maybe using the channel split would have more meat around the 1" hole. Probably would end up about 1-3/4"x 1-1/2". Would only have to split a piece about 20" long, so wouldn't be too hard with the angle grinder and cutoff wheel.
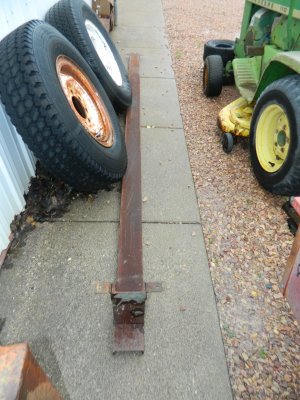
We were on the run most all day so the only thing I got done in the shop was to build that cable retaining strap on the pully end of the crane. Paint is drying right now.
DAC
Got the front weight mount fabbed up today. Good shop job while the race was on.
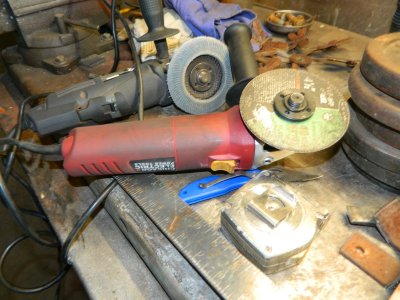
Brought that piece of 4" channel in and cut off a 20" piece. got it split in half.
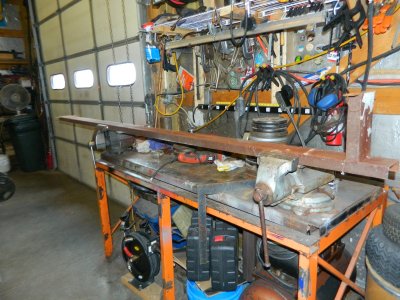
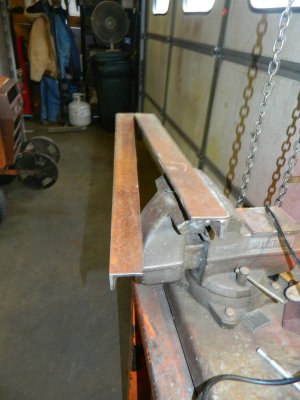
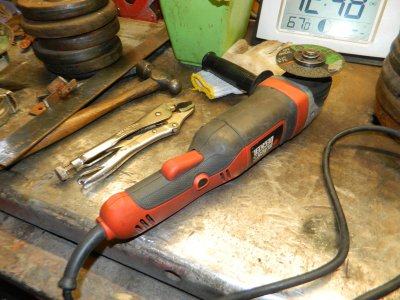
Not before I killed the old B/D grinder though. Stripped the gears evidently as it didn't let any color of smoke out, it quit spinning the blade.
Had to finish with HF grinders.
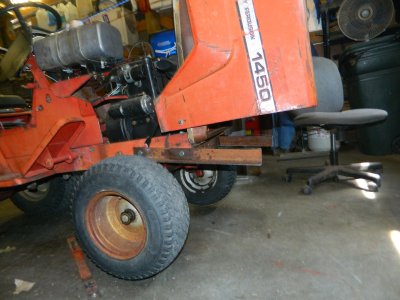
Drilled the frame mount holes and fitted the iron on the tractor.
Took them back off and drilled the 1" hole out on the end. I worked the hole out 1/8" at a time from a 1/2" hole. The 1" bit wouldn't finish it off. Need to sharpen it evidently. Used a burr on a die grinder to finish it off. Drilled a pin in one end of the 1" shaft.
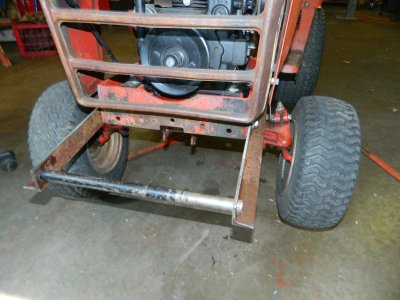
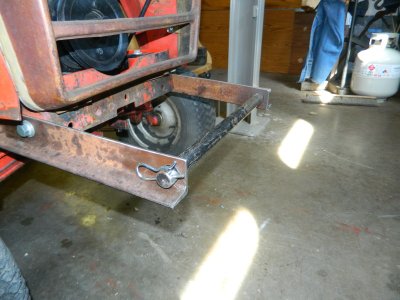
Welded a big washer on the other end of the shaft and trimmed it to fit.
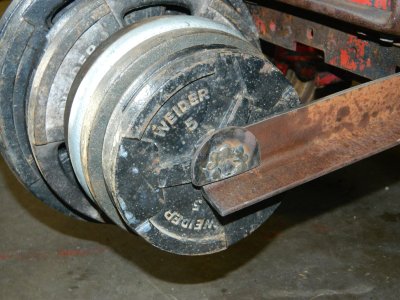
Front tires of the MF1450 stayed on the floor when I lifted the MF12G this time. Ended up with 163.5# on the weight mount, not counting the mounting steel. Probably around 170# total.
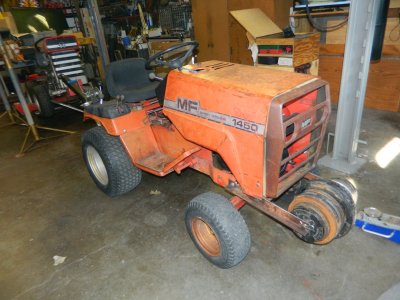
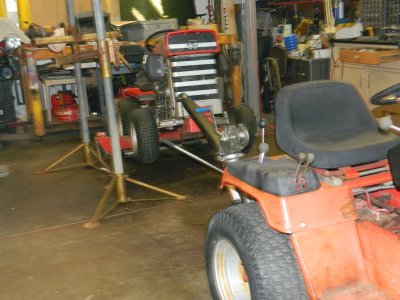
I didn't weld in a crossbar to bolt to the front of the frame. It's not real easy to load the weights and the best way seemed to be to have the pin side loose in the tractor frame, load the weights supported by a jack then put the pin side bracket on the shaft and tighten the bolts. Maybe it will hold for what I use it for at least.
DAC
Brought that piece of 4" channel in and cut off a 20" piece. got it split in half.


Not before I killed the old B/D grinder though. Stripped the gears evidently as it didn't let any color of smoke out, it quit spinning the blade.
Had to finish with HF grinders.


Drilled the frame mount holes and fitted the iron on the tractor.

Took them back off and drilled the 1" hole out on the end. I worked the hole out 1/8" at a time from a 1/2" hole. The 1" bit wouldn't finish it off. Need to sharpen it evidently. Used a burr on a die grinder to finish it off. Drilled a pin in one end of the 1" shaft.


Welded a big washer on the other end of the shaft and trimmed it to fit.

Front tires of the MF1450 stayed on the floor when I lifted the MF12G this time. Ended up with 163.5# on the weight mount, not counting the mounting steel. Probably around 170# total.


I didn't weld in a crossbar to bolt to the front of the frame. It's not real easy to load the weights and the best way seemed to be to have the pin side loose in the tractor frame, load the weights supported by a jack then put the pin side bracket on the shaft and tighten the bolts. Maybe it will hold for what I use it for at least.
DAC
Still have 27.5#. 4-4.4# and a couple of mismatched ones. I can't see a good way to mount them on the front wheels. I won't put fluid in these old crappy tires. Surprisingly, they do hold air at least! If I get new ones, definitely will fluid fill! I think the tires will crumble if I try to break the bead or try to squeeze them to suck in fluid. Thanks for the help, Noel!Lookin good Doug. If more weight is needed, do you have any barbell weights that would fit the front wheels. And load the front tires with fluid. Might gain 20 lbs doing that.
Noel
That may be what happens still Chris---LOL! May not have enough weight on the front to stop wheelies anyway! This tractor is by far the fastest one I have! It really gets a little scary, full throttle, high range and full hydro! Had to run it a few laps around the old go-kart track when I got it running!If you’re worried about the strength of the bracket just do a few wheelies. If it holds up to that you’re good to go
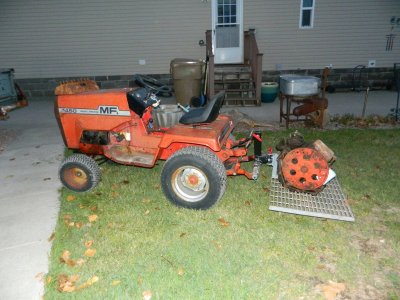
It was doing wheelies in this pic until I put a SBC head on the hood! That pic was before I rebuilt the engine.
DAC
Still have 27.5#. 4-4.4# and a couple of mismatched ones. I can't see a good way to mount them on the front wheels. I won't put fluid in these old crappy tires. Surprisingly, they do hold air at least! If I get new ones, definitely will fluid fill! I think the tires will crumble if I try to break the bead or try to squeeze them to suck in fluid. Thanks for the help, Noel!
Should be holes in the wheels ??? If there is could you drill the weights to match those holes.
I’d be putting tubes in if I was going to load them Doug. That’s just me. Every body has their opinion.
Noel
No holes in the front wheels, Noel. The tires have tubes but they are so old and hard I don't think the tubes would survive loading and putting in new tubes will destroy the tires. Maybe you have a method how to fill tires/tubes with fluid that can vent the air out while filling without squeezing them down? I don't want to put the money out for new tires yet. I have a set of almost new rears for the MF1450, but no extra 8" rim tires around here. I need front tires for that JD110 same size as the 1450 but don't want to buy any until I know it will run!Should be holes in the wheels ??? If there is could you drill the weights to match those holes.
I’d be putting tubes in if I was going to load them Doug. That’s just me. Every body has their opinion.
Noel
DAC
I’ve used a 12 volt sprayer pump Doug. Take the valve out of stem. Hook a hose to the valve stem. Hook the hose to the pump. Pump in for a bit then stop, pull the hose off to release the air. Then go back at it. Have the valve stem at the 12:00 o’clock position. Fill till it starts coming out stem.
Also can use a hand manual spray pump. Won’t take long to do with those little tires.
Noel
Also can use a hand manual spray pump. Won’t take long to do with those little tires.
Noel
