You are using an out of date browser. It may not display this or other websites correctly.
You should upgrade or use an alternative browser.
You should upgrade or use an alternative browser.
New project
- Thread starter jdcrawler
- Start date
IT RUNS AGAIN !
Just a short test but I'm pleased with it so far.
The clutch seams to work well.
The wire that I connected to the points to shut the mag off works good too.
I need to do some adjusting on the carburetor.
Both steering brakes need to be adjusted but I really don't want to work on them until I can get it outside where I can drive it around without worrying about running into something.
OOPS !
It isn't often that one of my projects turns out to not work as well as I had thought they would but that has happened with this one.
The rain stopped so I took it out for a run this morning and the results were really disappointing.
The steering by braking one wheel or the other is very touchy.
The cart wants to pull to one side or the other and I have to keep working the steering levers to keep it going in a straight line.
Also, when I brake one wheel to turn the cart, it seams like the other wheel actually speeds up so that it turns much faster then you would expect.
As a result of this test run, I'm going to re-design the cart by removing the caster wheels and put a regular steering axle in the back that will be controlled by a steering wheel.
So it is back to work on the cart.
First thing is to use a come-a-long and get it back up on the work table.
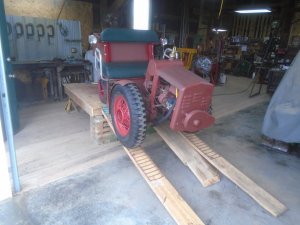
The wheels in the back aren't as wide apart as the front wheels so I had to use a third ramp.
With it going up just a little crocked, the front and rear wheels on the left ( as you're looking at it ) stay on the same ramp.
On the other side, the rear wheel rides on the inside ramp and the front wheel rides on the outer ramp.
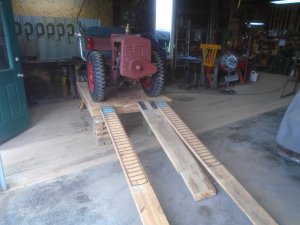
The pickup bed and the rear axle are removed.
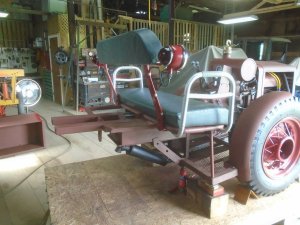
The front wheel is removed and the cart is blocked up so it is sitting level on the work table.
This gives me more room to work with for installing the new steering.
The white line drawn on the center of the original wheel hub is to mark where the inside of the rubber tire is located.
First thing is to use a come-a-long and get it back up on the work table.

The wheels in the back aren't as wide apart as the front wheels so I had to use a third ramp.
With it going up just a little crocked, the front and rear wheels on the left ( as you're looking at it ) stay on the same ramp.
On the other side, the rear wheel rides on the inside ramp and the front wheel rides on the outer ramp.

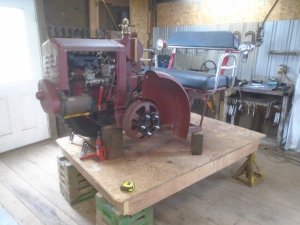
The pickup bed and the rear axle are removed.

The front wheel is removed and the cart is blocked up so it is sitting level on the work table.
This gives me more room to work with for installing the new steering.
The white line drawn on the center of the original wheel hub is to mark where the inside of the rubber tire is located.

I have been able to find the parts that I need on ebay so while I'm waiting for them to arrive, I decided to go ahead and work on the brakes.
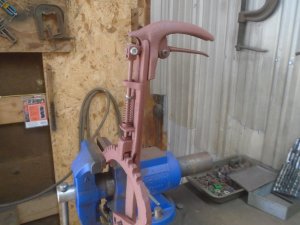
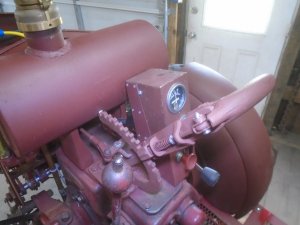
I'm going to use this old implement lever arm for my brake handle.
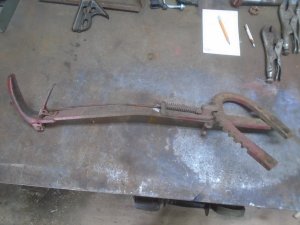
First thing is to take it all apart.
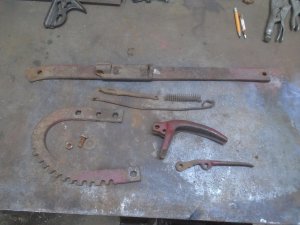
This lever was set up so that the plunger was always pushed down into one of the notches and the trigger on the handle had to be squeezed to lift it up so the lever arm could be moved.
Because this is going to operate the brakes, I want to change that so that the plunger is kept up so the lever arm moves freely without having to squeeze the trigger.
The lever arm is cut off to shorten it and a notch is milled into the end where the handle bolts on.
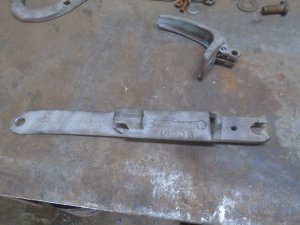
I'm going to fasted the handle onto the other side of the arm and the front of the handle fits into that notch.
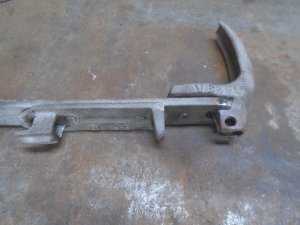
The front part of the handle where the pivot pin went thru is trimmed off.
The center hole on the trigger where the lifting wire was attached is brazed shut and a hole for a shoulder bolt is drilled thru it.
I bent up a U-shape bracket to hold the trigger and drilled and tapped it for the shoulder bolt.
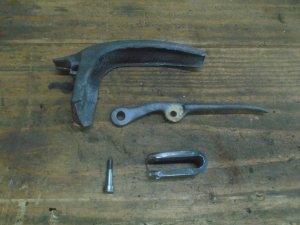
That U-shape bracket is welded to the underside of the handle.
The trigger is mounted in place and the handle is bolted onto the lever arm.
This will be the normal position of the trigger with it holding the plunger up.
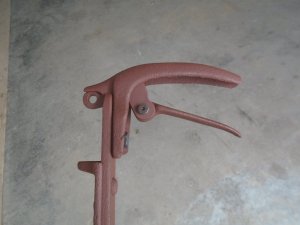
Squeezing the trigger will push the plunger down.
This way, the lever arm can be pulled back freely to operate the brakes without having to squeeze the trigger.
To operate the parking brake, the lever arm is pulled back and the trigger is squeezed to push the plunger down into a notch.
The pressure of the return springs on the brakes should be enough to keep the plunger engaged into a notch.
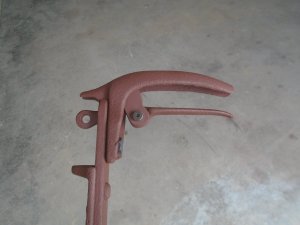
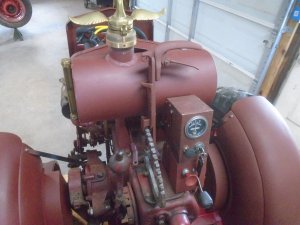
The brake lever assembly is just leaning up against the gas tank but it gives you an idea of how it will look when finished.
I'm going to use this old implement lever arm for my brake handle.

First thing is to take it all apart.

This lever was set up so that the plunger was always pushed down into one of the notches and the trigger on the handle had to be squeezed to lift it up so the lever arm could be moved.
Because this is going to operate the brakes, I want to change that so that the plunger is kept up so the lever arm moves freely without having to squeeze the trigger.
The lever arm is cut off to shorten it and a notch is milled into the end where the handle bolts on.

I'm going to fasted the handle onto the other side of the arm and the front of the handle fits into that notch.

The front part of the handle where the pivot pin went thru is trimmed off.
The center hole on the trigger where the lifting wire was attached is brazed shut and a hole for a shoulder bolt is drilled thru it.
I bent up a U-shape bracket to hold the trigger and drilled and tapped it for the shoulder bolt.

That U-shape bracket is welded to the underside of the handle.
The trigger is mounted in place and the handle is bolted onto the lever arm.
This will be the normal position of the trigger with it holding the plunger up.

Squeezing the trigger will push the plunger down.
This way, the lever arm can be pulled back freely to operate the brakes without having to squeeze the trigger.
To operate the parking brake, the lever arm is pulled back and the trigger is squeezed to push the plunger down into a notch.
The pressure of the return springs on the brakes should be enough to keep the plunger engaged into a notch.

The brake lever assembly is just leaning up against the gas tank but it gives you an idea of how it will look when finished.

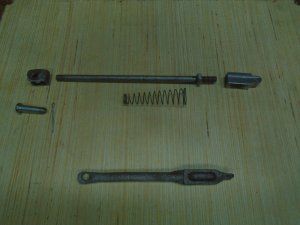
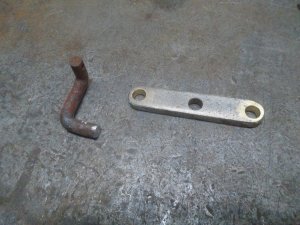
These are the parts for the new locking pin assembly that I made up.
The end of the locking pin is machined to the same shape as the notches in the curved bar.
The original locking pin is shown below the new parts.
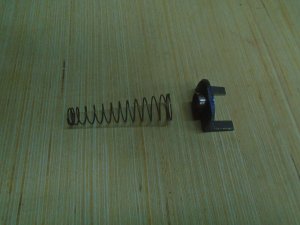
With the spring lifting up the locking pin instead of pushing it down, I needed to make a bracket for the base of the spring to attach to.
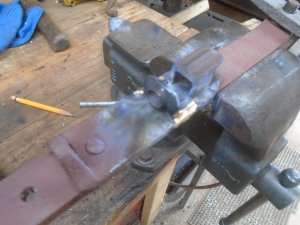
This bracket is brazed onto the lever.
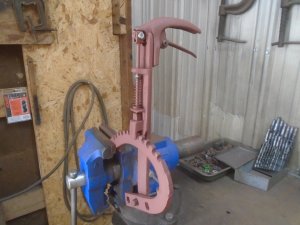
This is how it looks with the lever assembled.
This is the normal position with the locking pin held up to clear the notched bar.
And with the locking pin pushed down into a notch.
I made up a steel plate that bolts onto the same place as the old levers did.
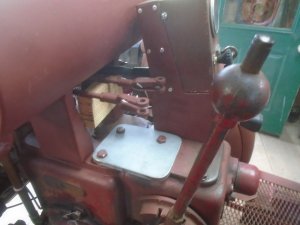
A piece of angle iron is machined to fit the notched bar and it is welded onto this plate.
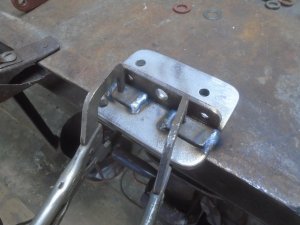
This is then bolted onto the top of the transmission.
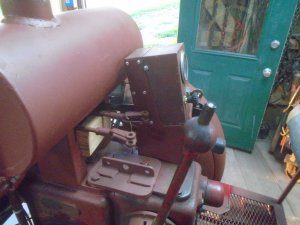
The notched bar is bolted to it.
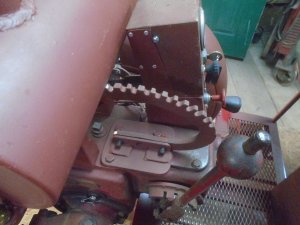
And the brake lever is bolted in place.
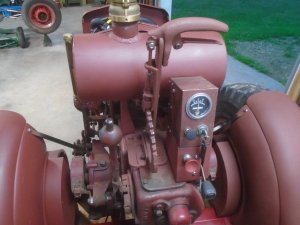
The end of the locking pin is machined to the same shape as the notches in the curved bar.
The original locking pin is shown below the new parts.

With the spring lifting up the locking pin instead of pushing it down, I needed to make a bracket for the base of the spring to attach to.

This bracket is brazed onto the lever.

This is how it looks with the lever assembled.
This is the normal position with the locking pin held up to clear the notched bar.

And with the locking pin pushed down into a notch.

I made up a steel plate that bolts onto the same place as the old levers did.

A piece of angle iron is machined to fit the notched bar and it is welded onto this plate.

This is then bolted onto the top of the transmission.

The notched bar is bolted to it.

And the brake lever is bolted in place.

A crossbar with a center link rod is made up.
This will fasten to the brake lever arm.
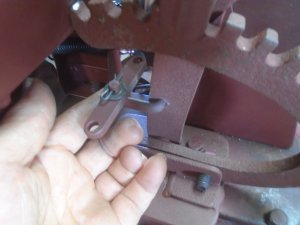
Both of the brake control rods have to be shortened.
The bottom one is finished.
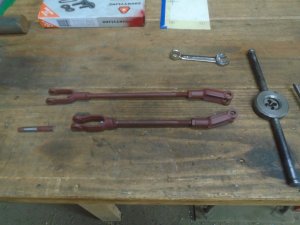
The brake control rods are then attached to the crossbar.
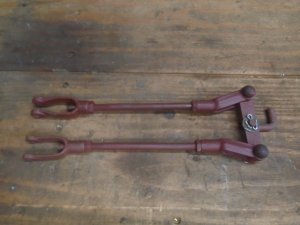
The crossbar is attached to the brake lever and the other end of the brake rods are attached back onto the brake levers in front of the gas tank.
This crossbar allows the same even pressure to be applied to both of the brakes.
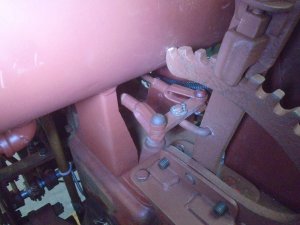
This is the normal position of the brake lever.
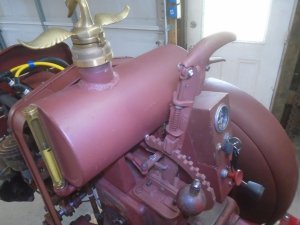
And this is the position with the brake lever pulled back and locked into a notch for parking.

This will fasten to the brake lever arm.

Both of the brake control rods have to be shortened.
The bottom one is finished.

The brake control rods are then attached to the crossbar.

The crossbar is attached to the brake lever and the other end of the brake rods are attached back onto the brake levers in front of the gas tank.
This crossbar allows the same even pressure to be applied to both of the brakes.

This is the normal position of the brake lever.

And this is the position with the brake lever pulled back and locked into a notch for parking.

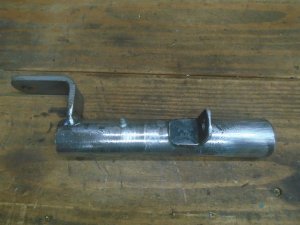
I made up the lower steering column bracket out of a steel tube with bronze bushings in each end.
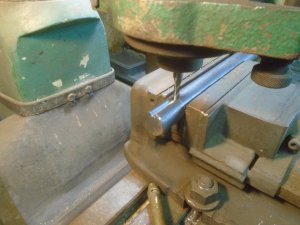
Milling a keyway slot into the steering shaft.
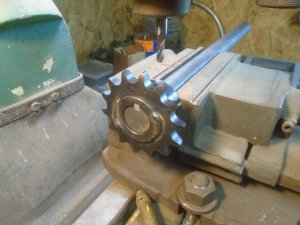
A sprocket fits onto this end.
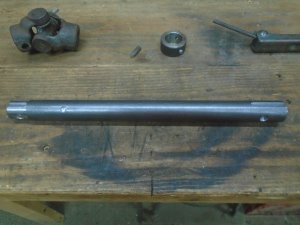
The machining on this part of the steering shaft is finished.
The left end of the shaft is turned down to fit a universal joint. The drill point holes on the shaft are for the set screws to set down into instead of just being screwed up against the surface of the shaft.
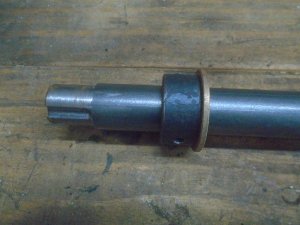
A collar fits onto the shaft a few inches below the universal joint. This collar is held on with three set screws and there is a bronze thrust washer that fits under it.
The lower part of the steering column is assembled and fastened in place on the floor of the cart.
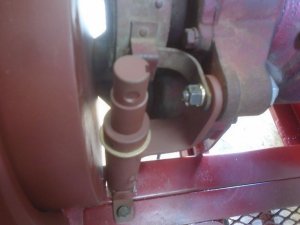
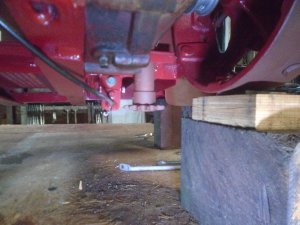
The end with the sprocket extends down below the floor.
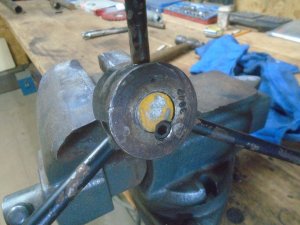
A hole is drilled and tapped for a set screw between the steering wheel and the shaft.
This set screw keeps the steering wheel from rotating on the shaft and it also locks it in position so it can't slide up or down on the shaft.
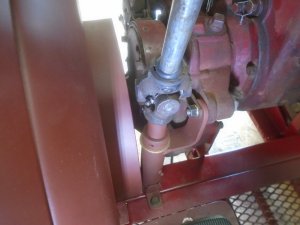
The universal joint attaches to the top of the lower steering shaft and the shaft for the steering wheel fits into it.
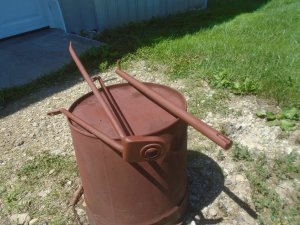
Starting to make the brackets to hold the upper bearing support in position.

Milling a keyway slot into the steering shaft.

A sprocket fits onto this end.

The machining on this part of the steering shaft is finished.
The left end of the shaft is turned down to fit a universal joint. The drill point holes on the shaft are for the set screws to set down into instead of just being screwed up against the surface of the shaft.

A collar fits onto the shaft a few inches below the universal joint. This collar is held on with three set screws and there is a bronze thrust washer that fits under it.

The lower part of the steering column is assembled and fastened in place on the floor of the cart.

The end with the sprocket extends down below the floor.

A hole is drilled and tapped for a set screw between the steering wheel and the shaft.
This set screw keeps the steering wheel from rotating on the shaft and it also locks it in position so it can't slide up or down on the shaft.

The universal joint attaches to the top of the lower steering shaft and the shaft for the steering wheel fits into it.

Starting to make the brackets to hold the upper bearing support in position.

The upper steering shaft and bearing bracket are finished.
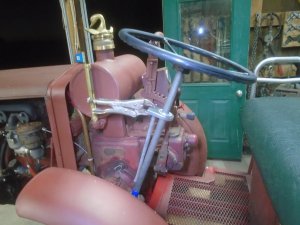
The bearing bracket is fastened in place.
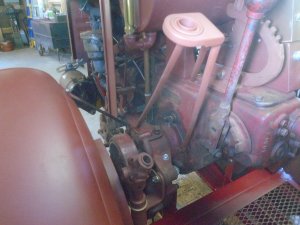
Then the steering shaft is slid down thru it and fastened into the top of the universal joint.
The three point mount makes the the steering shaft very stable.
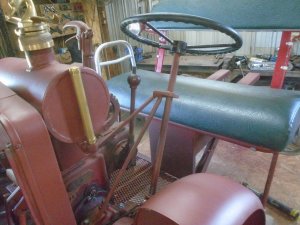
Side view of the steering wheel in relation to the seat.
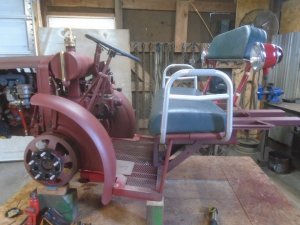
How it looks from the driver's seat.
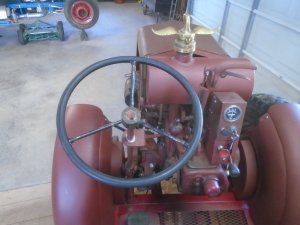

The bearing bracket is fastened in place.

Then the steering shaft is slid down thru it and fastened into the top of the universal joint.
The three point mount makes the the steering shaft very stable.

Side view of the steering wheel in relation to the seat.

How it looks from the driver's seat.

Last edited:
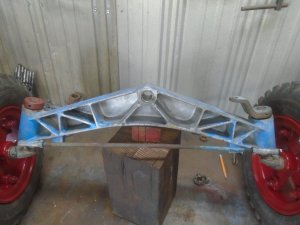
The garden tractor front axle that I bought off ebay arrived today.
It was listed as being off a Montgomery Ward tractor but with the blue color, I have to wonder if it is actually off a Ford garden tractor.
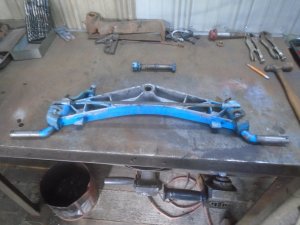
First thing to do is to take it apart so I can see just what shape it is in.
The guy I got it from said that the wheel spindles didn't show much wear and that he couldn't feel any slop in the pivot bushings in the axle.
I'm pleased to see that he was telling me the truth. Everything looks good.
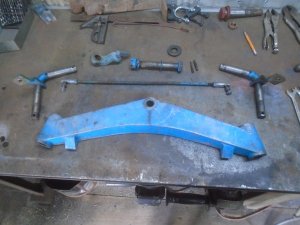
I'm drilling and tapping the axle for grease fittings so the pivot bushings can be greased now.
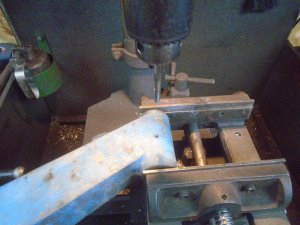
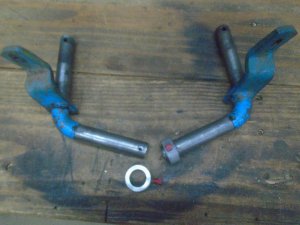
The wheel spindles have a pin pressed into them on the back side of the wheel and a hole drilled thru them for a pin on the front side of the wheel.
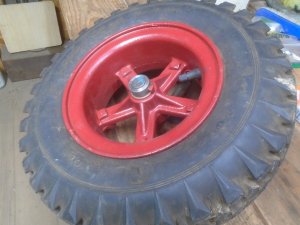
I'm using bronze thrust washers on both sides of the wheels and I want a full surface for them to ride against instead of just the side of a pin.
These are the two collars that I made for the front of the wheels and they are being drilled and tapped for a set screw.
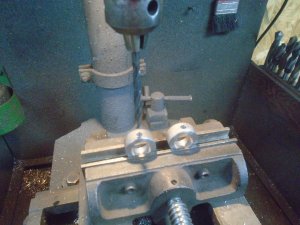
The holes in the end of the spindles are counter drilled and the set screw tightens down against them.
One of the wheels is assembled on the spindle with the bronze thrust washer between the wheel and the collar.
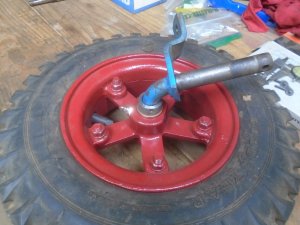
Here is the collar on the back side and it is held in place with the split pin.
It was listed as being off a Montgomery Ward tractor but with the blue color, I have to wonder if it is actually off a Ford garden tractor.

First thing to do is to take it apart so I can see just what shape it is in.
The guy I got it from said that the wheel spindles didn't show much wear and that he couldn't feel any slop in the pivot bushings in the axle.
I'm pleased to see that he was telling me the truth. Everything looks good.

I'm drilling and tapping the axle for grease fittings so the pivot bushings can be greased now.

The wheel spindles have a pin pressed into them on the back side of the wheel and a hole drilled thru them for a pin on the front side of the wheel.
I'm using bronze thrust washers on both sides of the wheels and I want a full surface for them to ride against instead of just the side of a pin.
These are the two collars that I made for the front of the wheels and they are being drilled and tapped for a set screw.

The holes in the end of the spindles are counter drilled and the set screw tightens down against them.

One of the wheels is assembled on the spindle with the bronze thrust washer between the wheel and the collar.

Here is the collar on the back side and it is held in place with the split pin.

When ya get done with that steering I will bring you the my 34 chevy and you can put new suspension and steering in it.
Back in the 80's and 90's, I had a part time business that I ran after my regular work and on weekends doing just that.
I would put those Mustang-2 front end assembles in streetrods. I also did the prostreet modifications where I narrowed the rear frame and axle and put those 16 and 18 inch wide tires under them.
I'm going to pull up the photo of how the axle looked when I got it for comparison.
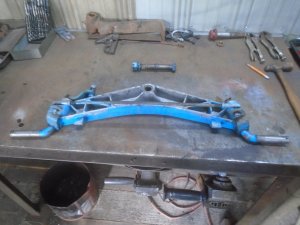
The two wheels and spindles are assembled onto the axle.
You'll notice that I have switched the steering arm from the left side, over to the right side.
If you look closely at the first axle photo, you can see the top of the kingpin opposite of the steering arm just has a washer with a split pin on top of it.
I made up a collar that is held in place with the split pin.
The axle is set in place and ready to make the mounting plates.
The pivot bolt is drilled and tapped for a grease fitting.
The first mounting bracket is made out of 3/8 thick steel and welded in place.
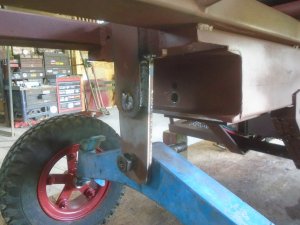
The second mounting bracket is then made up and welded in place.
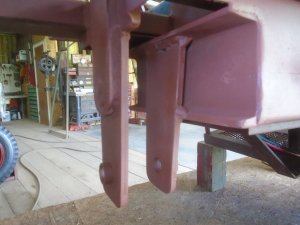
The axle is assembled in between the two mounting brackets.
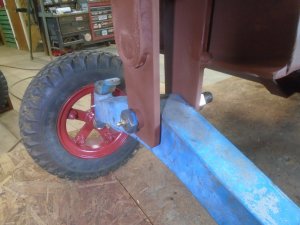
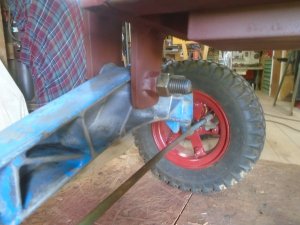
The inside mounting bracket has a nut welded to it that the pivot bolt is threaded into.
Then another nut is screwed onto the bolt and tightened up to lock the pivot bolt in place.
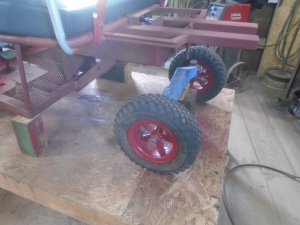
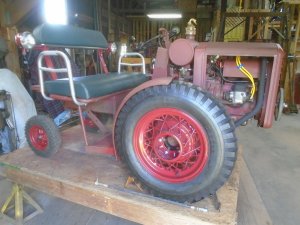
Once again, the cart is on its own wheels.

The two wheels and spindles are assembled onto the axle.
You'll notice that I have switched the steering arm from the left side, over to the right side.
If you look closely at the first axle photo, you can see the top of the kingpin opposite of the steering arm just has a washer with a split pin on top of it.
I made up a collar that is held in place with the split pin.

The axle is set in place and ready to make the mounting plates.

The pivot bolt is drilled and tapped for a grease fitting.

The first mounting bracket is made out of 3/8 thick steel and welded in place.

The second mounting bracket is then made up and welded in place.

The axle is assembled in between the two mounting brackets.

The inside mounting bracket has a nut welded to it that the pivot bolt is threaded into.
Then another nut is screwed onto the bolt and tightened up to lock the pivot bolt in place.

Once again, the cart is on its own wheels.

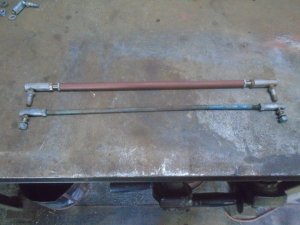
I wanted a stronger tie-rod connecting the two wheels so I made one up using 3/8 inch stainless rod inside a 1/2 inch OD tube sleeve.
The old tie-rod is only 5/16 inch.
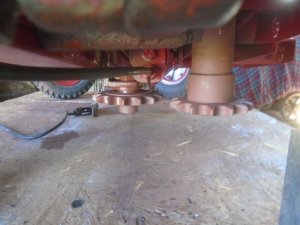
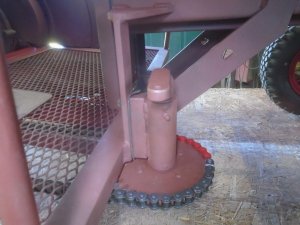
A idler sprocket is mounted to the left of the sprocket on the steering shaft.
This is to get the chain out around the clutch pedal assembly.
I have to make up a mounting flange for the rear sprocket.
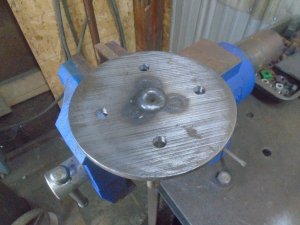
I have a 1/4 inch thick piece of round steel that is just the right size for the flange itself and I'll cut a piece of the other steel bar for the center hub.
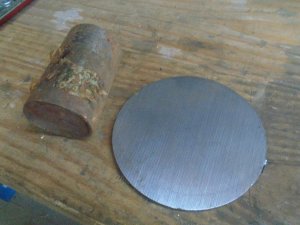
The two pieces are welded together and the center is bored out for the shaft.
The sprocket is set on the flange and one of the holes is marked and drilled thru.
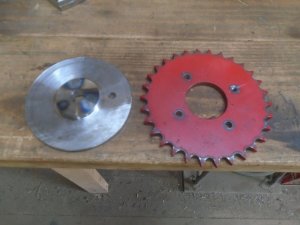
That hole in the sprocket is tapped for a 3/8-16 thread and the sprocket is bolted onto the flange.
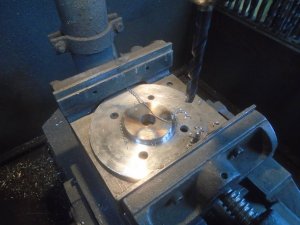
Then the rest of the holes are drilled thru the flange.
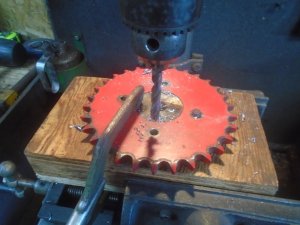
The rest of the holes in the sprocket are threaded and the holes in the flange are drilled out for a 3/8 bolt.
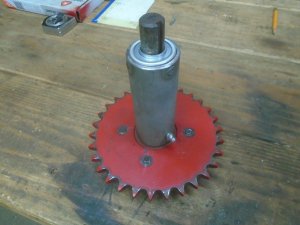
I have an old shaft that already has keyway grooves in it. One end is turned down to fit into the flange.
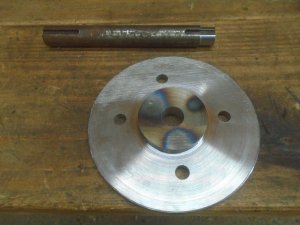
The shaft is pressed into the flange.
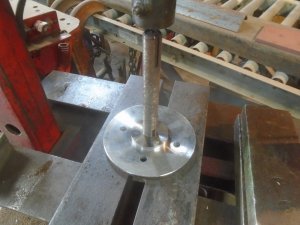
And the end is welded up.
I made up a steel sleeve with two bearings in it that the sprocket assembly fits into.
The old tie-rod is only 5/16 inch.

A idler sprocket is mounted to the left of the sprocket on the steering shaft.
This is to get the chain out around the clutch pedal assembly.

I have to make up a mounting flange for the rear sprocket.
I have a 1/4 inch thick piece of round steel that is just the right size for the flange itself and I'll cut a piece of the other steel bar for the center hub.

The two pieces are welded together and the center is bored out for the shaft.
The sprocket is set on the flange and one of the holes is marked and drilled thru.

That hole in the sprocket is tapped for a 3/8-16 thread and the sprocket is bolted onto the flange.
Then the rest of the holes are drilled thru the flange.

The rest of the holes in the sprocket are threaded and the holes in the flange are drilled out for a 3/8 bolt.

I have an old shaft that already has keyway grooves in it. One end is turned down to fit into the flange.

The shaft is pressed into the flange.

And the end is welded up.

I made up a steel sleeve with two bearings in it that the sprocket assembly fits into.

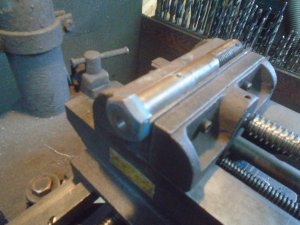
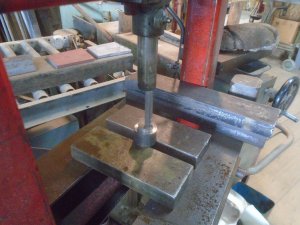
I machined out a collar to go on the top end of the sprocket shaft and here I'm broaching a keyway into it.
The collar with the keyway finished.
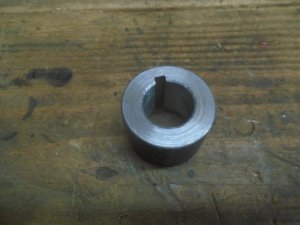
The steering arm is made up and welded to the collar.
Then it is fastened onto the top of the sprocket shaft with three set screws.
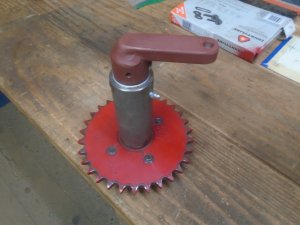
These two pieces of metal are for mounting the sprocket onto the cart.
The taller one has two 3/8 inch holes drilled into it.
The shorter on has two 3/8-24 threaded holes in it so these two pieces can be bolted together.
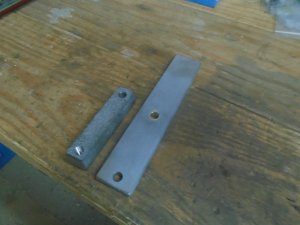
The bottom end of the taller one is welded onto the back edge of the floor and the top is braced against the side of the frame.
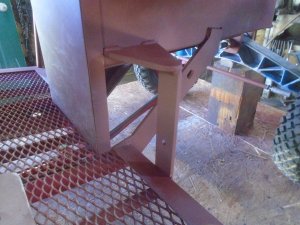
The shorter piece is welded to the side of the bearing tube of the sprocket.
Then the sprocket is fastened in place with two 3/8-24 bolts.
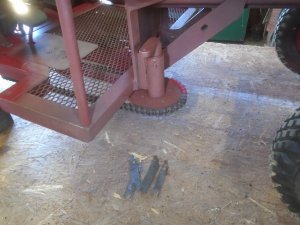
I set this up so that I can use Chevy starter motor shims to adjust the tension on the chain.
You can see two shims in between the sprocket housing and the mounting bracket.
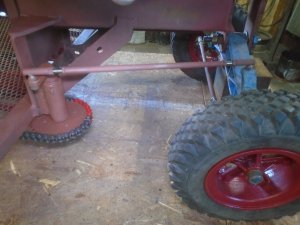
I made up the drag link out of that 3/8 stainless rod and fastened it place.
This is the position of everything when driving straight.
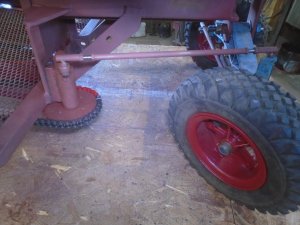
Full left turn.
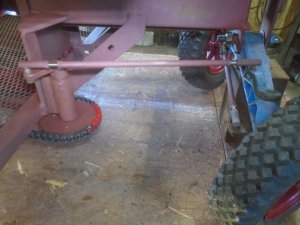
And full right turn.

The collar with the keyway finished.

The steering arm is made up and welded to the collar.
Then it is fastened onto the top of the sprocket shaft with three set screws.

These two pieces of metal are for mounting the sprocket onto the cart.
The taller one has two 3/8 inch holes drilled into it.
The shorter on has two 3/8-24 threaded holes in it so these two pieces can be bolted together.

The bottom end of the taller one is welded onto the back edge of the floor and the top is braced against the side of the frame.

The shorter piece is welded to the side of the bearing tube of the sprocket.
Then the sprocket is fastened in place with two 3/8-24 bolts.

I set this up so that I can use Chevy starter motor shims to adjust the tension on the chain.
You can see two shims in between the sprocket housing and the mounting bracket.

I made up the drag link out of that 3/8 stainless rod and fastened it place.
This is the position of everything when driving straight.

Full left turn.

And full right turn.

Getting ready to order the front end probably next week, It's between a Fatman's and a heidt's. Any suggestions?Back in the 80's and 90's, I had a part time business that I ran after my regular work and on weekends doing just that.
I would put those Mustang-2 front end assembles in streetrods. I also did the prostreet modifications where I narrowed the rear frame and axle and put those 16 and 18 inch wide tires under them.
Getting ready to order the front end probably next week, It's between a Fatman's and a heidt's. Any suggestions?
I have never worked with the Fatman's front end kits, not sure if they were even in business yet back when I was building streetrods.
I have installed the Heidt's Mustang-2 kits and they are very high quality kits.
Pretty cool! I bet that thing turns on a dime.

