What are you currently working on??

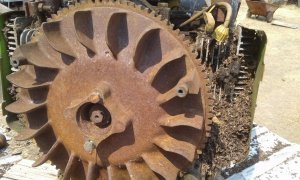
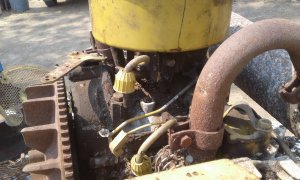
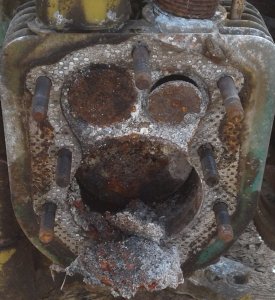
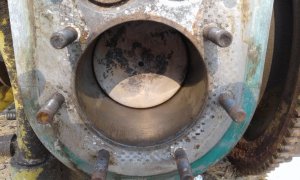
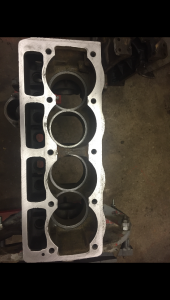
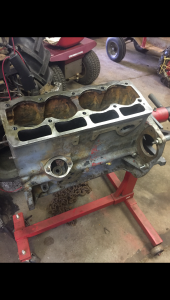
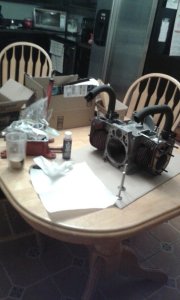
Doin a little to my Ferguson tractor engine. Been apart since February, got all the parts to put it back together in Apirl, but just can't seem to get the motivation to work on it. See how far I get today. I would rather be killin potato bugs, but it's raining so I thought I'd work on the engine. Oh well.

Noel
 
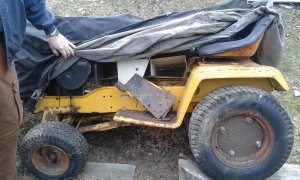
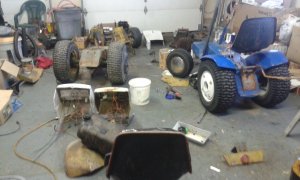
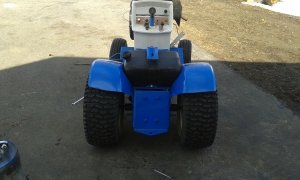
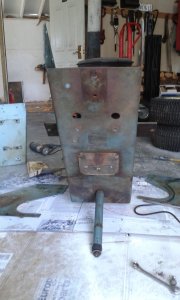
I am not working on it at the moment because I had to put the project on hold due to funds and time and well other projects. But I got a 1968 Sears that I am converting to a 1968/1973 Sears and I have done a Kohler K301 swap on it. This set up will be my plow tractor when its finished. When I got this tractor it was a basket case literally or shall I say bucket case because most of the parts were in 5 gallon buckets. I didn't have far to go to strip down the tractor so I started with the frame.

20151029_110313.jpg

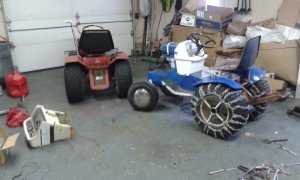
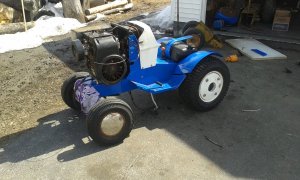
I got it together and started using it before I got to finish it because I needed a plow tractor to use right away. With plans to tear it back down again at a later date to finish it.

20160113_141525 (1).jpg
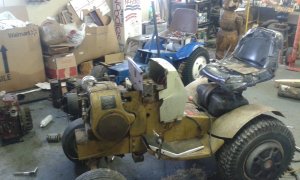
I got it back in the garage late winter early spring ish and had access to a 1973 basket case that had a broken front frame, busted up dash, and a roached transmission. I also had purchased a cub cadet 1250 quietline that needed more then I was willing to give so I pulled the engine out of it and sold most of the parts from it and got me a free engine and made a few bucks with a bit of work.
20171129_104658.jpg
20171125_143928.jpg

Now back to the 73 sears, there are things about the newer style sears that I really like but also dislike so looking at the two tractors my goal is to make the best of both worlds so my journey begins. I'll explain whats different and what I like better so anyone reading along learning about these sears will have a good explanation.

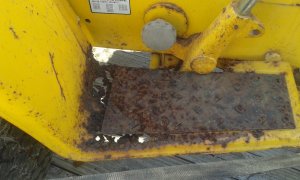
20180317_124520.jpg

I'll start with the foot boards the foot boards on the later models are larger and hold a larger foot print making it easier and safer to use during winter time with the ice and snow. the 73 had the foot boards my 68 needed so I used those. photo above shows 68 foot board on top on the 73.

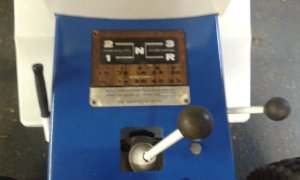
Next was the gas tank, the older metal tanks are a hot commodity because they rust out I had a good metal tank on mine but after looking at the 73 and the placement of the tank under the seat that also relocated the battery to a different position I can see that I will be gaining a lot more room under the hood with this set up. This leads on to needing the fenders, seat spring, seat bracket, and oddly enough the shifter I found that one out after the 73 has a bend toward the front and the 68 does not, you cannot put a bend in the 68 lever because its not designed to, the 73 has notches on the shaft that keep it from rotating side to side when trying to shift , the 68 will rotate 360 degrees and will cause it to tear the boot while if rotated.
20180321_133714.jpg
The fenders have indentations for the gas tank.

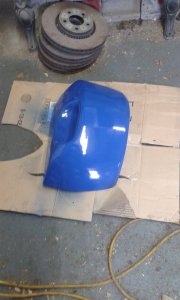
Then I had to dig some more and get the battery tray and side covers off the 73, that meant removing the ones I already had prepped and paint up before and paining up the 73's to match.

20180322_181139.jpg

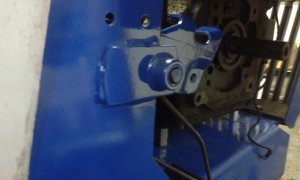
Battery tray side panels are also the clutch bracket support on the 73 so when using this set up it makes engine swap a lot easier.

20180317_161247.jpg
Getting both tractors torn down and comparing parts

20180321_133642.jpg

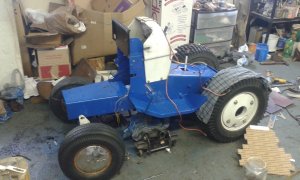
Finally after get both tractors torn apart and then sanding and re-painting of all the needed parts I got my tractor together. Aluminum dash, large foot board, relocated gas tank and battery I now have room for that cast iron kohler.
 

Attachments

  • 20180303_145535.jpg
    20180303_145535.jpg
    130.4 KB · Views: 8
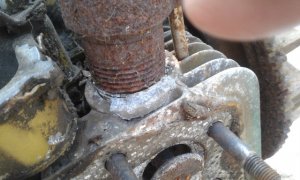
Yes acetylene maybe needed, could try Map gas torch, hotter than propane. Soaking the treads for a few days may help too. Use what ever penetrating fluid you like. Everybody has their favorite. Tap pipe and block with flat punch and small hammer too, may help jar it loose.

Noel
 
I haven't tried to remove the exhaust from my present engine. In the past on an engine with steel pipe screwed into aluminum I got to forceful and unscrewed it and it pulled the thread out of the block with the pipe. that was an educational experience. Now I try penetrating oil, heat, and tapping with a small hammer with lots of patience. If it is to stubborn I opt for sacrificing the steel part. cut it off with a hack saw them reach inside with an end grinder and carbide burr to remove enough material from the pipe to weaken it so I can pick it out. Don
 
Last edited:
Well got a little done to the old 51 Ferguson engine today. Two weeks time is our yearly plow match time. Be nice to have the old tractor running. But. I know what I’m like. We will see I guess.
 

Attachments

  • 8F983FE8-A0EA-427E-AE26-A34B52756350.png
    8F983FE8-A0EA-427E-AE26-A34B52756350.png
    1.1 MB · Views: 3
  • 46E8E4DF-EA47-4595-A352-D3F42243BC41.png
    46E8E4DF-EA47-4595-A352-D3F42243BC41.png
    1.2 MB · Views: 3
How does anyone know how get to exhaust loose to rotate. I got the lock nut loose by heating it. Will heat possibly get it loose? I may need to find an acetylene torch. My one camera died and the other is to large so I can't post pics.

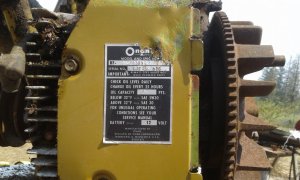
When I rebuilt my Onan , I left the exhaust on. I feel if I would have proceeded to remove them I would be replacing them. I tried but it was just to tight.

20180203_173854.jpg
 
I am not working on it at the moment because I had to put the project on hold due to funds and time and well other projects. But I got a 1968 Sears that I am converting to a 1968/1973 Sears and I have done a Kohler K301 swap on it. This set up will be my plow tractor when its finished. When I got this tractor it was a basket case literally or shall I say bucket case because most of the parts were in 5 gallon buckets. I didn't have far to go to strip down the tractor so I started with the frame.

View attachment 3931

I got it together and started using it before I got to finish it because I needed a plow tractor to use right away. With plans to tear it back down again at a later date to finish it.

View attachment 3932
I got it back in the garage late winter early spring ish and had access to a 1973 basket case that had a broken front frame, busted up dash, and a roached transmission. I also had purchased a cub cadet 1250 quietline that needed more then I was willing to give so I pulled the engine out of it and sold most of the parts from it and got me a free engine and made a few bucks with a bit of work.
View attachment 3934
View attachment 3935

Now back to the 73 sears, there are things about the newer style sears that I really like but also dislike so looking at the two tractors my goal is to make the best of both worlds so my journey begins. I'll explain whats different and what I like better so anyone reading along learning about these sears will have a good explanation.

View attachment 3936

I'll start with the foot boards the foot boards on the later models are larger and hold a larger foot print making it easier and safer to use during winter time with the ice and snow. the 73 had the foot boards my 68 needed so I used those. photo above shows 68 foot board on top on the 73.

Next was the gas tank, the older metal tanks are a hot commodity because they rust out I had a good metal tank on mine but after looking at the 73 and the placement of the tank under the seat that also relocated the battery to a different position I can see that I will be gaining a lot more room under the hood with this set up. This leads on to needing the fenders, seat spring, seat bracket, and oddly enough the shifter I found that one out after the 73 has a bend toward the front and the 68 does not, you cannot put a bend in the 68 lever because its not designed to, the 73 has notches on the shaft that keep it from rotating side to side when trying to shift , the 68 will rotate 360 degrees and will cause it to tear the boot while if rotated.
View attachment 3937
The fenders have indentations for the gas tank.

Then I had to dig some more and get the battery tray and side covers off the 73, that meant removing the ones I already had prepped and paint up before and paining up the 73's to match.

View attachment 3940

Battery tray side panels are also the clutch bracket support on the 73 so when using this set up it makes engine swap a lot easier.

View attachment 3941
Getting both tractors torn down and comparing parts

View attachment 3942

Finally after get both tractors torn apart and then sanding and re-painting of all the needed parts I got my tractor together. Aluminum dash, large foot board, relocated gas tank and battery I now have room for that cast iron kohler.


That's a nice build, you should start a completely separate threads in the garden tractors section on your build.

Just to let you know, that is not a 73, the plastic gas tanks under seat did not show up until '76. Shifter decal looks just like my '77.
You will have to drill a nice size hole in the frame for the gas outlet on the tank.

The shifter on the 68 should not rotate, I believe there is a little pin inside keeping it straight.

Is that OH160 toast?
 
I had to do a "in the field...or yard" fix on the Suburban last night. Cutting my wife's aunt's grass and tractor just lost all power and went to an idle.
Hopped off, yep, throttle cable broke off at the governor hook up, did pretty well for 41 yrs. Thankfully I had 2 needle nose pliers, did the proper bend on the end of cable wire and back to mowing.
 
I haven't tried to remove the exhaust from my present engine. In the past on an engine with steel pipe screwed into aluminum I got to forceful and unscrewed it and it pulled the thread out of the block with the pipe. that was an educational experience. Now I try penetrating oil, heat, and tapping with a small hammer with lots of patience. If it is to stubborn I opt for sacrificing the steel part. cut it off with a hack saw them reach inside with an end grinder and carbide burr to remove enough material from the pipe to weaken it so I can pick it out. Don
It is a couple days latter now and I have removed the exhaust. Once I removed the muffler the rest nearly fell of so I am not much help. Don
 
Or - cut the pipe about 1/2" from the head. Use a hack saw blade, or small burr in a dremal, etc. cut through the pipe in one place. Start to pry it ou on one side of the cut. Can usually turn it out with a pair of pliers or vise grip from then on. I like to use a hack saw blade as i have more control over the cutting.
 
That's a nice build, you should start a completely separate threads in the garden tractors section on your build.

Just to let you know, that is not a 73, the plastic gas tanks under seat did not show up until '76. Shifter decal looks just like my '77.
You will have to drill a nice size hole in the frame for the gas outlet on the tank.

The shifter on the 68 should not rotate, I believe there is a little pin inside keeping it straight.

Is that OH160 toast?

Good catch ....I got confused with the year its my Roper thats a 73 , I believe I was told its a 76 but could just as well be a 77. I met a local buddy not far from me that I met from ebay he was the one I got the tractor from. After I sold him something on ebay I noticed he was in Maine so I got his name and searched Facebook and he is also a member of the backyard club we are in, so I told him not to buy anything else and that I would sell it to him personally at a better deal. We made a few deals back and forth and he treated me like I treated him, he was asking for a few things that I had so I told him to just take it. I gave him 100% of my Tecumseh stuff. Then when I needed something I expected him to try and cut my head off but he didn't.

20180329_113717.jpg

I already drilled the hole but I did forget to mention that.

As far as the shifter goes , the 68 does do a complete 360 rotation and there is no stop pin only thing that stop that is the rubber boot thats why I had a hard time trying to shift it with the lever bent instead of going into gear it just rotated the shaft.
20151212_123628.jpg

The OH160 , I never even tried to do anything with I gave it back to my buddy after I was done getting everything I wanted from the 76/77
20180329_113737.jpg

My goal was to fit the Kohler in, I got a bunch of oem Kohler parts over the winter and have plans to rebuild this engine before putting it back to work.
 
Good catch ....I got confused with the year its my Roper thats a 73 , I believe I was told its a 76 but could just as well be a 77. I met a local buddy not far from me that I met from ebay he was the one I got the tractor from. After I sold him something on ebay I noticed he was in Maine so I got his name and searched Facebook and he is also a member of the backyard club we are in, so I told him not to buy anything else and that I would sell it to him personally at a better deal. We made a few deals back and forth and he treated me like I treated him, he was asking for a few things that I had so I told him to just take it. I gave him 100% of my Tecumseh stuff. Then when I needed something I expected him to try and cut my head off but he didn't.
.

who is your backyard buddy? Im in that group too.
 
Not a tractor. But I pulled the engine off the minibike I bought. Put a cone filter, jet kit, and a open header on it. Tweaked the governor linkage to set at 4k instead of the 3250 it was running out of the box. Got it mounted on. Realized the clutch I had was for a 5/8" shaft. Not 3/4. So I stopped and ordered a new clutch, chain guard, and an rlv gold 35 chain, and master links.

Should be ripping around on it next week.
 
Last time I mowed with the Cub 1512 it did a miserable job. Pulled the deck off this morning and started to check a few things. Drive belt was streatched and wore thin so will pick up a new one in the morning. Blades were not sharp, really need to be replaced and will go with Gator Blades this time. Sharpened these up and checked for flatness, both cutting edges should lay flat on a flat surface. 2 of these blades rocked so had to tweek them a little to get them to lay flat. Then checked for cutting edge eveness across the deck. On blade was 3/16" higher than the other two. Don't know how that happened but adding a shim brought it down to where it should be. Deck just might cut better next time. Now on to the ugly tin work off the 2166 I entered in Tractor of The Month.
 
@##**%$#**$# :mad::mad: I think a JD engineer designed the placement of the solenoid on my Sears 16/6, job was way more complicated than it should have been, just like every JD mower I've ever worked on. Took me over an hour just to replace the solenoid, only other worst place it could have been would be if it had been placed in between the rearend and frame. :mad:
 
@##**%$#**$# :mad::mad: I think a JD engineer designed the placement of the solenoid on my Sears 16/6, job was way more complicated than it should have been, just like every JD mower I've ever worked on. Took me over an hour just to replace the solenoid, only other worst place it could have been would be if it had been placed in between the rearend and frame. :mad:
If you notice on the build I posted above I relocated the solenoid behind the engine where I can get to it easy.
 
Back
Top