What are you currently working on??

Front Side.JPG Bot. Frnt.JPG Driver Side.JPG

Pass Side.JPG Tool.JPG


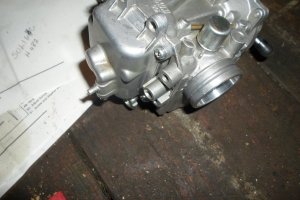
First photo is the pas side of the carb with the engine side point to lower right.
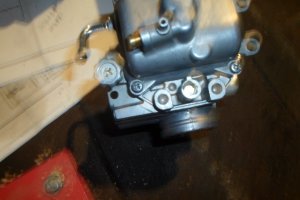
Second shows the bottom of the carb with the pilot in the center in front of the float chamber and just back of the engine side intake.
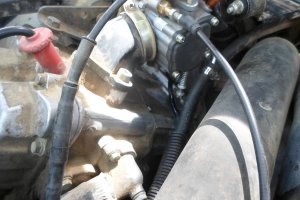
Third is the driver side w/carb installed.
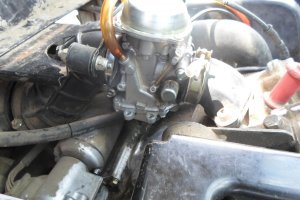
Fourth is Passenger side w/carb installed.
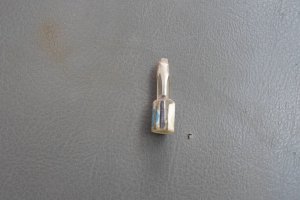
Last is the tool I made to get in the pot to adjust the pilot.

Had to insert the tool using a finger from each hand on each side of the carb, as that is all there is room for. Then rotate the tool till it fell up into the slot in the pilot and turn it a bit. Then turn the idle acrew to slow the idle down. Then back to the pilot adjusting again. As you can see there is very minimal room to do any adjusting. A flex shaft screw driver would work IF I had one small enough to fit in the slot and hole in the carb body. Polaris has special tools for adjusting the pilot and the idle screw. In the third photo, right in the center of the photo the small shiny black tube is the carb drain line. The long screw that is sticking down just to the right of the drain line is the idle adjusting screw.
 
View attachment 12920 View attachment 12918 View attachment 12919

View attachment 12921 View attachment 12922


First photo is the pas side of the carb with the engine side point to lower right.
Second shows the bottom of the carb with the pilot in the center in front of the float chamber and just back of the engine side intake.
Third is the driver side w/carb installed.
Fourth is Passenger side w/carb installed.
Last is the tool I made to get in the pot to adjust the pilot.

Had to insert the tool using a finger from each hand on each side of the carb, as that is all there is room for. Then rotate the tool till it fell up into the slot in the pilot and turn it a bit. Then turn the idle acrew to slow the idle down. Then back to the pilot adjusting again. As you can see there is very minimal room to do any adjusting. A flex shaft screw driver would work IF I had one small enough to fit in the slot and hole in the carb body. Polaris has special tools for adjusting the pilot and the idle screw. In the third photo, right in the center of the photo the small shiny black tube is the carb drain line. The long screw that is sticking down just to the right of the drain line is the idle adjusting screw.

Now you made me have flashbacks to Tuesday when I had to replace the starter on one of those things! Wasn't any fun but at least I got paid to work on it. I would have lost my butt if it would have been a flat-rate job!

Good work designing that tiny screwdriver to do the job, Roger!

DAC
 
Now you made me have flashbacks to Tuesday when I had to replace the starter on one of those things! Wasn't any fun but at least I got paid to work on it. I would have lost my butt if it would have been a flat-rate job!

Good work designing that tiny screwdriver to do the job, Roger!

DAC
Those are the darnedest things to work on I ever seen. Mine needs a little more adjusting as it is a little hard to start when it warms up. Fires right off when cold though. Also don't want to idle over 30 seconds or so. Need to open the pilot a bit more.

Thanks for the compliment on the tools design. I even thought ahead enough to cut several grooves in the handle for gripping it. Normally don't think that far ahead, usually backwards. ;)
 
Well, keep adjusting Roger, you'll get it dialed in! Pretty sure that they were designed the way they are to encourage people to take them to an "authorized dealer". Most folks can't afford it though.

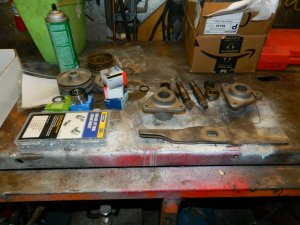
The bearings for the deck overhaul on the MF 610 cutting deck came in so I'm set up to rebuild the two spindles I got from @esbbent . Will get them done but the entire job won't be done until after mowing season. I want to clean and paint the deck then one of the spindles on that deck will be rebuilt making the 3 needed to complete the job.

DAC

deck rebuild parts.JPG
 
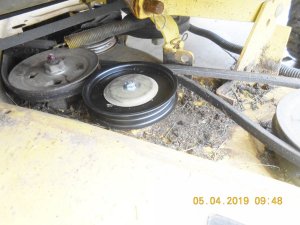
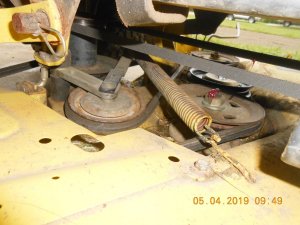
I have the JD 265 under the canopy. Should get an idler pulley for the deck today. Cleaned it out underneath and greased things. Crazy JD made the bore bigger than the normal 5/8" pulleys you can get everywhere!
 
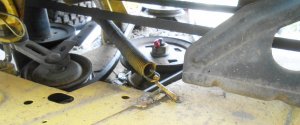
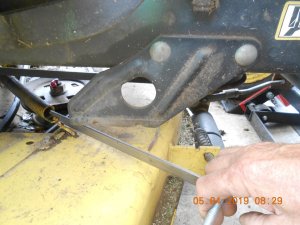
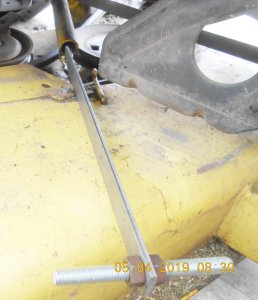
Pulley came in the mail! I had a spring to unhook to get the belt on the pulley. JD says to drop the deck to change the belt. I chose to make a tool to take the spring off and put it back on.
DSCN4593.JPG DSCN4594.JPG DSCN4595.JPG

DSCN4596.JPG

Installed the pulley and hooked the spring back up. Easy, peasy!
DSCN4597.JPG DSCN4598.JPG
 
Well, keep adjusting Roger, you'll get it dialed in! Pretty sure that they were designed the way they are to encourage people to take them to an "authorized dealer". Most folks can't afford it though.

DAC

I went a bit to far,. now have to back it up a bit. Was harder to start and run rough this morning. Hours meter stopped a 1048 so who know how many hours are on it. Can't expect it to run like new. Sure a lot handier than a 4 wheeler.

I like your tool to release the spring. I think some of the people that write the manuals have never seen a finished product. Or else a stupid attorney gets involved with liability concerns.
 
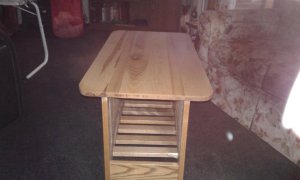
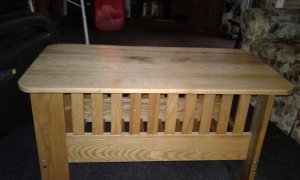
With casters, it is in it's place where ever it gets put.

Cub goes in the shop this morning to see why it wants to run lousy at times. Also check out the deck as to why it is cutting low on the right side. I suspect a bent blade but they were new last summer and didn't hit anything that I know of. Will find out I bet.
 
Im finally getting near the end of this Lgt100 project, it started out pretty rough, broken clutch linkage, wouldnt charge the batt, body panels and hood were so bent they wouldnt even fit, no muffler, lights didnt work, badly busted plastic dash and junk tires.... now I just need to finish up the paint and add the new stickers....

051.JPG
 
With casters, it is in it's place where ever it gets put.

Ha Ha Roger! Yup, it rolls anywhere in the shop except out of the way of other things that need to come in and out. A "parking place" for that cabinet would be nice instead of right in the way of getting the truck out.

Had some honeydoos today then started clearing out the cabinet of the cordless tools, and drill bits, putting them in that new cabinet too. I added a shelf in the cabinet for the cordless drills and little saw. It took a bunch of sorting as things had gotten pretty disorganized in the old storage places.

DAC
 
Looking real sharp there lance. Need a bit more black tape on the seat though. ;) ;)

Lol.. Ive made a few Gorilla tape seat covers... but in this case I actually have a PrincessAuto seat cover for it.... but it would be filthy in 2 days with me using it. They're under $50cad, got a couple pockets on the back.
 
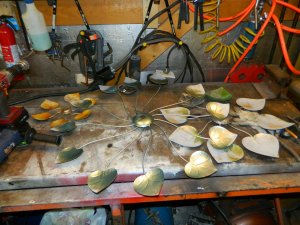
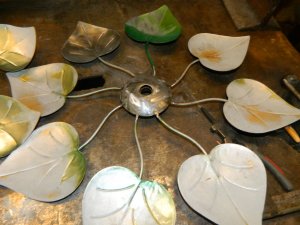
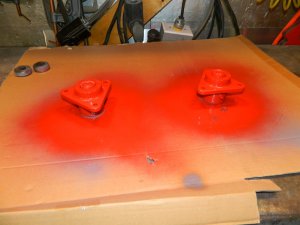
I remembered I have a project for one of my sisters in Denver. We are heading that way in about a week and a half and I had forgot. She likes wind spinners. When one breaks or fades I take it home to repair and repaint. Guess I better get started! Had to weld on one of the 3 spinning blades and obviously a paint job is needed. Got the welding done tonight and pulled the bearings. I always put new ones in. I'll take them to work, stay after and bead blast through the week so painting can start this weekend. Won't be any tractor work until after we get back again but I will mow at least one more time before we leave.

DAC

DSCN1562.JPGDSCN1564.JPG
 
Priming and painting the wind spinner pieces is about all I've had time for today. Too wet to mow. Not sure if I will get them done in time to take to Denver Friday. We will bo going down there again in August, so if I miss this trip it will have to be the next one.

DAC
 
I have the JD 265 under the canopy. Should get an idler pulley for the deck today. Cleaned it out underneath and greased things. Crazy JD made the bore bigger than the normal 5/8" pulleys you can get everywhere!
Yep, they force you to get all parts from them. Like a PTO shaft bearing for my F935 which at a glance appeared to be a 1" machinery bearing in a pillar block. Well, the shaft measures like 1/64" over an inch. A std machinery bearing is around $10, so I figured maybe $20 or $30 from John Deere. Nope, only comes with the pillar block and cost me $98! Robbery!
 
Back
Top