What are you currently working on??

That carpet had to cause that rot in the floor. I'm not sure I've seen a truck bed rotted out like that except for 70s and 80s junk steel.

I wish you weren't so far away. There is a place semi local to me that sells truck bed. Ohio Light Truck Parts. The company my Dad worked for had a fleet of older GMC 2x4 2500s. They would comletely mangle the beds with fork lifts and dropping stuff in them. It was cheaper for them to just buy a used bed. I'd almost bet a pay check they'd have a bed to fit your truck.
 
Got into my bees today, not as many bees as I had hoped was in there, but there is some brood hatching and various stages of larvae including eggs which is a good sign.
Then I put carb back on the Briggs 18 I/C twin after cleaning twice. Running much better, but won't idle down to a lower idle, governor seems to keep it higher than I think it should. Oh well just won't be idling it much. All kinds of noise was coming from I think idler pulley on drive belt, guess thats next on the list. Poor mower hasn't ran since 2010.
 
I've been driving the '55 GMC a lot again since the snow seems to have finally gone away and I don't have to scrape the frost off the glass. The throttle linkage has been binding under acceleration having to push past a certain spot. Deccelerated fine. I put a new clone Rochester MV on it last fall and am still very happy with how it runs. Anyway when I got home from work this evening I figured I better tinker some. The bell crank arm bolted to the firewall has 3 holes for the linkage going to the carb. I moved that rod to the middle hole and poking through the opposite side. Made a big difference. Linkage angle looks straighter now. Got my wife's planter chairs out on the patio so it's up to her to get flowers planted in them. Cleared some stuff in one of the sheds, and got both walk-behind snow blowers to fit, and then finished getting air hoses set up and hung again after cleaning and remounting a bunch of stuff at my welding table.

It's a lot easier to get some stuff done after work when the weather cooperates!

DAC
 
I painted and installed a dishwasher at my nephews today, pretty much at a stand still until they get me a vanity top for bathroom and get all the furniture out of FR so I can paint.

Once I got home, I put a layer of plastic under my cheapo Harbor Freight carport. Less than a year old and leaking at the pipe connections, must have small holes worn in them.
Then I installed the carb on my Honda walk behind with a GXV390. Runs pretty good, now gotta figure out what is lose on the drive belts.
 
So found two rust spots on my truck. I shouldn't post pictures of this welding , but here goes. Found some 3/16 stuff in junk pile and made two patches and welded them on. Used 6013 rods. That’ll hold her for a few years.

Noel
 

Attachments

  • 038CD8BD-726A-49F2-9A83-36C575710FEC.jpeg
    038CD8BD-726A-49F2-9A83-36C575710FEC.jpeg
    243.5 KB · Views: 10
  • 9E42C295-93D6-49D5-9793-F7A989ADB608.jpeg
    9E42C295-93D6-49D5-9793-F7A989ADB608.jpeg
    201.9 KB · Views: 10
  • 91B6474C-24F1-4B06-B001-D5BBCCA34ADF.jpeg
    91B6474C-24F1-4B06-B001-D5BBCCA34ADF.jpeg
    233.8 KB · Views: 10
  • DDAC5340-4D91-45FD-BB27-54134BF28A20.jpeg
    DDAC5340-4D91-45FD-BB27-54134BF28A20.jpeg
    231.1 KB · Views: 11
  • 51015E08-15C3-4D28-8303-C61B5ECA01FD.jpeg
    51015E08-15C3-4D28-8303-C61B5ECA01FD.jpeg
    224.6 KB · Views: 12
  • 022A9A0D-0D7C-4CFA-A197-38DE197BBC49.jpeg
    022A9A0D-0D7C-4CFA-A197-38DE197BBC49.jpeg
    213.6 KB · Views: 12
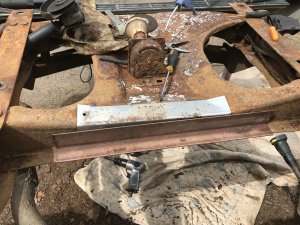
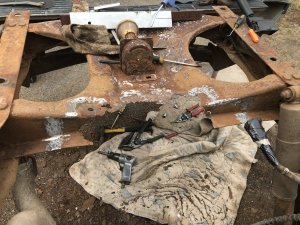
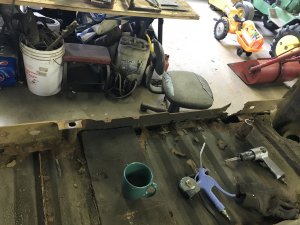
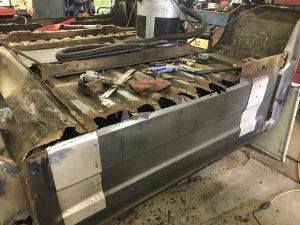
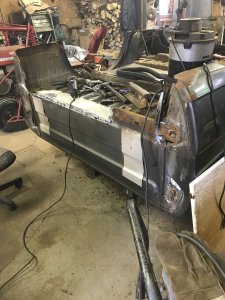
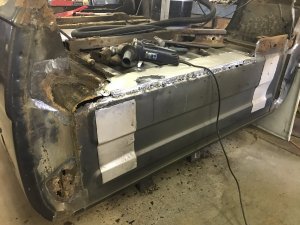
After it started to clear up, to a point where I knew we had a break from the monsoon of the past few days, I hit the local junkyard looking for a small underhood fuse box that takes the big plug in maxi fuses, as I am rehabbing a wiring harness for my new to me truck. The original one is a mess, alot of past owner interference going on. Cobble city. I have never seen a wiring harness on a single truck, so cobbled. I have seen a lot of add ons on some vehicles over the years, that are easy to rip out/undo, and this one had a couple of those too. Like aftermarket cruise and an aux switch wire nutted to an extension cord (!) Run right to the blower motor.
But in the length of the valve cover, (inline 6) the hot wire off of the alternator changes colors 3 times, just twisted and taped together. One of which is an inch from the fuel line that feeds the carburetor. The next one is like 3 inches from that. The wires to the coil, distributor, and field side of the alternator too. That part of the harness actually unplugs from the main harness, would have been much easier to get another engine harness from a yard and "plug and play" into the main harness.
What idiots have had their mitts on this truck in the past. Electrical is NO place for such a cobble job.no wonder why the truck had no spark when I first tried to start it.

Along the driver side fenderwell, the fusible links are just as bad. I'm surprised that this thing didn't burn to the ground.
Plus I am removing the primitive computer and reverting to plain old factory electronic ignition along the way.
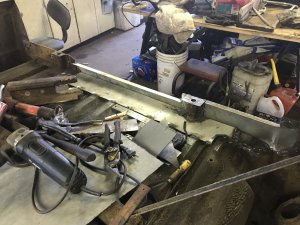
I got a better underhood harness in my last trip to the junkyard that I have untaped and crimped/soldered/heat shrunk any spots that the insulation has split and showed bare.
We did the same thing to my son's ramcharger last year.
I hunted and looked at many makes and models, car and truck, before I decided on a suitable fuse box. Not too huge, has the style of fuses I wanted with just enough fuse spots for each fusible link, plus a few extra for future consideration.
When we did the ramcharger we wound up with a fuse box from a 98 ZX2, I spent a little more time and walked the whole yard, except for the imports and the sections of the Fords that were under water from the last two days of solid rain.
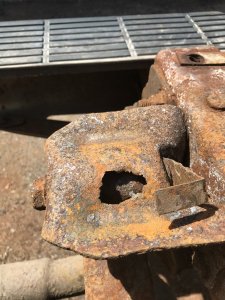
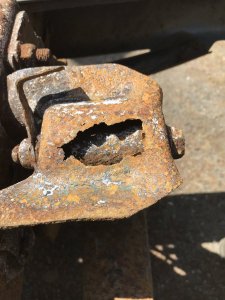
I found one that I liked the best off of a 90-92 ranger. "Last of the square body rangers"
Only one row of fuses within, with about a dozen maxi fuse spots and 2 regular standard size blade style fuses. Now to put the new revamped harness on the truck so I can see how much wire that I will have to add in to make the connection.
Now to remember to grab a couple of ballast resistors for the glove box haha
 
So found two rust spots on my truck. I shouldn't post pictures of this welding , but here goes. Found some 3/16 stuff in junk pile and made two patches and welded them on. Used 6013 rods. That’ll hold her for a few years.

Noel

Mine rusted completely off. I bought new ones and put on. Quite a pain with the bed on. Especially since Ford riveted them in place.

20 bucks each at napa.
 
So found two rust spots on my truck. I shouldn't post pictures of this welding , but here goes. Found some 3/16 stuff in junk pile and made two patches and welded them on. Used 6013 rods. That’ll hold her for a few years.

Noel
It's not like you are trying to restore a classic here. Just trying to get a few more years out of your work truck! Nothing wrong with using what you got! Good thing there was enough left to patch! Sounds like Aaron wasn't so lucky!

DAC
 
Just did some maintinece, checking fluids, cleaning windows, etc on the '55 and saw something weird! The heat riser coil was laying on the block web where the bell housing bolts up. How it landed there and not on the road somewhere is beyond me! At least the manifold heat riser is counter-weighted to hang open as long as it works smoothly it's not a real bad problem. It still pivots freely so no big deal. I'll see if LMC or somewhere may have new ones. The old one was looking pretty bad, loosing it's tension.

The cruise night is still on for tomorrow night. Wife has to work until 6 and is having a rough week at work. Gonna have to play it by ear if we go or not. It "officially" starts at 6. I'm having a decent week at work, but the bosshole took vacation this week. Things always go smoother, production is better and morale improves when he's gone---LOL!

DAC
 
Another 10 years Doug, it will be an antique. Don’t think it will make it that far. 25 years old or over is considered a antique here, for a vehicle.

I guess I’m an antique too. But a senior senior antique. Hehe.

Noel
 
A little more rust. Under the gas vapour thing. A few pictures of what I did. And of my superior welding skills. Hehehehe. That'll hold her. Long as it passes inspection. Used 6013 rods again.

Noel
 

Attachments

  • DD2A3716-8C28-43E9-8987-DA756FE0F087.jpeg
    DD2A3716-8C28-43E9-8987-DA756FE0F087.jpeg
    300.6 KB · Views: 16
  • F76B3C9E-FCF5-43CA-8A36-7D484A64149F.jpeg
    F76B3C9E-FCF5-43CA-8A36-7D484A64149F.jpeg
    311.7 KB · Views: 16
  • 50BA1907-1461-4A29-A137-953B291FDD8F.jpeg
    50BA1907-1461-4A29-A137-953B291FDD8F.jpeg
    313.1 KB · Views: 15
  • 9B15243F-2782-48D8-A5E6-298764F53C15.jpeg
    9B15243F-2782-48D8-A5E6-298764F53C15.jpeg
    319 KB · Views: 15
  • 59007B8D-DDB3-46EB-AA0C-9D87759FD2C0.jpeg
    59007B8D-DDB3-46EB-AA0C-9D87759FD2C0.jpeg
    296.2 KB · Views: 15
Added some side panels and a couple rubber flaps to my Sears Rotospader. These should have had shields from the factory, they throw dirt everywhere. I had an old semi mud flap, made a CAD assisted pattern and cut them out, attached with self tappers. I also had an old piece of rubber fish pond liner, made flaps for the rear. I did a small garden for a resident, so much better, I didn't have dirt flying 15 feet behind or to the side.
 

Attachments

  • 20200501_133756.jpg
    20200501_133756.jpg
    301.2 KB · Views: 6
Some done on my truck box.

Noel
 

Attachments

  • BF510C59-650A-41E4-B84E-604633E19B15.jpeg
    BF510C59-650A-41E4-B84E-604633E19B15.jpeg
    205.8 KB · Views: 8
  • 74D22771-DF88-422F-915A-6217A0A09680.jpeg
    74D22771-DF88-422F-915A-6217A0A09680.jpeg
    237.3 KB · Views: 8
  • DC1CA35C-DA64-46DD-9DDA-6B84D8E949B4.jpeg
    DC1CA35C-DA64-46DD-9DDA-6B84D8E949B4.jpeg
    227.4 KB · Views: 7
  • 98AC25CF-B093-4F37-9502-0CDBC1E1D43B.jpeg
    98AC25CF-B093-4F37-9502-0CDBC1E1D43B.jpeg
    233.6 KB · Views: 8
  • 24316ADC-F665-483C-A83D-B370C1883ACE.jpeg
    24316ADC-F665-483C-A83D-B370C1883ACE.jpeg
    204.5 KB · Views: 8
  • 7161814F-51AF-4225-816A-31C78EF1CF4D.jpeg
    7161814F-51AF-4225-816A-31C78EF1CF4D.jpeg
    169.4 KB · Views: 8
  • B852979E-6377-41B5-8150-F0333368708F.jpeg
    B852979E-6377-41B5-8150-F0333368708F.jpeg
    179.9 KB · Views: 8
  • C7FC19BF-6879-4E79-8D7D-067A84CB846B.jpeg
    C7FC19BF-6879-4E79-8D7D-067A84CB846B.jpeg
    161.9 KB · Views: 8
  • B8F74312-8532-4C06-B5C4-8F98B62264B6.jpeg
    B8F74312-8532-4C06-B5C4-8F98B62264B6.jpeg
    166.4 KB · Views: 8
  • 7ACF5B5B-889E-4E98-9497-F77CEED15FA2.jpeg
    7ACF5B5B-889E-4E98-9497-F77CEED15FA2.jpeg
    163.1 KB · Views: 8
Some more done. Most of the hard part.

Noel
 

Attachments

  • 125593AE-7FF4-4CEE-8FF2-345CC2A257A1.jpeg
    125593AE-7FF4-4CEE-8FF2-345CC2A257A1.jpeg
    205.8 KB · Views: 7
  • 7106AEA4-07E3-459A-9372-814782DA8509.jpeg
    7106AEA4-07E3-459A-9372-814782DA8509.jpeg
    222.6 KB · Views: 7
  • B9F74904-6D50-4B32-A113-D24ABE770B92.jpeg
    B9F74904-6D50-4B32-A113-D24ABE770B92.jpeg
    237.3 KB · Views: 7
  • A5043A78-9C81-491A-9738-094331274E9A.jpeg
    A5043A78-9C81-491A-9738-094331274E9A.jpeg
    189.8 KB · Views: 7
  • 38AA1E9A-FFC6-49F0-8146-EF220365AF18.jpeg
    38AA1E9A-FFC6-49F0-8146-EF220365AF18.jpeg
    165.5 KB · Views: 7
  • 552184A3-77D1-44EB-9EB2-37816A6F5D32.jpeg
    552184A3-77D1-44EB-9EB2-37816A6F5D32.jpeg
    220 KB · Views: 7
  • 35D9B390-F110-410B-A279-CCA329266AE2.jpeg
    35D9B390-F110-410B-A279-CCA329266AE2.jpeg
    220.4 KB · Views: 7
You have it coming together nicely, Noel! I noticed the little anvil you made out of a piece of railroad iron! It appears to be ore car size and not full locomotive size! I dig that idea! A person has to take out a 15 year loan any more to buy an anvil!

DAC
 
Hehe. I wondered if anybody would notice it. I don’t and wouldn’t know the difference in size Doug. It was my fathers. Came in handy the last two days. Dad is gone 25 years this Saturday.

Noel
 
Back
Top