You are using an out of date browser. It may not display this or other websites correctly.
You should upgrade or use an alternative browser.
You should upgrade or use an alternative browser.
What are you currently working on??
- Thread starter backwoods
- Start date
Pretty busy day since we got a break in the weather. Had to move some a couple tractors and the '55 GMC first thing as I had the septic tank pumped. She needed to back in where they could run the suction hoses over to the tank, right in the parking places for some of my junk!
Repaired the door on the BBQ grill the wind blew off, and of course the rivets the factory used were in between 1/8" and 3/16" so I drilled them out to 3/16". I only had wide head 3/16" rivets so I chucked them in a drill and made small head ones out of them on the bench grinder. Found a bungee cord to wrap around the handles.
Then, finally got to spray weeds that were coming up in the new gravel! Amazing how weeds grow even when the low temps are in the 20's at night!
Took the '55 for about a 25 mile drive since It hadn't been out of the driveway since last year! Ran perfect, but the electric temp gauge decided to quit working. More stuff to take care of later.
Then I got back in the shop and worked on the Gardenway hydro LT for a friend. The park brake linkage is gone but the mechanism is still there so started building that. If it was my yard no problem, don't need it. Their yard has a pretty good hill in it though so it better work.
Oh yeah, did two loads of laundry too---LOL!
DAC
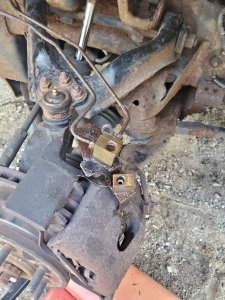
Should have stayed at work yesterday..... I noticed on my way home I was losing brake pedal in the Durango. Got home and front frame is covered with fluid, this is my plow day tow vehicle. Of course the idiots at Chrysler mount the distribution block in a spot you can't access. I ended up having to cut the bracket off frame due to rusty stripped bolt and broke another rusty line. They are also metric so I ended up having to buy line and some fittings, need to get flaring tool tonight to make new lines.
Then to relax went out to mow since deck has to be removed for plow day. I got tractor too close to trailer, hooked pedal or my foot came off and tried to destroy everything. Got tractor jammed under trailer, pushed big trailer back almost 4 feet into camper. Damage ended up being a slightly bent rod and lower grill. I had enough work to get done for plow day, didn't need these extras.
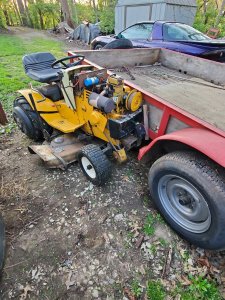
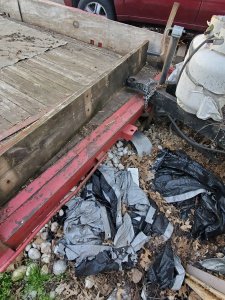
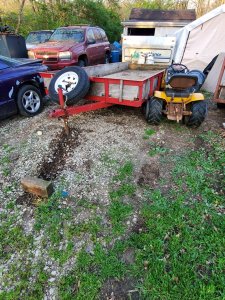

Then to relax went out to mow since deck has to be removed for plow day. I got tractor too close to trailer, hooked pedal or my foot came off and tried to destroy everything. Got tractor jammed under trailer, pushed big trailer back almost 4 feet into camper. Damage ended up being a slightly bent rod and lower grill. I had enough work to get done for plow day, didn't need these extras.


Got the Durango fixed tonight...I think.
I was telling my coworker about it, he still owns the auto garage he used to run, told me to stop on the way home and grab his flaring tools.
Man, what a Godsend these things worked like butter. Flared 3 ends with a union. No leaks so far after bleeding them.
Now onto more grill repair so at least one tractor will have a hood.
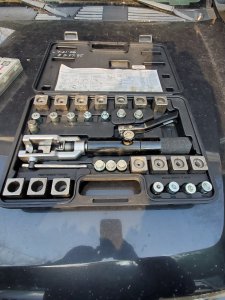
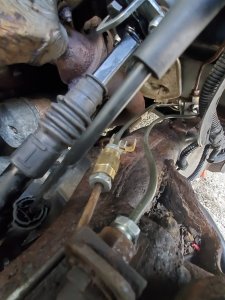


That’s a nice set I’ve always used the cheap kit but they work in a pinch. Glad you got it fixed.Got the Durango fixed tonight...I think.
I was telling my coworker about it, he still owns the auto garage he used to run, told me to stop on the way home and grab his flaring tools.
Man, what a Godsend these things worked like butter. Flared 3 ends with a union. No leaks so far after bleeding them.
Now onto more grill repair so at least one tractor will have a hood.
View attachment 51649
View attachment 51650
Yup I bought one of those flaring tools. Love it except when I gotta get it into tight quarters.
What year Durango? Hate to say that frame looks rougher than my 01.
Around here the 04-07 ish version ones that are still around are rustier than most 98-03s. And the 04+ version, there always seemed to be less of on the roads than the older ones even when they were the new and current model.
My particular 01 lived in the South for it's 1st 12 years of existence, meaning no salt exposure. Still has all of its original steel brake lines. 294,xxx miles and counting.
On another note I deadlined an 01 Chevy 1 ton van today at work because the frame is ready to buckle under the passenger door right where you'd put the pad for the lift... And the cross member above the spare is ready to crumble on the driver side.
Another disadvantage of living in the heart of the salt belt.
Yup I bought one of those flaring tools. Love it except when I gotta get it into tight quarters.
What year Durango? Hate to say that frame looks rougher than my 01.
Around here the 04-07 ish version ones that are still around are rustier than most 98-03s. And the 04+ version, there always seemed to be less of on the roads than the older ones even when they were the new and current model.
Another disadvantage of living in the heart of the salt belt.
It's an '02 and frame is relatively clean, just has a few bad spots of mainly surface rust, rockers are also getting bad with holes. It's just a work vehicle that gets parked on dirt and gravel so it is what it is.
I've also replaced both rear leaf springs as the main spring on both sides snapped right behind the front eye. The 2nd spring in pack wore a thin spot.
Yep, the toils of living in the midwest winter salt belt
The main thing is, Marty, you didn't smash your foot or break a leg the way that tractor augered under that trailer! Sure hope you get to Daniel's and get to relax and have some fun this weekend!
DAC
Yea, I've smashed my leg before on trees riding dirt bikes, I know have that pull it out of the way reaction for stuff like that.
I was actually able to crank trailer tongue up and pull tractor out from under it fairly easily.
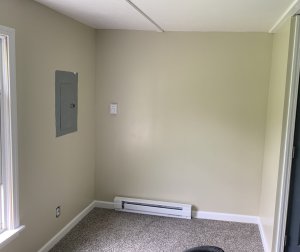
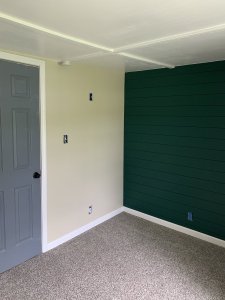
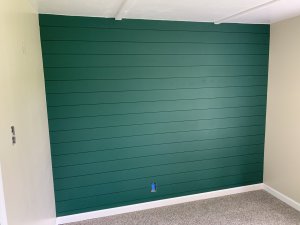
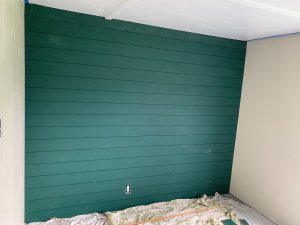
I finished up my sons drywall job in their nursery last week. He did the second coat and done a good job then I went back out to do the final coat last week. They both sanded and painted the walls and trim. I went out yesterday and hung the ship lap on one wall. Not much room in the milling of these to fudge as you go up the wall. The ceiling was out 3/4” from bottom to top. I managed to fudge several of them a fat frog hair to get it to come out even at the top. I suggested several different types of boards but they settled on the MDF boards and I hate that stuff. Once they touch up the paint I’m going back out for one more day to do the rest of the trim and caulk. I was surprised at the color they used. I told her it looked John Deere green. Lol

Working on my Chinese log splitter. I bought it after a fire about 20 years back. The engine was melted down, Tires gone, valve cooked. I welded Subaru doughnut spares to the existing Wheels.![20220424_114217[1].jpg 20220424_114217[1].jpg](https://tractorfanatics.com/data/attachments/51/51682-dd78d5695d7e37388847fba5c3523a08.jpg?hash=3XjVaV1-Nz)
That got it mobile.
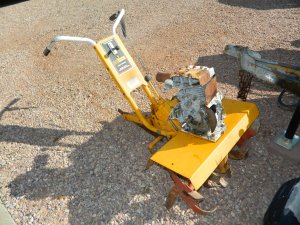
Replaced the valve with one I had. Bought a tiller at a garage sale for $5 and put that Briggs on the splitter and used it for about 5 years. Loaned it out and when I went to retrieve it the engine was stuck. Put a predator on it and used it until this spring. The fluid leak that has been developing over the years has now become intolerable so I pulled it apart.
You can't see it here but the cylinder looks good. You can kinda see the groove the retained wire ring for the gland fits in.
![20220424_114227[1].jpg 20220424_114227[1].jpg](https://tractorfanatics.com/data/attachments/51/51684-c3d0eb22eab4dad4a8c5746561713327.jpg?hash=w9DrIuq02t)
You just have to push the gland in to expose the retainer. Here are a couple views of the gland. The shoulder on the left side in the first picture is what pushes against the retainer.![20220424_120755[1].jpg 20220424_120755[1].jpg](https://tractorfanatics.com/data/attachments/51/51685-865cb2fade5d17a5e869c2a10b4e8557.jpg?hash=hlyy-t5dF6)
I think the last guy used a BFH to push in the gland instead of pipe clamps. It has worked good for years so I guess the damage isn't critical. If the lip that holds the wiper wasn't so thin I would clean it up in the lathe. Inside is a rod wiper a seal and a bearing and through here is where the leak developed. Actually the wiper is what you see on the paper with the O ring laying in side it![20220424_120808[1].jpg 20220424_120808[1].jpg](https://tractorfanatics.com/data/attachments/51/51689-39d8ab88d476174250defea731efa06e.jpg?hash=OdiriNR2F0)
Here is the retainer for the gland.![20220424_114234[1].jpg 20220424_114234[1].jpg](https://tractorfanatics.com/data/attachments/51/51690-9897bea946b520a52997a1f083f4efe1.jpg?hash=mJe-qUa1IK)
I went to town and bought new seals and wiper for the gland.![20220430_123157[1].jpg 20220430_123157[1].jpg](https://tractorfanatics.com/data/attachments/51/51691-29dfb69a6248dbcef28bcd84ec4385eb.jpg?hash=Kd-2mmJI28)
![20220430_123206[1].jpg 20220430_123206[1].jpg](https://tractorfanatics.com/data/attachments/51/51692-31ef789b529893260b4a6585d0c0cce1.jpg?hash=Me94m1KYky)
Couldn't find new piston seals.![20220424_120712[1].jpg 20220424_120712[1].jpg](https://tractorfanatics.com/data/attachments/51/51693-78a7842d1f0e25aea4c847deba8032e2.jpg?hash=eKeELR8OJa)
That seal may have been fine but it got torn up pulling it out of the cylinder. They tend to catch on the retainer groove. What you see in the picture and two O rings one under the white plastic seal and the other between the piston and the rod are all that is easily replaceable here. The shop that replaced the gland seals is having a piston seal custom made and that puts this project on hold until Tuesday. One of the defects In the cylinder was the big nut that holds the piston to the rod had worked loose so the piston was flopping around. This destroyed the O ring that seals to the rod.![20220424_121150[1].jpg 20220424_121150[1].jpg](https://tractorfanatics.com/data/attachments/51/51694-8405aea459112bf59b8844c1adb12b4d.jpg?hash=hAWupFkRK_)
The O ring seals against the shoulder on the rod.
![20220424_120405[1].jpg 20220424_120405[1].jpg](https://tractorfanatics.com/data/attachments/51/51695-619a427ea7d09d51d9882410c5d9c295.jpg?hash=YZpCfqfQnV)
So now I move on to a snow blower.
Don
![20220424_114217[1].jpg 20220424_114217[1].jpg](https://tractorfanatics.com/data/attachments/51/51682-dd78d5695d7e37388847fba5c3523a08.jpg?hash=3XjVaV1-Nz)
That got it mobile.
Replaced the valve with one I had. Bought a tiller at a garage sale for $5 and put that Briggs on the splitter and used it for about 5 years. Loaned it out and when I went to retrieve it the engine was stuck. Put a predator on it and used it until this spring. The fluid leak that has been developing over the years has now become intolerable so I pulled it apart.
You can't see it here but the cylinder looks good. You can kinda see the groove the retained wire ring for the gland fits in.
![20220424_114227[1].jpg 20220424_114227[1].jpg](https://tractorfanatics.com/data/attachments/51/51684-c3d0eb22eab4dad4a8c5746561713327.jpg?hash=w9DrIuq02t)
You just have to push the gland in to expose the retainer. Here are a couple views of the gland. The shoulder on the left side in the first picture is what pushes against the retainer.
![20220424_120755[1].jpg 20220424_120755[1].jpg](https://tractorfanatics.com/data/attachments/51/51685-865cb2fade5d17a5e869c2a10b4e8557.jpg?hash=hlyy-t5dF6)
I think the last guy used a BFH to push in the gland instead of pipe clamps. It has worked good for years so I guess the damage isn't critical. If the lip that holds the wiper wasn't so thin I would clean it up in the lathe. Inside is a rod wiper a seal and a bearing and through here is where the leak developed. Actually the wiper is what you see on the paper with the O ring laying in side it
![20220424_120808[1].jpg 20220424_120808[1].jpg](https://tractorfanatics.com/data/attachments/51/51689-39d8ab88d476174250defea731efa06e.jpg?hash=OdiriNR2F0)
Here is the retainer for the gland.
![20220424_114234[1].jpg 20220424_114234[1].jpg](https://tractorfanatics.com/data/attachments/51/51690-9897bea946b520a52997a1f083f4efe1.jpg?hash=mJe-qUa1IK)
I went to town and bought new seals and wiper for the gland.
![20220430_123157[1].jpg 20220430_123157[1].jpg](https://tractorfanatics.com/data/attachments/51/51691-29dfb69a6248dbcef28bcd84ec4385eb.jpg?hash=Kd-2mmJI28)
![20220430_123206[1].jpg 20220430_123206[1].jpg](https://tractorfanatics.com/data/attachments/51/51692-31ef789b529893260b4a6585d0c0cce1.jpg?hash=Me94m1KYky)
Couldn't find new piston seals.
![20220424_120712[1].jpg 20220424_120712[1].jpg](https://tractorfanatics.com/data/attachments/51/51693-78a7842d1f0e25aea4c847deba8032e2.jpg?hash=eKeELR8OJa)
That seal may have been fine but it got torn up pulling it out of the cylinder. They tend to catch on the retainer groove. What you see in the picture and two O rings one under the white plastic seal and the other between the piston and the rod are all that is easily replaceable here. The shop that replaced the gland seals is having a piston seal custom made and that puts this project on hold until Tuesday. One of the defects In the cylinder was the big nut that holds the piston to the rod had worked loose so the piston was flopping around. This destroyed the O ring that seals to the rod.
![20220424_121150[1].jpg 20220424_121150[1].jpg](https://tractorfanatics.com/data/attachments/51/51694-8405aea459112bf59b8844c1adb12b4d.jpg?hash=hAWupFkRK_)
The O ring seals against the shoulder on the rod.
![20220424_120405[1].jpg 20220424_120405[1].jpg](https://tractorfanatics.com/data/attachments/51/51695-619a427ea7d09d51d9882410c5d9c295.jpg?hash=YZpCfqfQnV)
So now I move on to a snow blower.
Don
The Montgomery Wards snowblower I am working on I picked up maybe a year ago. Not something I would generally be interested in because it doesn't have a seat.![20220430_111813[1].jpg 20220430_111813[1].jpg](https://tractorfanatics.com/data/attachments/51/51696-3500aece791433c4c318f87d08f2a9ad.jpg?hash=NQCuznkUM8)
You can see in the picture the IV line hooked up because the gas tank is MIA.
SO I put a shot of gas in the spark plug hole and spun it over and it fired up and ran for a second. Filled the IV line, another shot of gas in the plug hole and it fired up and ran for another second.
Pulled the carb off and found a wasp nest in the fuel inlet. Disassembled the carb and gave it a quick cleaning put it all back together, filled the IV and started it up. It now runs but hunts a lot at idle sounds good at high rpm. This is a Briggs I am working on right. I am loosing my memory along with my mind.
I seem to remember a rather long tutorial about these carbs. Any one know where I can find that.
![20220430_111831[1].jpg 20220430_111831[1].jpg](https://tractorfanatics.com/data/attachments/51/51699-bbb93e691ee60c1f94d62c817354bce8.jpg?hash=u7k-aR7mDB)
I would like to get a manual for this machine or one very similar. Like I said no seat I don't even know how to operate it. The tag isn't much help other than it seems to indicate Gilson.![20220430_111759[1].jpg 20220430_111759[1].jpg](https://tractorfanatics.com/data/attachments/51/51701-b517e3400d5491c39813bffa6993020c.jpg?hash=tRfjQA1Ukc)
I do like the 110 electric start.![20220430_111820[1].jpg 20220430_111820[1].jpg](https://tractorfanatics.com/data/attachments/51/51702-44ed1393e5c6ed31ff0e3752374258cb.jpg?hash=RO0Tk-XG7T)
I know some of you guys have a life time of experiance with such things any help would be appreciated
Don.
![20220430_111813[1].jpg 20220430_111813[1].jpg](https://tractorfanatics.com/data/attachments/51/51696-3500aece791433c4c318f87d08f2a9ad.jpg?hash=NQCuznkUM8)
You can see in the picture the IV line hooked up because the gas tank is MIA.
SO I put a shot of gas in the spark plug hole and spun it over and it fired up and ran for a second. Filled the IV line, another shot of gas in the plug hole and it fired up and ran for another second.
Pulled the carb off and found a wasp nest in the fuel inlet. Disassembled the carb and gave it a quick cleaning put it all back together, filled the IV and started it up. It now runs but hunts a lot at idle sounds good at high rpm. This is a Briggs I am working on right. I am loosing my memory along with my mind.
I seem to remember a rather long tutorial about these carbs. Any one know where I can find that.
![20220430_111831[1].jpg 20220430_111831[1].jpg](https://tractorfanatics.com/data/attachments/51/51699-bbb93e691ee60c1f94d62c817354bce8.jpg?hash=u7k-aR7mDB)
I would like to get a manual for this machine or one very similar. Like I said no seat I don't even know how to operate it. The tag isn't much help other than it seems to indicate Gilson.
![20220430_111759[1].jpg 20220430_111759[1].jpg](https://tractorfanatics.com/data/attachments/51/51701-b517e3400d5491c39813bffa6993020c.jpg?hash=tRfjQA1Ukc)
I do like the 110 electric start.
![20220430_111820[1].jpg 20220430_111820[1].jpg](https://tractorfanatics.com/data/attachments/51/51702-44ed1393e5c6ed31ff0e3752374258cb.jpg?hash=RO0Tk-XG7T)
I know some of you guys have a life time of experiance with such things any help would be appreciated
Don.
Was going to mention this came to me as part of a package deal. Three Harbor freight compressors, a Sears wood chipper and this blower for $75. All the compressors work to harbor freight standards. The wood chipper is missing the carb, Tecumseh 5 horse.The Montgomery Wards snowblower I am working on I picked up maybe a year ago. Not something I would generally be interested in because it doesn't have a seat.View attachment 51786
You can see in the picture the IV line hooked up because the gas tank is MIA.
SO I put a shot of gas in the spark plug hole and spun it over and it fired up and ran for a second. Filled the IV line, another shot of gas in the plug hole and it fired up and ran for another second.
Pulled the carb off and found a wasp nest in the fuel inlet. Disassembled the carb and gave it a quick cleaning put it all back together, filled the IV and started it up. It now runs but hunts a lot at idle sounds good at high rpm. This is a Briggs I am working on right. I am loosing my memory along with my mind.
I seem to remember a rather long tutorial about these carbs. Any one know where I can find that.
View attachment 51789
I would like to get a manual for this machine or one very similar. Like I said no seat I don't even know how to operate it. The tag isn't much help other than it seems to indicate Gilson.View attachment 51791
I do like the 110 electric start.View attachment 51792
I know some of you guys have a life time of experiance with such things any help would be appreciated
Don.
Yup. That's a Briggs not a Tecumseh/
Another Don
Another Don
Getting mower ready for the season one at a time. The Cub 1862 was easy as it had not been run more then a couple hour since last fall. Trim mower is ready. Have the Cub 1018 to do yet. Rains every other day and talking more rain most of the week.. Once the faucet opened it stuck open. Bought a new lawn roller yesterday. 18 X 48. Full weighs 480 lbs so should flatten the wet ground out some.
Thanks my friend!That’s nice Jim.
Noel

